No Products in the Cart
 Products used today:
Laura Kelly Toner Card Fronts
Iridescent Deco Foil
Glitz Glitter Gel - silver and grass green
Ink Blot Shop Spaced Out Greetings stamps
Ink Blot Shop Giant Hey You stencil
Pink & Main Layered Rectangles A2 dies
Thermoweb 3D Foam Tape
Thermoweb Foam Squares
Ultra Bond liquid adhesive
Distress Oxide Ink - cracked pistachio, chipped sapphire, evergreen bough and tumbled glass
Products used today:
Laura Kelly Toner Card Fronts
Iridescent Deco Foil
Glitz Glitter Gel - silver and grass green
Ink Blot Shop Spaced Out Greetings stamps
Ink Blot Shop Giant Hey You stencil
Pink & Main Layered Rectangles A2 dies
Thermoweb 3D Foam Tape
Thermoweb Foam Squares
Ultra Bond liquid adhesive
Distress Oxide Ink - cracked pistachio, chipped sapphire, evergreen bough and tumbled glass
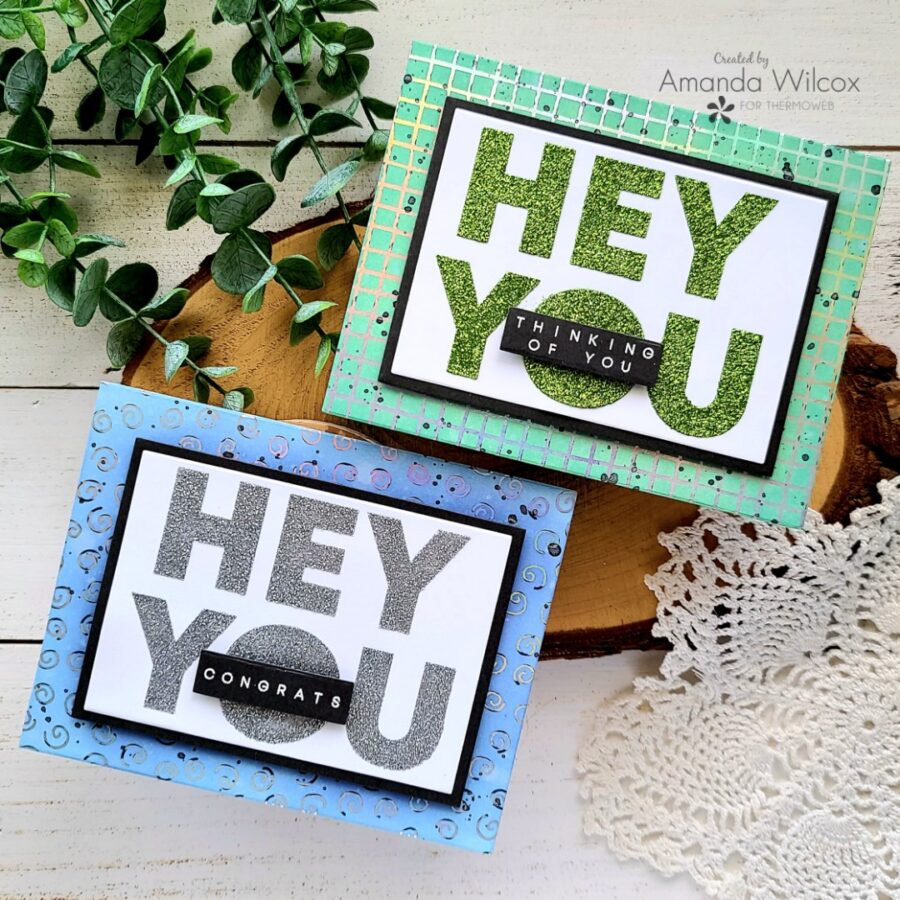
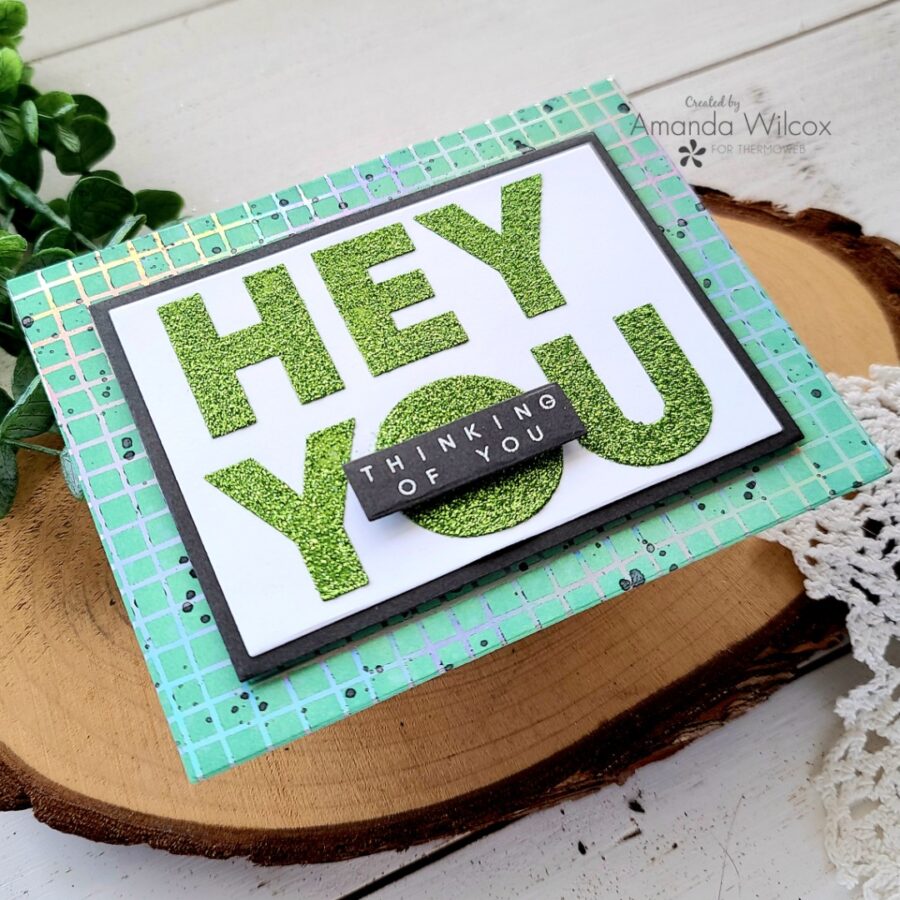
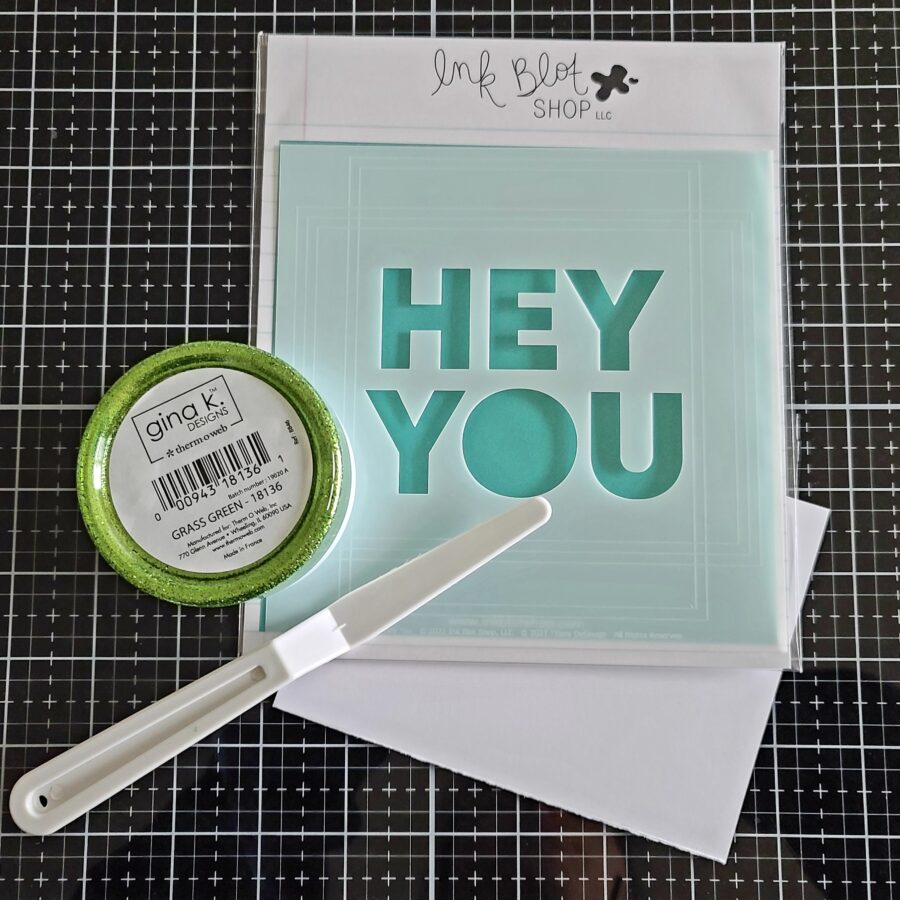 I started with the messy part first that needed to dry. I taped a white panel to the giant hey you stencil and spread grass green glitz glitter gel through it. Later on, I did decide to make a second card so I also did the same thing with silver glitz glitter gel too. Then I set them aside to dry.
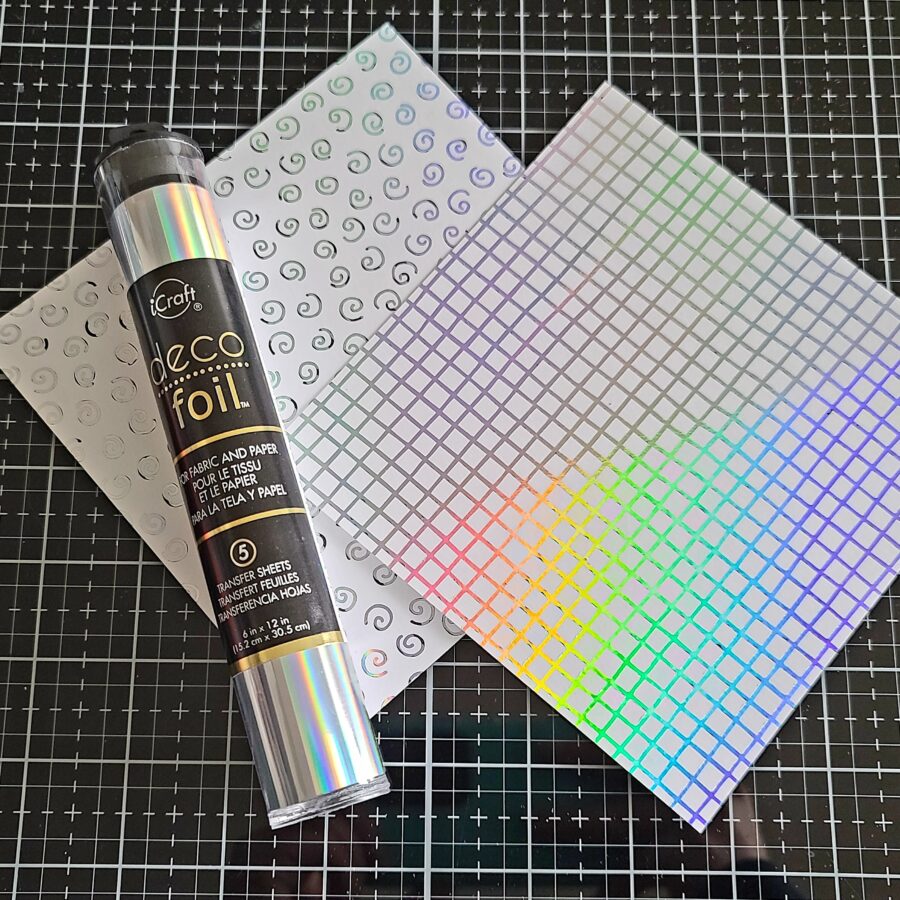 I heated up my laminator and foiled two different toner sheets from the Laura Kelly collection with iridescent deco foil. They give a silver look straight on but a great rainbow effect in the light. I just love it!
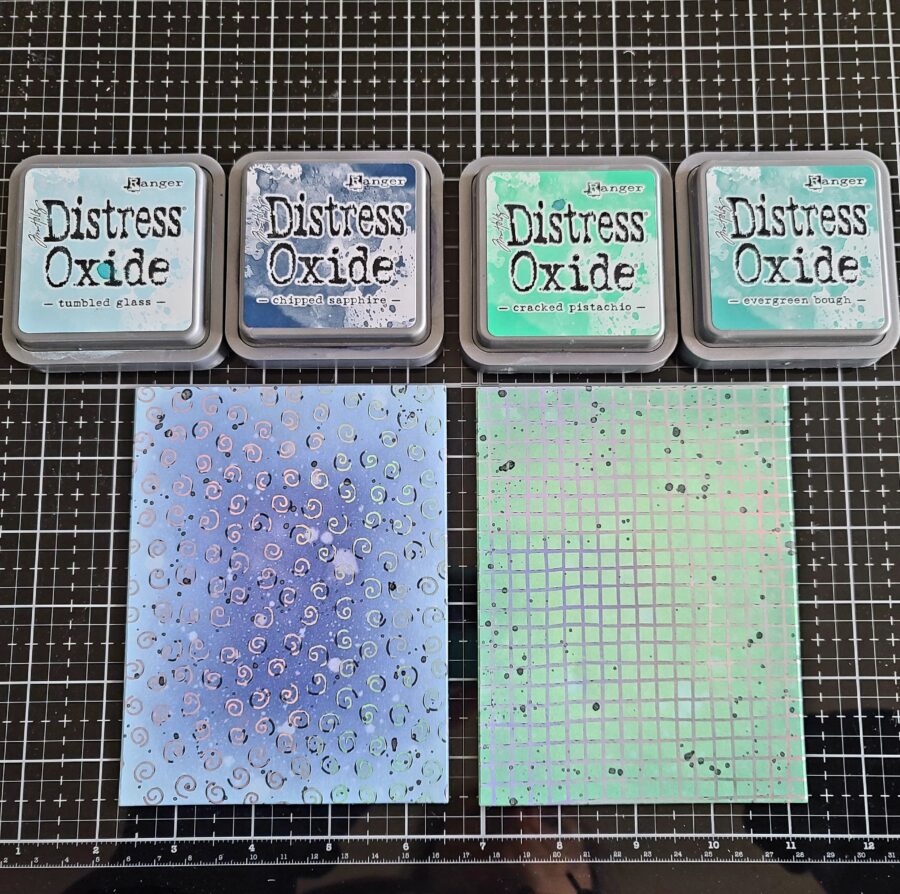 I ink blended the foiled panels with distress oxide inks - tumbled glass and chipped sapphire on one and cracked pistachio and evergreen bough on the other. I spritzed them with water and flicked some black acrylic paint on the panels for extra texture.
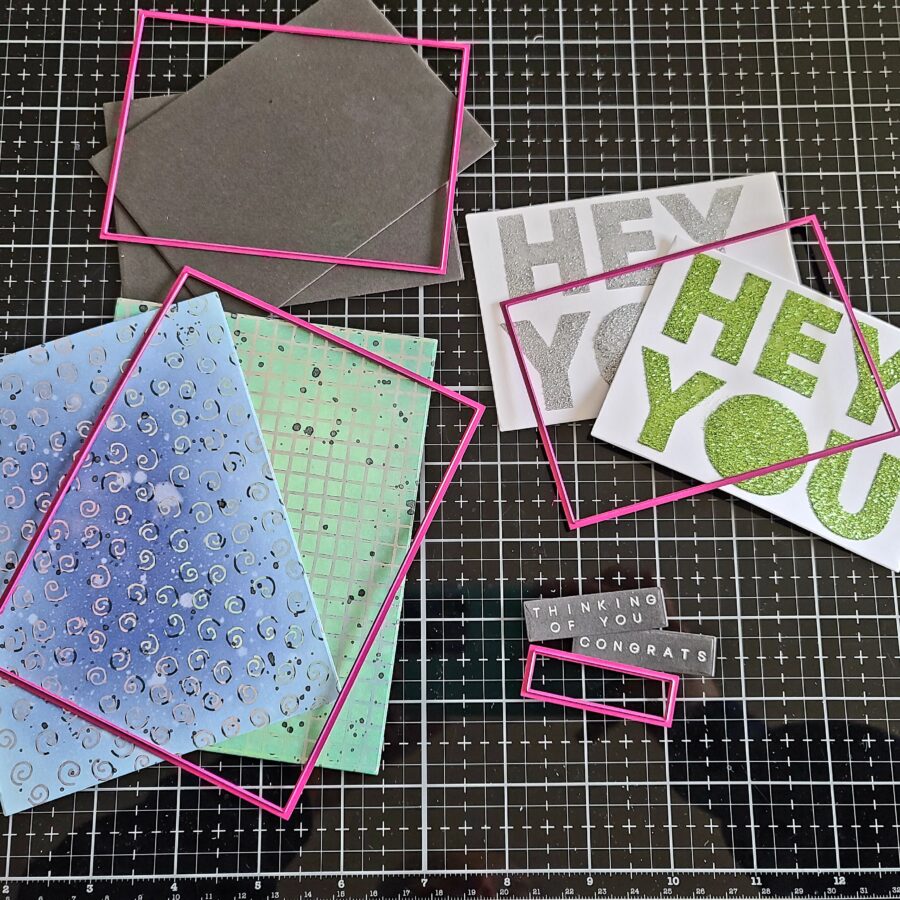 After stamping and heat embossed sentiments from the spaced-out greetings set on dark gray cardstock, I pulled all my pieces together and cut them with different sizes from the Pink & Main Layered Rectangle A2 dies.
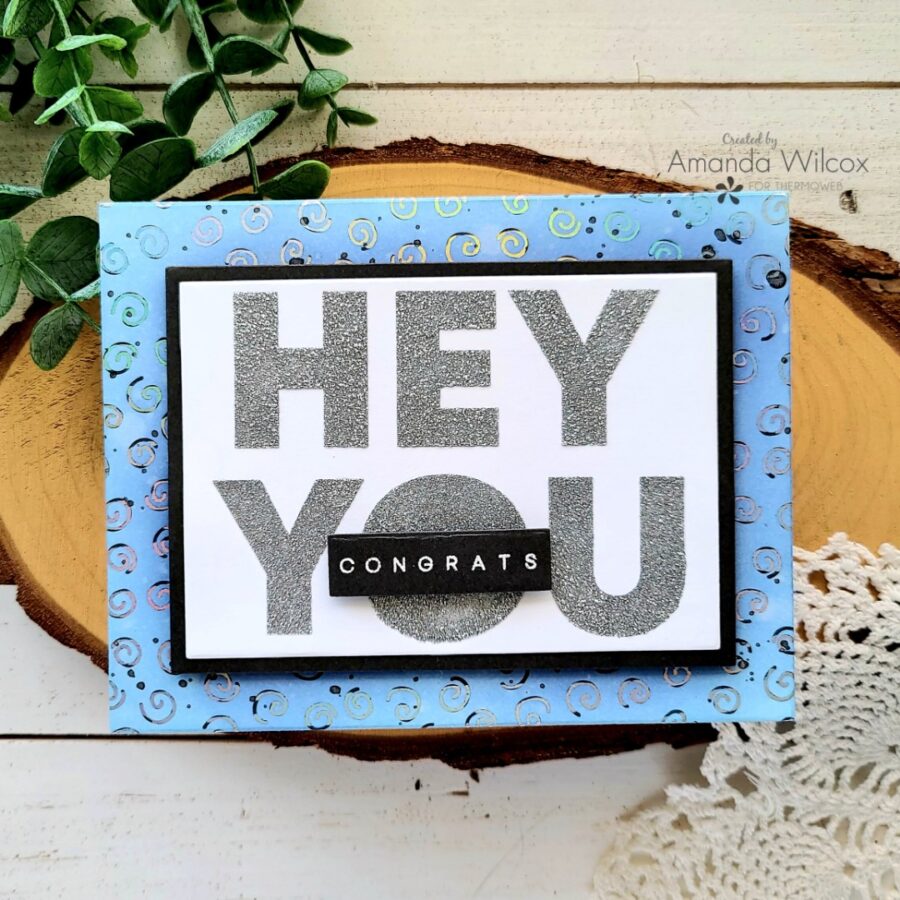 I adhered the foiled toner sheets to white card bases with ultra bond liquid glue pen. Then I also use liquid glue to adhere the stenciled panel to the gray rectangle. Next, I added foam tape to that and popped it up on the foiled panel. Finally, I added the sentiment across the "O" with foam squares.
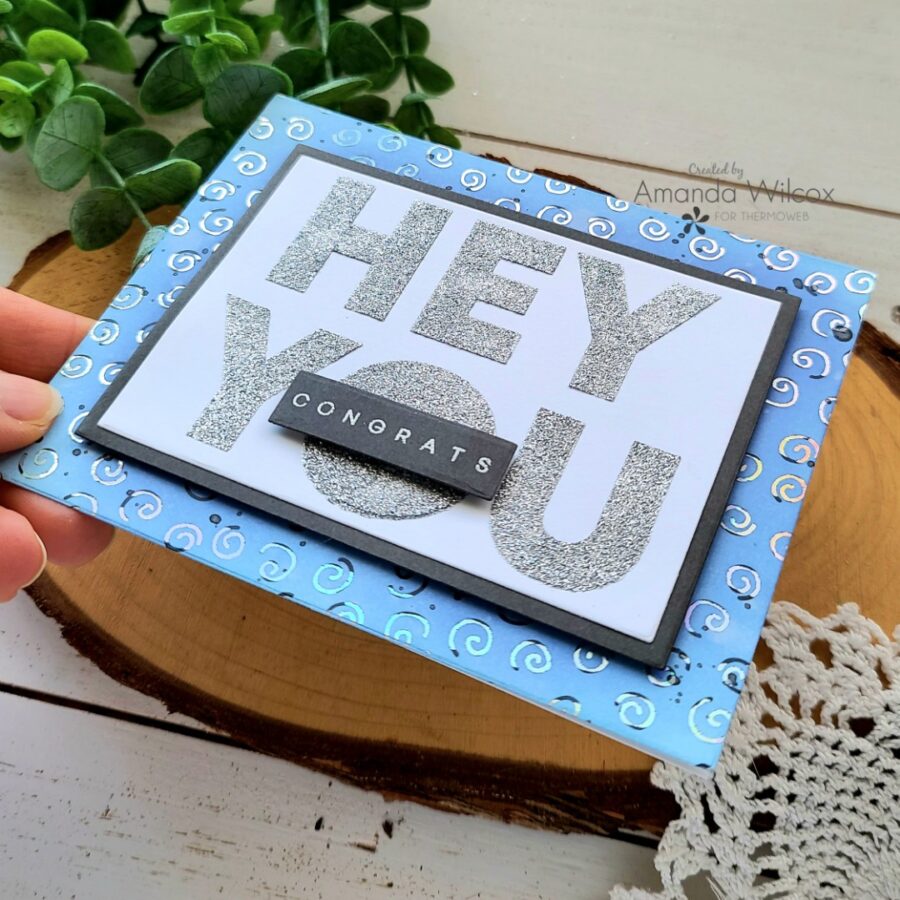 I think this is such a fun design and totally customizable depending on the secondary sentiment you add to it.
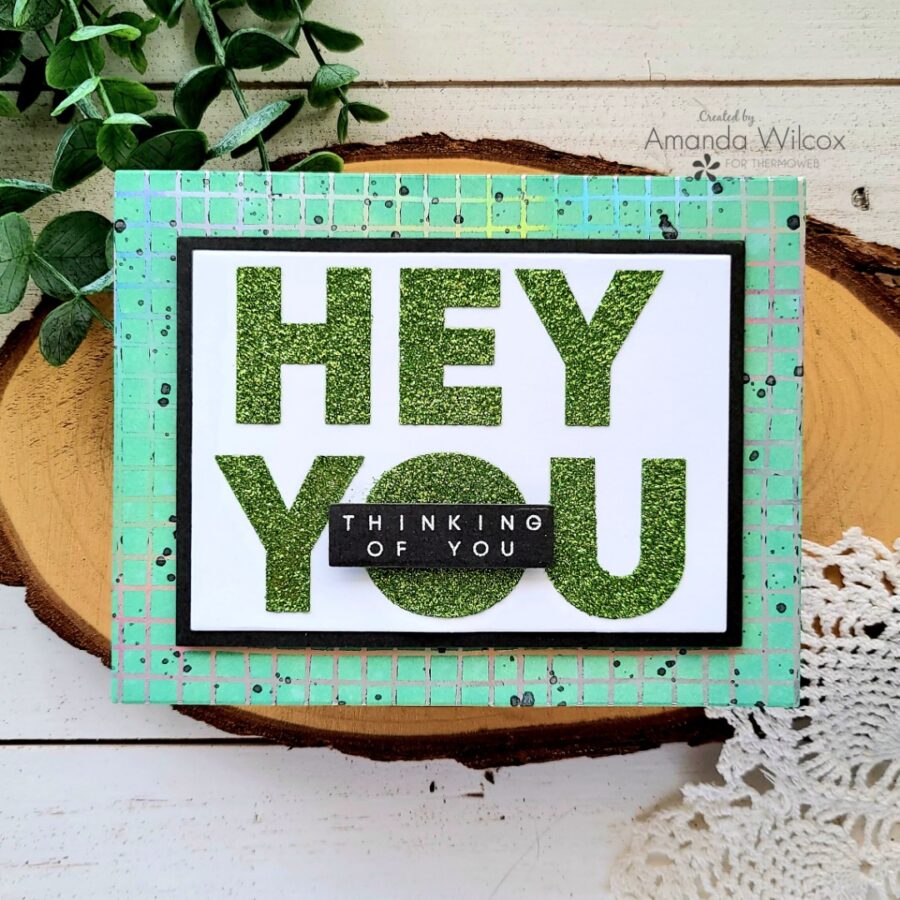 Different feel with different colors too! I really love how this green one turned out! It's definitely a favorite!
 I hope you enjoyed today's cards and found some inspiration to create something wonderful!
I appreciate you sharing your time with me. Have a fabulous day!
I hope you enjoyed today's cards and found some inspiration to create something wonderful!
I appreciate you sharing your time with me. Have a fabulous day!