No Products in the Cart
 Have you heard the news? Crafters Edge has released their new "Tumbler" die.
 This die comes with 5 different sizes. Can I hear a "whoop whoop"?
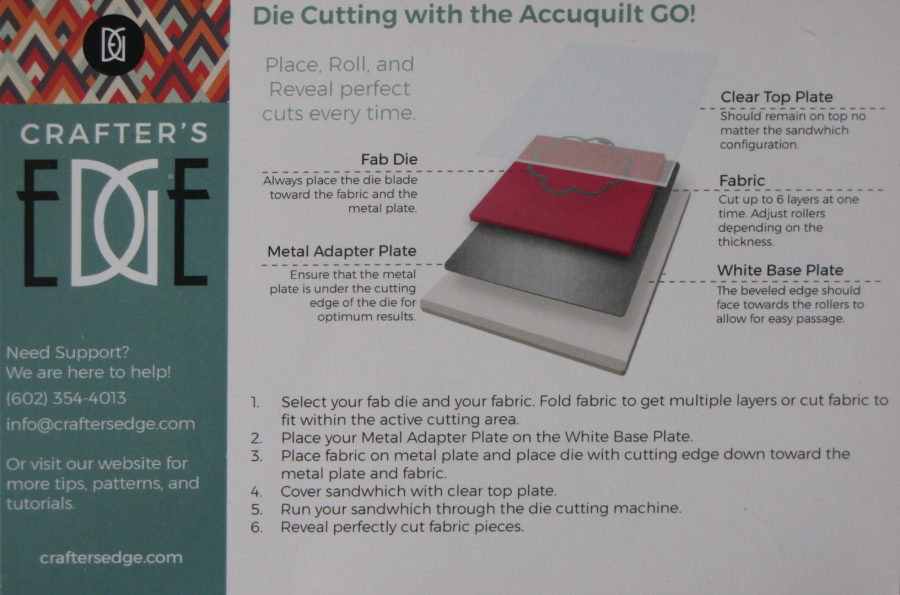
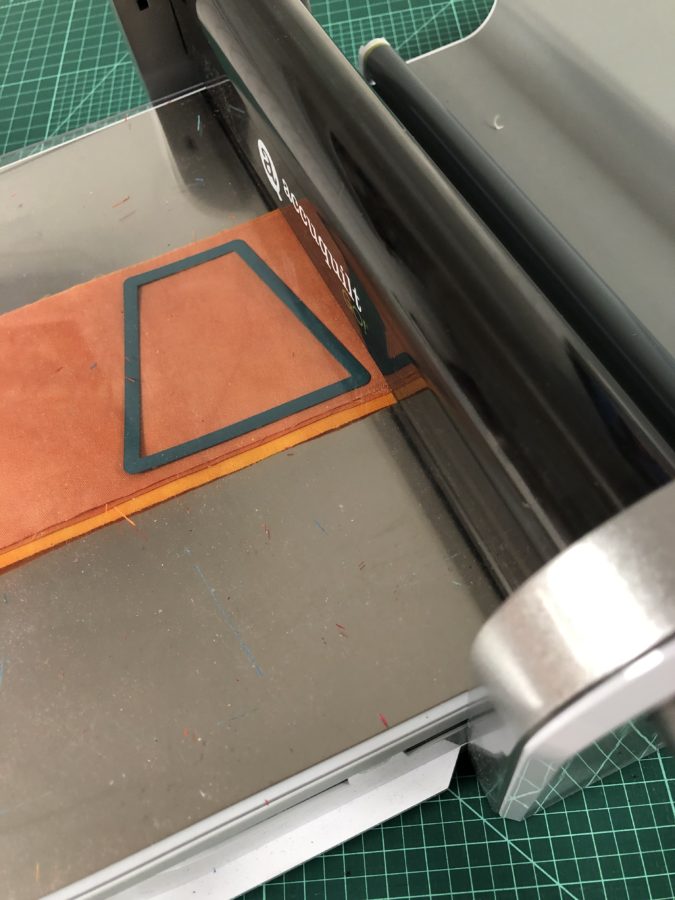 Did you know that Crafters Edge dies, work with the Accuquilt GO Cutter.
It just takes a "conversion platform set" that you can find HERE.
Did you know that Crafters Edge dies, work with the Accuquilt GO Cutter.
It just takes a "conversion platform set" that you can find HERE.
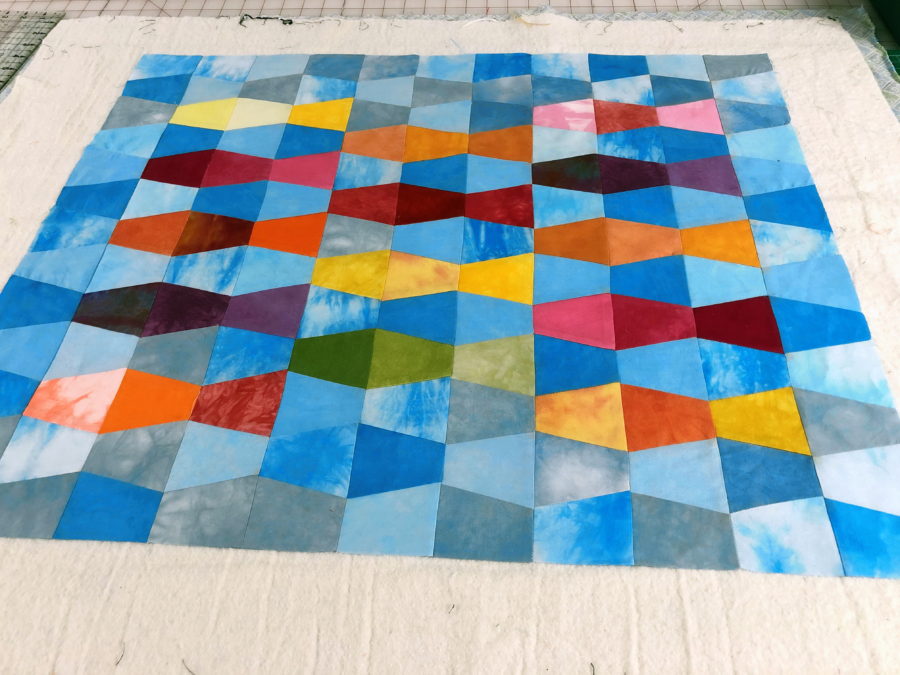
 This quilt is constructed a little differently. I knew I wanted a flange around my quilt, but quilting with a flange can be difficult. So I wanted the center quilted before I added it.
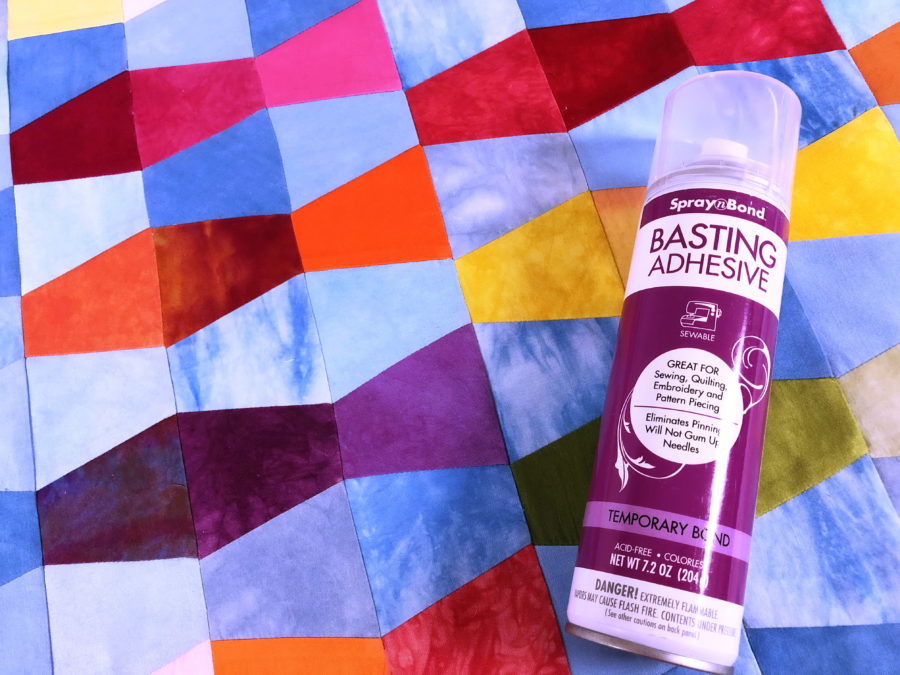 With the help of Spray n Bond Basting Adhesive, I was able to layer the center, on my quilt sandwich, and square it up nicely before quilting, allowing plenty of extra fabric around it to accommodate the borders that were added later.
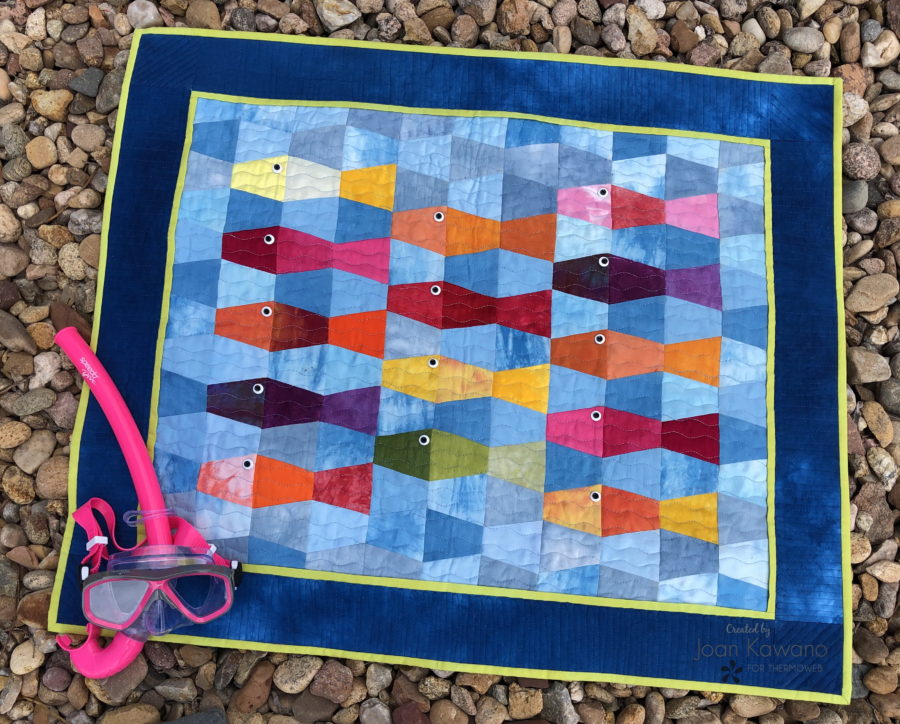
Want to make a "fishy" quilt of your own? First, you need to decide what size you want it to be. I used the 3" die for my quilt, which finished at approximately 33" x 28".
Supplies
Crafters EdgeTumbler die
Crossover cutting machine or Accuquilt GO cutter and the Conversion Platform Set
Spray n Bond Basting Adhesive
Chalk Marker
Thread
Batting
Ruler
14 - 1/4" black buttons
14 - 1/2" white buttons
Fabric
The secret to this quilt is a variation of colors. The background "blues" as well as the different colored fish. I pulled out my hand-dye fabrics, but this is perfect, raid your stash and scrap bin kind of quilt.
The amount of fabric needed depends on the size of the tumbler you choose.
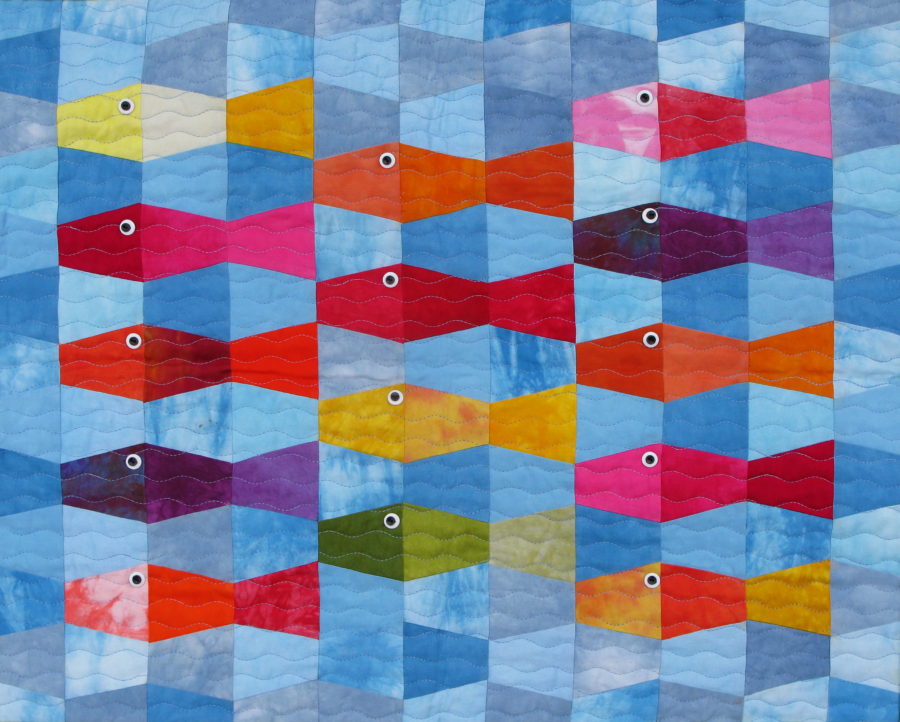
You will need 101 tumblers in blues for the background.
The fish consist of 3 tones of the same color. With 14 fish, you will need 42 tumblers. Mix and match them as you like.
3" x the width of fabric for the piping
1/4 yard for borders
1/4 yard for binding
1 yard for backing
Cutting
Tumblers (143 total)
2 - 1 1/4" strips for piping
2- 3 1/2" strips for borders
2- 2 1/4" strips for binding
With the help of Spray n Bond Basting Adhesive, I was able to layer the center, on my quilt sandwich, and square it up nicely before quilting, allowing plenty of extra fabric around it to accommodate the borders that were added later.
Want to make a "fishy" quilt of your own? First, you need to decide what size you want it to be. I used the 3" die for my quilt, which finished at approximately 33" x 28".
Supplies
Crafters EdgeTumbler die
Crossover cutting machine or Accuquilt GO cutter and the Conversion Platform Set
Spray n Bond Basting Adhesive
Chalk Marker
Thread
Batting
Ruler
14 - 1/4" black buttons
14 - 1/2" white buttons
Fabric
The secret to this quilt is a variation of colors. The background "blues" as well as the different colored fish. I pulled out my hand-dye fabrics, but this is perfect, raid your stash and scrap bin kind of quilt.
The amount of fabric needed depends on the size of the tumbler you choose.
You will need 101 tumblers in blues for the background.
The fish consist of 3 tones of the same color. With 14 fish, you will need 42 tumblers. Mix and match them as you like.
3" x the width of fabric for the piping
1/4 yard for borders
1/4 yard for binding
1 yard for backing
Cutting
Tumblers (143 total)
2 - 1 1/4" strips for piping
2- 3 1/2" strips for borders
2- 2 1/4" strips for binding
 Lay your top piece on the batting/backing, allowing approximately 5" around each side. Using chalk markers and rulers, to make sure your top is square, then using Spray n Bond basting adhesive, give it a good spray to hold. Double-check that you are still square.
 Quilt as desired.
Next, fold your 2 piping pieces in half, wrong sides together, and press. Using measurements of your quilt, cut side pieces and stitch to top of the quilt sandwich, using a scant 1/4". Again using your quilt measurement, cut top and bottom flange and attach with a scant 1/4" seam.
Next cut side borders using your quilt measurements. Stitch on top of quilt/flange, this time using a 1/4" seam. Press borders out. Measure your quilt and cut the top and bottom borders. Attach with a 1/4" seam and press open.
I found that it was easiest to trim some of the excess backing/batting before I quilted the borders, but you do want to leave a little excess. Once you have completed all quilting, trim, and bind as desired.
Stack the black and white buttons on top of each other, to create an eye for each of the fish and attach.
Quilt as desired.
Next, fold your 2 piping pieces in half, wrong sides together, and press. Using measurements of your quilt, cut side pieces and stitch to top of the quilt sandwich, using a scant 1/4". Again using your quilt measurement, cut top and bottom flange and attach with a scant 1/4" seam.
Next cut side borders using your quilt measurements. Stitch on top of quilt/flange, this time using a 1/4" seam. Press borders out. Measure your quilt and cut the top and bottom borders. Attach with a 1/4" seam and press open.
I found that it was easiest to trim some of the excess backing/batting before I quilted the borders, but you do want to leave a little excess. Once you have completed all quilting, trim, and bind as desired.
Stack the black and white buttons on top of each other, to create an eye for each of the fish and attach.
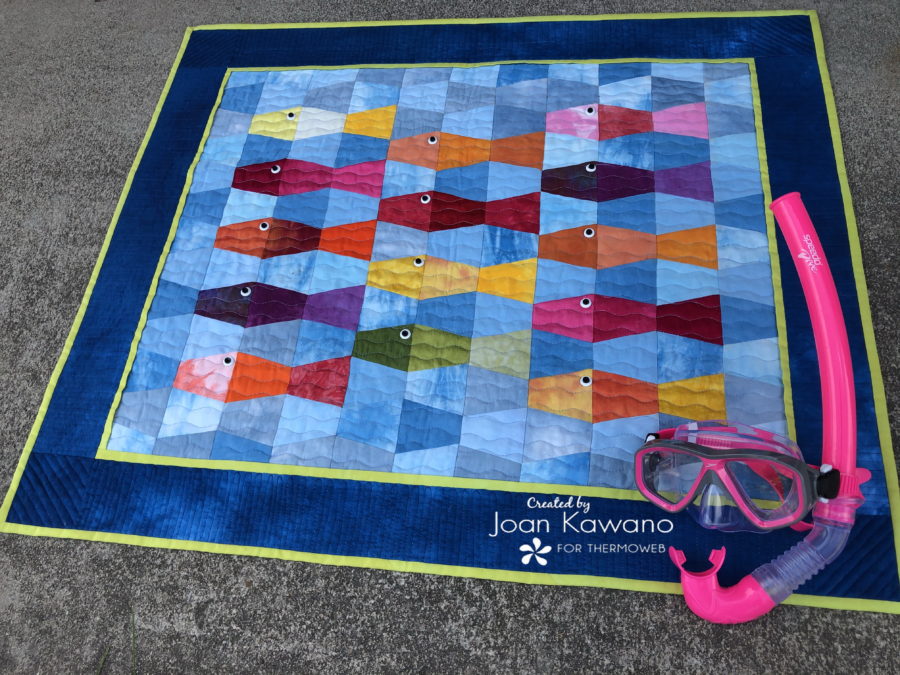 Grab your snorkel and enjoy your little "Fishy" quilt.
til next time...Keep on Stitchin'
Joan
Grab your snorkel and enjoy your little "Fishy" quilt.
til next time...Keep on Stitchin'
Joan