No Products in the Cart
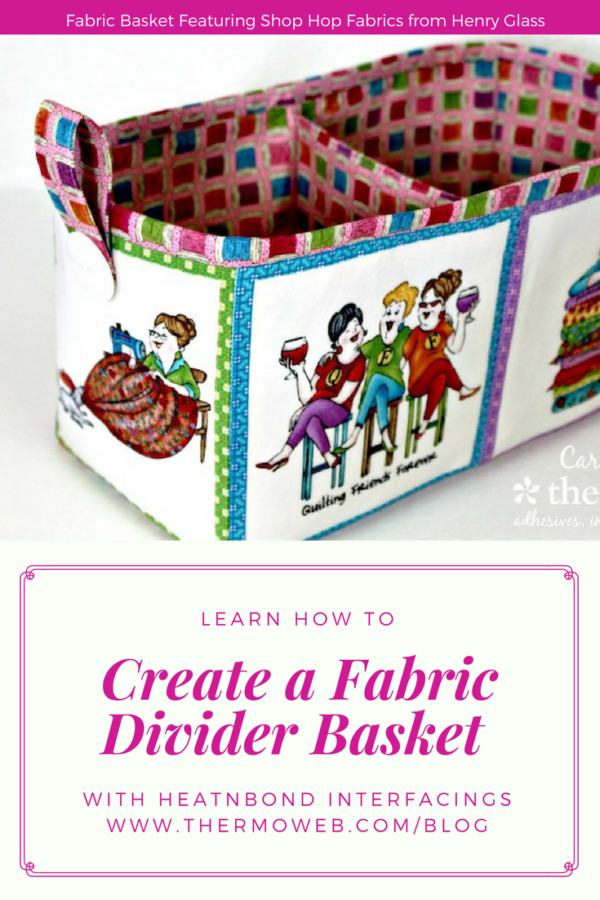
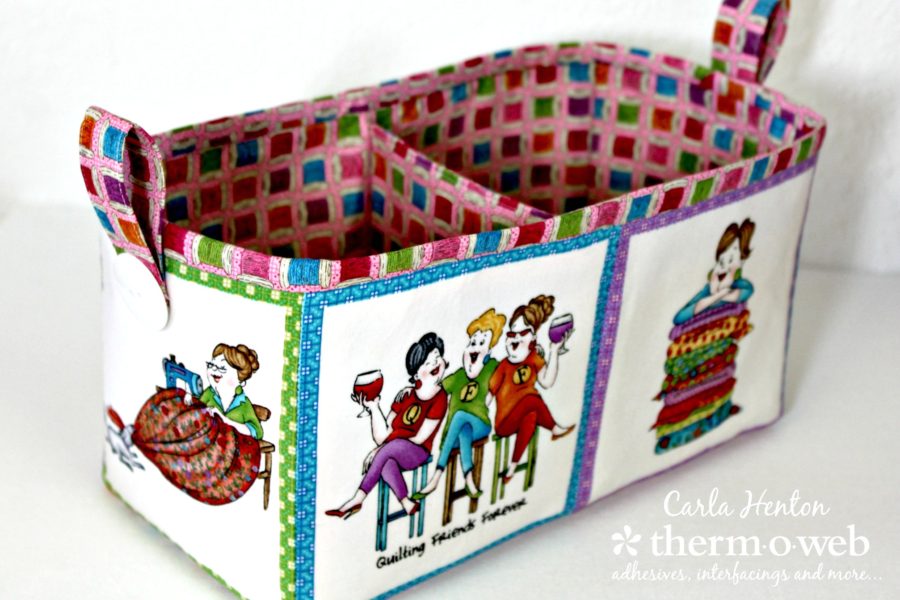 Organizing craft supplies is always a challenge. Henry Glass has the best fabric for making super cute baskets to decorate and organize any creative space and using craft interfacing will keep the baskets in shape. Let Carla Henton from Creatin' in the Sticks explain how to use HeatnBond® Craft Extra Firm Non-Woven Interfacing to make a fabric organizer basket with a divider for decorative supply storage.
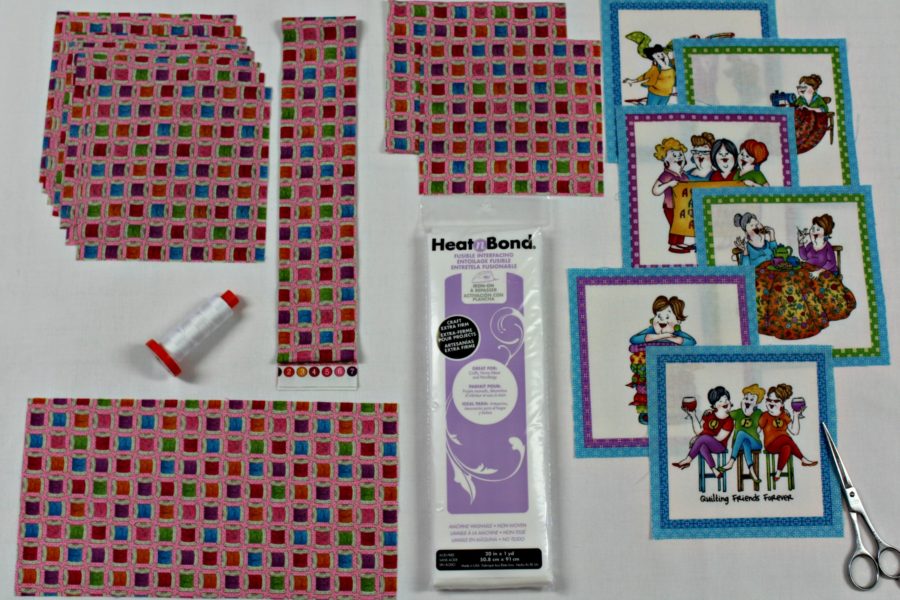 HeatnBond® Craft Extra Firm Non-Woven Interfacing
Henry Glass Shop Hop Fabric
Aurifil Thread 50 wt thread #2024 white
Fabric Cutting:
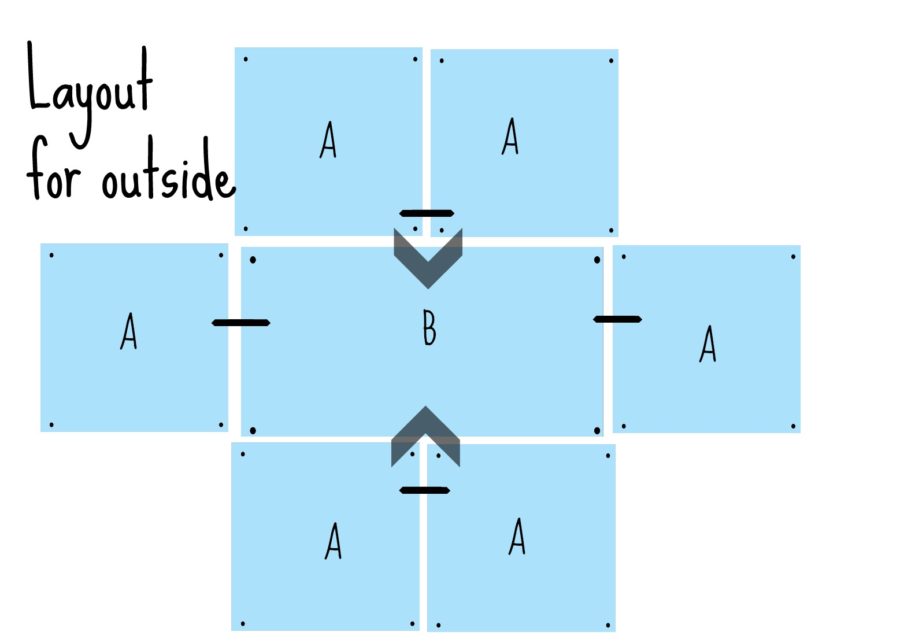
6 “A” – 5 ½” x 5 ½” squares for outside of box
1 “B” – 5 ½” x 10 ½” rectangle for bottom outside of box
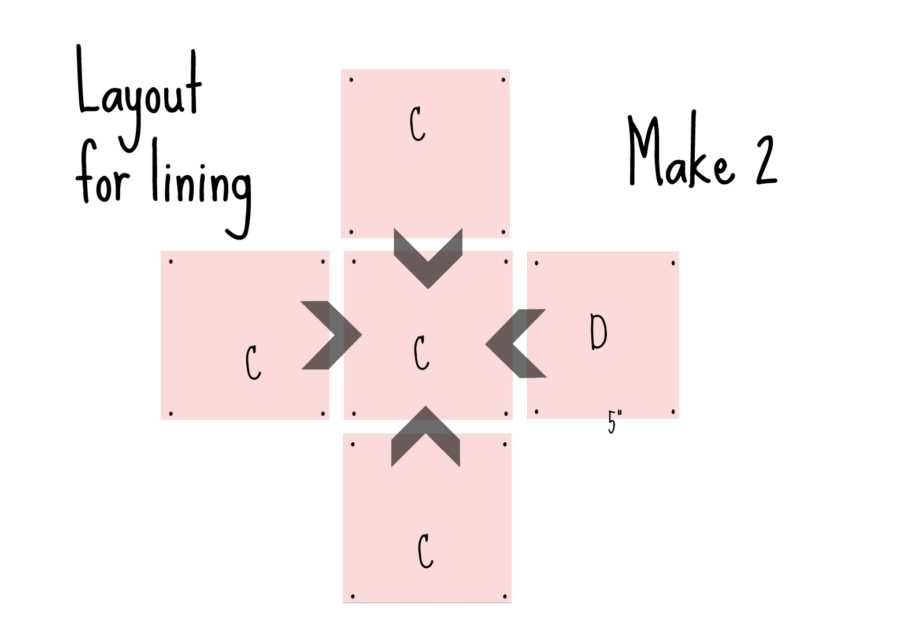
8 “C”– 5 ½” x 5 ½” squares for inside of box
2 “D” – 5” x 5 ½” squares for inside of box divider
2 – 2 ½” x 5 ½” rectangles for handles
1- 2 ¼” x WOF (width of fabric) for binding
Interfacing Cutting:
14 – 5 ½” x 5 ½” squares
2 – 5” x 5 ½” squares
1 – 5 ½” x 10 ½” rectangle
2 – 1 ¾” x 5 ½” for handles
Other Supplies:
2 - 1 1/4" buttons, erasable marking pen, Iron (I love my Oliso Pro), sewing machine with a ¼” foot, sharp scissors, other general sewing supplies
HeatnBond® Craft Extra Firm Non-Woven Interfacing
Henry Glass Shop Hop Fabric
Aurifil Thread 50 wt thread #2024 white
Fabric Cutting:
6 “A” – 5 ½” x 5 ½” squares for outside of box
1 “B” – 5 ½” x 10 ½” rectangle for bottom outside of box
8 “C”– 5 ½” x 5 ½” squares for inside of box
2 “D” – 5” x 5 ½” squares for inside of box divider
2 – 2 ½” x 5 ½” rectangles for handles
1- 2 ¼” x WOF (width of fabric) for binding
Interfacing Cutting:
14 – 5 ½” x 5 ½” squares
2 – 5” x 5 ½” squares
1 – 5 ½” x 10 ½” rectangle
2 – 1 ¾” x 5 ½” for handles
Other Supplies:
2 - 1 1/4" buttons, erasable marking pen, Iron (I love my Oliso Pro), sewing machine with a ¼” foot, sharp scissors, other general sewing supplies
 Step 2:
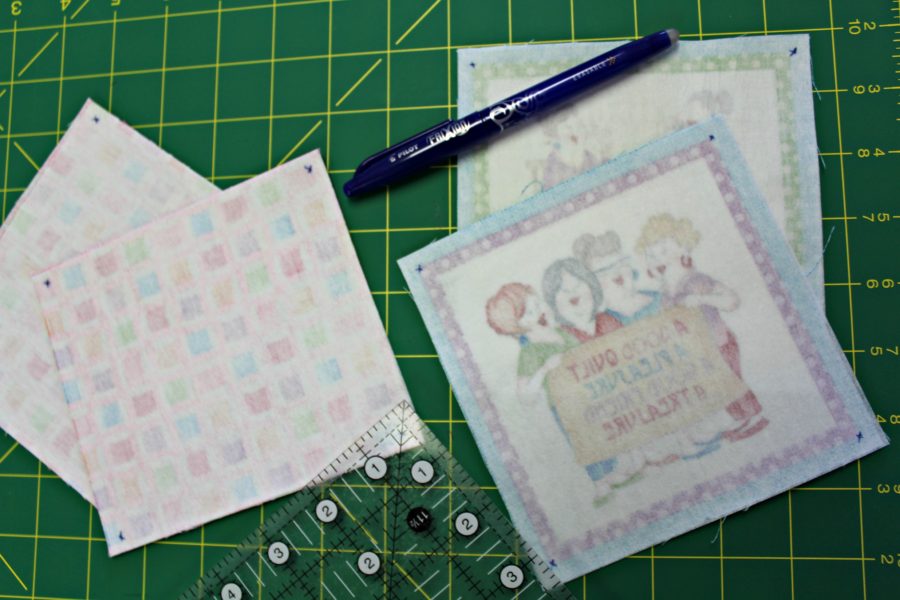
On all pieces, mark a dot in all four corners on the wrong side of fabrics where the ¼” seams will meet.
Step 2:
On all pieces, mark a dot in all four corners on the wrong side of fabrics where the ¼” seams will meet.
 Step 3:
Following the layout for the outside fabric, stitch ¼” seams from dot to dot. When stitching the side panels, A to A, stitch from the edge to the edge.
Step 3:
Following the layout for the outside fabric, stitch ¼” seams from dot to dot. When stitching the side panels, A to A, stitch from the edge to the edge.
 Once the flat layout is stitched as shown, sew the corners by matching the dots and with right sides together, stitch from the top edge to the dot in the corner. Do this on all 4 corners to make a box.
 Turn the box right side out and push all corners out. Set this aside.
Step 4:
Prepare the lining by first making 2 of the sections shown on the lining layout diagram. Note that one of the squares “D” is the 5” x 5 ½” square. This will be half of the divider in the lining.
Turn the box right side out and push all corners out. Set this aside.
Step 4:
Prepare the lining by first making 2 of the sections shown on the lining layout diagram. Note that one of the squares “D” is the 5” x 5 ½” square. This will be half of the divider in the lining.
 Next sew the two units together by stitching the “D” squares right sides together with a ¼” seam where indicated.
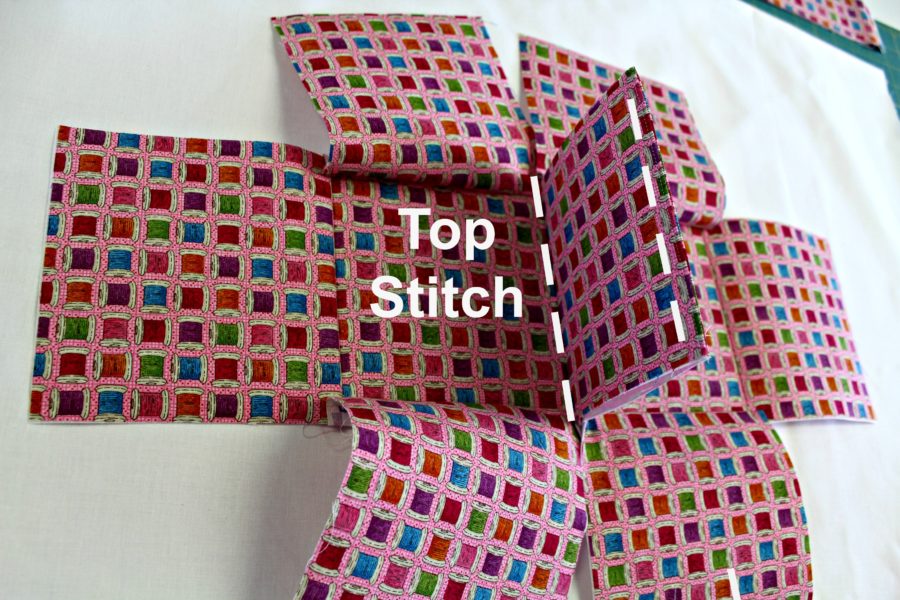
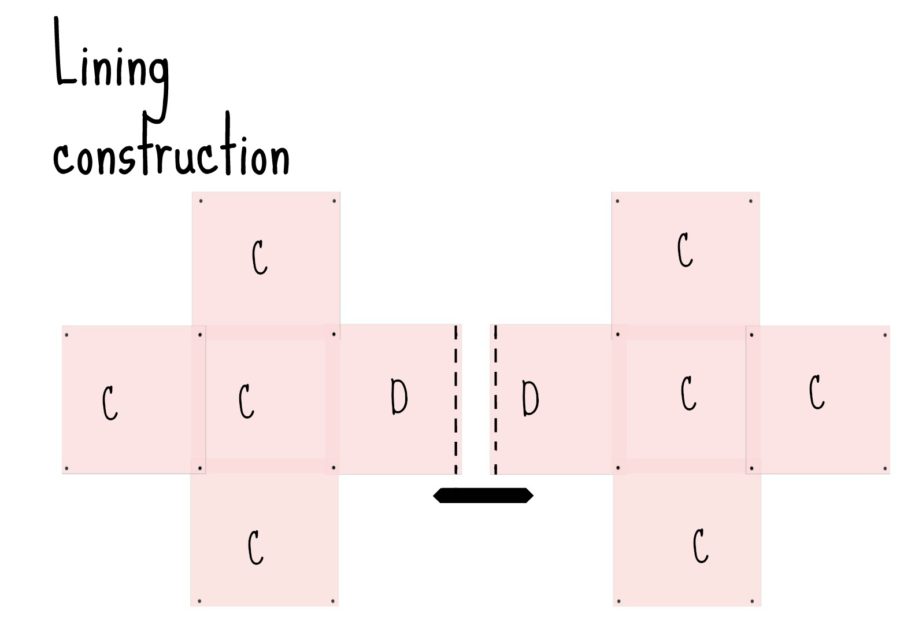 On right sides, pin the “D” squares wrong sides together. Topstitch along the top edge of "D" flap and on the seam where the “D” squares meet the “C” squares.
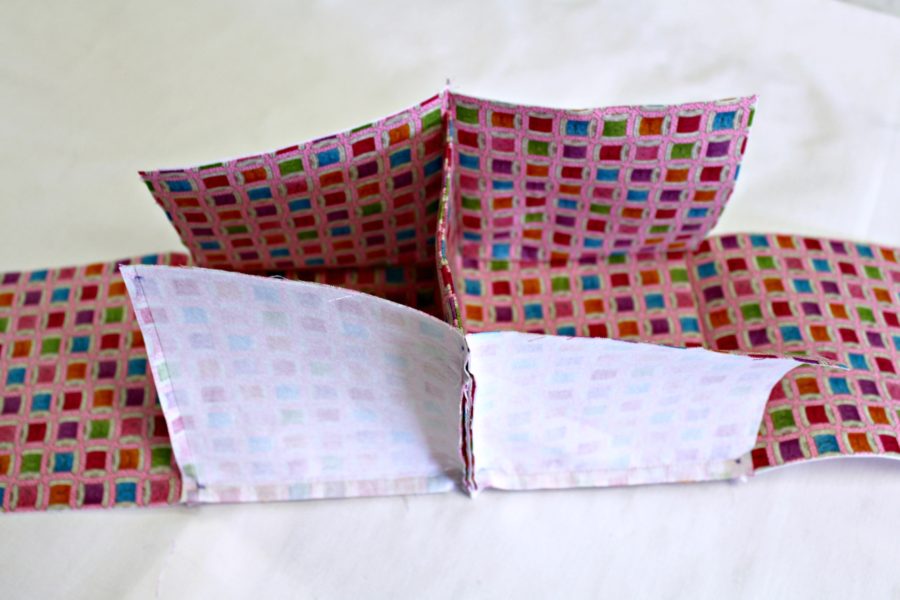
 Sew the middle seams of the lining by sandwiching the “D” flap in the seam of the side panels. Pin the seams first and then start at the top edge with right sides together and sew ¼” seam to the dot. Repeat on the other side.
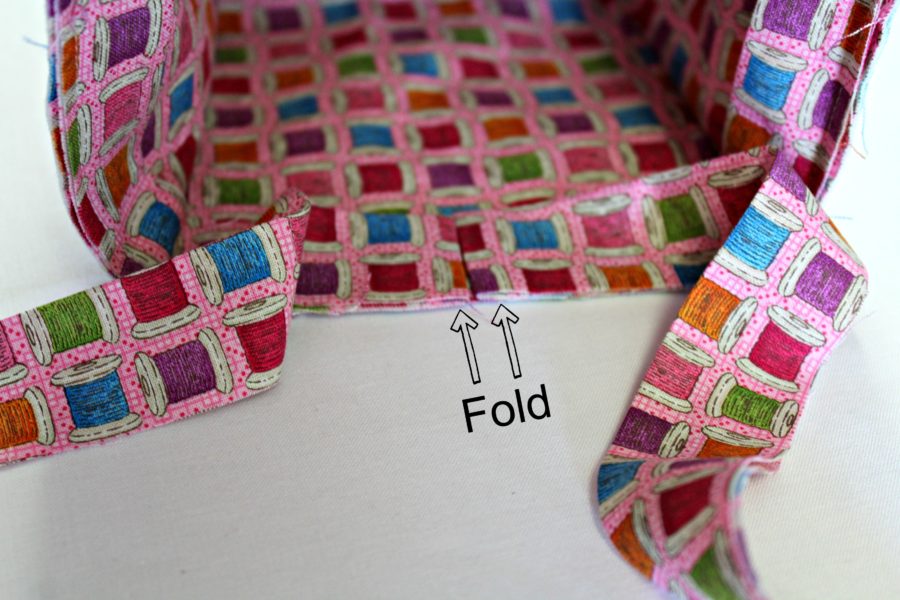
 Now sew the lining corners just as the outside corners were sewn in step 3.
Step 5:
Slip lining into the outside with wrong sides together. Pin around the top, matching all seams. Baste 1/8” from the top edge all around the top.
Step 6:
Prepare the binding by pressing the 2 ¼” strip in half lengthwise with wrong sides together. On the lining side of the basket, stitch the binding ¼” from the edge with all raw edges lining up. Start the binding on one of the narrow ends of the basket leaving a 7” tail before starting. Stitch around the basket to the start end of the basket about ½” from the corner and backstitch. Remove the basket from the sewing machine. To finish the binding, fold the binding tails back and press.
Now sew the lining corners just as the outside corners were sewn in step 3.
Step 5:
Slip lining into the outside with wrong sides together. Pin around the top, matching all seams. Baste 1/8” from the top edge all around the top.
Step 6:
Prepare the binding by pressing the 2 ¼” strip in half lengthwise with wrong sides together. On the lining side of the basket, stitch the binding ¼” from the edge with all raw edges lining up. Start the binding on one of the narrow ends of the basket leaving a 7” tail before starting. Stitch around the basket to the start end of the basket about ½” from the corner and backstitch. Remove the basket from the sewing machine. To finish the binding, fold the binding tails back and press.
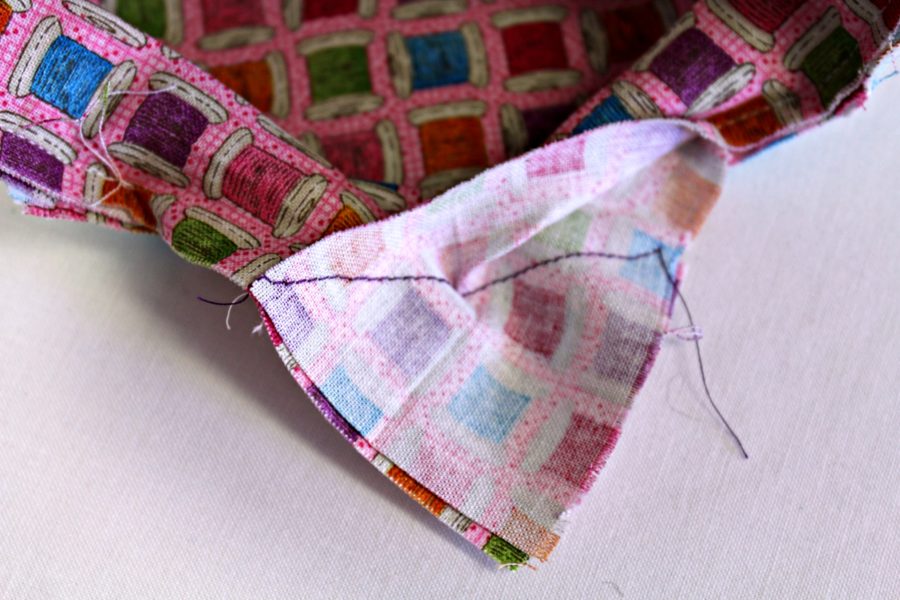
 Trim the ends 1 ¼” from folds. Unfold the ends and place them at 90 degrees, right sides together and stitch across as pictured.
 Trim the seam allowance to ¼”, press, refold the binding, and stitch in place. Fold the binding around the edge and stitch by hand or machine.
Step 7:
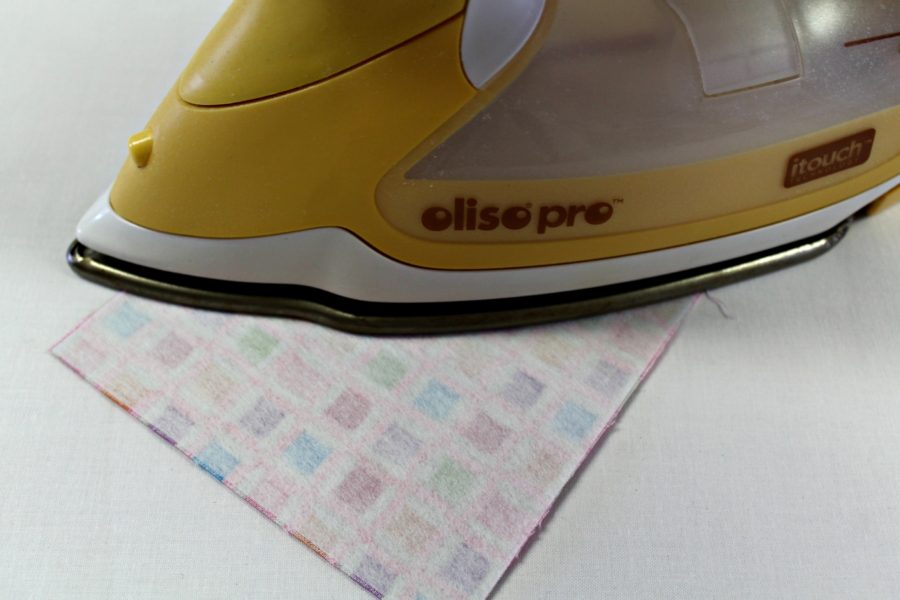
The handles are made by fusing the interfacing pieces to the center of the wrong side of the 2 ¼” x 5 ½” fabrics. Fold the un-fused edges of fabric over the interfacing and press. Fold the fabric in half lengthwise, enclosing the interfacing inside, and edge stitch around the strips. Find the center of each narrow end of the fabric basket and measure 1” down from the top. Mark a line and pin the ends of the handle on the line.
Trim the seam allowance to ¼”, press, refold the binding, and stitch in place. Fold the binding around the edge and stitch by hand or machine.
Step 7:
The handles are made by fusing the interfacing pieces to the center of the wrong side of the 2 ¼” x 5 ½” fabrics. Fold the un-fused edges of fabric over the interfacing and press. Fold the fabric in half lengthwise, enclosing the interfacing inside, and edge stitch around the strips. Find the center of each narrow end of the fabric basket and measure 1” down from the top. Mark a line and pin the ends of the handle on the line.
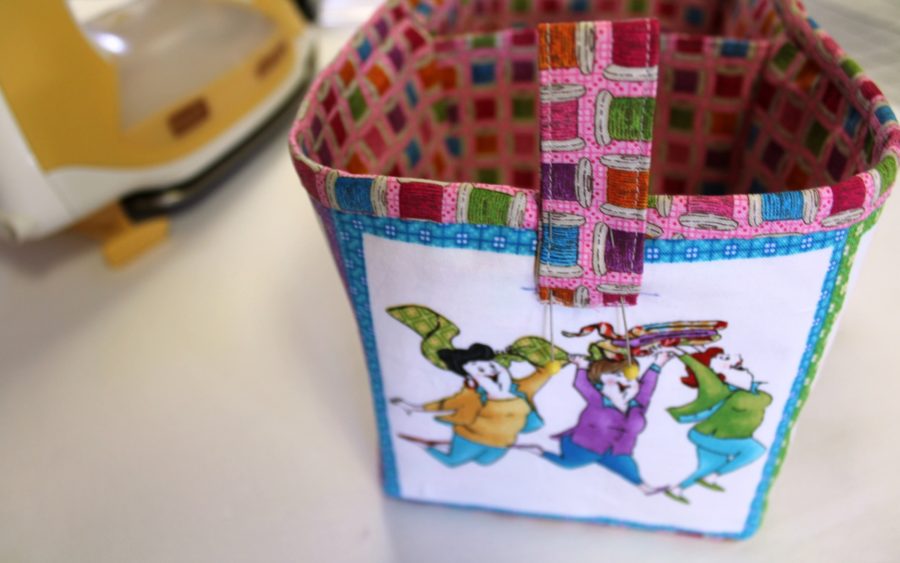 Stitch the ends of the handle to the basket ¼” from the ends. Finally, stitch a 1 ¼” button to cover the ends.
Carl
Stitch the ends of the handle to the basket ¼” from the ends. Finally, stitch a 1 ¼” button to cover the ends.
Carl