No Products in the Cart
 Hello Beautiful Gift Set with Therm O Web and Jillibean Soup
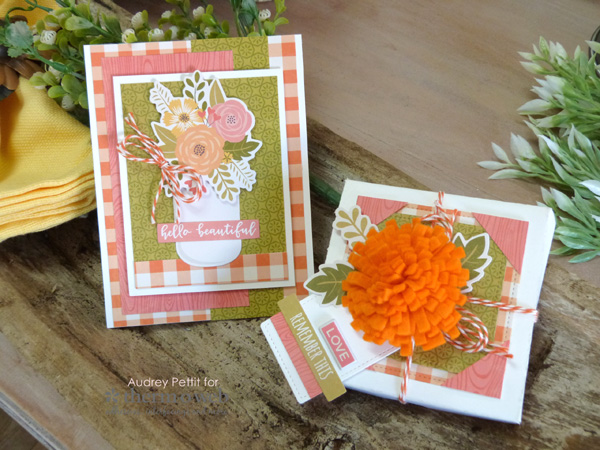
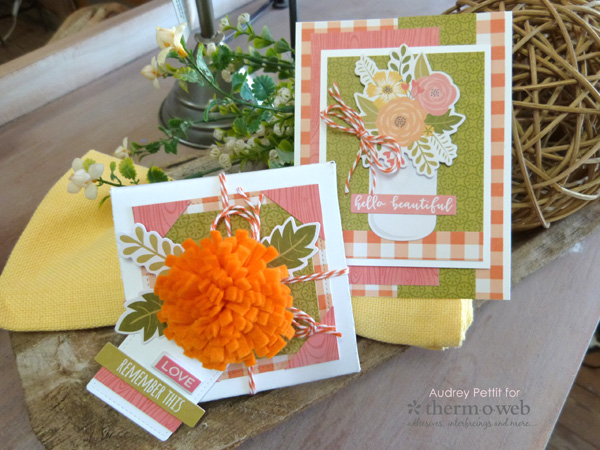
 As with many of my gift set ideas, when I'm looking to make several projects that coordinate together, I usually start with the card. May just seems to call for flowers, so that was the jumping off point for my design. The mason jar, the sentiment strip, and the flower bouquet are all from the die cut shape sheet and were so easy to put together. I chose three papers from the collection kit that pulled colors from the bouquet and layered them with crisp white Therm O Web Premium Cardstock to make all the patterns pop. I love adding Therm O Web iCraft Double-Sided Adhesive Foam between some of the elements to add depth to the design. A double bow tied from baker's twine is easily attached to the side of the jar with the help of a small Zots adhesive dot.
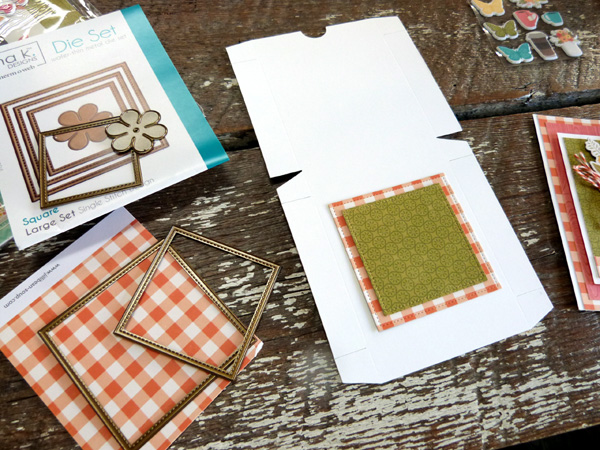 I needed a small gift box for this project, and this mini pizza box die shape was a perfect size. I die cut the box from Premium White cardstock, and to decorate the top of the box, I die cut the two largest square shapes from the Stitched Squares Large die set from the same patterned papers I used on the card.
 To begin the box assembly, pre-fold the die cut along all the score lines. And then adhere the two die-cut squares to the box lid using Therm O Web XL Memory Tape Runner Adhesive.
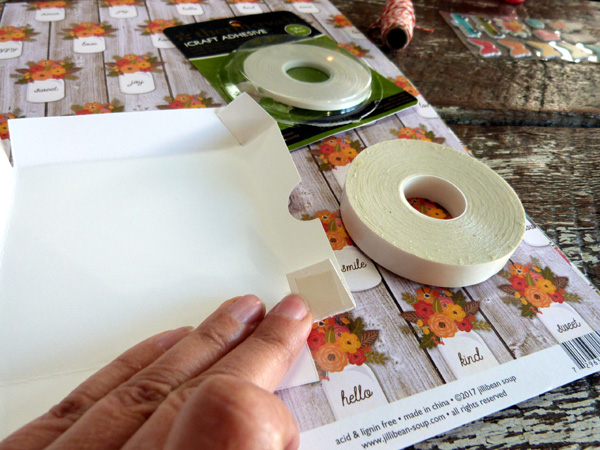 This pizza box die is held closed by three sets of side tabs, and you'll want to use a super strong adhesive to hold the box in shape. I recommend Therm O Web's Easy-Tear iCraft Adhesive, which comes in several widths to choose from. Just add a small piece of iCraft Adhesive to each tab, and rub over the top of the release paper with the tip of your finger to help burnish the adhesive in place. Then peel off the liner, fold the tabs in and adhere them to the side walls.
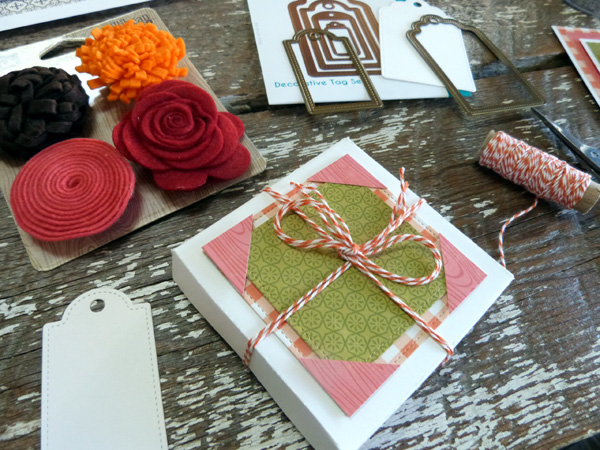 Trim two 1" squares from patterned paper. Snip them in half diagonally, and adhere each section to the four corners of the stitched squares using Zots adhesive dots. Wrap twine around the gift box, and tie the ends into a bow on the top. Die cut a gift tag from Premium White Cardstock using the GinaK Designs Decorative Tag die set.
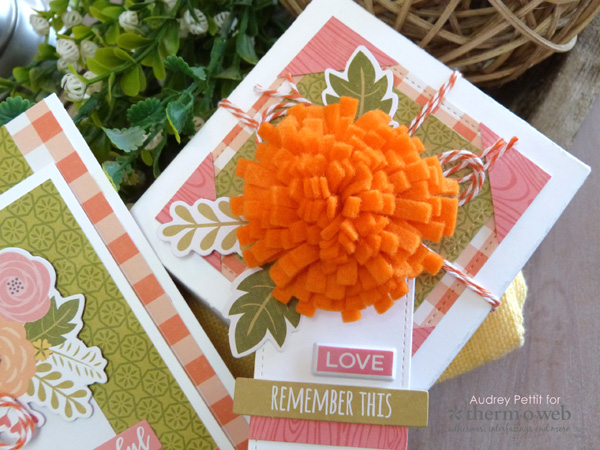 Embellish the tag with the sticker and patterned paper strips, and then tuck the tag under the bow. Place one of the super cute Jillibean Mix the Media felt flowers on the top of the tag. These flowers are already backed with a large adhesive foam dot, so they are very easy to add to any project. Then simply tuck a few die cut greenery sprigs around the flower using Zots adhesive dots to keep them in place.
Enjoy!
Save
Save
Embellish the tag with the sticker and patterned paper strips, and then tuck the tag under the bow. Place one of the super cute Jillibean Mix the Media felt flowers on the top of the tag. These flowers are already backed with a large adhesive foam dot, so they are very easy to add to any project. Then simply tuck a few die cut greenery sprigs around the flower using Zots adhesive dots to keep them in place.
Enjoy!
Save
Save
 a Rafflecopter giveaway