Hey there, friends! Missy here, and I'm very excited to be sharing my first layout for the Design Team here with you today :) I love using mixed media products on my layouts, and so I started this project off with some of the Lightweight Mixed Media Sheets and a few of the Gina K.™ Designs Premium Dye Inks. So join me today for my first project ...Happy Girl Mixed Media Layout Tutorial (and a video too!)
I took a few of the colored ink pads and stamped them down onto some plastic packaging. I spritzed it with water and then flipped the plastic over and smudged it down onto the Mixed Media Sheet. The colors blended together so nicely and I got a really fun watercolor and artsy effect. Once it dried, I punched a few different sized circles from it. Those Mixed Media Sheets are soft enough to rip and tear yet sturdy enough to go through a punch!
I did a little bit of inking with more plastic packaging on the background before deciding where I wanted the circles to go. I was so excited to add the Deco Foil™ to my layout! Once everything was dry, I used a sunburst stencil and used a palette knife to smudge some of the Deco Foil™ Transfer Gel over it. Once it dried, I chose some of the Gina K.™ Designs Fancy Foils to lay over it. I ran it through my Laminator and got a gorgeous shine on the sunbursts!
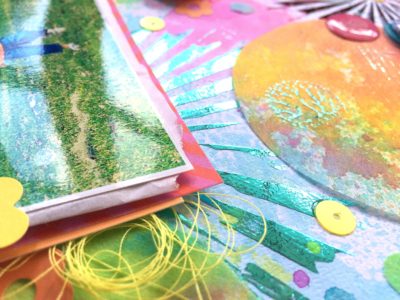
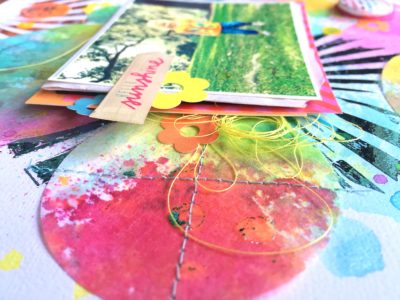
Look at that pretty shine! Photos don't do it justice, really. It's beautiful in person :) I used a few 3x4 cards as layers under my photo as well as some tissue paper and fun foam for dimension. I also added a few stickers and sequins.
To add even more detail and texture, I machine stitched through several of the circles using a light blue thread. I also added a few flair buttons to echo the circle theme.
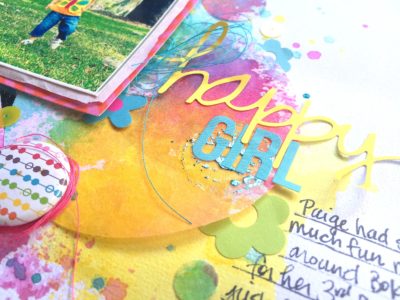
I really love how these ink colors blended together. Another fun fact about the Mixed Media Sheets is they don't warp like regular paper. I added quite a bit of water to it, and it dried without any buckling. I used a few stickers from my stash to create my simple title.
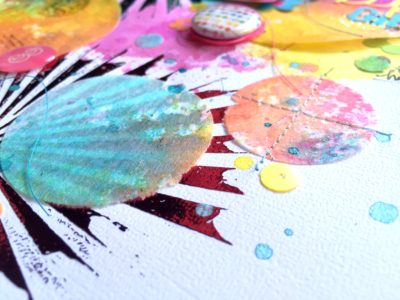
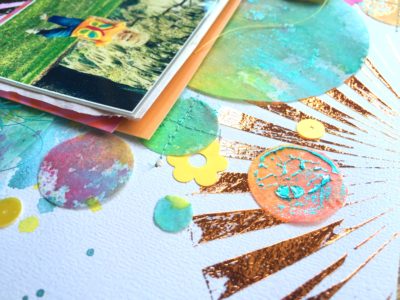
Here's another close-up of the details. I can't say enough how much I love these colors! They look awesome up against the bright colors of the foils.
I love that you can create whatever shape you want with the iCraft Mixed Media Liquid Adhesive. I applied it to a stamp here and then ran the foil over it. Such a cool and abstract look!
I hope this inspires you to give these fun foils and mixed media products a chance. They really are fun and very versatile to use!
I've put together a video for you to watch the process of how to create this layout. Enjoy!
 Happy Girl Mixed Media Layout Tutorial
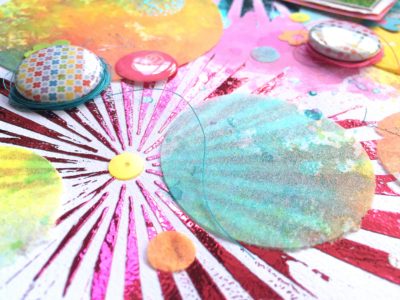 Look at that pretty shine! Photos don't do it justice, really. It's beautiful in person :) I used a few 3x4 cards as layers under my photo as well as some tissue paper and fun foam for dimension. I also added a few stickers and sequins.
 To add even more detail and texture, I machine stitched through several of the circles using a light blue thread. I also added a few flair buttons to echo the circle theme.
 I really love how these ink colors blended together. Another fun fact about the Mixed Media Sheets is they don't warp like regular paper. I added quite a bit of water to it, and it dried without any buckling. I used a few stickers from my stash to create my simple title.
 Here's another close-up of the details. I can't say enough how much I love these colors! They look awesome up against the bright colors of the foils.
 I love that you can create whatever shape you want with the iCraft Mixed Media Liquid Adhesive. I applied it to a stamp here and then ran the foil over it. Such a cool and abstract look!
 I hope this inspires you to give these fun foils and mixed media products a chance. They really are fun and very versatile to use!