No Products in the Cart
 Therm O Web Supplies Used:
Therm O Web Memory Runner XL
Therm O Web Zots Package-Small
Therm O Web Zots Box-Small
Therm O Web 3D Foam Square-1/4 inch
iCraft Deco Foil Foil Transfer Sheets-Silver Shattered Glass
iCraft Deco Foil Transfer Sheets Value Pack-Gold
iCraft Purple Tape-1.5 Inch
iCraft Purple Tape-.5 inch
Deco Foil Foil Toner Card Fronts by Unity-Butterfly Fly Away
Deco Foil Toner Card Fronts by Unity-Circles A Plenty
Gina K Designs Sheer Satin Fancy Ribbon-White/Silver
Laminator
Other Supplies Used:
Bloom Street (Pink Paislee) 12x12 Pad
Bloom Street (Pink Paislee) 6x8 Pad
Bloom Street (Pink Paisley) Cardstock Stickers
Distress Oxide Ink-Spun Sugar
Distress Oxide Ink-Squeezed Lemonade
Distress Oxide Ink-Tumbled Glass
Distress Oxide Ink-Shaded Lilac
Border Punch
Therm O Web Supplies Used:
Therm O Web Memory Runner XL
Therm O Web Zots Package-Small
Therm O Web Zots Box-Small
Therm O Web 3D Foam Square-1/4 inch
iCraft Deco Foil Foil Transfer Sheets-Silver Shattered Glass
iCraft Deco Foil Transfer Sheets Value Pack-Gold
iCraft Purple Tape-1.5 Inch
iCraft Purple Tape-.5 inch
Deco Foil Foil Toner Card Fronts by Unity-Butterfly Fly Away
Deco Foil Toner Card Fronts by Unity-Circles A Plenty
Gina K Designs Sheer Satin Fancy Ribbon-White/Silver
Laminator
Other Supplies Used:
Bloom Street (Pink Paislee) 12x12 Pad
Bloom Street (Pink Paislee) 6x8 Pad
Bloom Street (Pink Paisley) Cardstock Stickers
Distress Oxide Ink-Spun Sugar
Distress Oxide Ink-Squeezed Lemonade
Distress Oxide Ink-Tumbled Glass
Distress Oxide Ink-Shaded Lilac
Border Punch
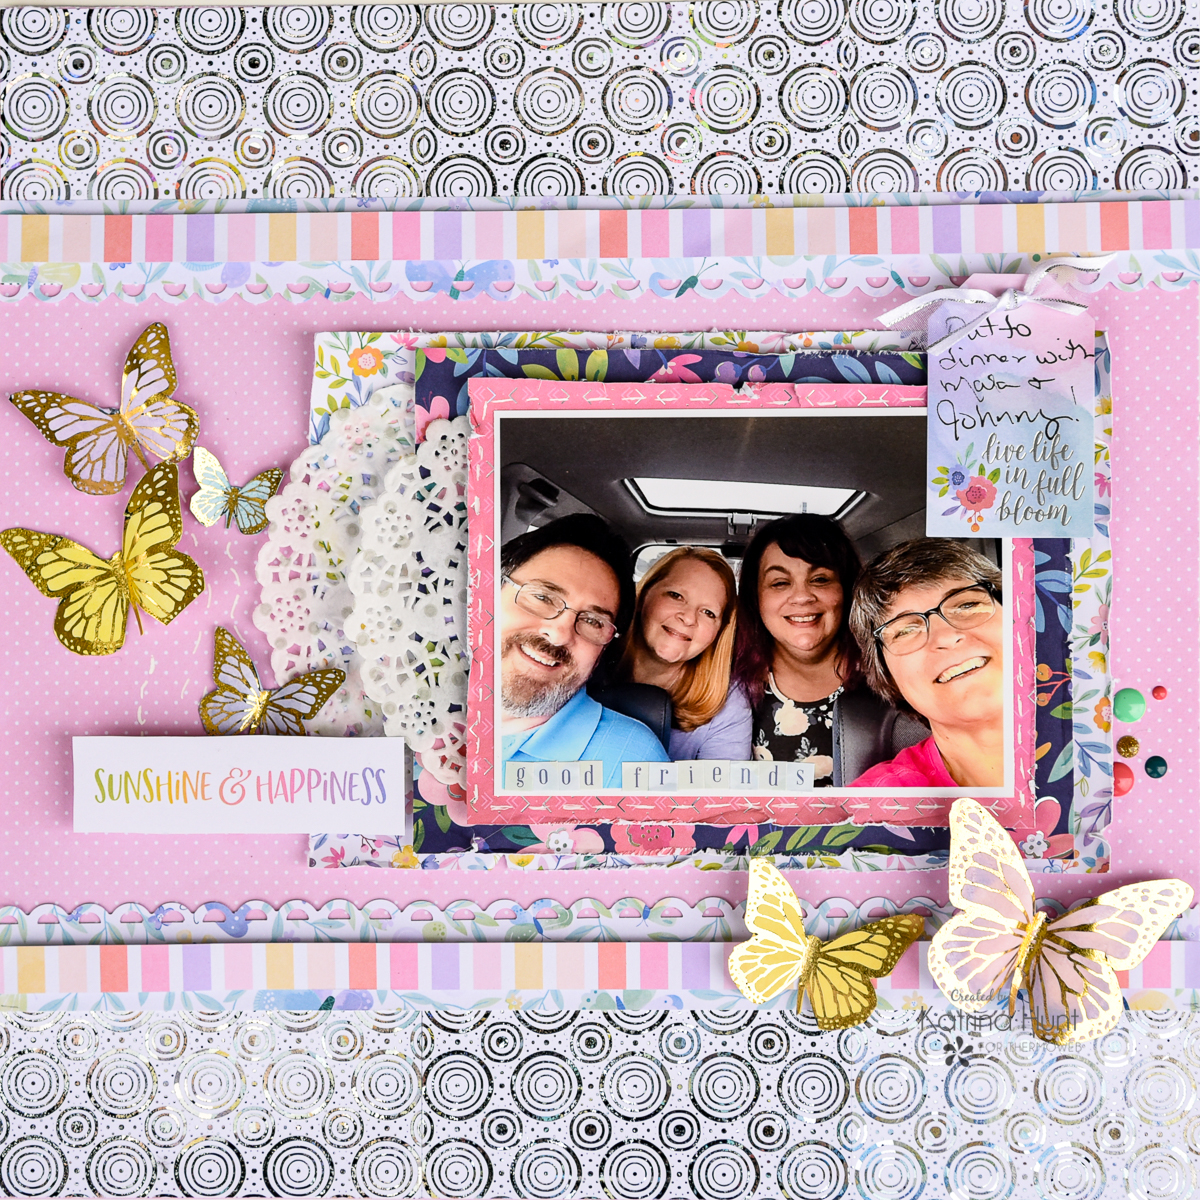 One of the fun things about the paper collection I used was that it had foil accents. So I chose the Silver Shatter Glass Deco Foil as my main foil for my page to match the silver foil accents in the paper collection.
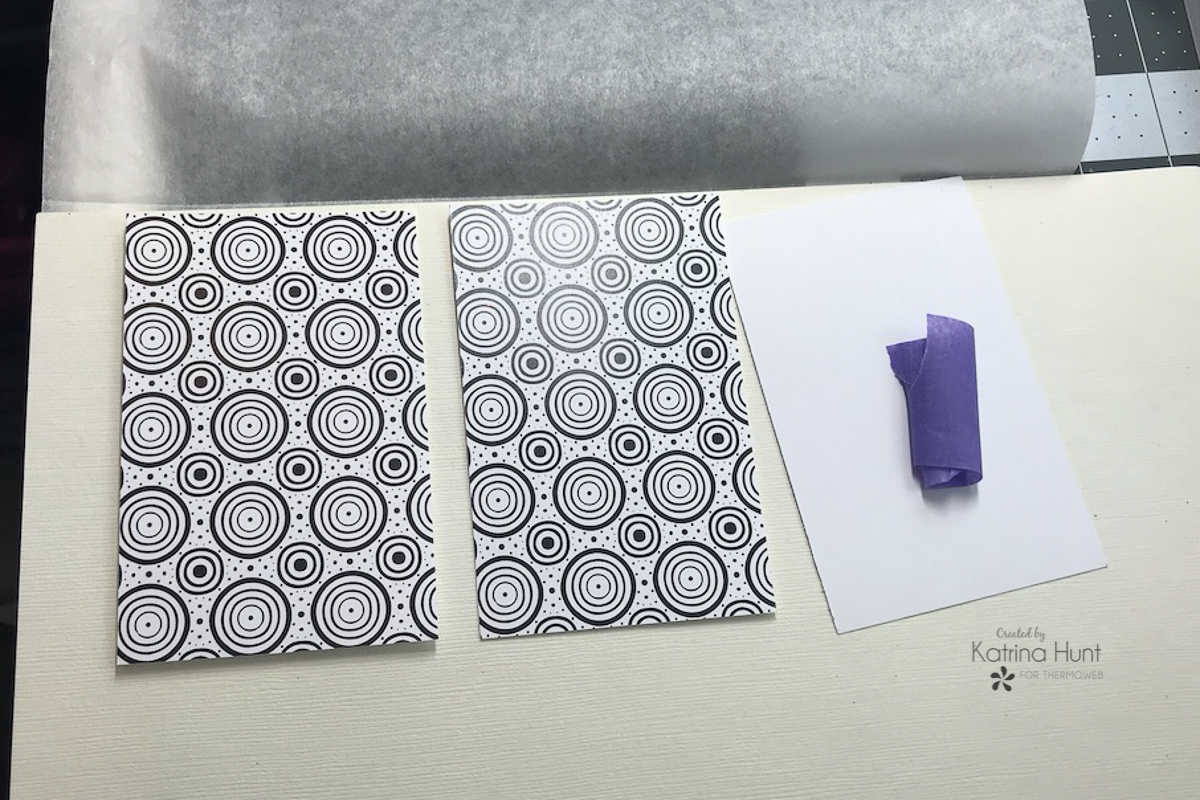
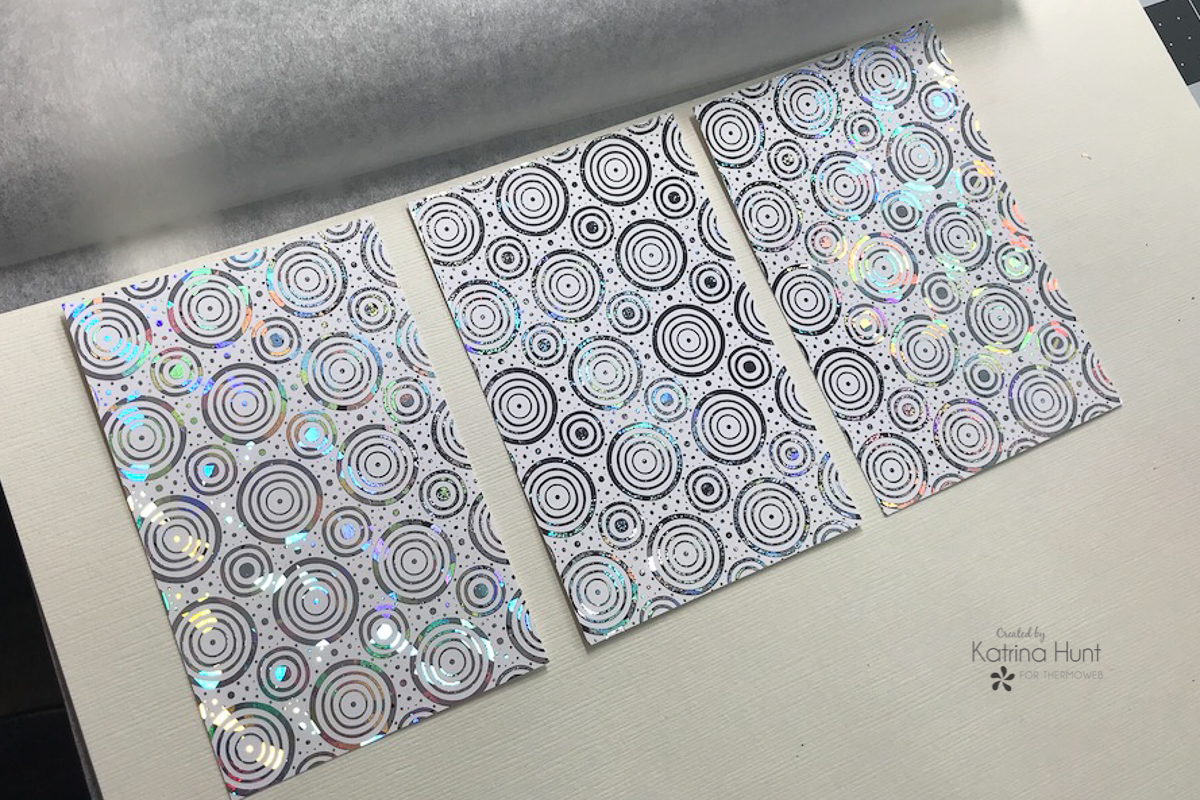
I started my layout by warming my laminator to get it ready to run the Unity Card Fronts thru. While the laminator was warming, I cut three of the Circles A Plenty card fronts in half making them 4.25 x 2.75 inches.
One of the fun things about the paper collection I used was that it had foil accents. So I chose the Silver Shatter Glass Deco Foil as my main foil for my page to match the silver foil accents in the paper collection.
I started my layout by warming my laminator to get it ready to run the Unity Card Fronts thru. While the laminator was warming, I cut three of the Circles A Plenty card fronts in half making them 4.25 x 2.75 inches.
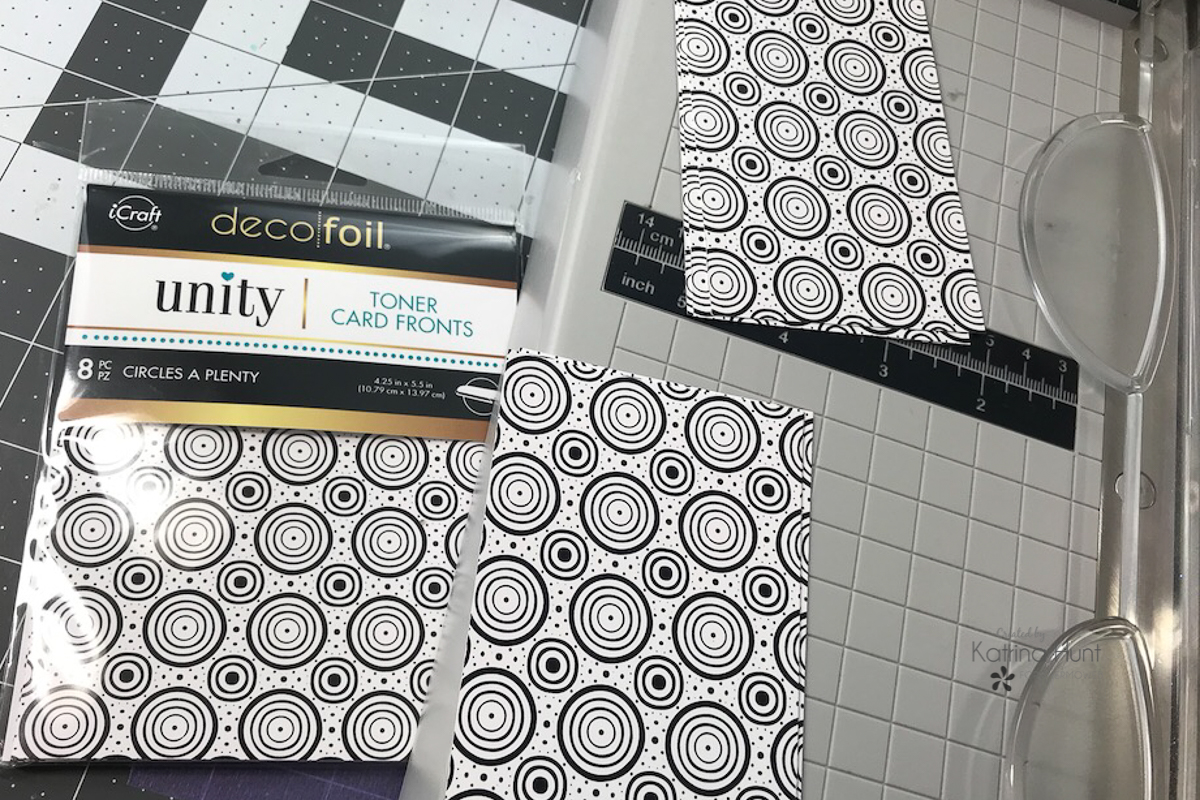 Now these card fronts will almost pattern match when you put them side by side, so when I trimmed them I trimmed all three at once. After they were trimmed I made sure to keep each stack separate from the other one, so I would know what halves went together.
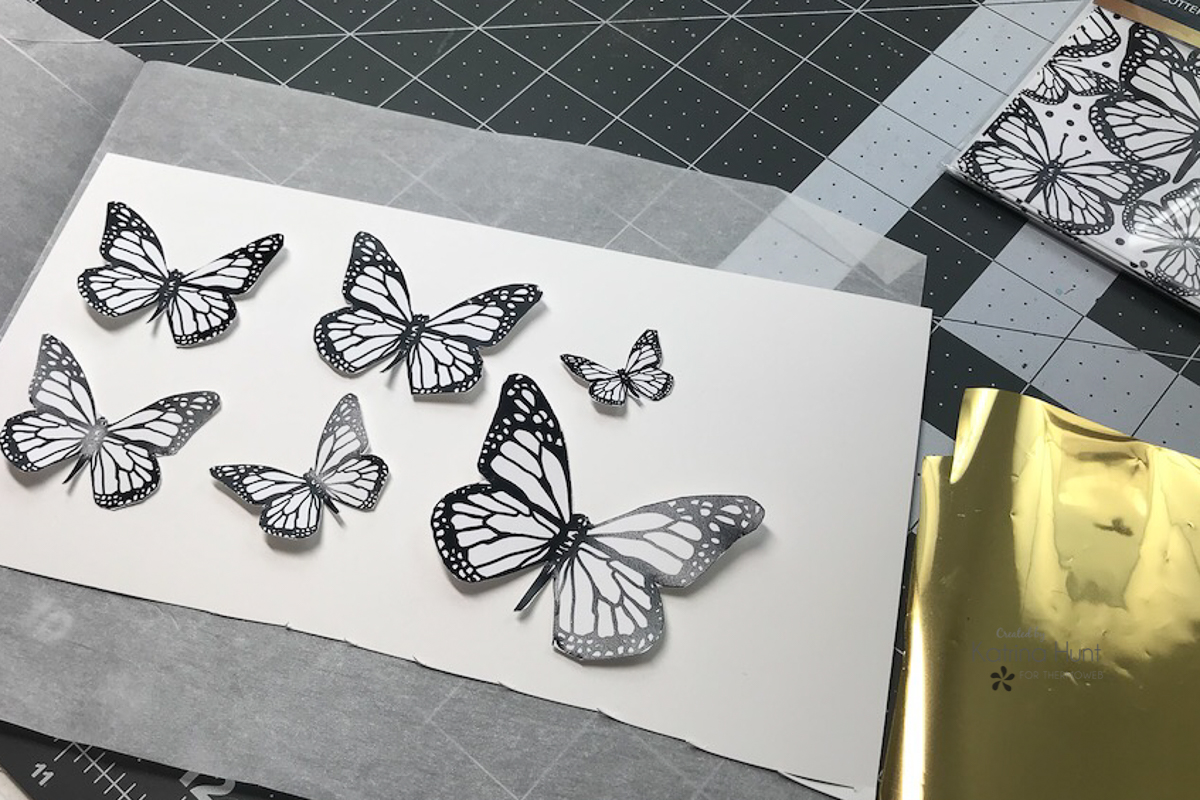
 Working with Deco Foil
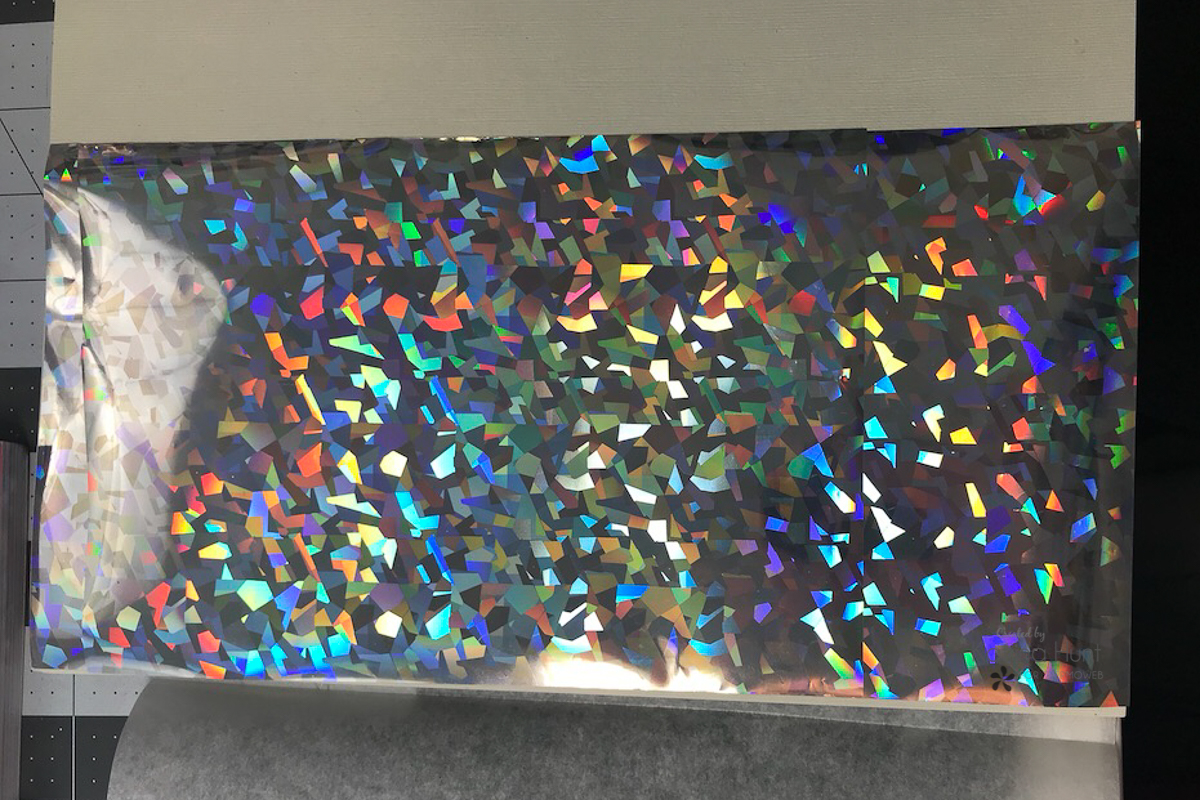 Once your pieces come out of the laminator, remove the foil transfer sheet to reveal your foiled pieces! How fun is that shine?! The Shattered Glass is almost like a prism effect on the foil.
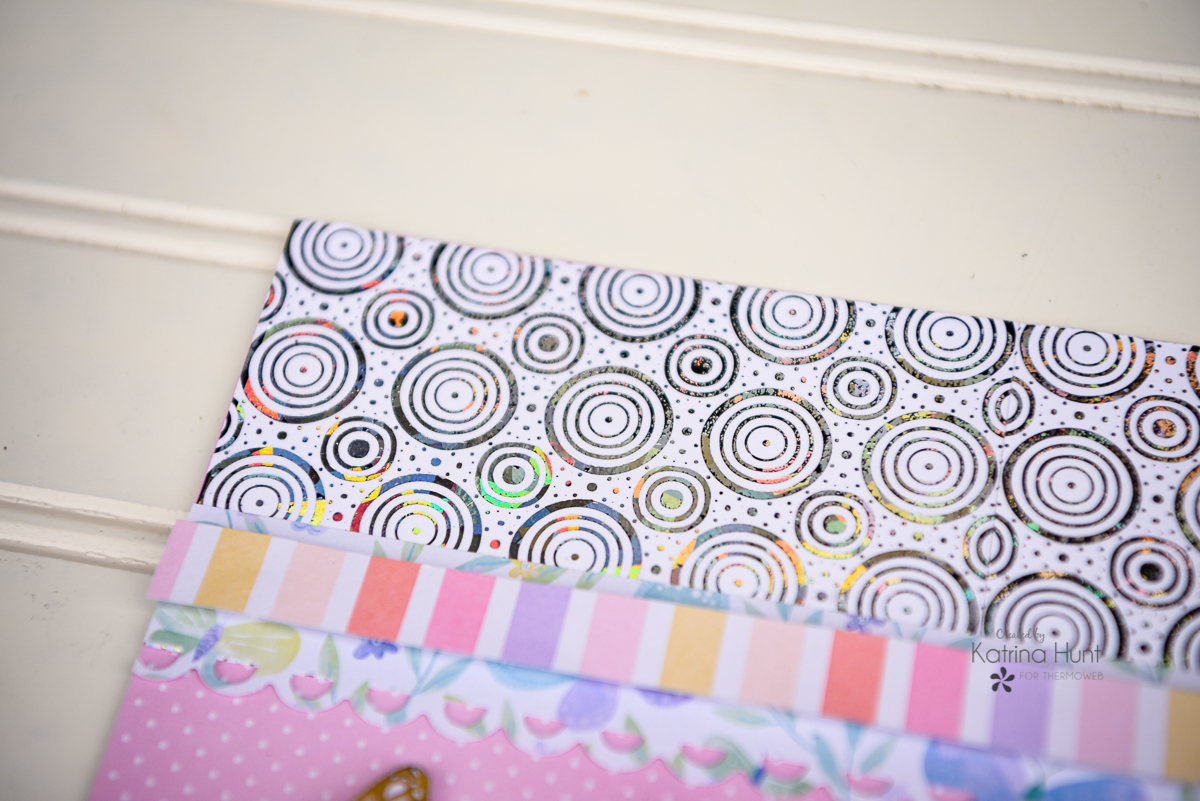
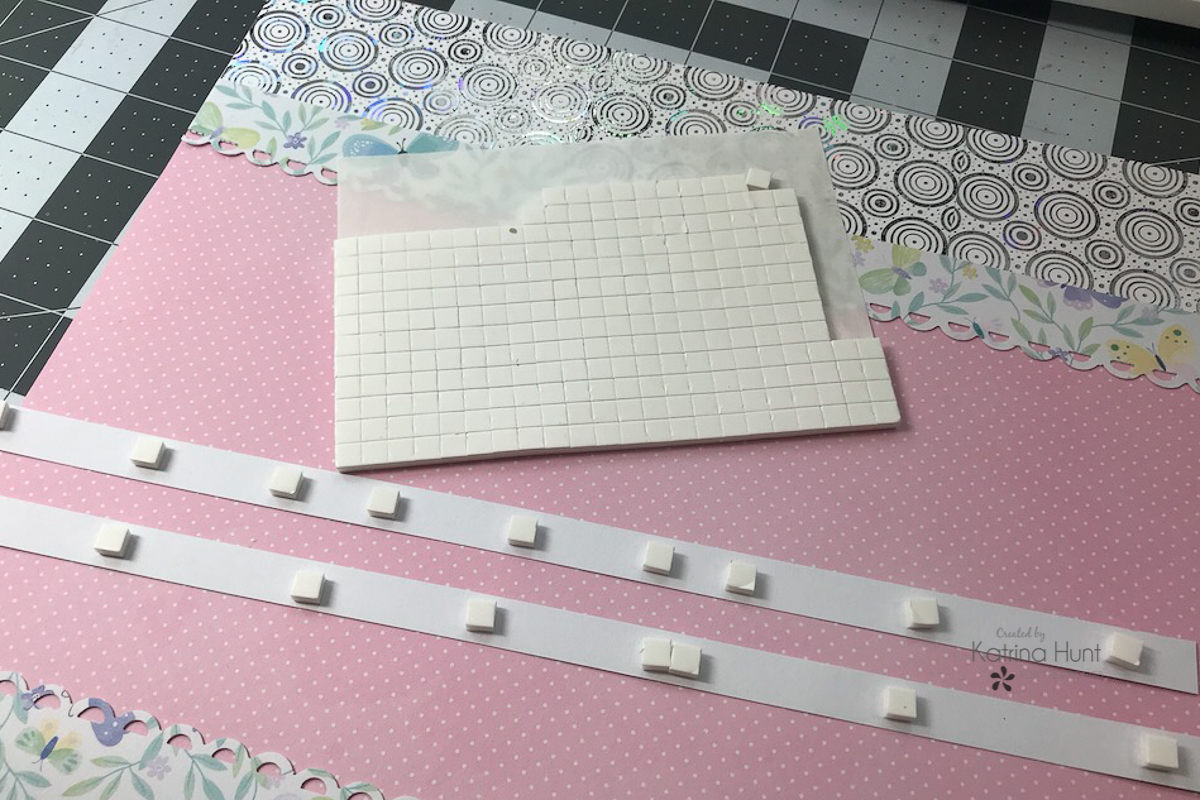
 Next, you will begin building some of the elements of your layout. I used border punch strips to fit on the top and bottom areas where the foiled card fronts go toward the middle. In addition, I trimmed two pieces of striped paper slightly smaller than my border punched strips and then adhered them with foam squares to give some dimension to my layout.
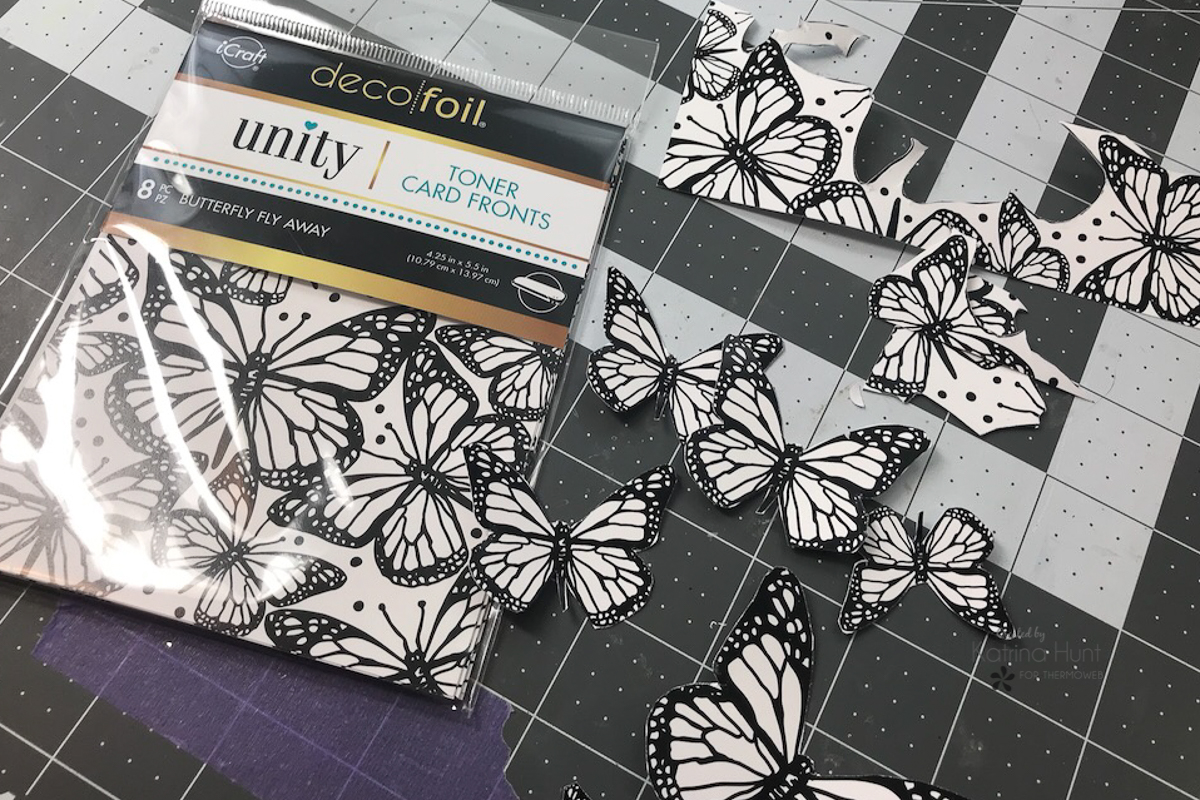
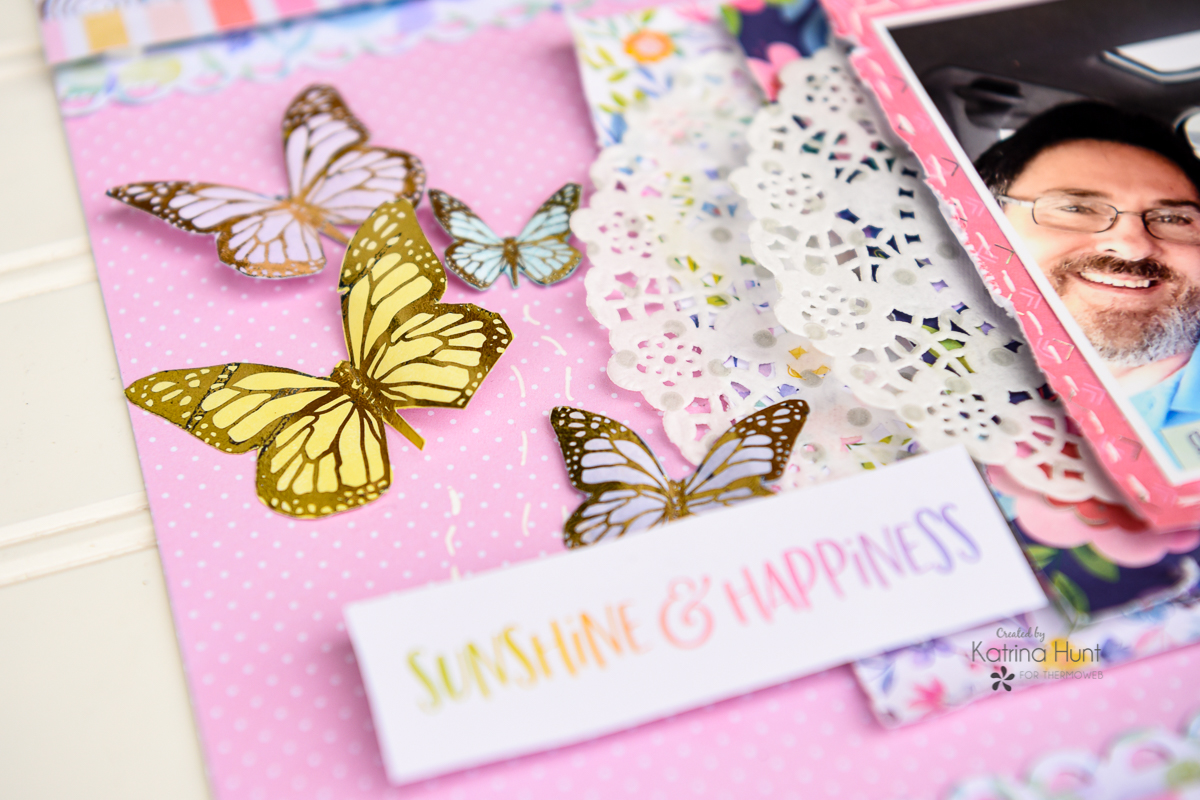
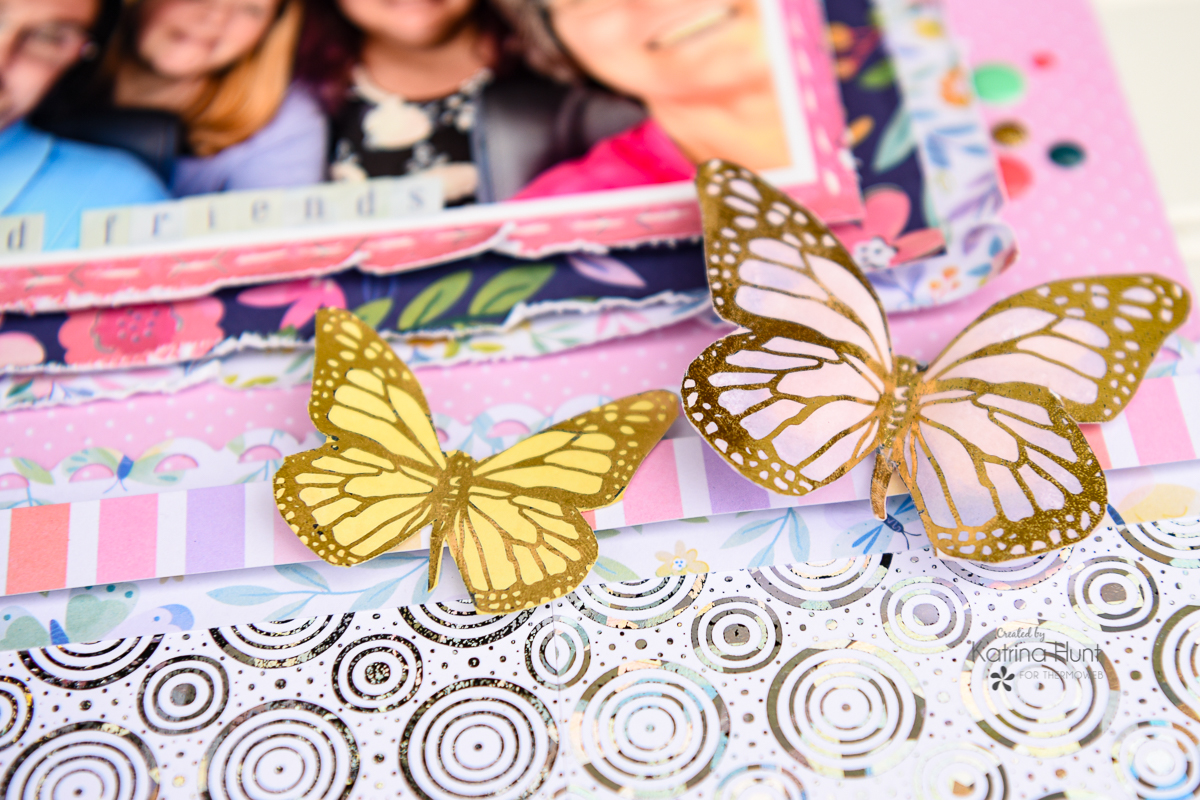 I wanted to embellish the layout with some of the butterflies from the Butterfly Fly Away card fronts. I started by hand-cutting them out of the card front and then foiling them with Gold Deco Foil. As a result, I almost left them white and gold, but then decided to add a little color with some Distress Oxide Inks. For this purpose, I foiled first and then inked. The Distress Oxide does have a chalky look, so I used a cotton swab to rub the ink from the foiled areas.
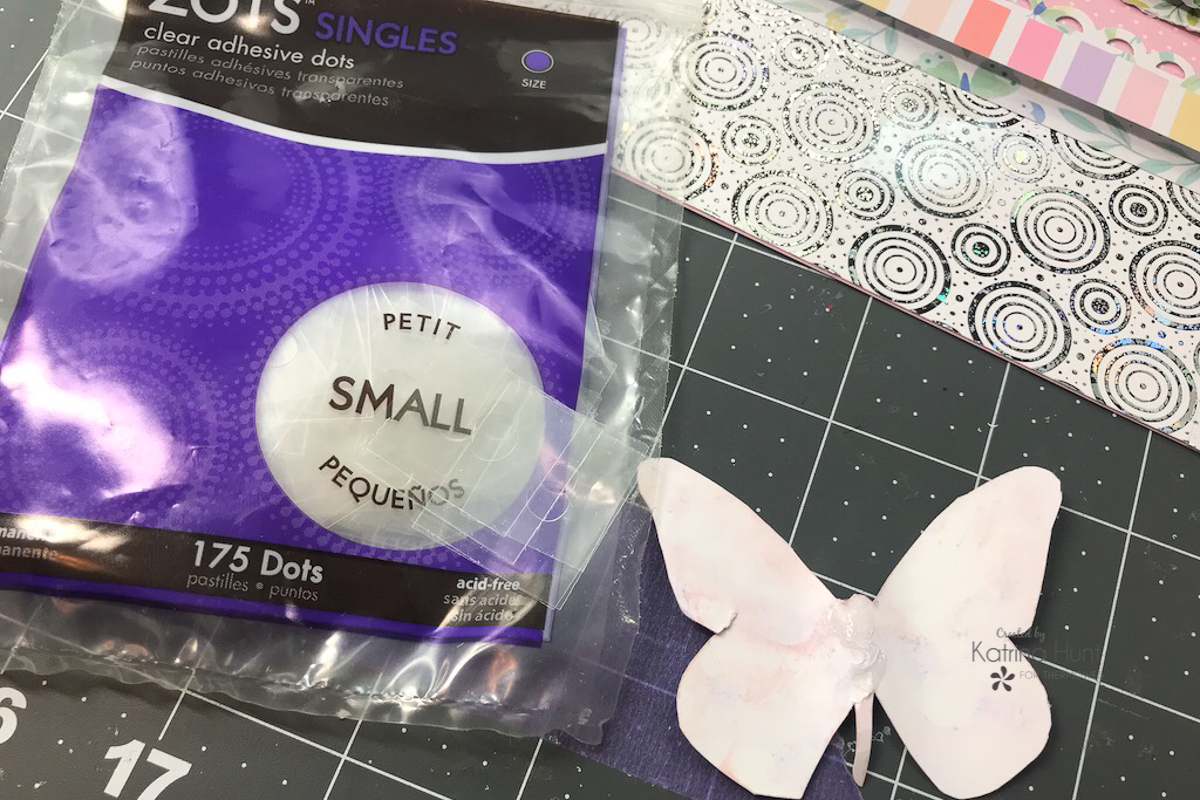
 I adhered all the butterfly cutouts with Zots in size Small. I only attached the Zots to the middle body parts, which left the wings where I could bend them and give them some lift.
 I finished up my layout by adding some details with a white gel pen, some enamel dots and a couple of the cutouts and stickers from the paper collection.
 I hope you pick up these new card fronts! In addition, the card fronts also take coloring with markers very well. I am telling you they are a very versatile item to have in your crafting stash!
Thanks for stopping by today and have a wonderful Sunshine and Happiness week!
I hope you pick up these new card fronts! In addition, the card fronts also take coloring with markers very well. I am telling you they are a very versatile item to have in your crafting stash!
Thanks for stopping by today and have a wonderful Sunshine and Happiness week!