No Products in the Cart
 Happy Spring! I'm Lisa Ruble from Love to Color My World and I'm happy to be here sharing a fun tutorial to keep kids busy while traveling.
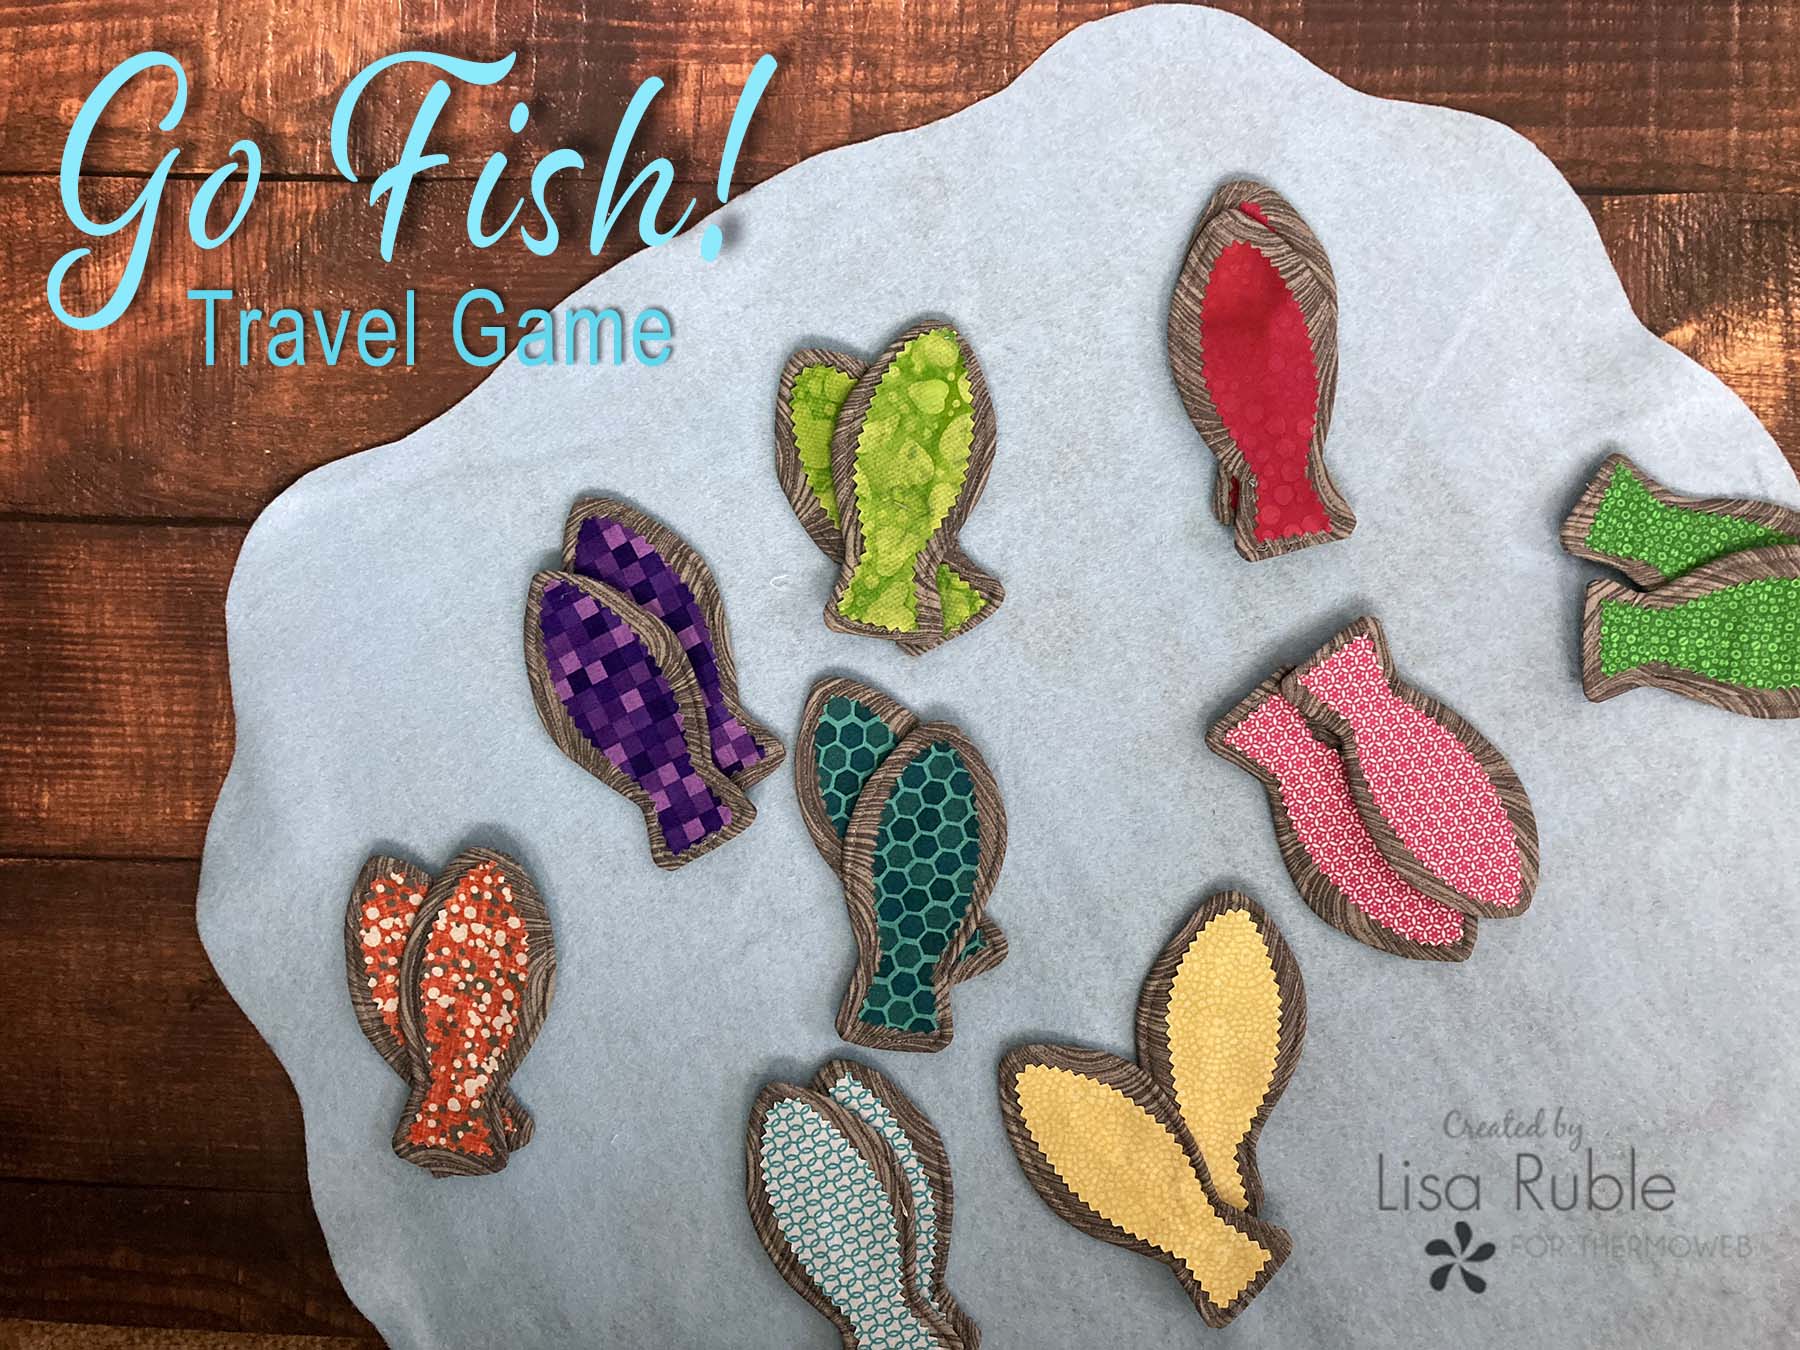 I have 3 boys and am always looking for ways to keep them entertained in the car - particularly alternatives to playing on a tablet! Matching games are a favorite at our house, so I created a Go Fish! travel game. I can't wait to take it on our upcoming road trip!

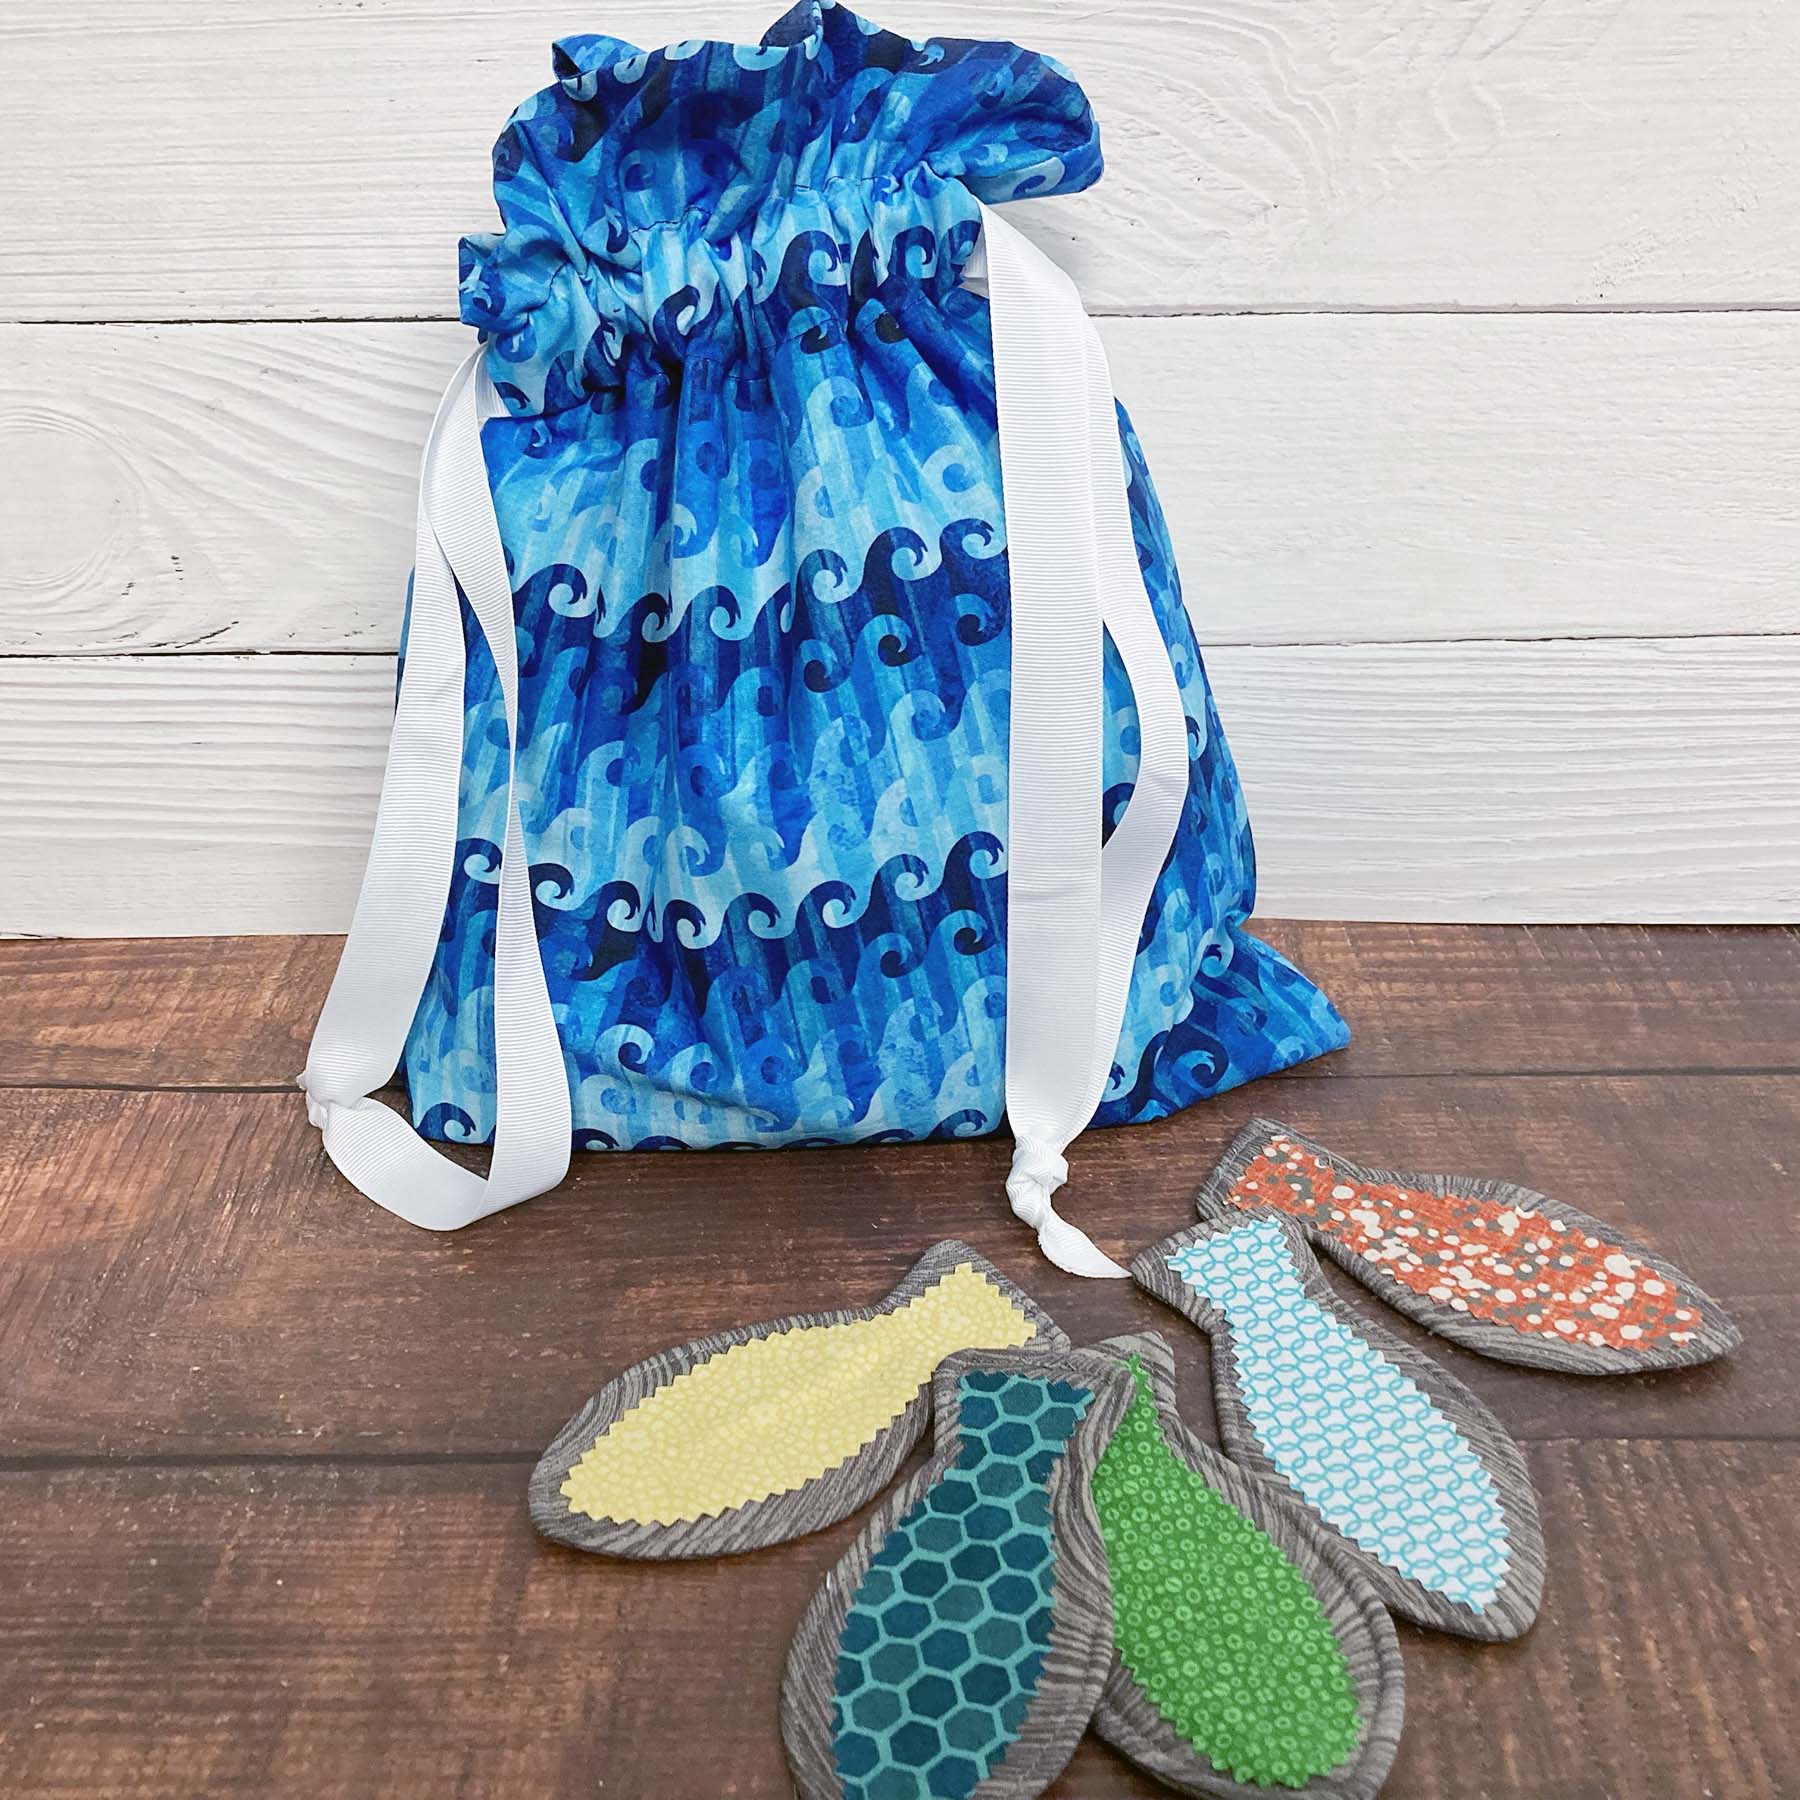
 I had fun picking through my fabric scraps to find different colors for the fish. I used Non-Woven Craft Sew-In Interfacing for the fish so they wouldn't be floppy. A simple piece of felt - blue of course, to be a pond! - makes a playing mat. Scroll down to the bottom a link to a drawstring bag tutorial to keep all the pieces together. Let's get started!
You'll Need:
I had fun picking through my fabric scraps to find different colors for the fish. I used Non-Woven Craft Sew-In Interfacing for the fish so they wouldn't be floppy. A simple piece of felt - blue of course, to be a pond! - makes a playing mat. Scroll down to the bottom a link to a drawstring bag tutorial to keep all the pieces together. Let's get started!
You'll Need:
 Cutting:
From the gray fabric:
(12) 3" x 12" pieces
From the Interfacing:
(12) 3" x 6" pieces
Download the template here.
Make the Fish:
Step 1: Print out the template page and cut out both the fish and inner fish template.
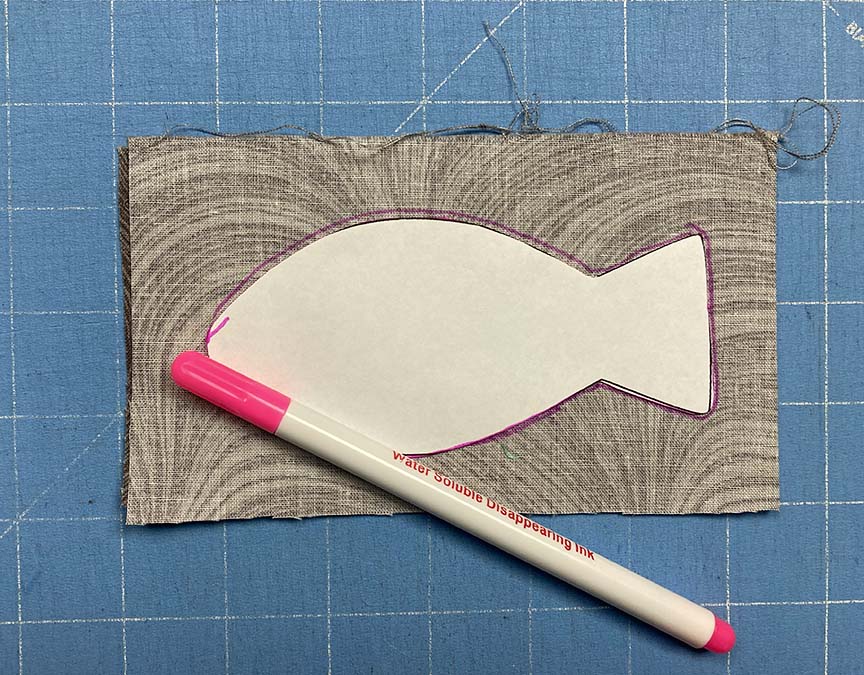
Step 2: Fold (1) 3" x 12" gray piece in half right sides together to create a 3" x 6" piece. Trace the fish template onto the doubled fabric using the fabric marking pen. Layer on top one piece of 3" x 6" Interfacing.
Cutting:
From the gray fabric:
(12) 3" x 12" pieces
From the Interfacing:
(12) 3" x 6" pieces
Download the template here.
Make the Fish:
Step 1: Print out the template page and cut out both the fish and inner fish template.
Step 2: Fold (1) 3" x 12" gray piece in half right sides together to create a 3" x 6" piece. Trace the fish template onto the doubled fabric using the fabric marking pen. Layer on top one piece of 3" x 6" Interfacing.
 Step 3: Stitch on the fish outline.
 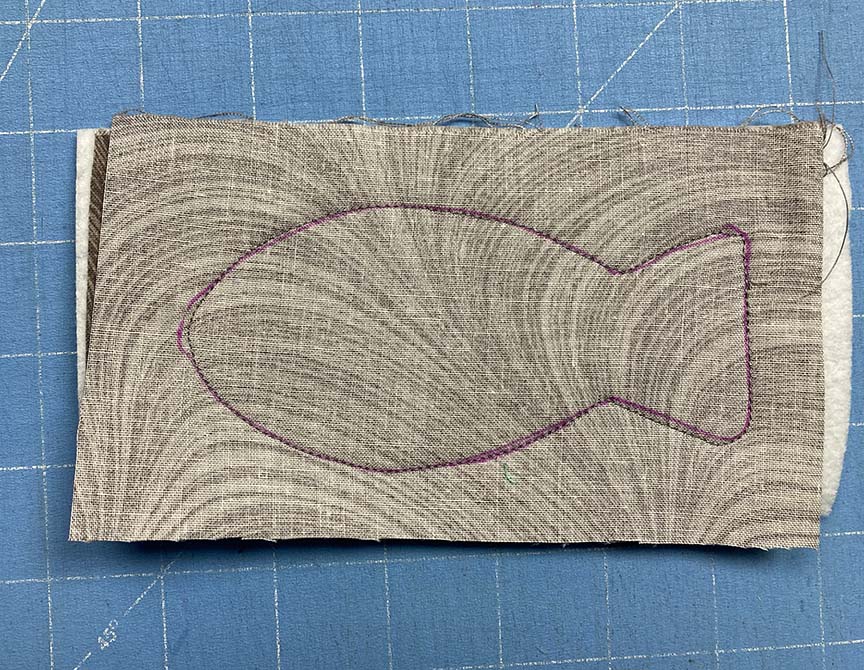 Step 4: Cut a slit through the top layer of fabric. The slit should be about 4” long, extending into the tail section, and should be at least 1/2” away from the stitched lines at both ends of the fish. Note: Be very careful to only cut through the top fabric layer!
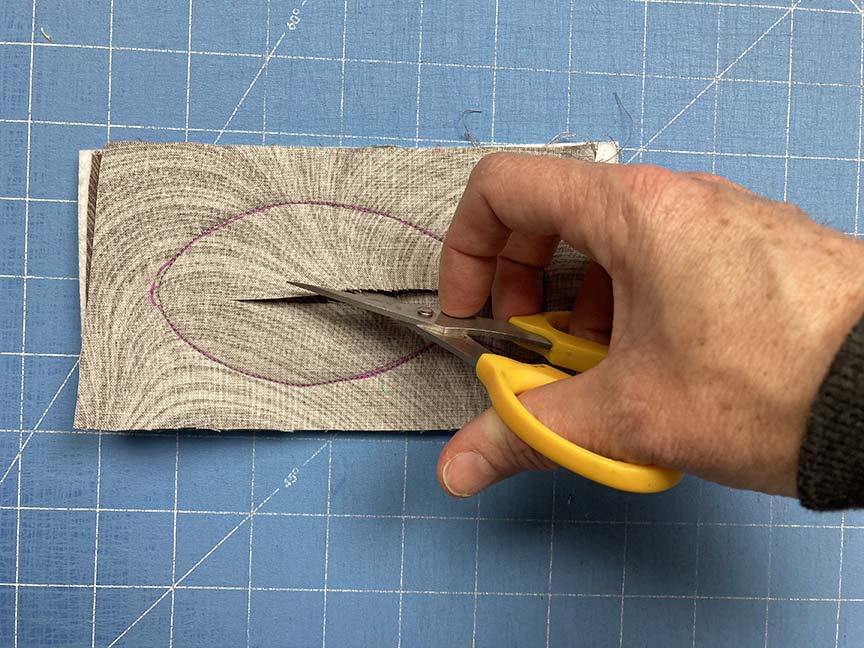
 Step 5: Turn fish right side out. Use a fabric turner to push out to the seams. Press the fish to flatten.
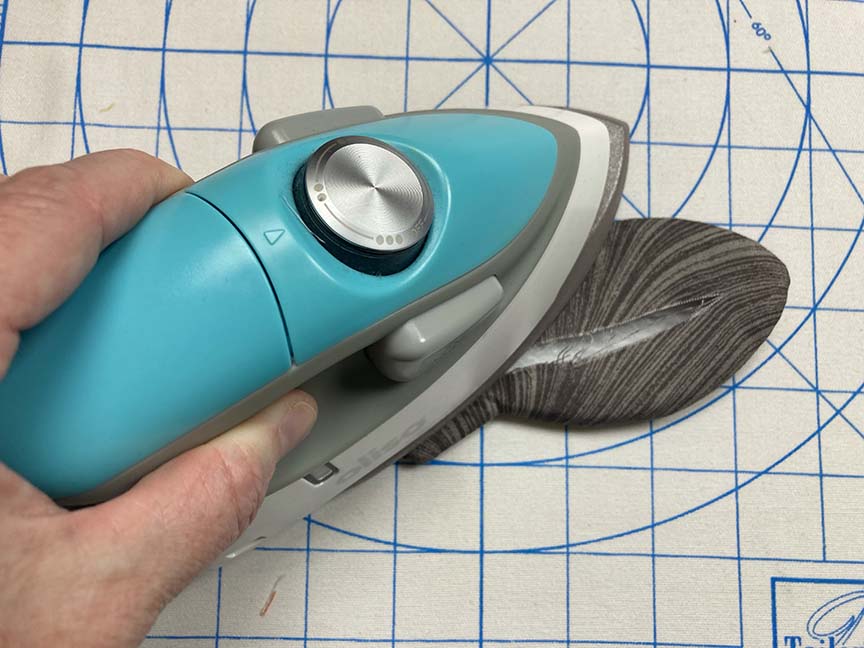 Step 6: Topstitch around the fish 1/4” from the outer edge. Repeat steps 2-6 to make a second fish.
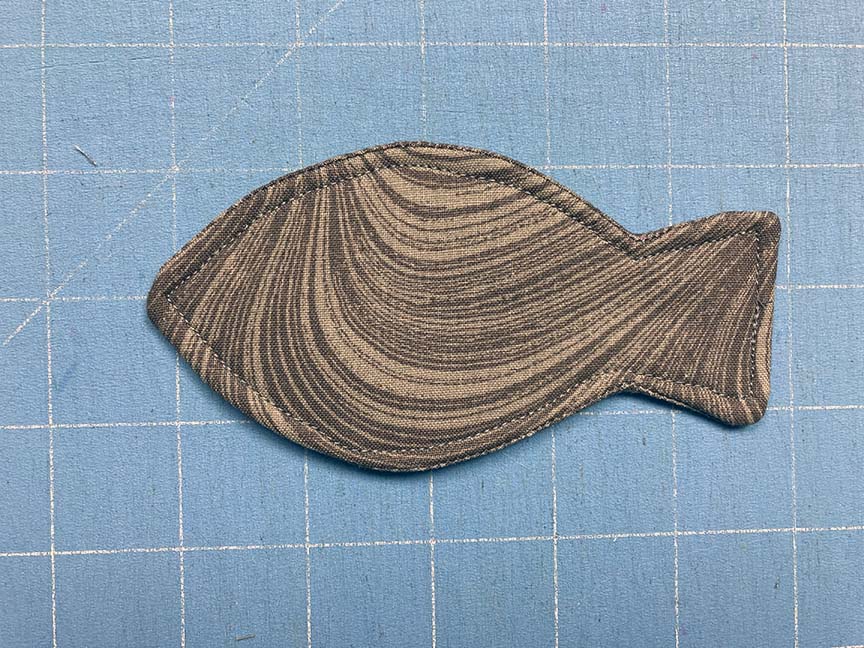 Step 7: Trace the inner fish shape two times onto the paper side of the fusible web. Fuse to the wrong side of one color 5” x 6” piece.
  Step 8: Cut out the inner fish shapes (I used pinking shears to create a textured edge) and fuse to the fish, covering the slit. Your first two matching fish are complete!
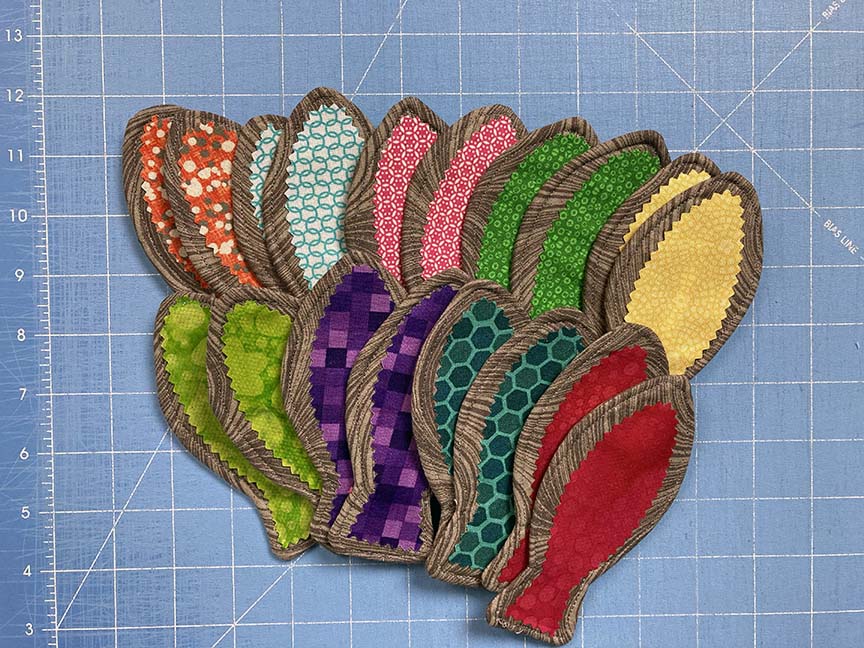
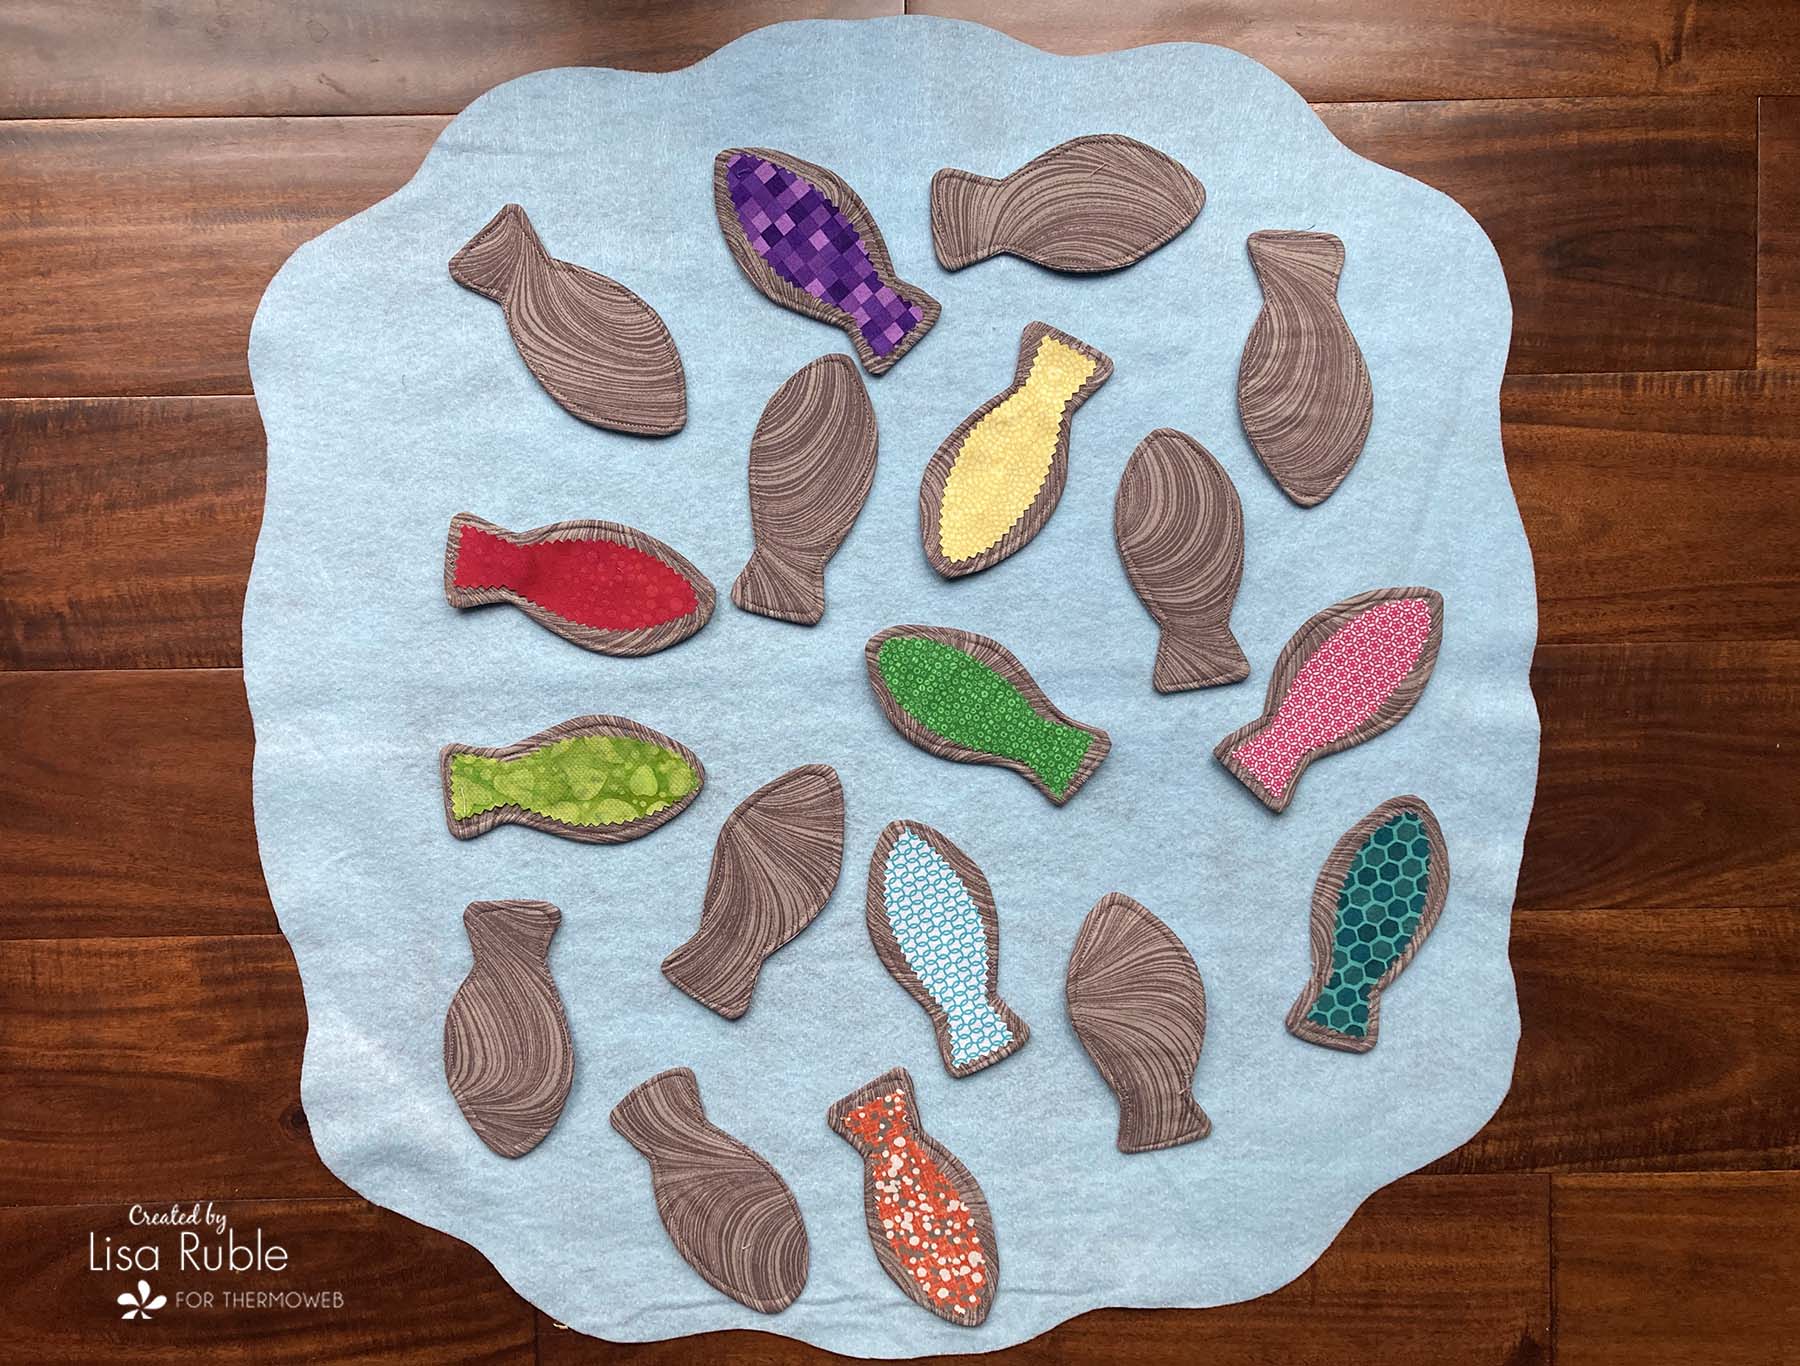
  Step 9: Repeat steps 2-8 to make a total of 12 pairs of matching fish (or more!)
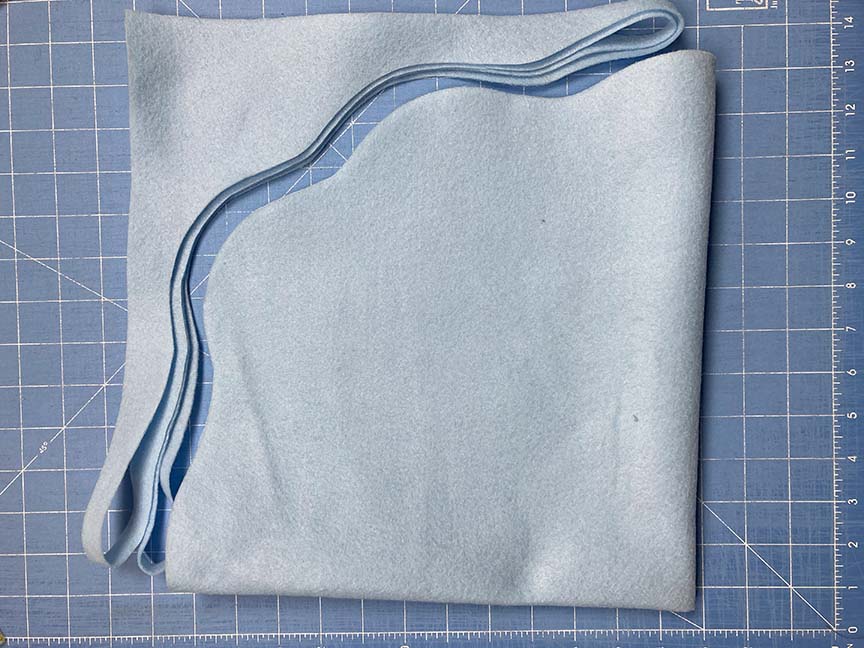
 Step 10: Fold the 24” square of light blue felt in half in both directions. Cut a wavy line along the non-folded lines to create a “pond.”
 To Play:
 Head over to my blog to find the tutorial to make a drawstring bag to hold your Go Fish! travel game.