No Products in the Cart
 Hey Hey! Katrina from Paper, Scissors, Glue and Hybrid Too sharing my scrapbook layout for our team up with Miss Ink Stamps. This layout has an interesting evolution, so let's get to it!
 Therm O Web Supplies Used
Memory Runner XL
Memory Runner XL Refill
3D Foam Squares – Combo Pack
NEW 3D FOAM SQUARES BOX
NEW 3D FOAM TAPE ROLL 1/16
Deco Foil Slimline Card Front Toner Sheet–Lots of Dots
Deco Foil Transfer Sheets - Wild Cherry
Deco Foil Flock Transfer Sheets - White
Deco Foil Foam Adhesive White
iCraft Purple Tape 1.5 inch
Gina K Designs Glitz Glitter Gel-White
Other Supplies Used
Grab at Miss Ink Stamps
Piñata Party Stamps
Piñata Party Dies
Rainbow Sky Stencil
Grab at Paper Issues
Use code Katrina at checkout for 20% off purchase
American Crafts White Cardstock
Bella Blvd. My Candy Girl Collection
PinkFresh Inks
Grab at Catherine Pooler Designs
Catherine Pooler Ink-Be Mine
Catherine Pooler Ink-It's a Girl
Grab at Blick.com
Zig Clean Color Real Brush Markers
Therm O Web Supplies Used
Memory Runner XL
Memory Runner XL Refill
3D Foam Squares – Combo Pack
NEW 3D FOAM SQUARES BOX
NEW 3D FOAM TAPE ROLL 1/16
Deco Foil Slimline Card Front Toner Sheet–Lots of Dots
Deco Foil Transfer Sheets - Wild Cherry
Deco Foil Flock Transfer Sheets - White
Deco Foil Foam Adhesive White
iCraft Purple Tape 1.5 inch
Gina K Designs Glitz Glitter Gel-White
Other Supplies Used
Grab at Miss Ink Stamps
Piñata Party Stamps
Piñata Party Dies
Rainbow Sky Stencil
Grab at Paper Issues
Use code Katrina at checkout for 20% off purchase
American Crafts White Cardstock
Bella Blvd. My Candy Girl Collection
PinkFresh Inks
Grab at Catherine Pooler Designs
Catherine Pooler Ink-Be Mine
Catherine Pooler Ink-It's a Girl
Grab at Blick.com
Zig Clean Color Real Brush Markers
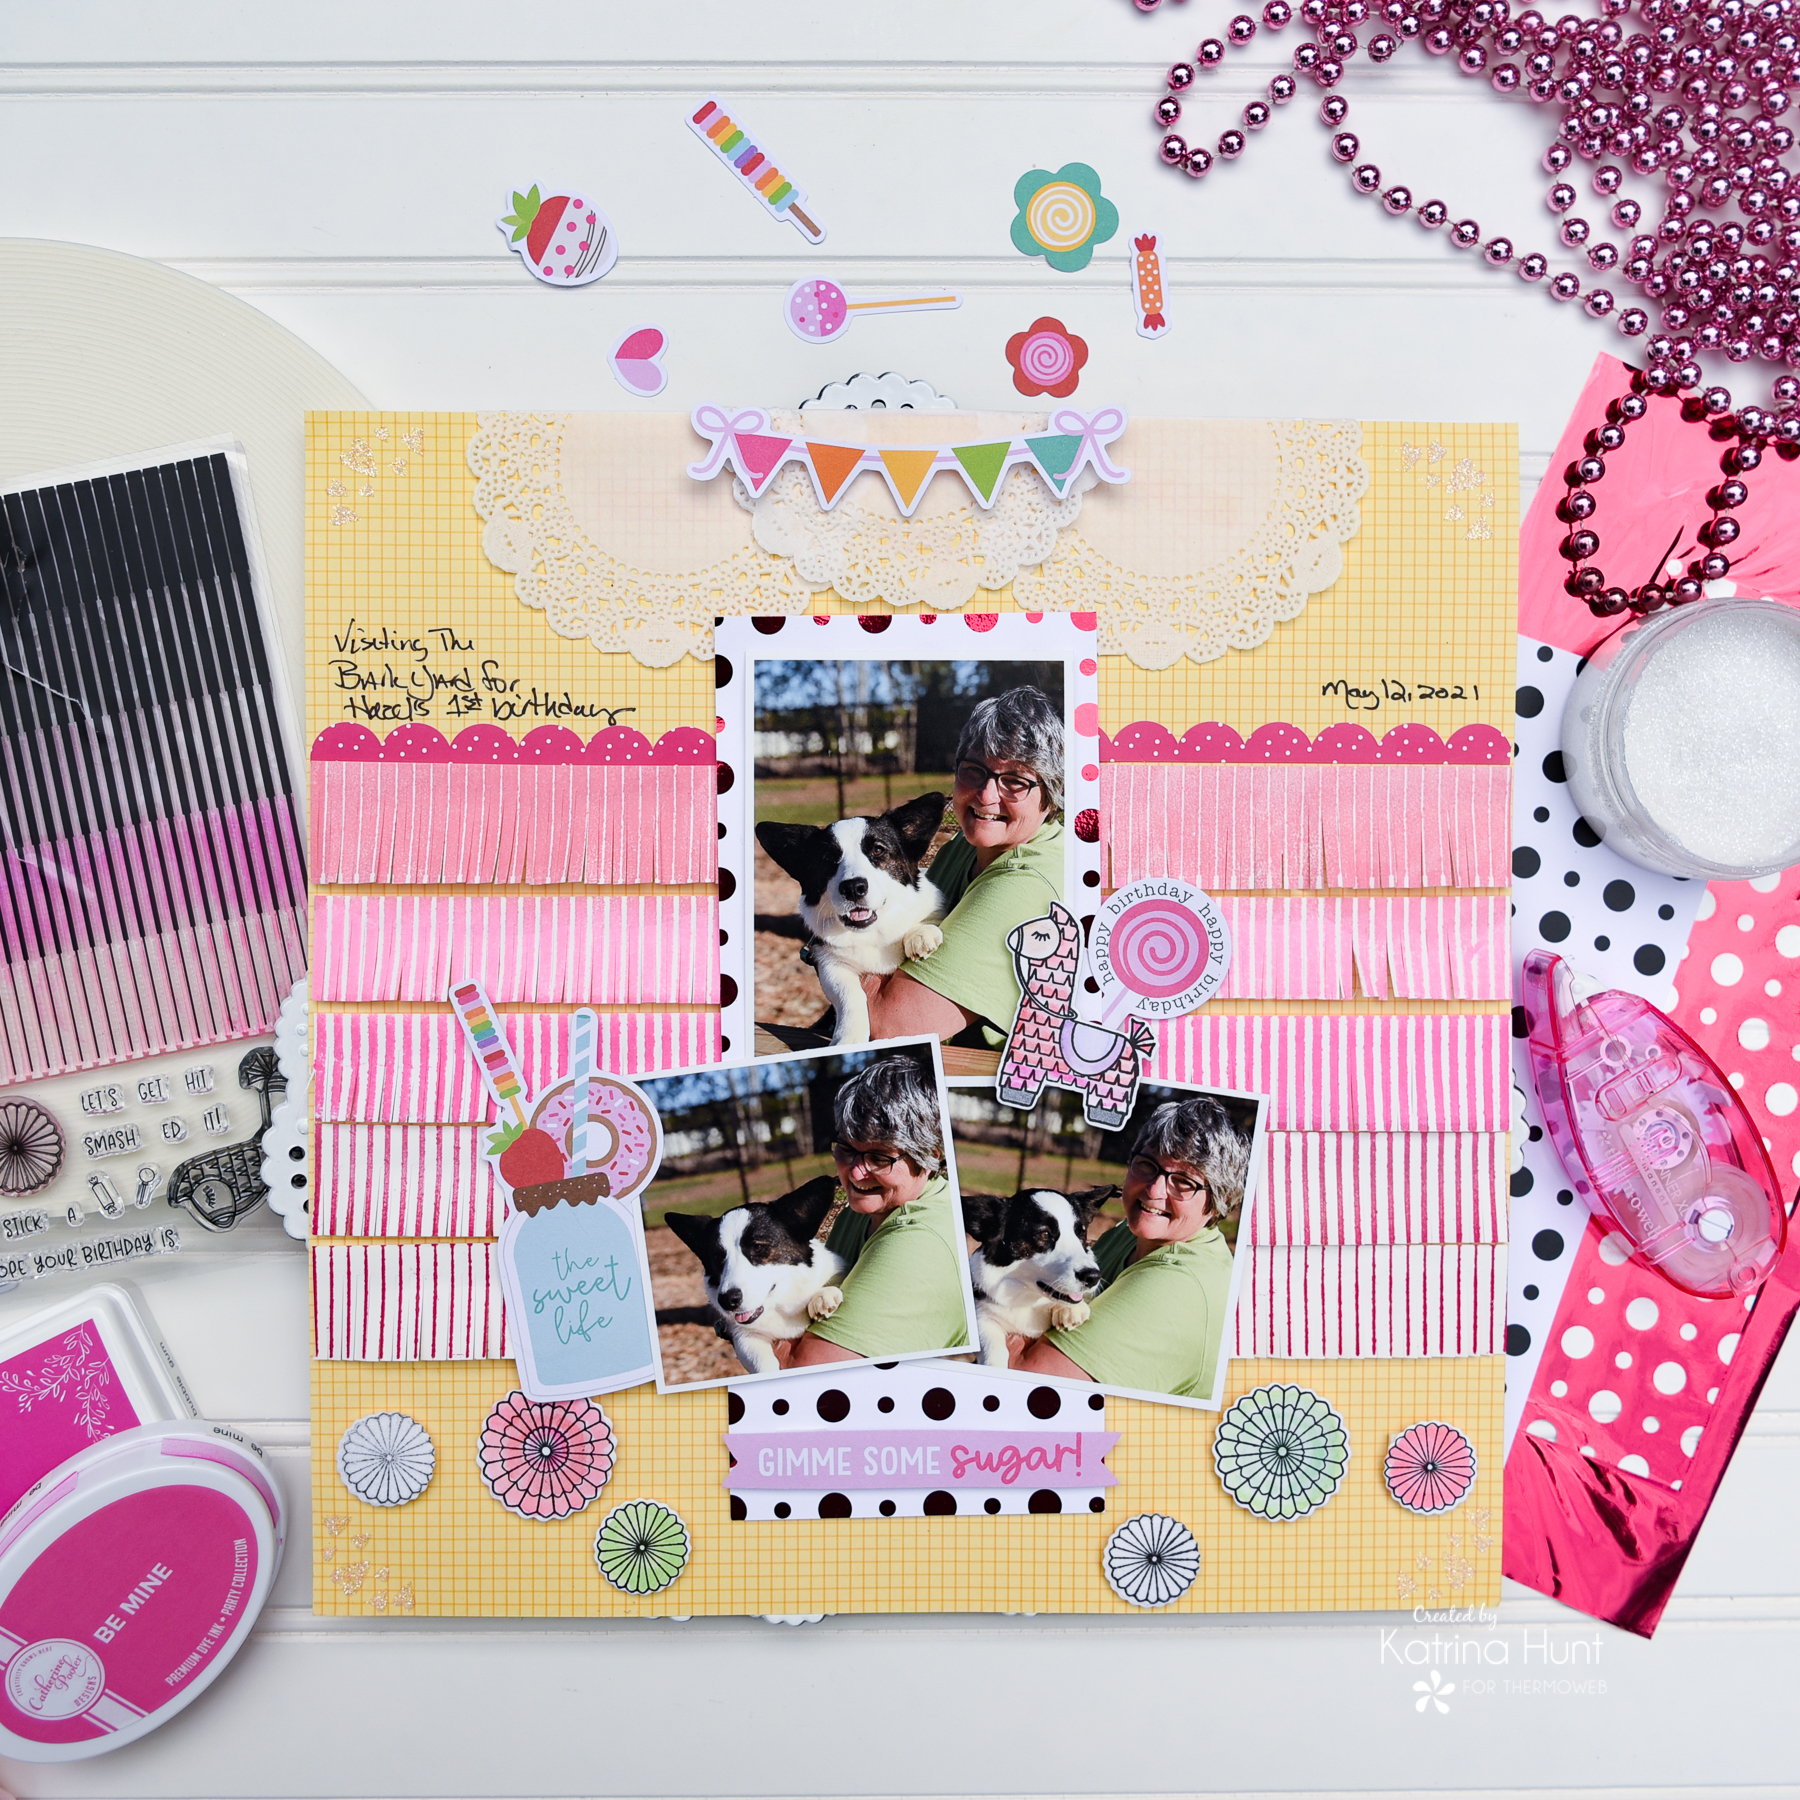
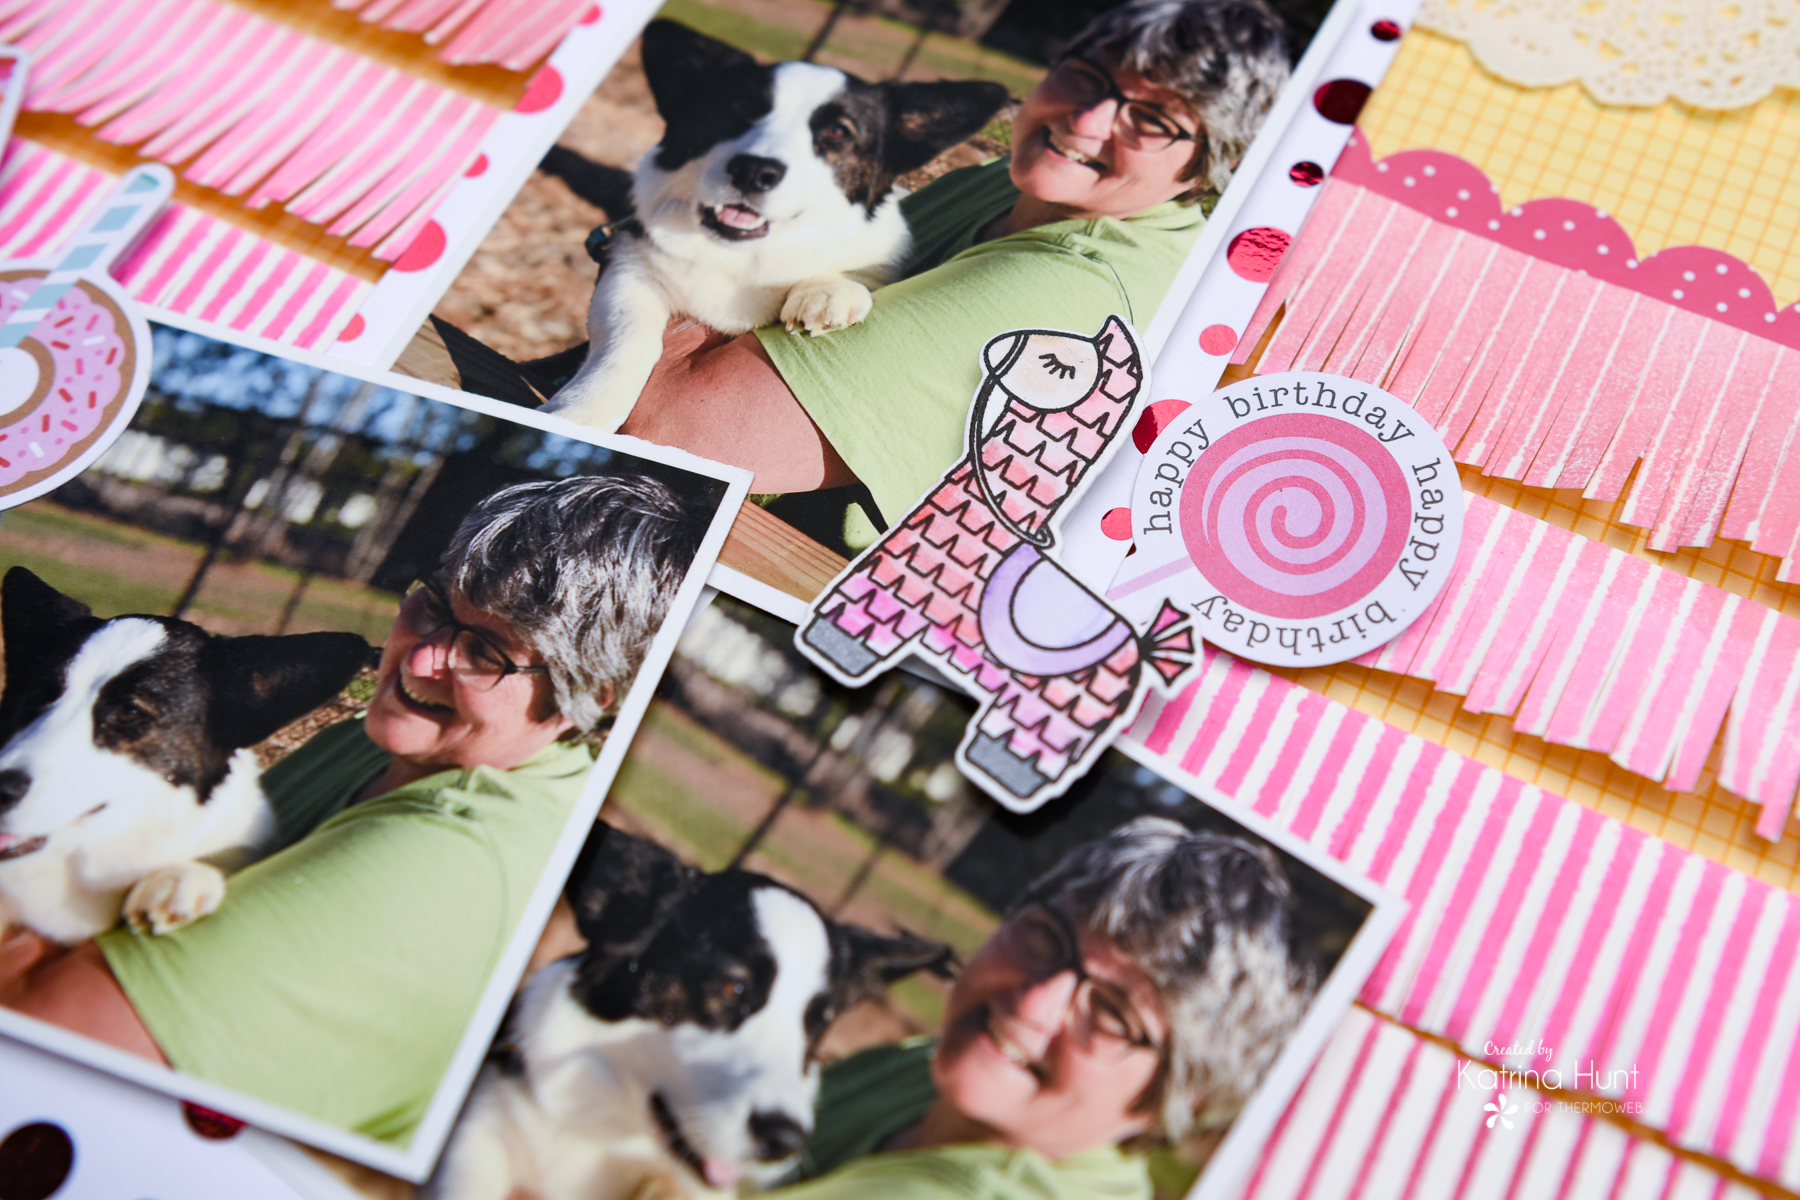
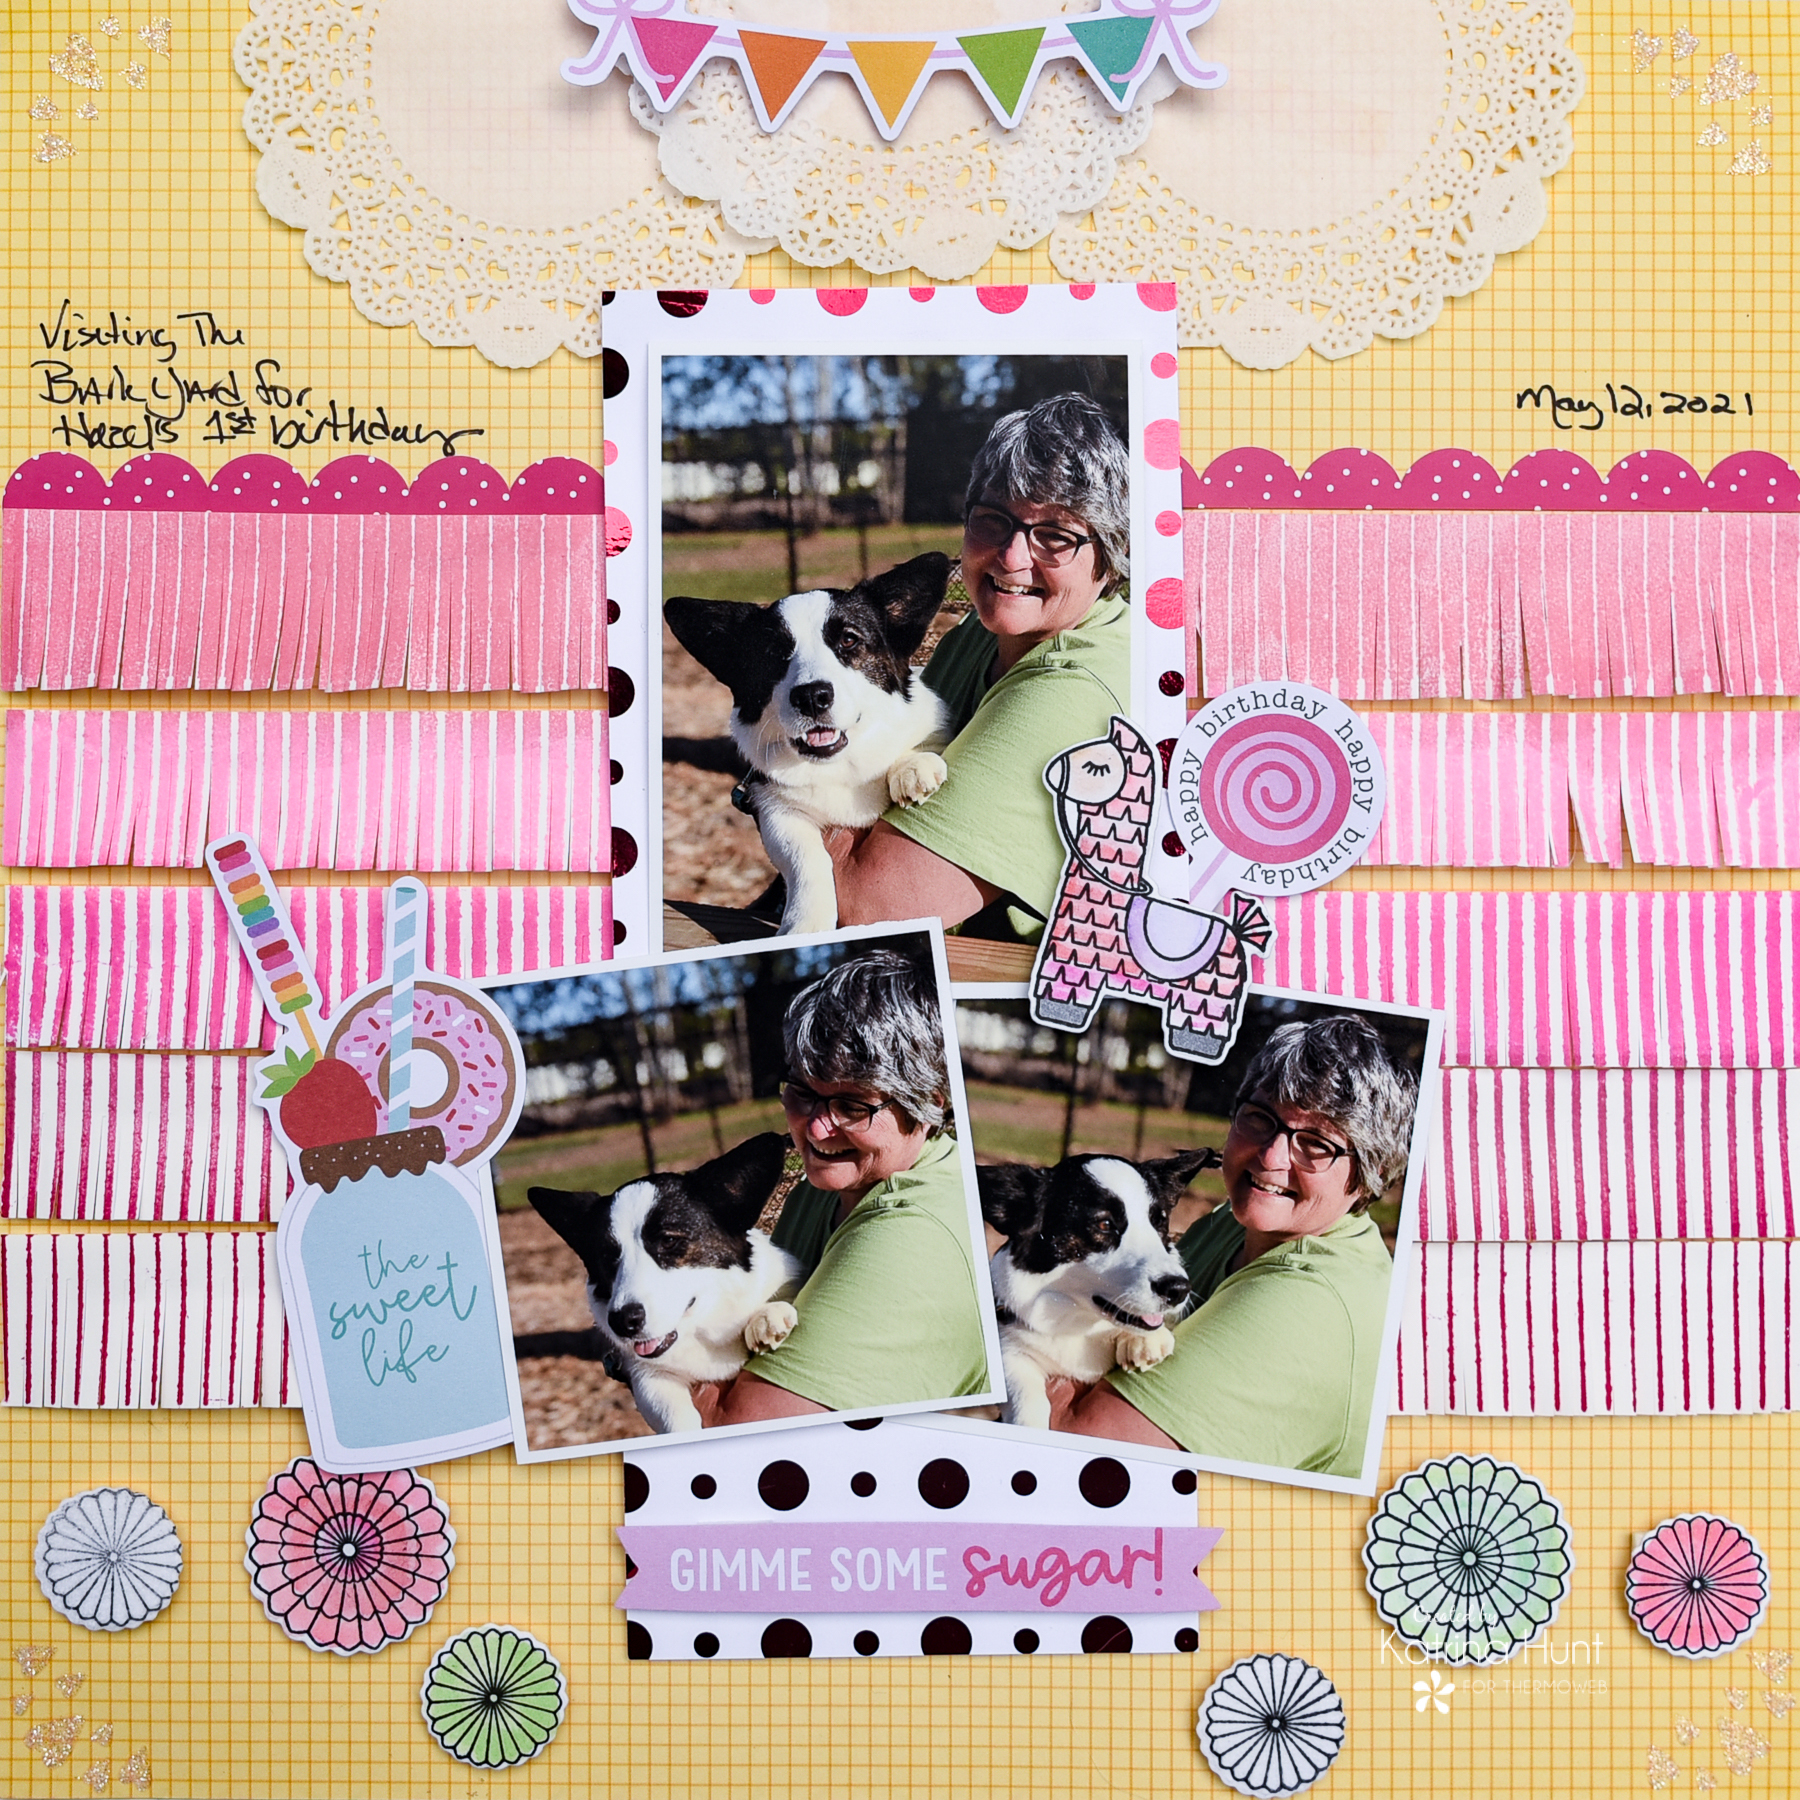 This layout only uses ONE piece of pattern paper for the entire layout! That fringe is stamped in various pink colors. I also used a few die cuts from the paper collection but used the stamp set for embellishments. Let's see the details! I used the Piñata Party stamp and die set from Miss Ink Stamps.
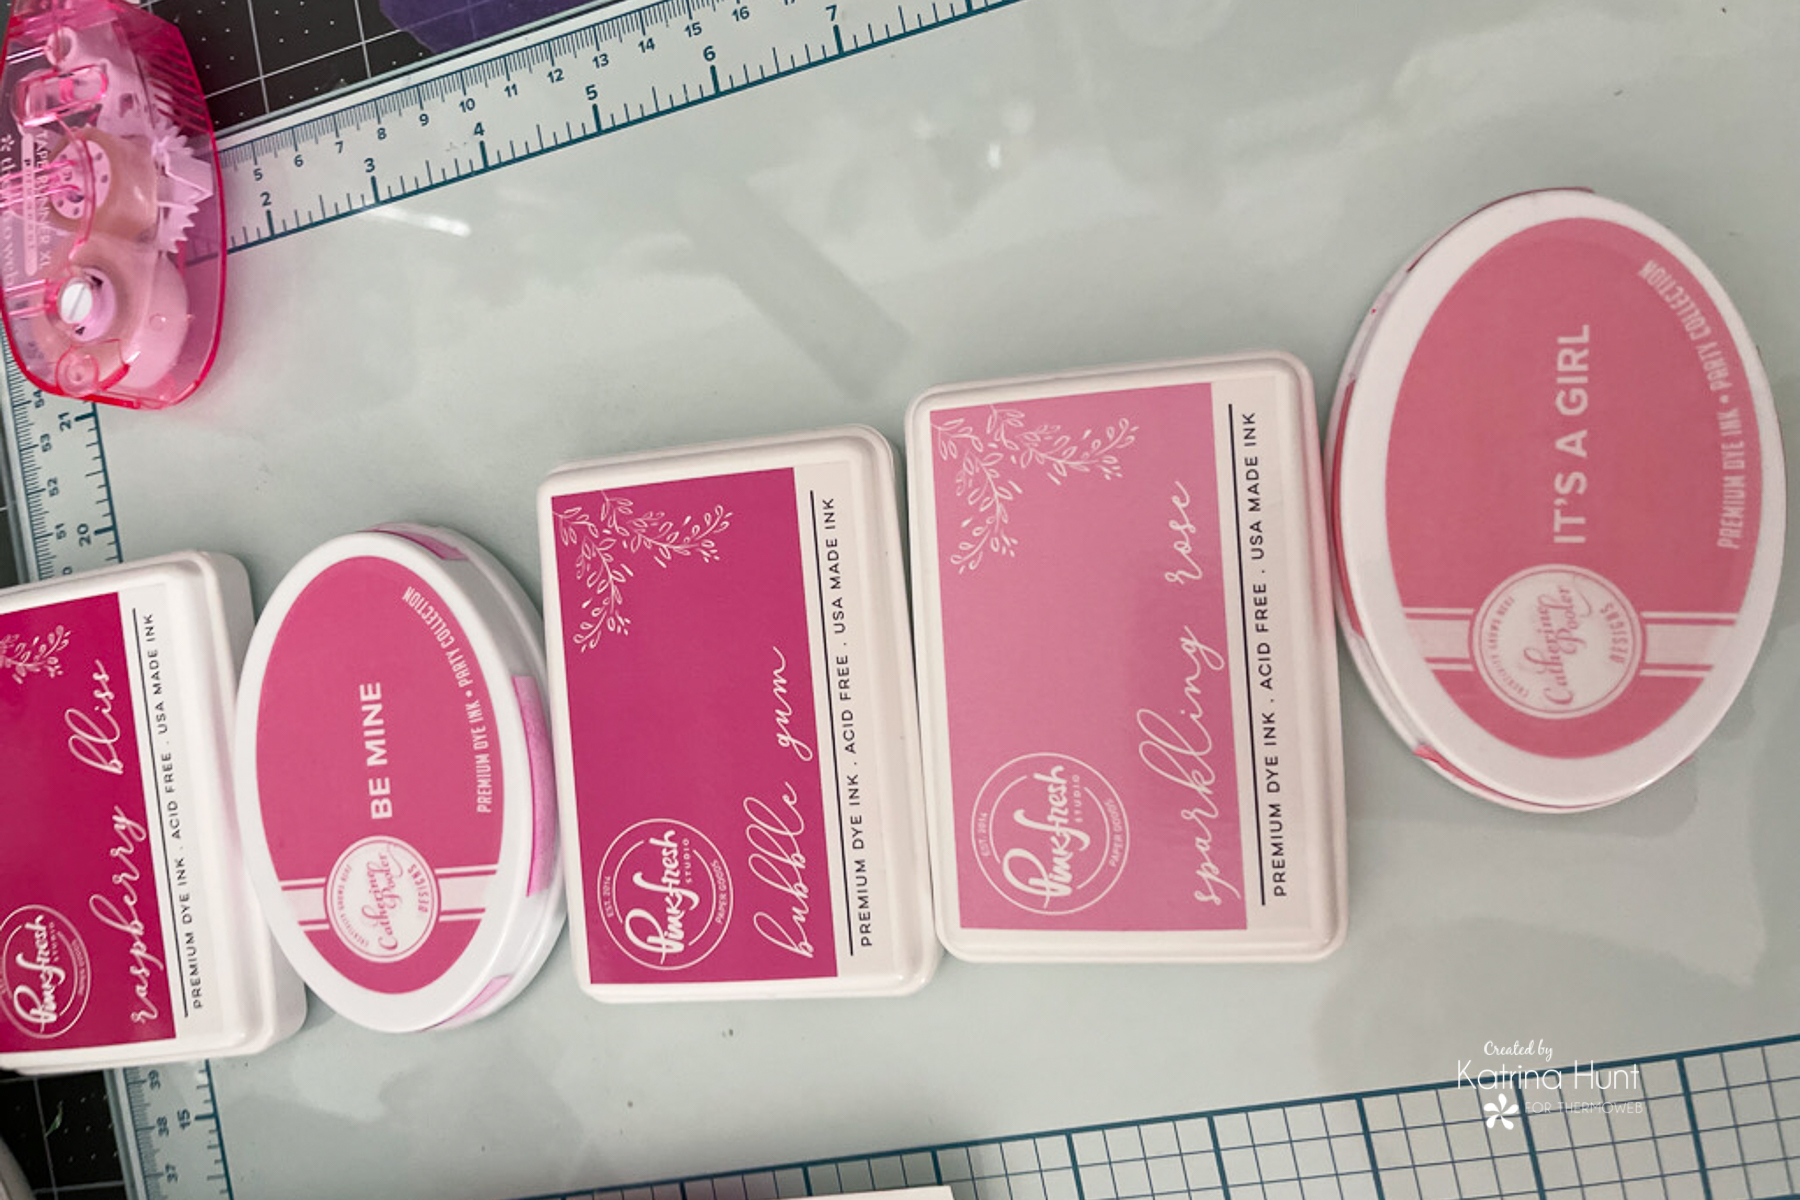 I started by picking inks to go in an ombre pink pattern. This took a little doing as each collection only had four that worked within the collection and there were five segments to stamp. Eventually, I ended up mixing the Pinkfresh Inks in with the Catherine Pooler inks to get my color pattern.
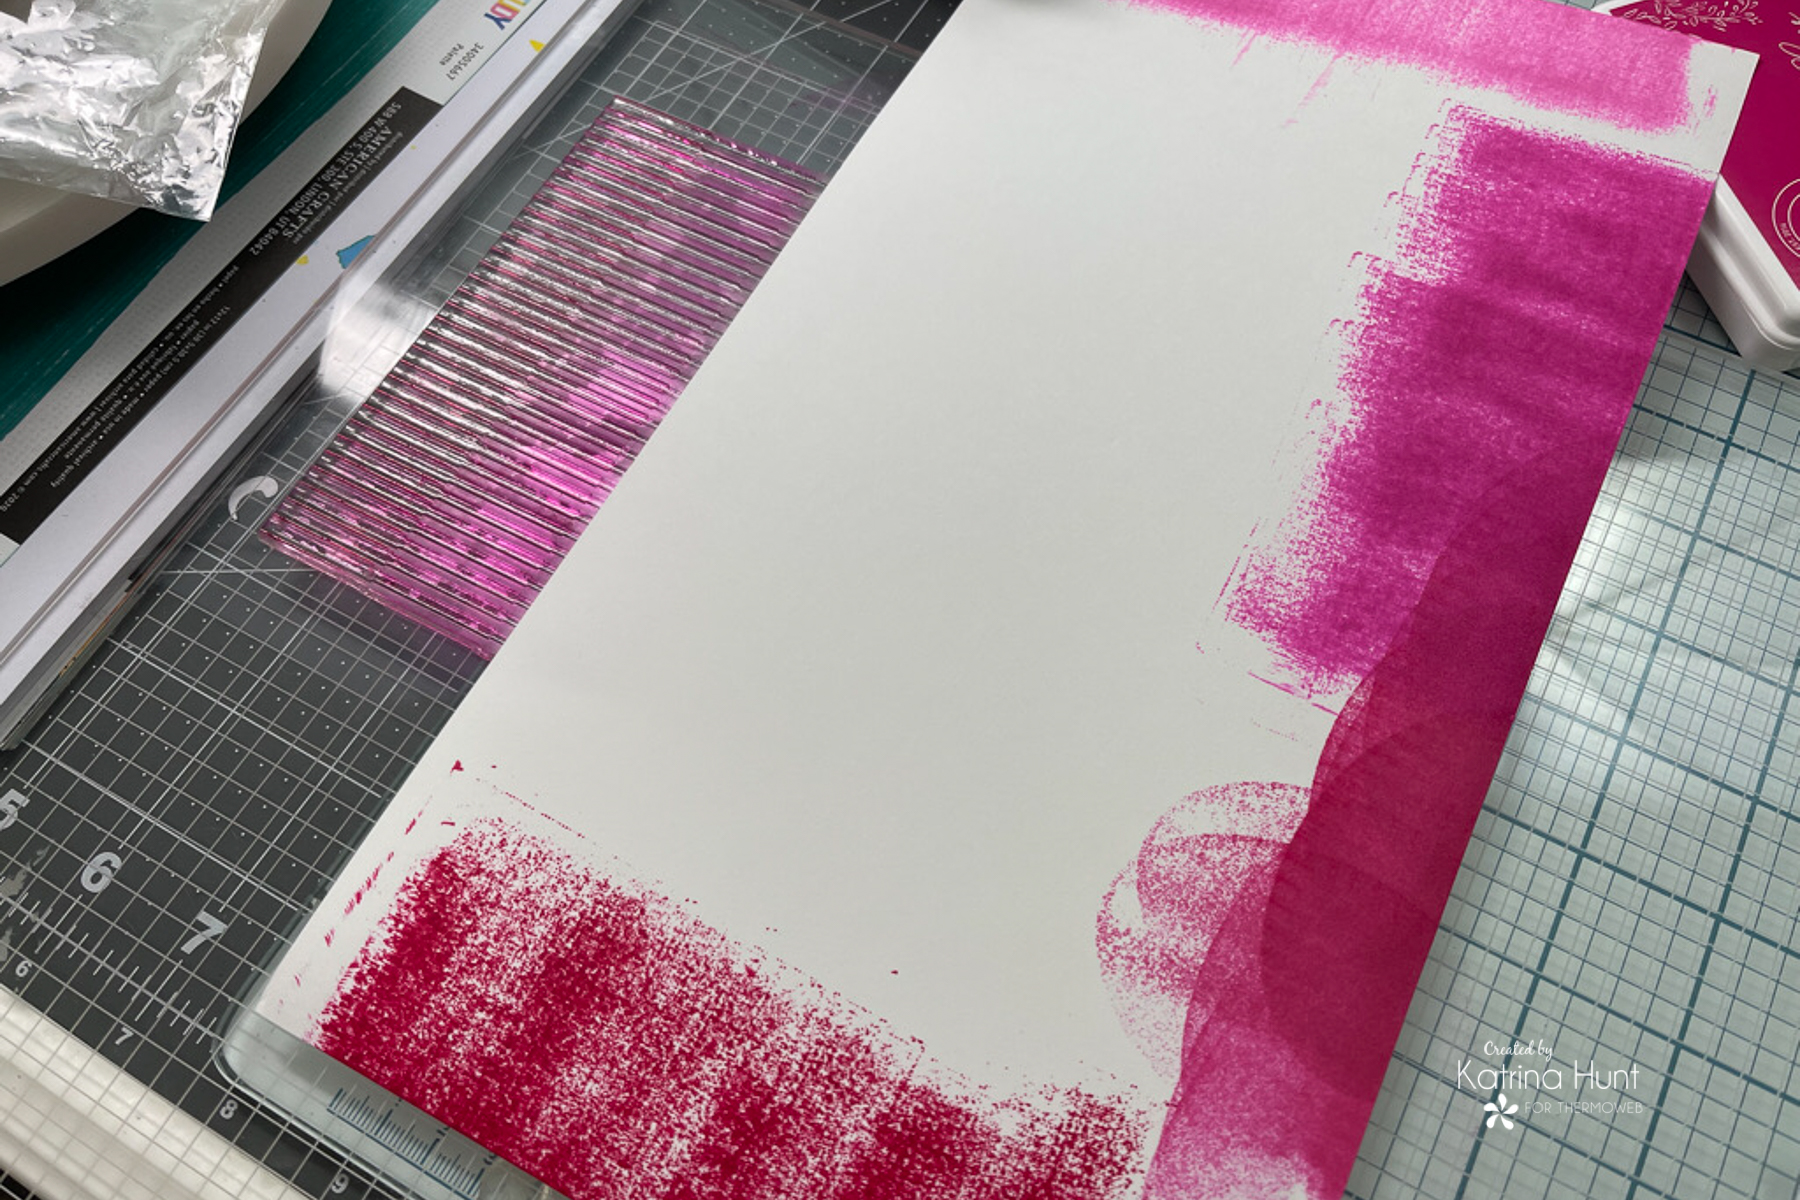 After getting the colors picked out, I stamped each section of the fringe, using a scrap piece of paper to "mask" the next area down from where I was inking. I didn't worry too much about color mixing, since they were all the same basic color family. I stamped this entire background stamp twice, overlapping the matching side.
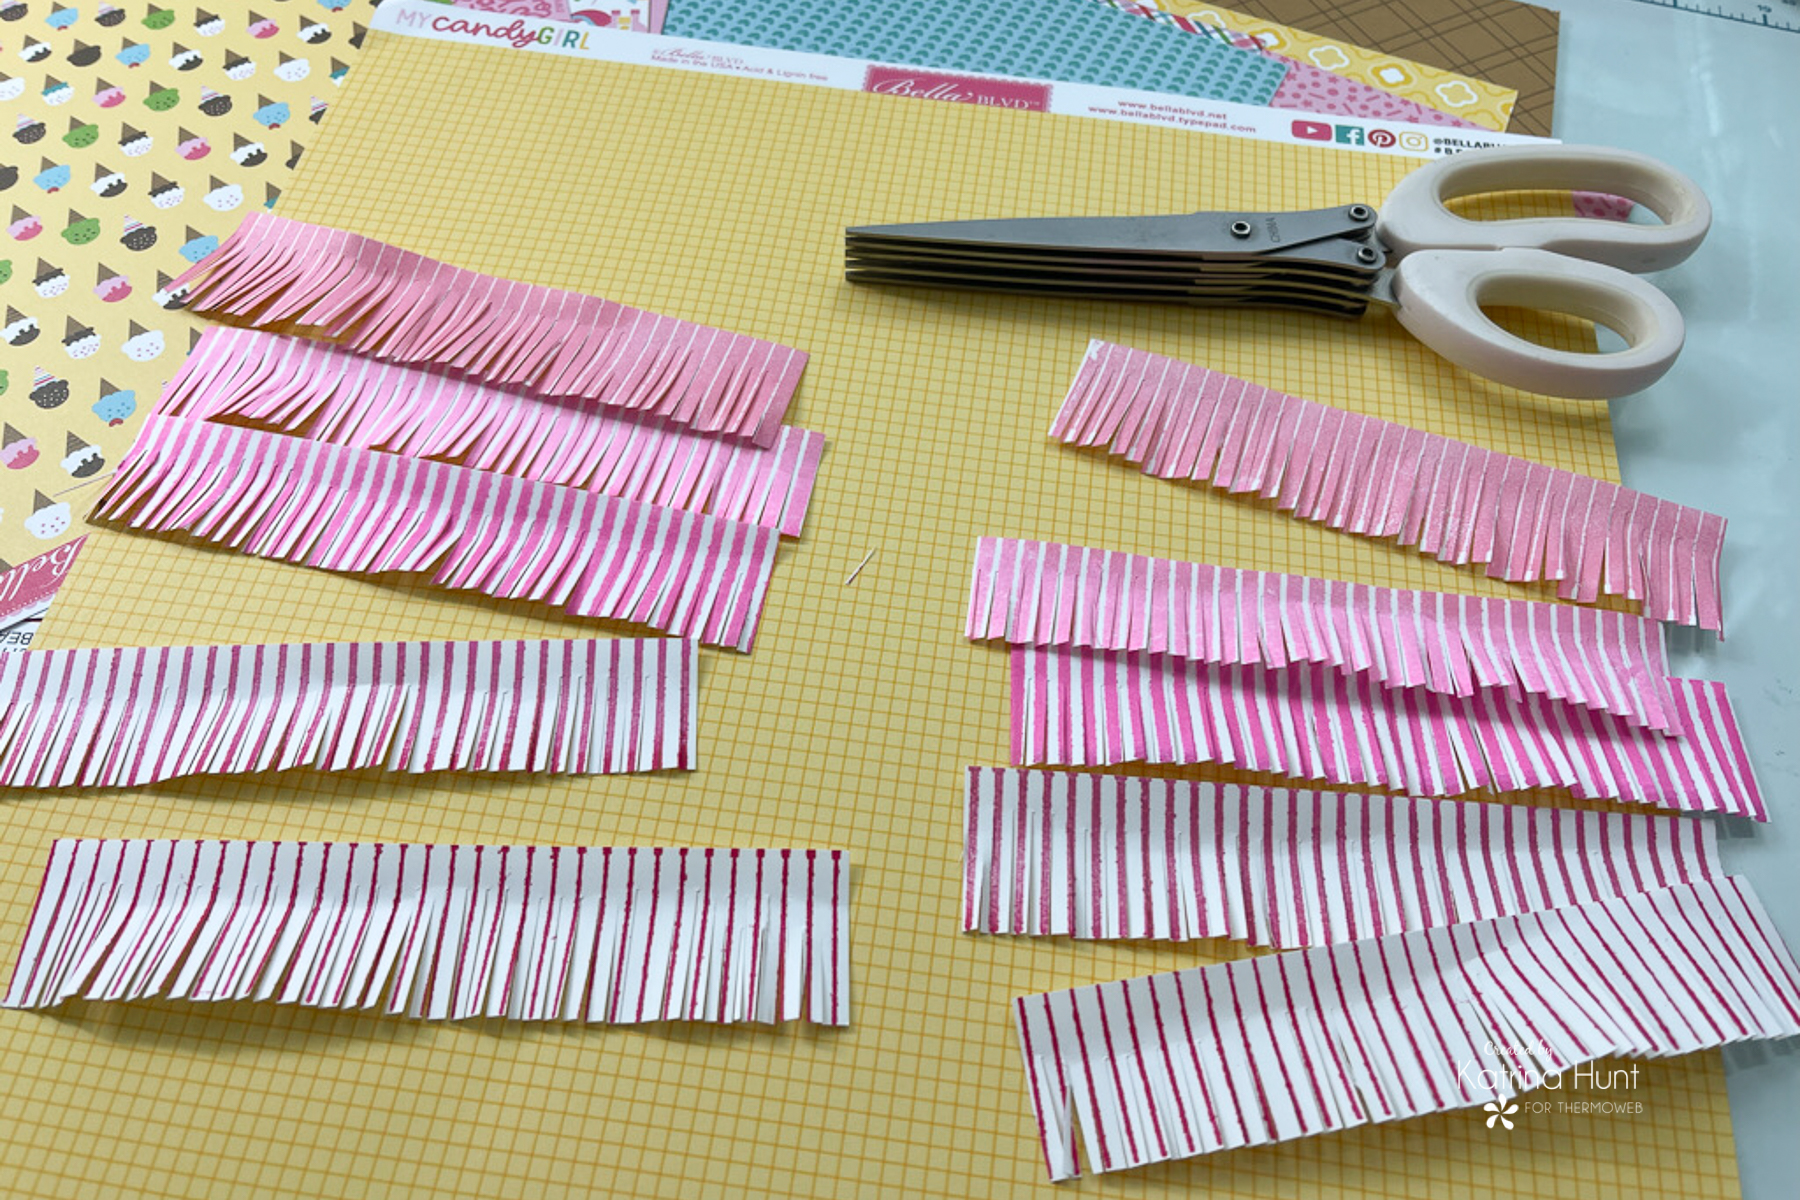
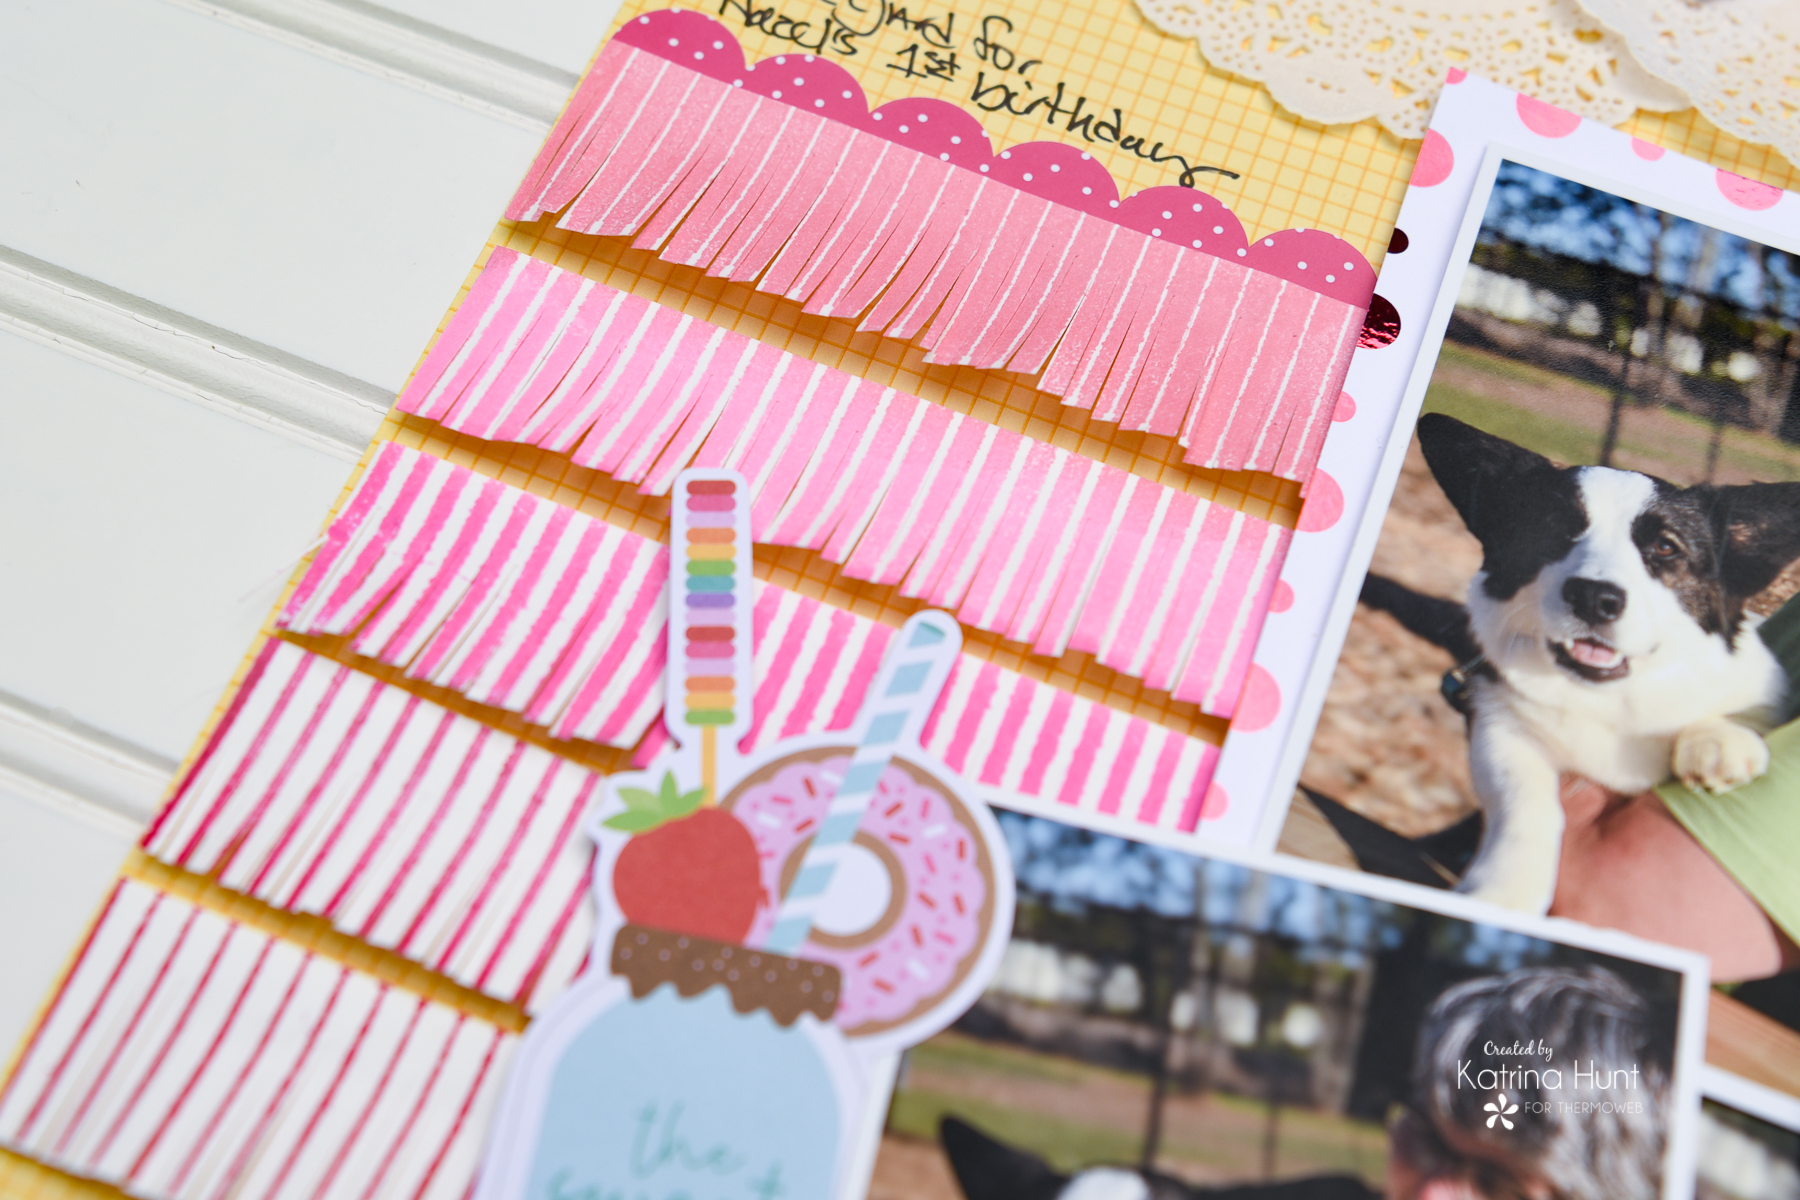
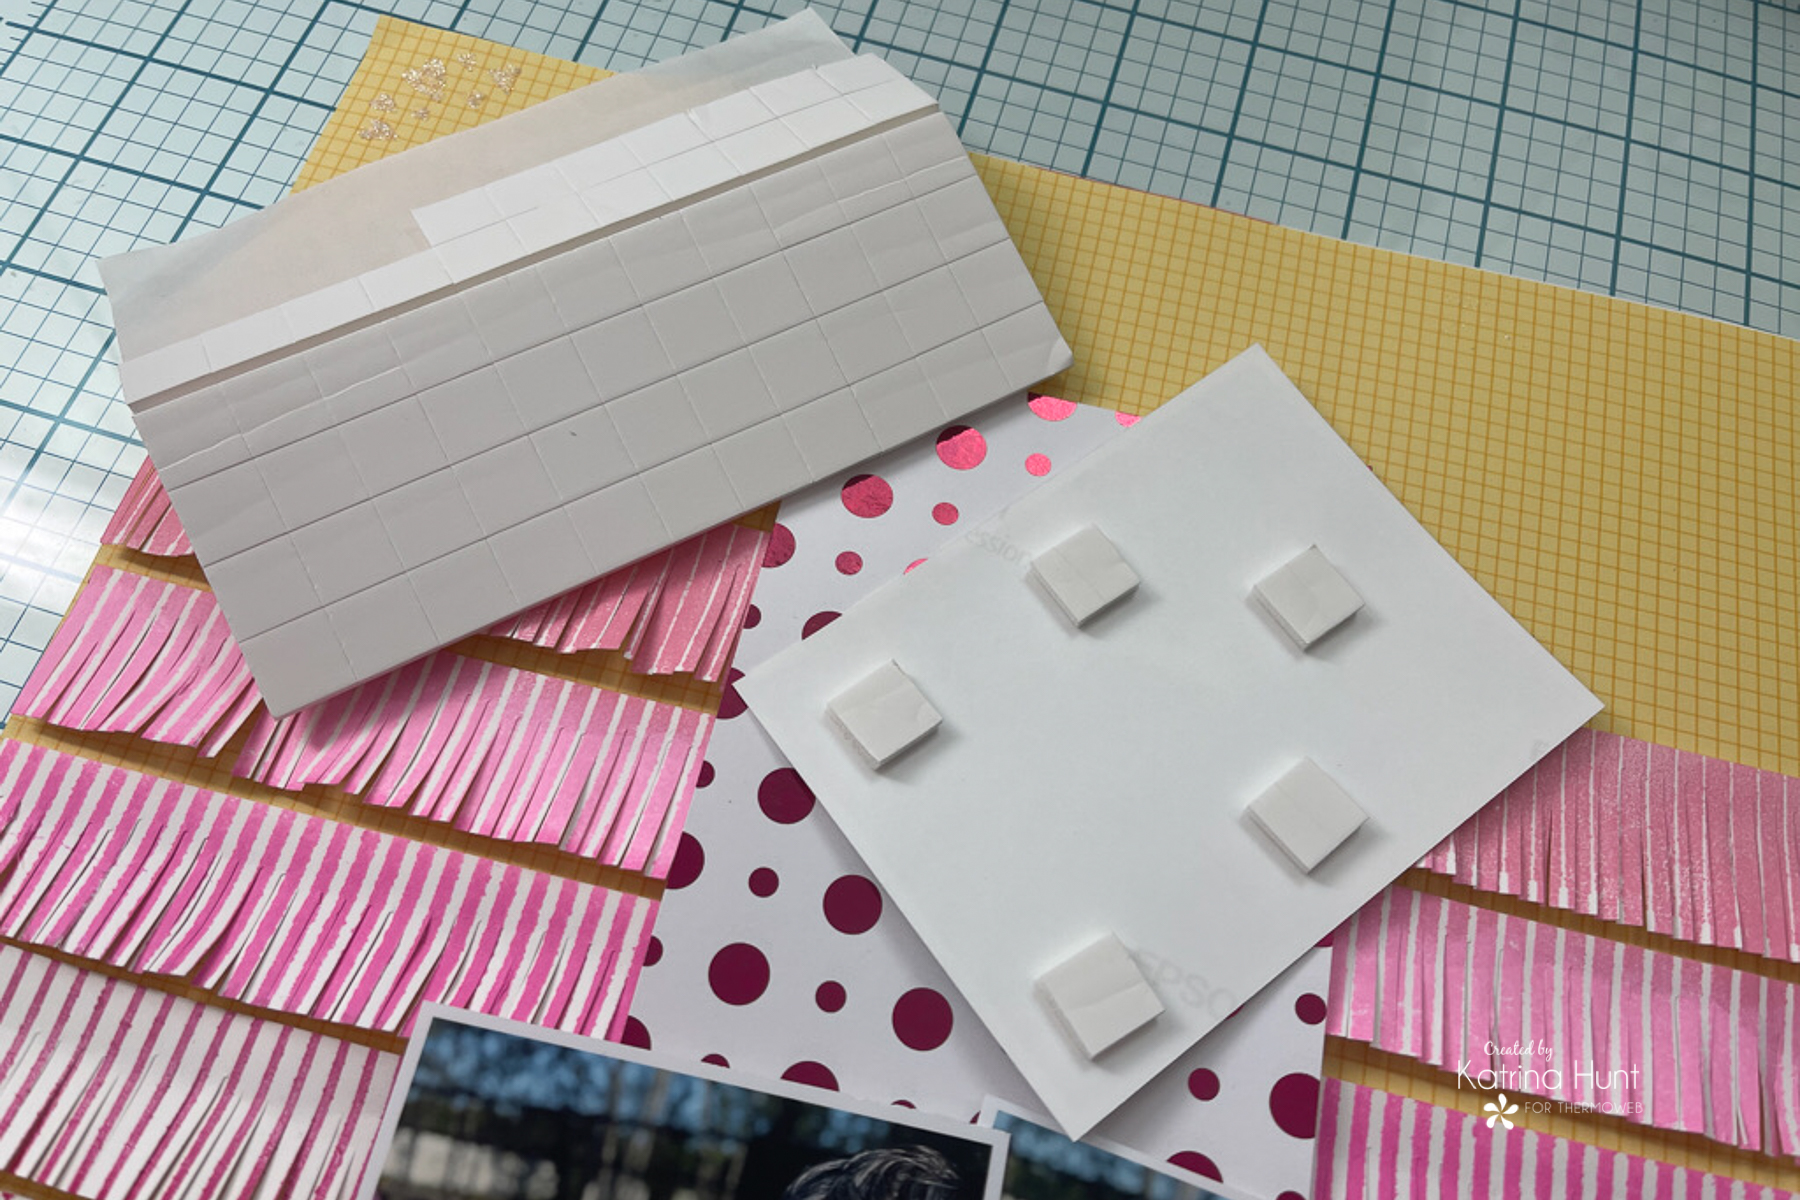
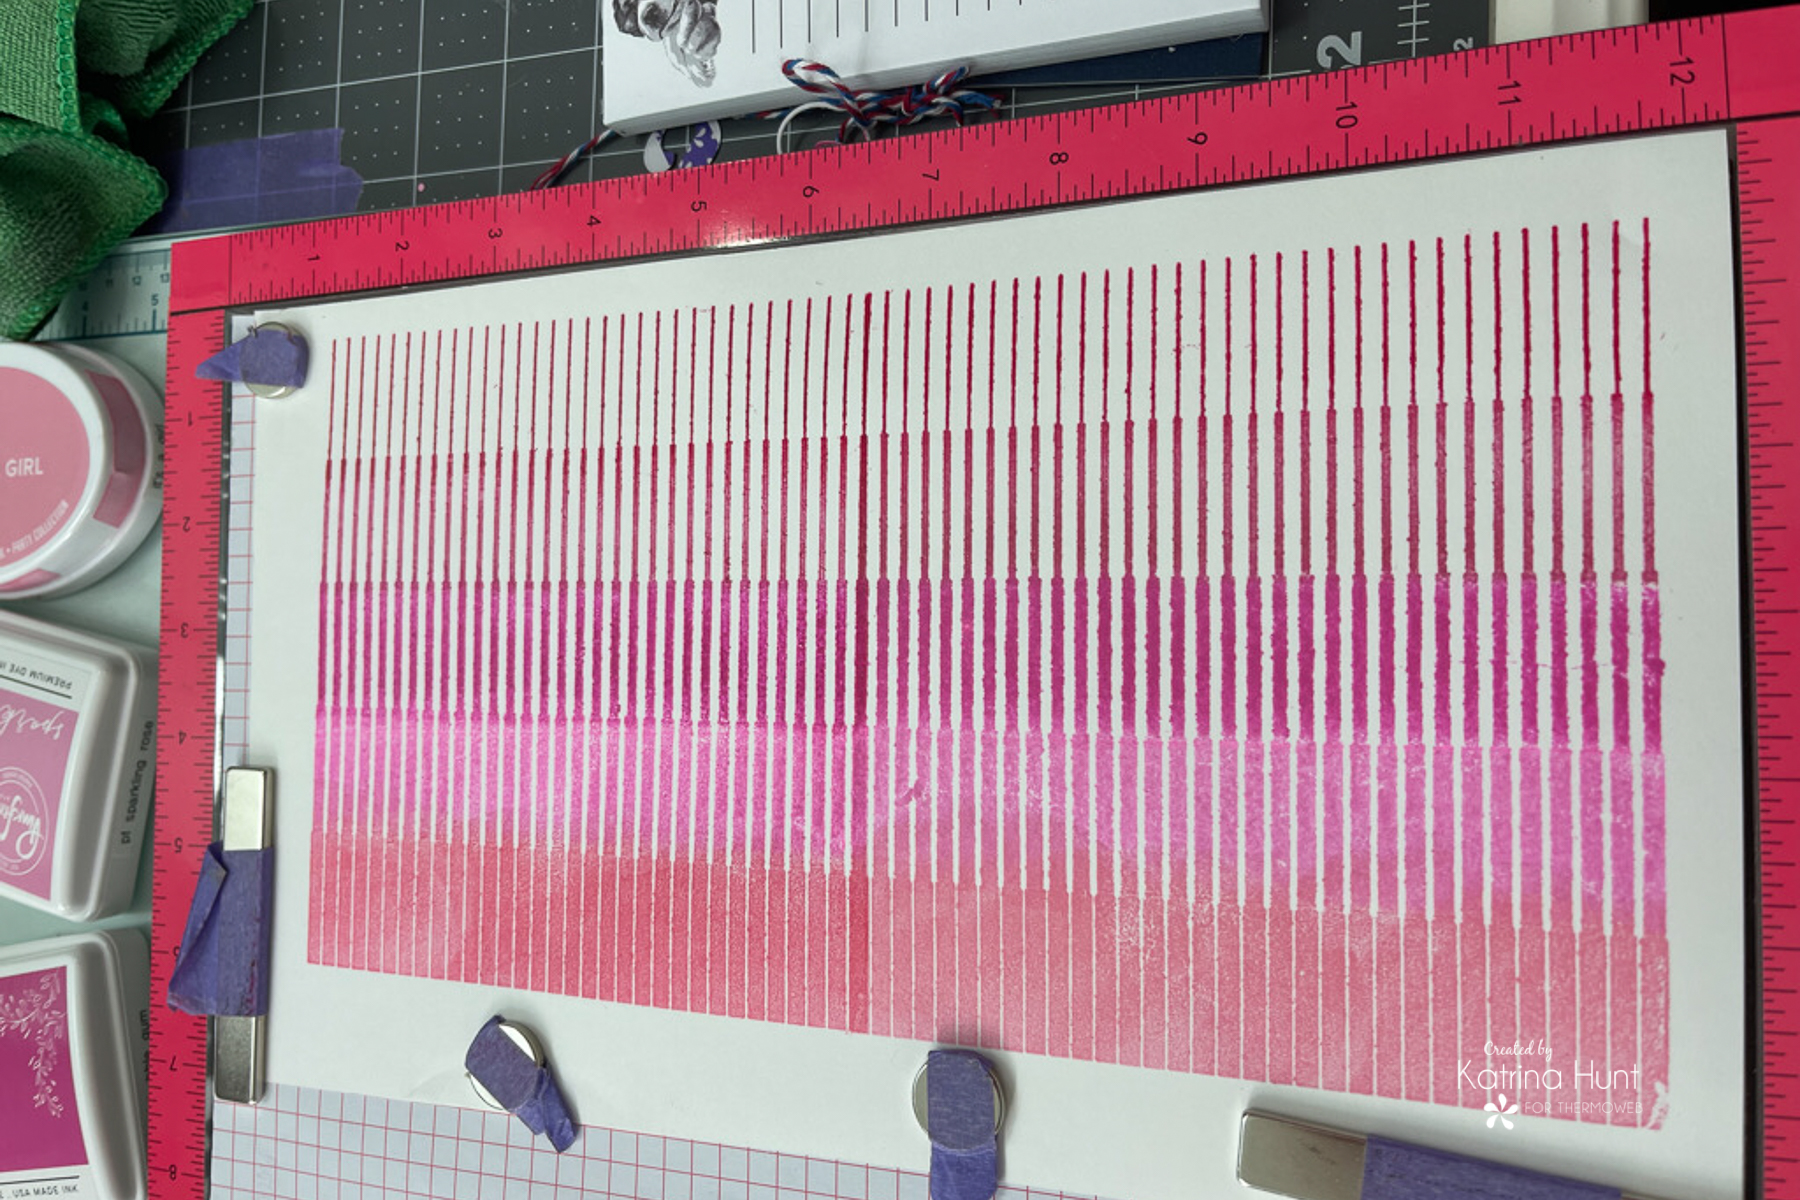 After stamping, I decided that I wanted a lot of dimension and texture. This lead to me cutting the different colored strips out and then fringed them with my scissors. I used the new Foam Tape to pop up each strip of fringe. Since the fringe stamp was not big enough to go across my page fully, I ended up designing with pictures in the middle to cover the blank area.
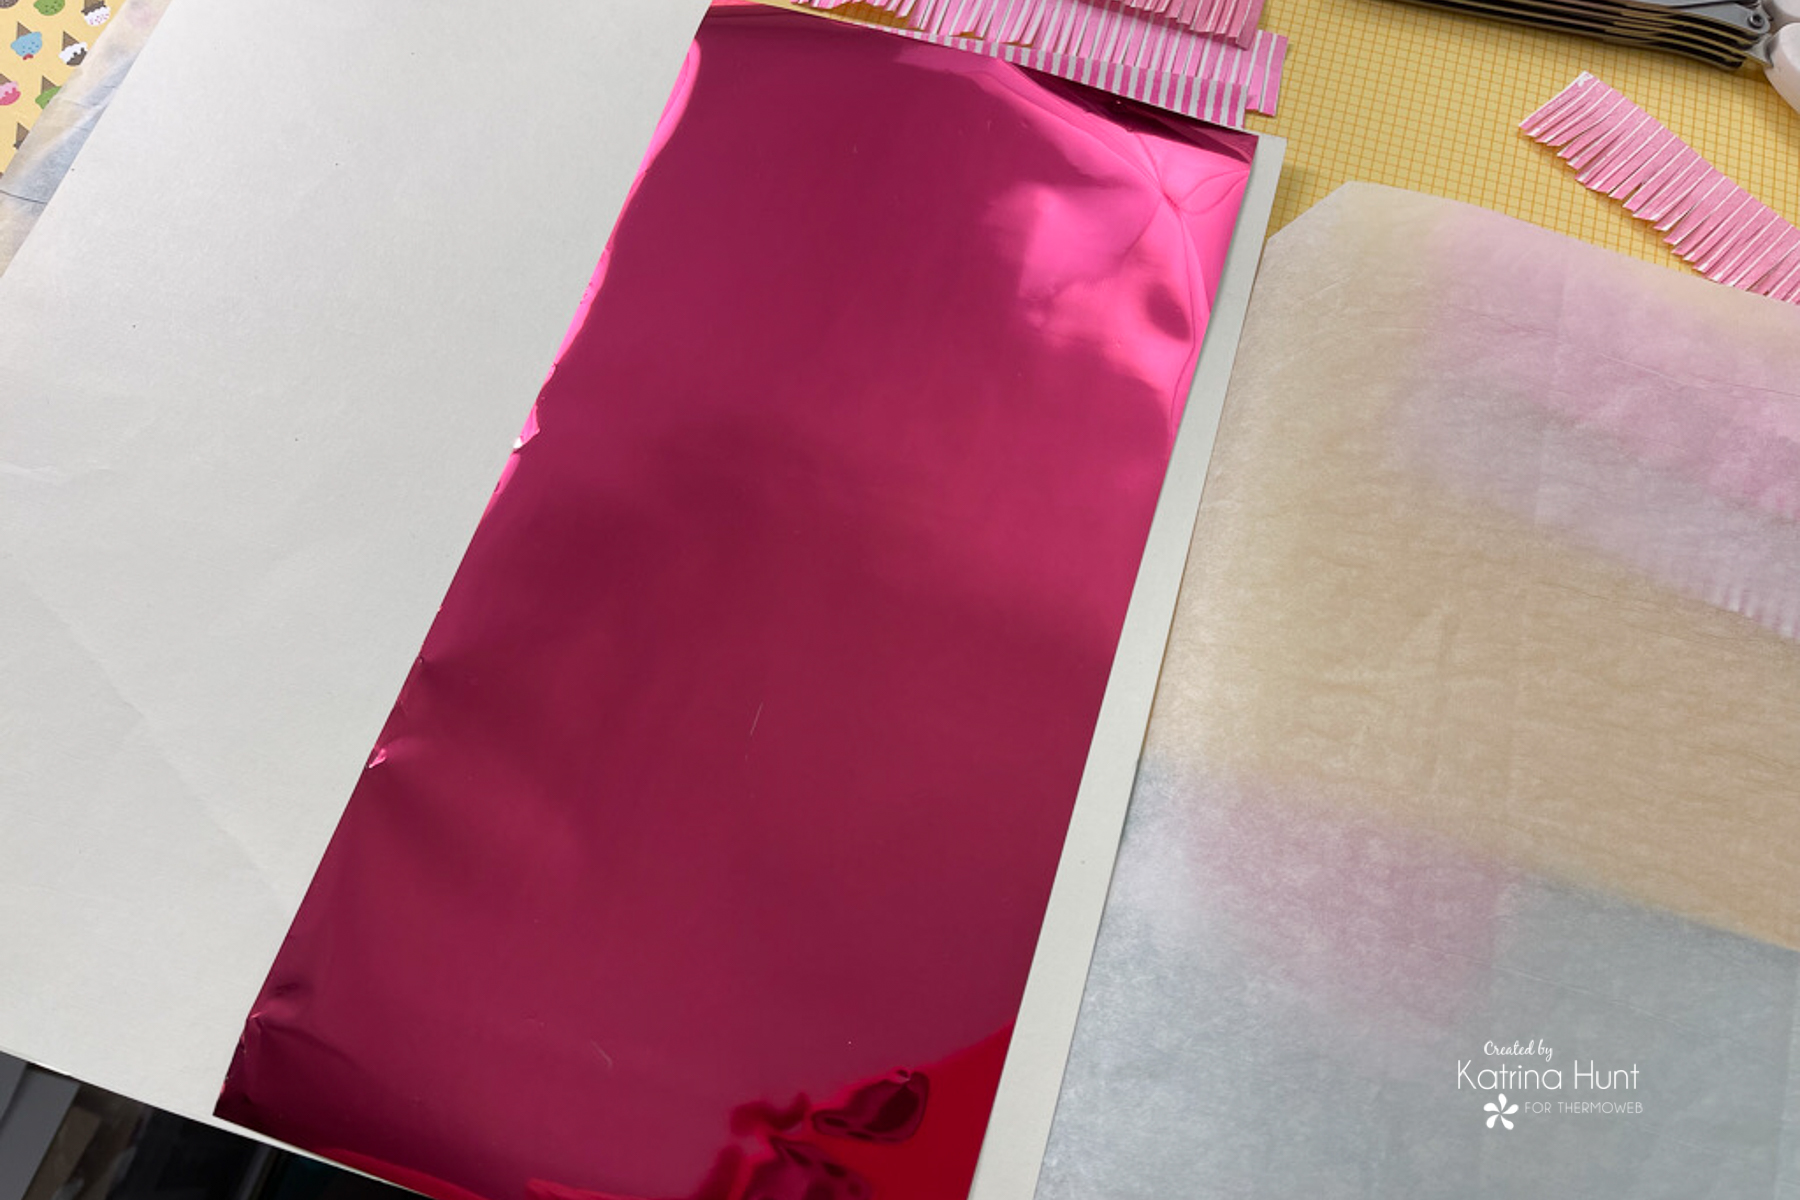 Once foiled, I adhered the toner sheet lengthwise with foam tape to cover the area where the fringe didn't meet. You can see how I pieced this together below.
 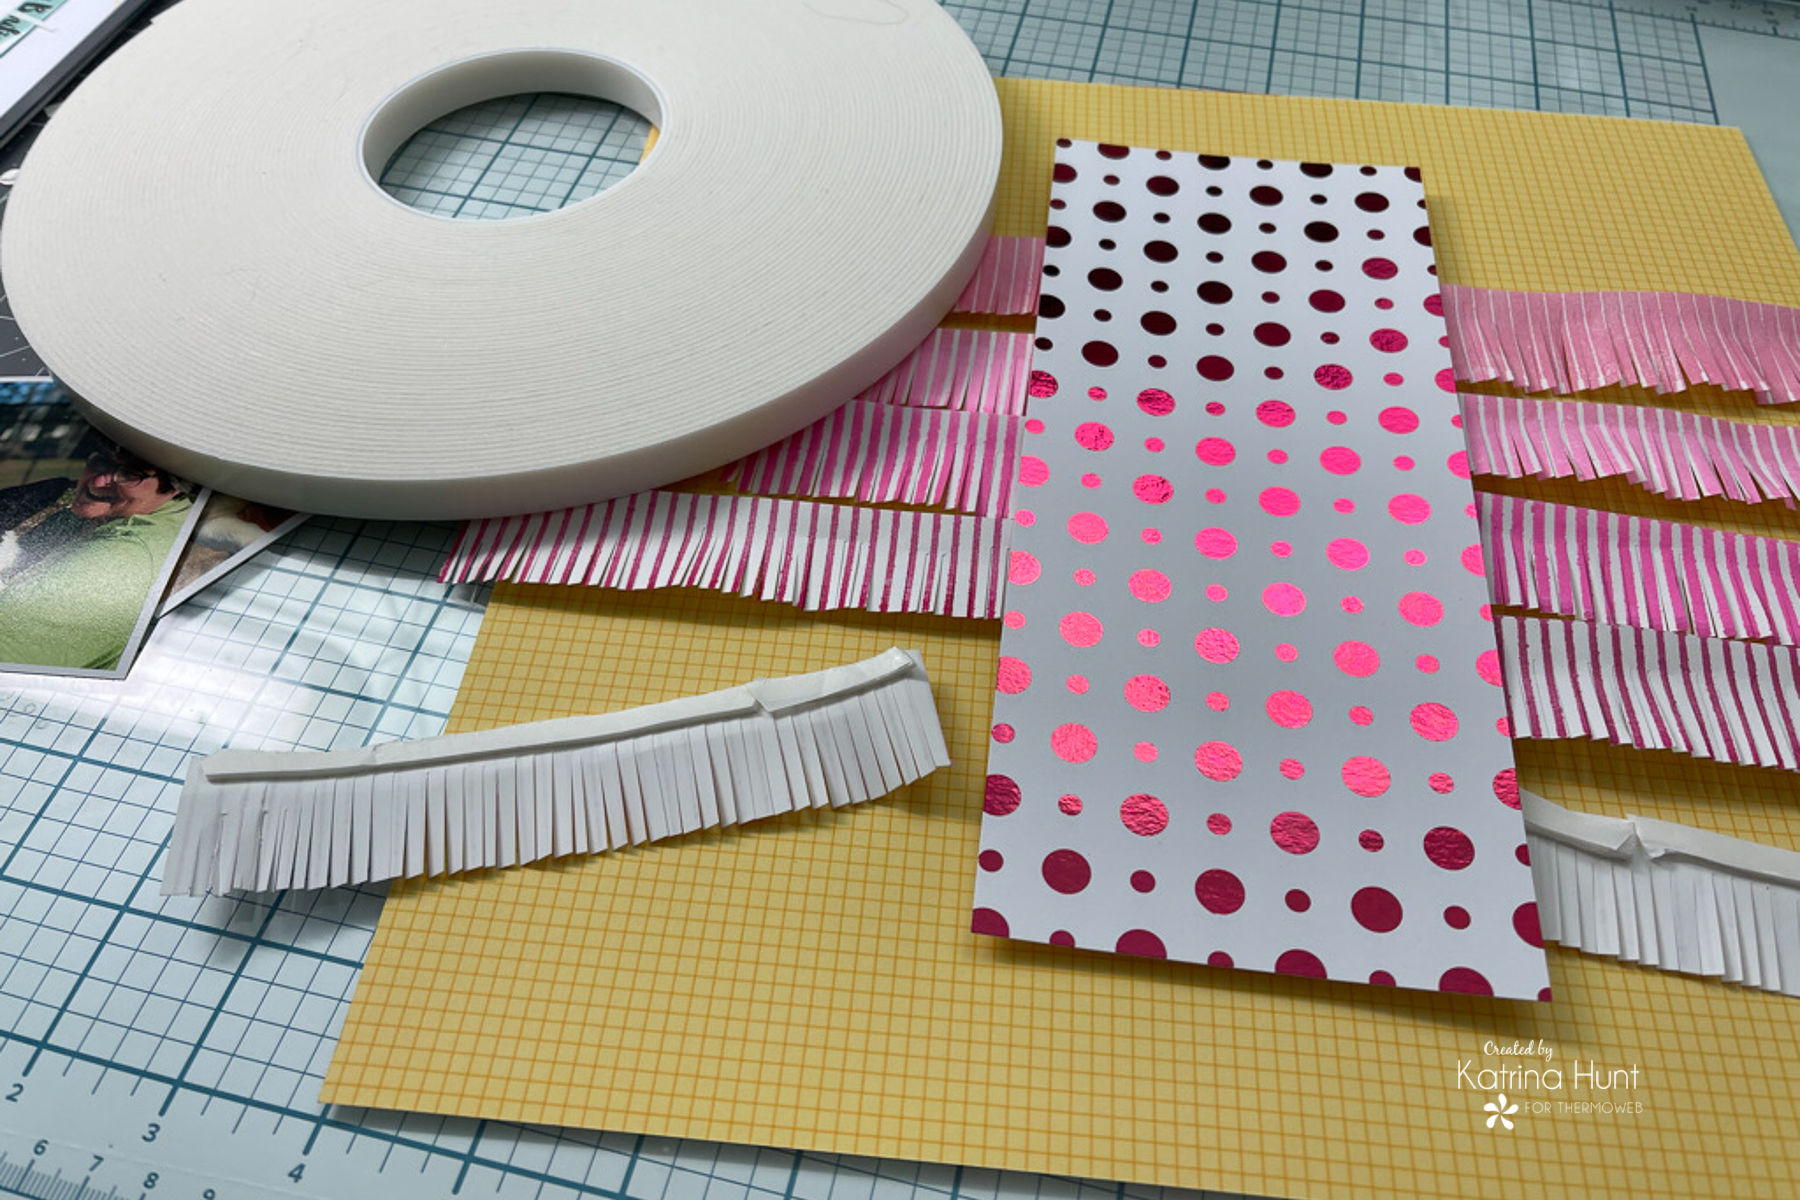 Pictures were popped up with 3D Foam Squares to make them stand out more!
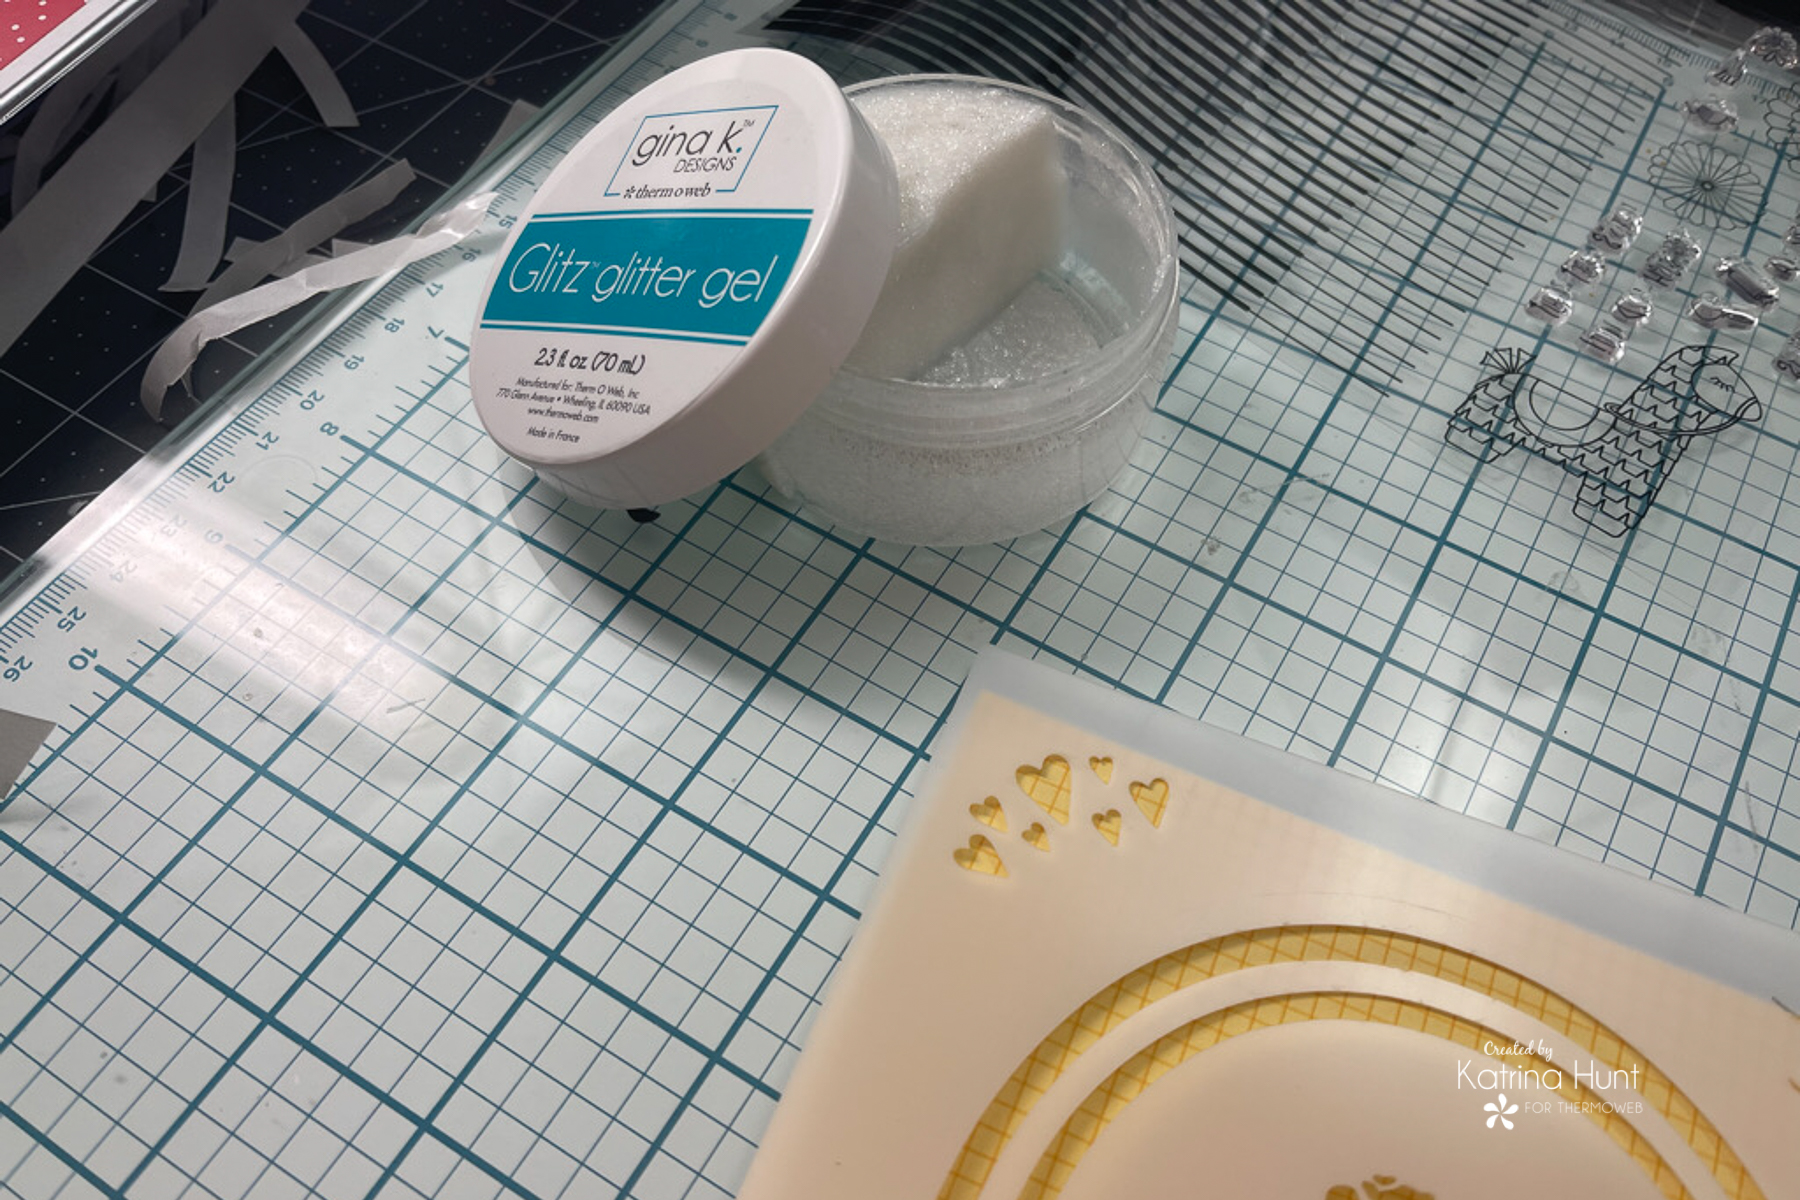
 Once I had this section completed, I added some Glitz Glitter Gel in the corners of the background page, using the corner hearts from the Rainbow Sky Stencil set. To keep the hearts subtle, I used the White Glitz Glitter Gel.
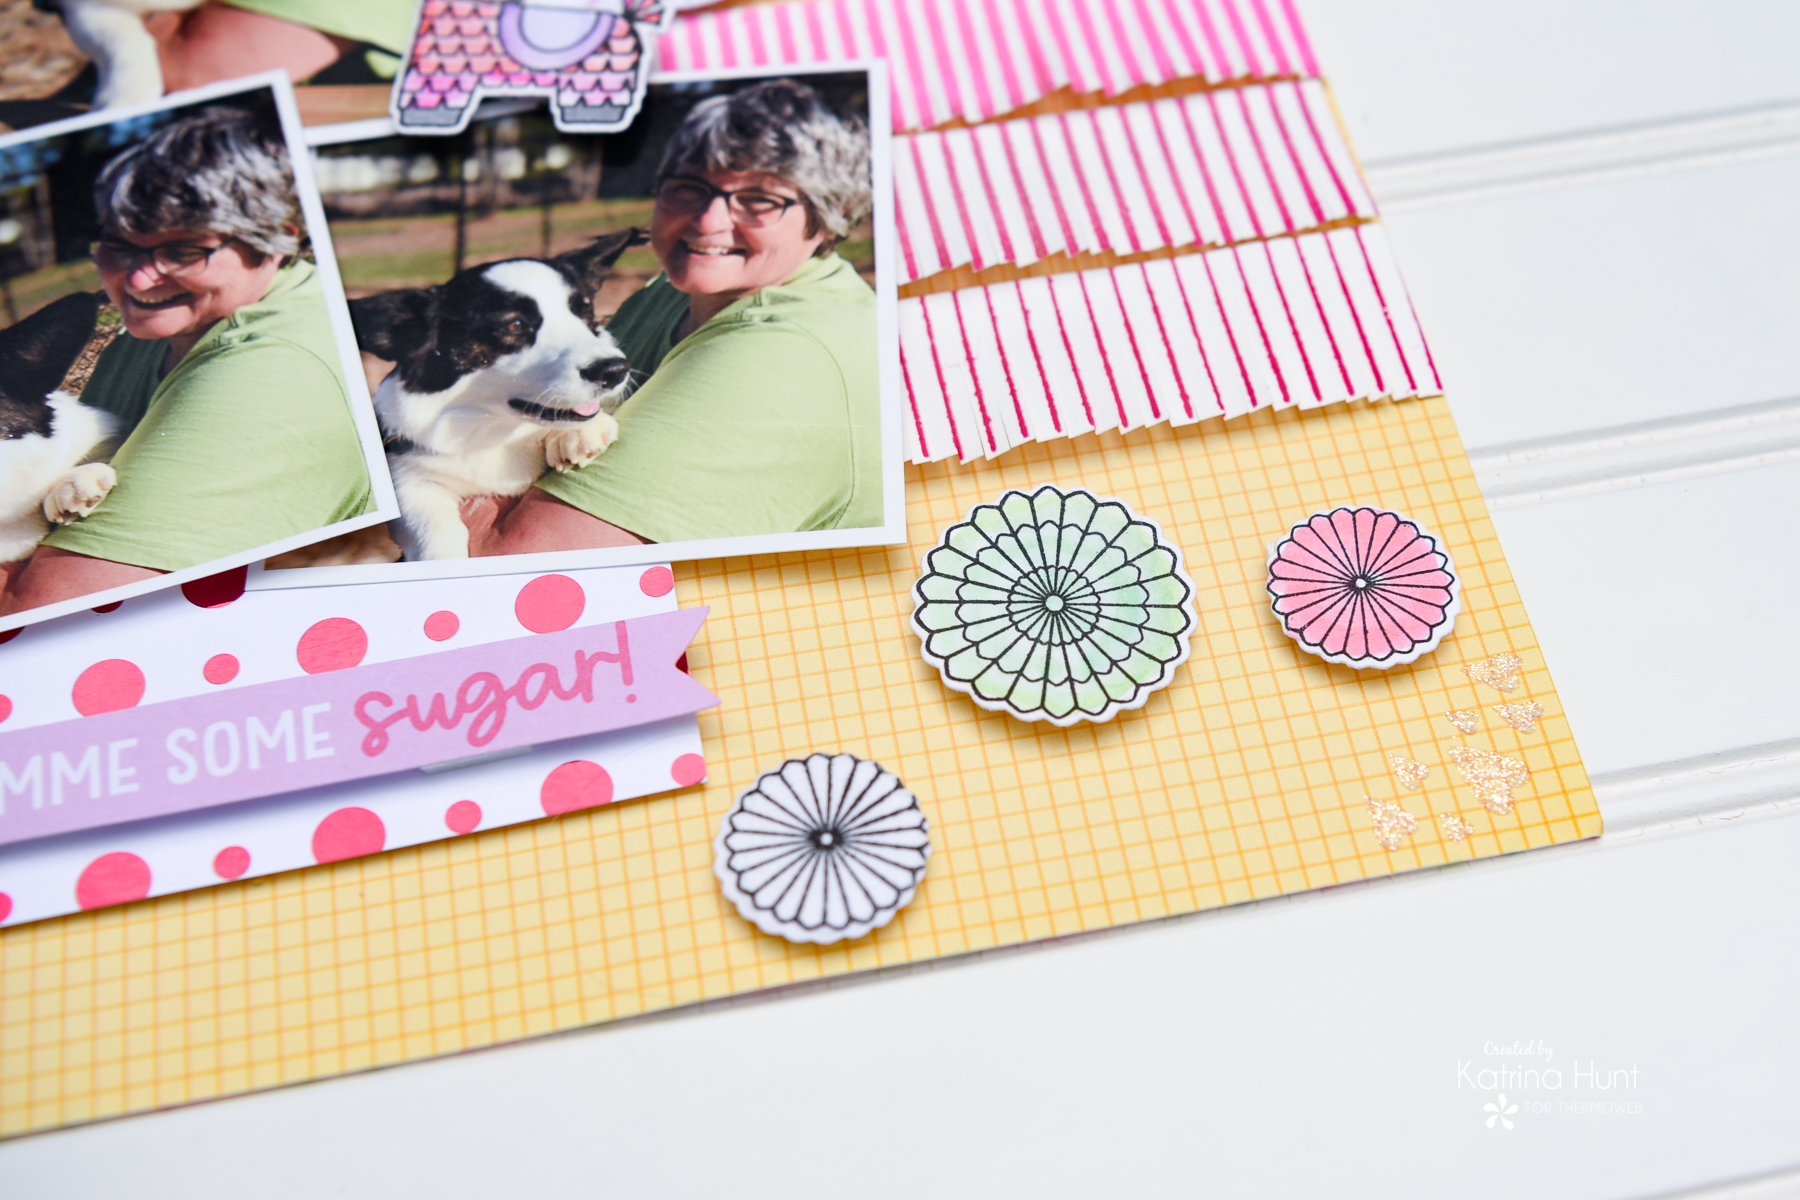
 While the glitter gel was drying, I stamped and colored the piñata and the little medallions in the stamp set. I used my Zig markers to do this.
 Along with stamping and coloring, I die-cut two white medallions, using Deco Foil Foam Adhesive and cardstock. I applied the foam adhesive to cardstock first and then used the dies to die cut two smaller medallions. After die cutting, I applied White Flock to the foam adhesive and then stamped the medallion stamp on top. I love the fuzzy look!
 And that is ALL I have for you today!!! I hope you enjoyed this fun take on using card-making supplies into a scrapbook layout! Thanks for stopping by the blog today!