No Products in the Cart
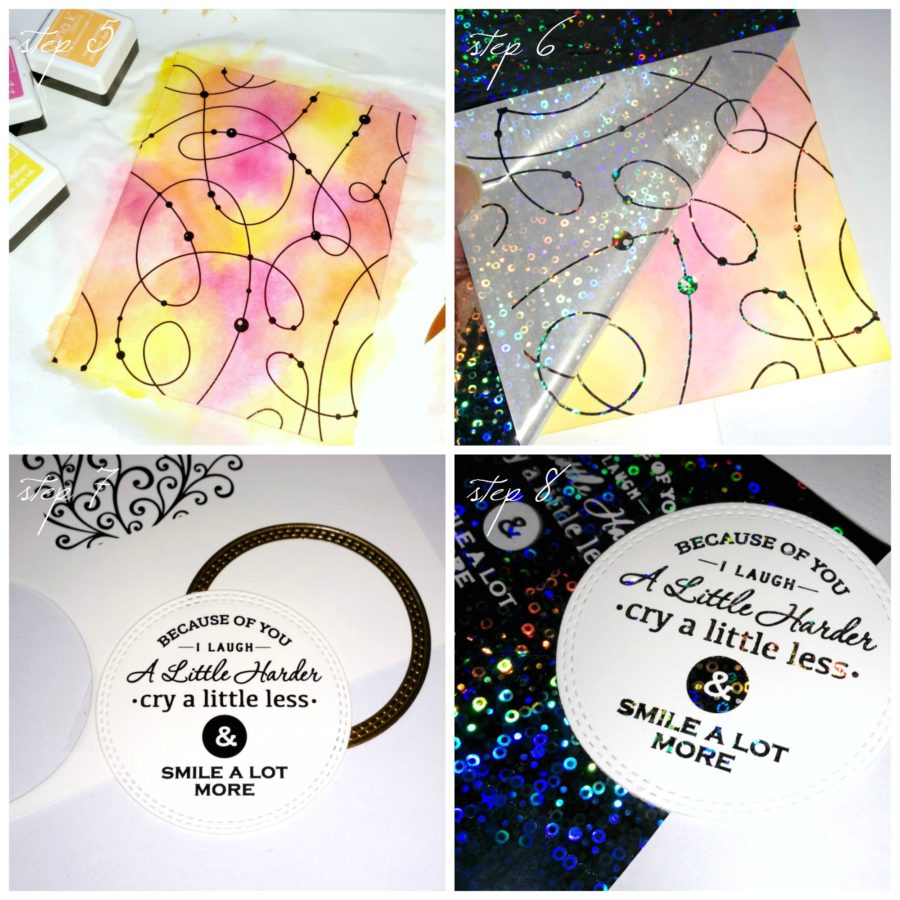
 Step 5. Continue adding color and layering different inks, allowing them to blend just as watercolor paints would and let the Foil-Mates sheet dry.
Step 6. Once dry, cover the colored mat with Gina K. Designs Fancy Foils™ 6" x 8" • Silver Sequins and run it through a laminator. (Crafty tip: The laminator will always flatten your watercolored backgrounds perfectly.)
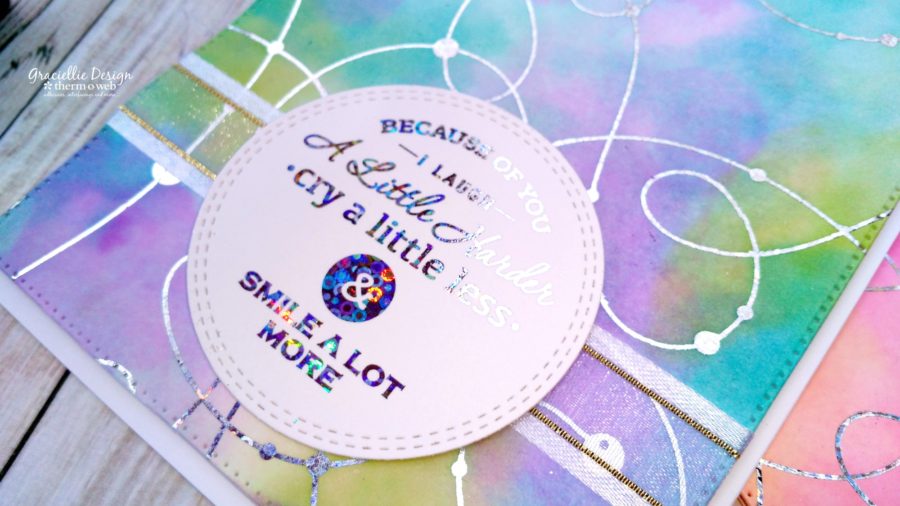
Step 7. Die cut a sentiment from Gina K. Designs Foil-Mates™ Sentiments • True Friend using the new Gina K. Designs (3) Nested Circle Dies • Single Stitch Design • Small Set.
Step 8. Cover the die cut sentiment with a piece of Silver Sequins transfer foil and run it through the laminator to create a matching piece for your background.
Step 5. Continue adding color and layering different inks, allowing them to blend just as watercolor paints would and let the Foil-Mates sheet dry.
Step 6. Once dry, cover the colored mat with Gina K. Designs Fancy Foils™ 6" x 8" • Silver Sequins and run it through a laminator. (Crafty tip: The laminator will always flatten your watercolored backgrounds perfectly.)
Step 7. Die cut a sentiment from Gina K. Designs Foil-Mates™ Sentiments • True Friend using the new Gina K. Designs (3) Nested Circle Dies • Single Stitch Design • Small Set.
Step 8. Cover the die cut sentiment with a piece of Silver Sequins transfer foil and run it through the laminator to create a matching piece for your background.
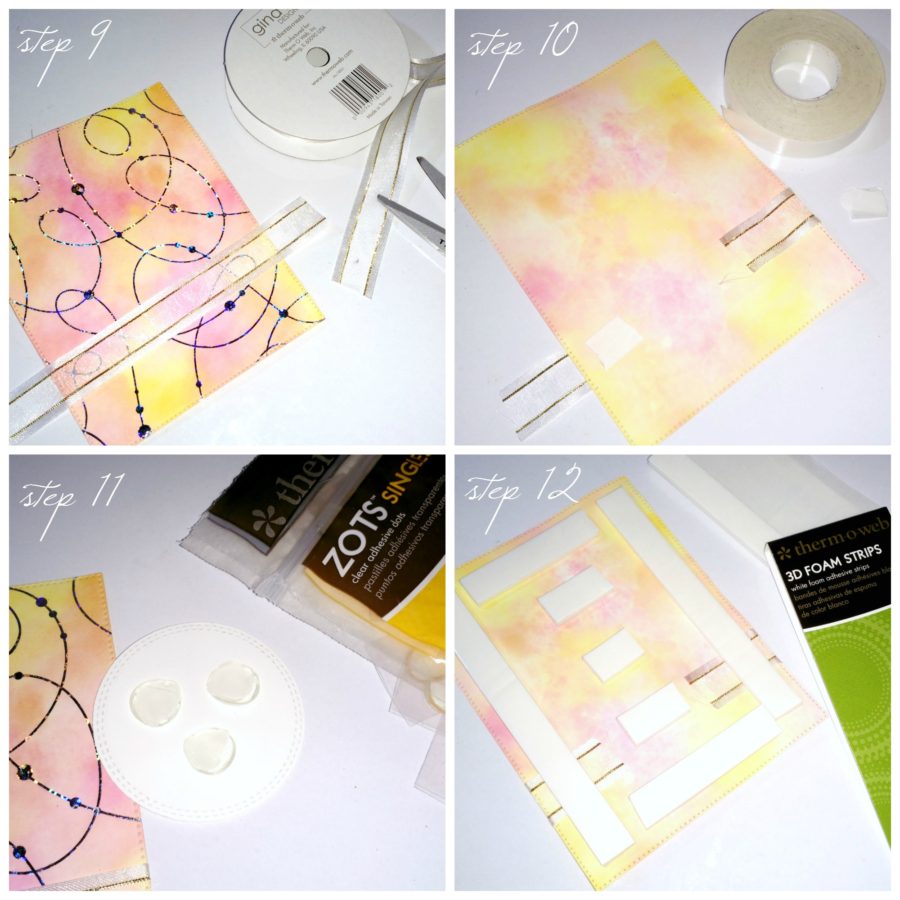
 Step 9. Cut a piece of Gina K. Designs Sheer Satin Fancy Ribbon 5/8" x 10 yd • White/Gold long enough to go across the colored background.
Step 10. Attach the ribbon to the back of the mat with iCraft Adhesive™ Tape • 1/4 in
Step 11. Then use Zots™ Singles • 3-D to adhere the sentiment die cut to the background, placing it right on the center, on top of the ribbon.
Step 12. Finally use 3D White Foam Sticky Strips • 1/2 in to add the colored Foil-Mates sheet to an A2 card base cut from Gina K. Designs Premium Cardstock 8.5" x 11" • White
Step 9. Cut a piece of Gina K. Designs Sheer Satin Fancy Ribbon 5/8" x 10 yd • White/Gold long enough to go across the colored background.
Step 10. Attach the ribbon to the back of the mat with iCraft Adhesive™ Tape • 1/4 in
Step 11. Then use Zots™ Singles • 3-D to adhere the sentiment die cut to the background, placing it right on the center, on top of the ribbon.
Step 12. Finally use 3D White Foam Sticky Strips • 1/2 in to add the colored Foil-Mates sheet to an A2 card base cut from Gina K. Designs Premium Cardstock 8.5" x 11" • White
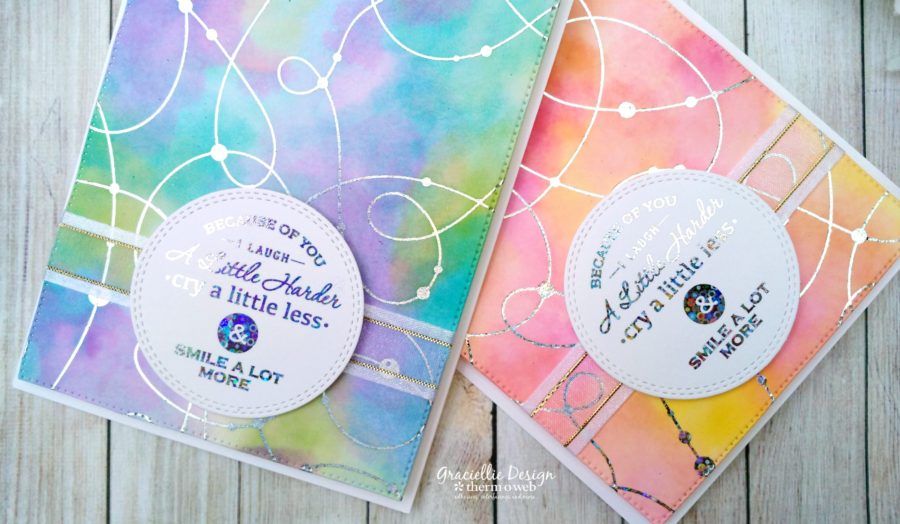
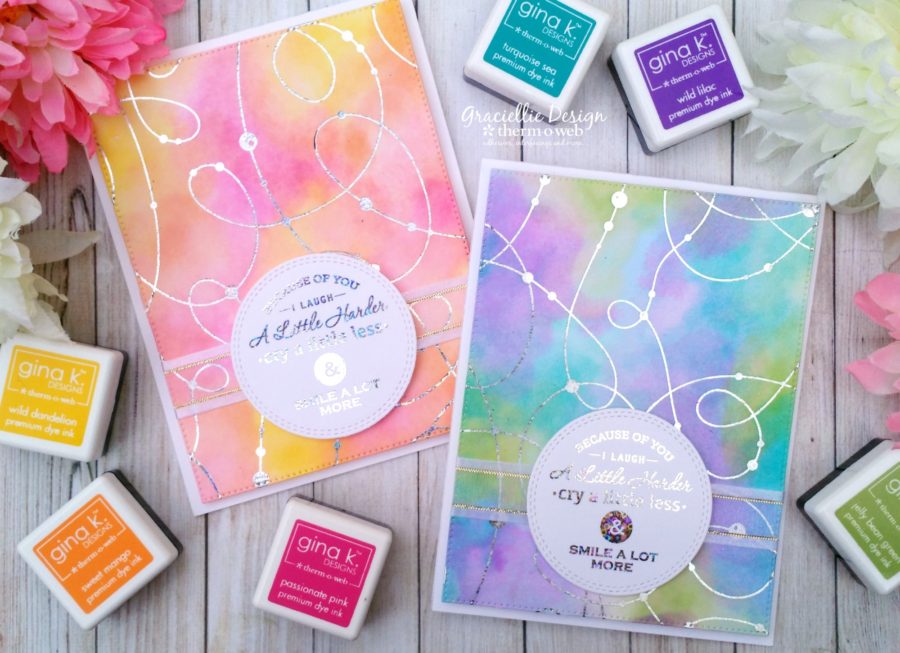
 I hope you enjoyed this tutorial! It's always fun to find new ways of using craft supplies so these cards were extra fun to make! Love the watercolored effect and especially like how easy to achieve it is! Can't wait to see what you make with this technique! Until next time.