No Products in the Cart
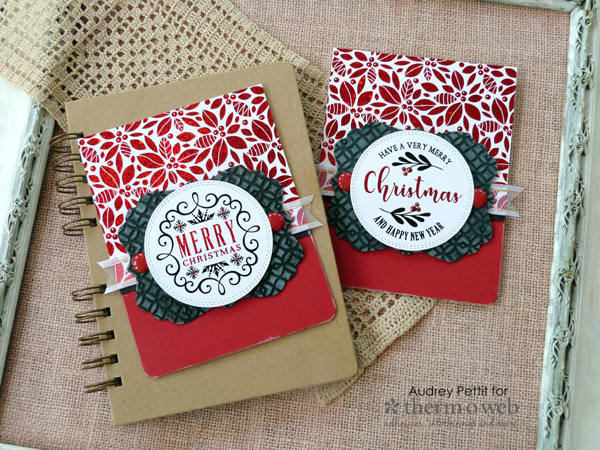
 We are so excited here at Therm O Web with the recent release of the new Gina K Designs holiday collection! And today, I have a pair of Christmas cards to share with you, made with just a few of the Fancy Foils, Foil-Mates, and dies from the new line. I know you all are going to love the holographic sparkle to these new foils!
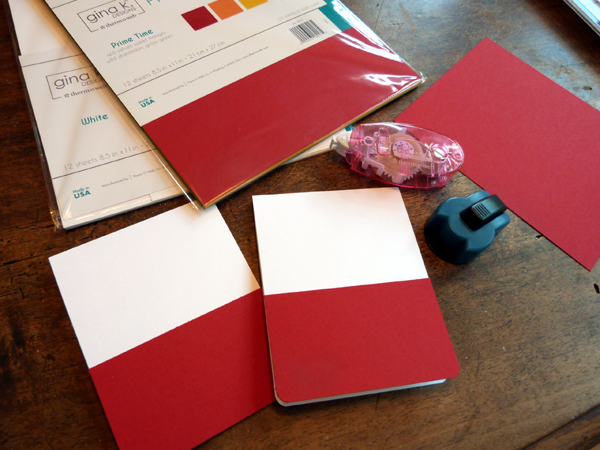 To begin, create a pair of top-folding standard A2 card bases from Premium White cardstock. Trim panels of Red Velvet cardstock to 2.5" x 4.25", and adhere them to the bottom of the card base using the XL Memory Tape Runner. Round the two bottom corners of the card using a corner rounder punch.
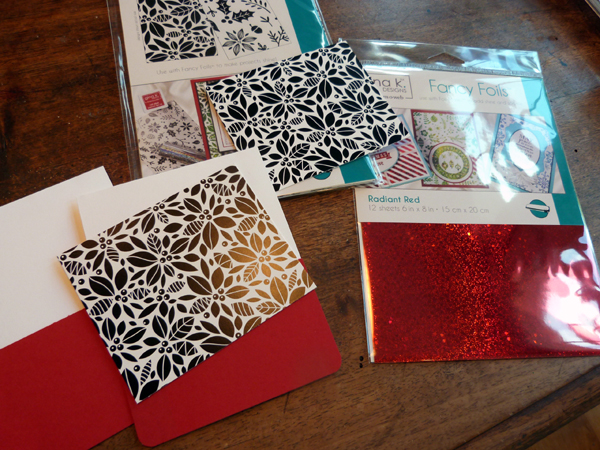 Plug in your Therm O Web laminator and let it come up to temperature while you are preparing the Foil-Mates sheets. Trim the Foil-Mates to 3.5" x 4.25". Cut a sheet of Radiant Red Fancy Foils in half, making sure that the foil sheet is slightly larger than the Foil-Mates pieces.
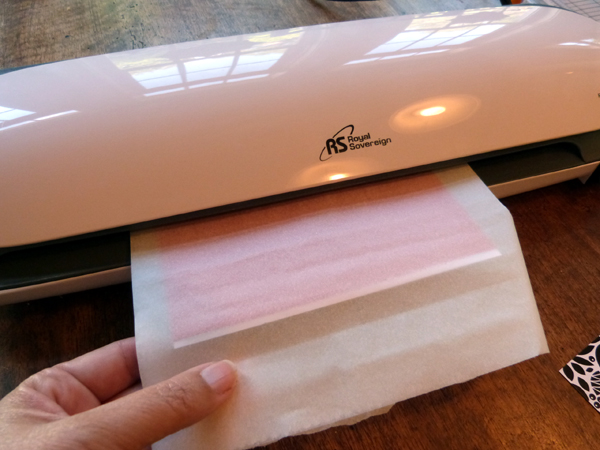 To add foil to Foil-Mates panels, use this standard laminating sandwich: scrap piece of cardstock, Foil-Mates panel (toner side up), Fancy Foil (colored side up). Place this sandwich between a folded piece of parchment paper, and run the whole thing through the laminator.
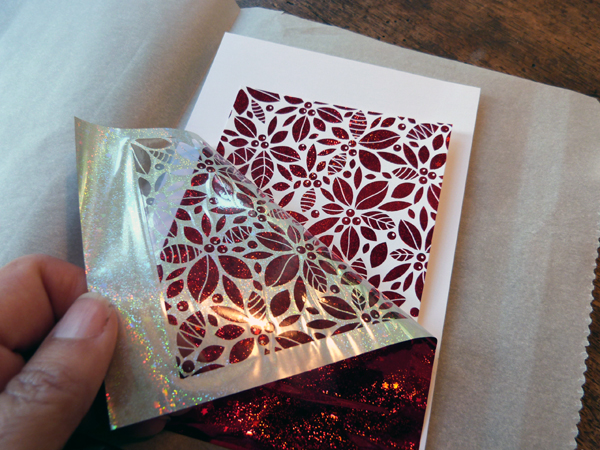 Peel off to Fancy Foil sheet to reveal the beautiful foiled pattern.
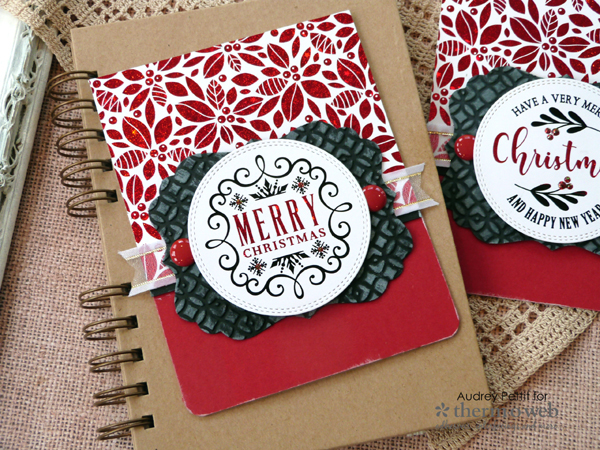
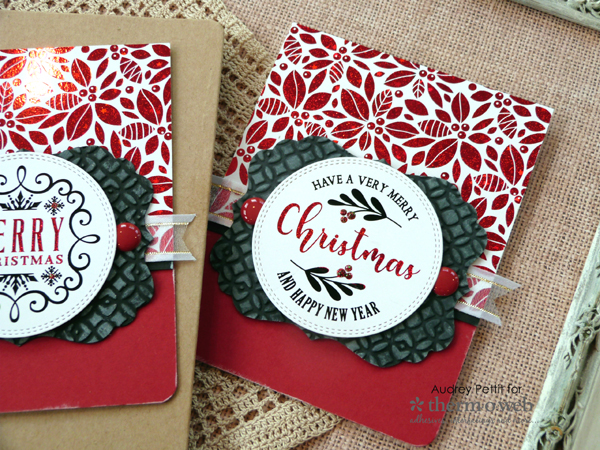
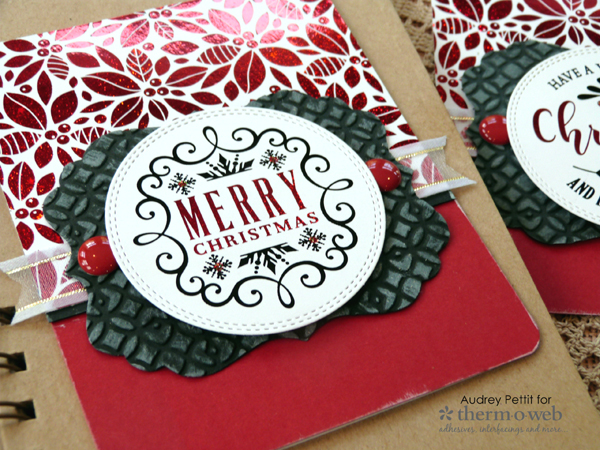
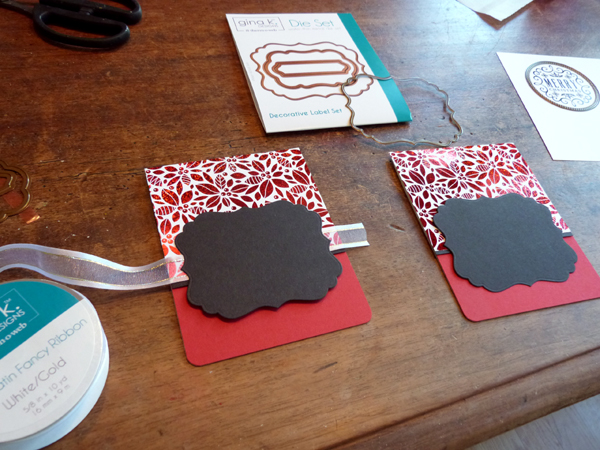 Adhere a thin strip of black cardstock along the bottom edge of the foiled panels, and then adhere the panels to the top of the card base. Run a line of adhesive along the bottom edge of the foiled piece, and place a strip of sheer satin ribbon across the edge. Cut the ends into a V-notch on each side. Die cut the largest label shape from the Decorative Label Die Set from black cardstock.
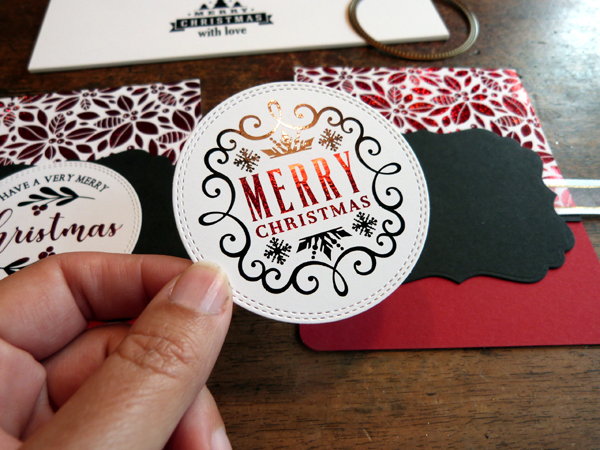 Die cut sentiment from the Holiday Cheer Foil-Mates sheets using a circle die. Add foil to the die cut pieces using the same process as above. As you can see, I used two colors of foils for a bit of extra interest.
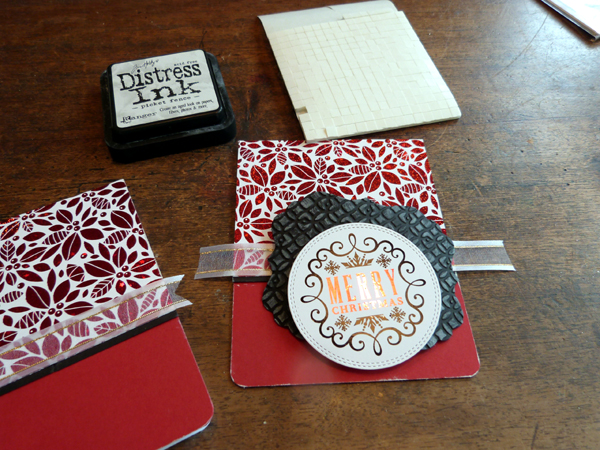 To finish the card, emboss the black labels with your favorite embossing folder, and add a bit of white ink to the raised embossed areas to really bring out the design. Swipe the white ink pad around the edge of the card base, too. Adhere the round sentiment to the embossed label using 3D Adhesive Squares, and then use additional foam squares to pop up the label onto the card. Add red enamel dots and red Stickles glitter glue for a final detail.
 Enjoy!