No Products in the Cart
 Welcome back crafty friends! This is Amanda from Twiddler's Nook with a couple of gift tags featuring Deco Foil flock transfer sheets and a super fun way to use your slimline toner card fronts too!
 Products used:
Deco Foil Transfer Gel Blanco
Deco Foil Transfer Flock - Blue Sky and Sunshine Yellow
Slimline Toner Card Front - Candy Stripes
Deco Foil - silver stars
Stencil Pal
Ultra Bond Liquid Adhesive Pen
Foam squares
Super Tape - 1/4"
Pixie Spray
Reverse Confetti - celebrate tag dies
Heffy Doodle Shellabrate stamps and dies
Heffy Doodle Bubble Waves stencil
Heffy Doodle Wavy Banner Sentiments stamps and dies
Pink & Main Layered Circle dies
Products used:
Deco Foil Transfer Gel Blanco
Deco Foil Transfer Flock - Blue Sky and Sunshine Yellow
Slimline Toner Card Front - Candy Stripes
Deco Foil - silver stars
Stencil Pal
Ultra Bond Liquid Adhesive Pen
Foam squares
Super Tape - 1/4"
Pixie Spray
Reverse Confetti - celebrate tag dies
Heffy Doodle Shellabrate stamps and dies
Heffy Doodle Bubble Waves stencil
Heffy Doodle Wavy Banner Sentiments stamps and dies
Pink & Main Layered Circle dies
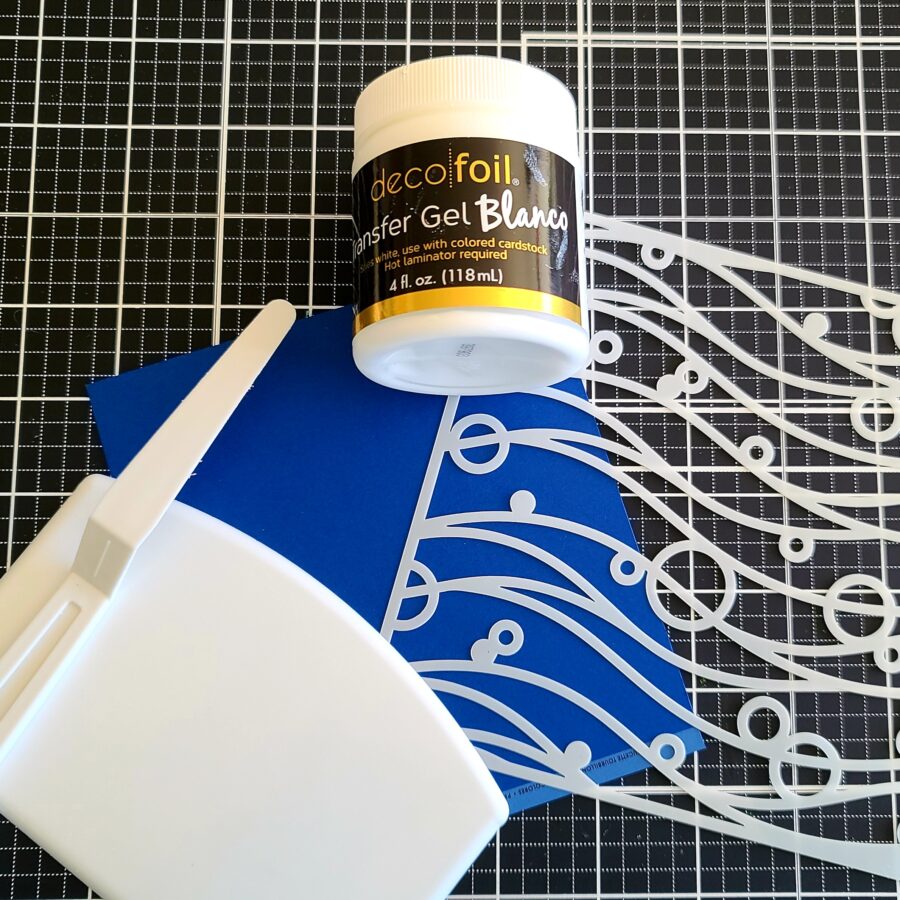 I always try to start projects like this with the messy stuff first because I can be an impatient crafter and have a hard time waiting for things to dry. So I chose my dark blue cardstock, sprayed my stencil with Pixie Spray, and spread Deco Foil Transfer Gel Blanco through it with a palette knife and my stencil pal for a smooth spread. When you're using a very open stencil like this it's important to get as smooth of coverage as possible for the foil or flock to transfer the best.
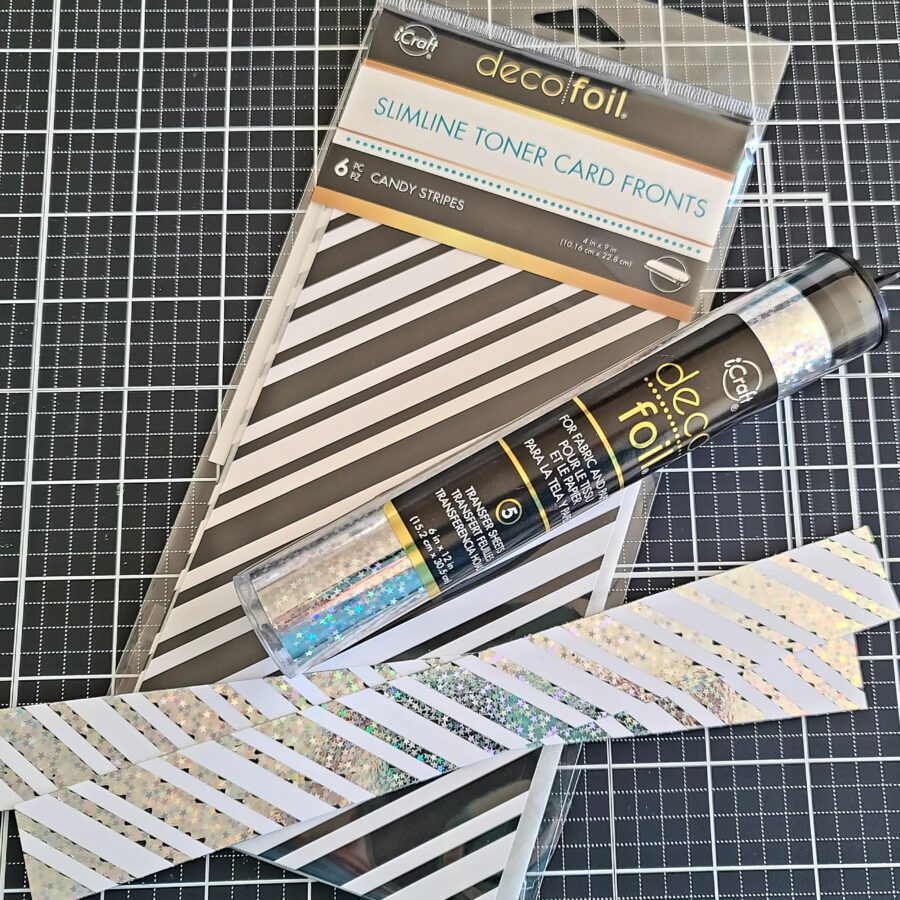 While that was drying and my laminator was heated up I used the silver stars foil on a slimline candy stripes toner card front. Then I trimmed the sheet into 1" strips.
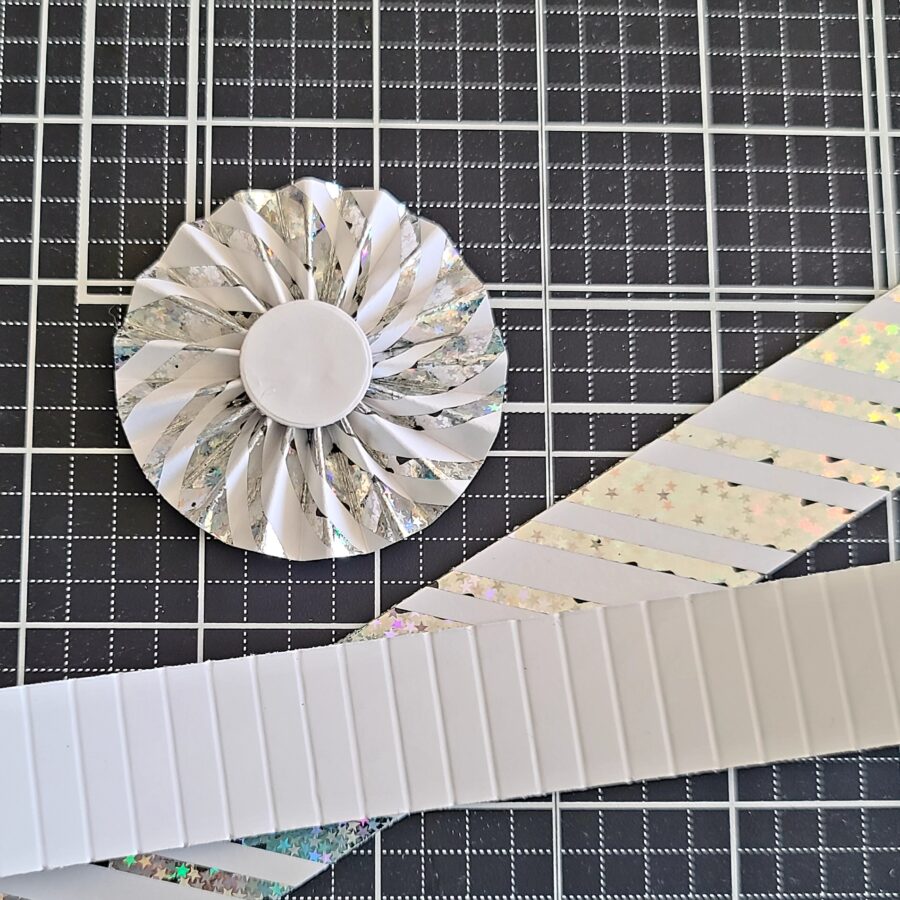 I scored the strips every 1/4" and then accordion folded them. I trimmed the last section off and linked the ends together with super tape. Then I cut a couple of circles from white cardstock and used my hot glue gun to adhere them to the rosette on the front and back. This really reinforces it and keeps it flat. I made 2 of these and have 2 more strips left for another time. I'm so excited that the slimline toner card fronts are long enough to make them with. I'll be trying them with all the designs now!
I guess I forgot to take a photo of this next step, I apologize. But I just stamped and colored the turtle and party hat from Heffy Doodle Shellabrate and used the coordinating dies to cut them out. I added the hat to the turtle with liquid glue and popped them up on the rosettes with foam squares.
I scored the strips every 1/4" and then accordion folded them. I trimmed the last section off and linked the ends together with super tape. Then I cut a couple of circles from white cardstock and used my hot glue gun to adhere them to the rosette on the front and back. This really reinforces it and keeps it flat. I made 2 of these and have 2 more strips left for another time. I'm so excited that the slimline toner card fronts are long enough to make them with. I'll be trying them with all the designs now!
I guess I forgot to take a photo of this next step, I apologize. But I just stamped and colored the turtle and party hat from Heffy Doodle Shellabrate and used the coordinating dies to cut them out. I added the hat to the turtle with liquid glue and popped them up on the rosettes with foam squares.
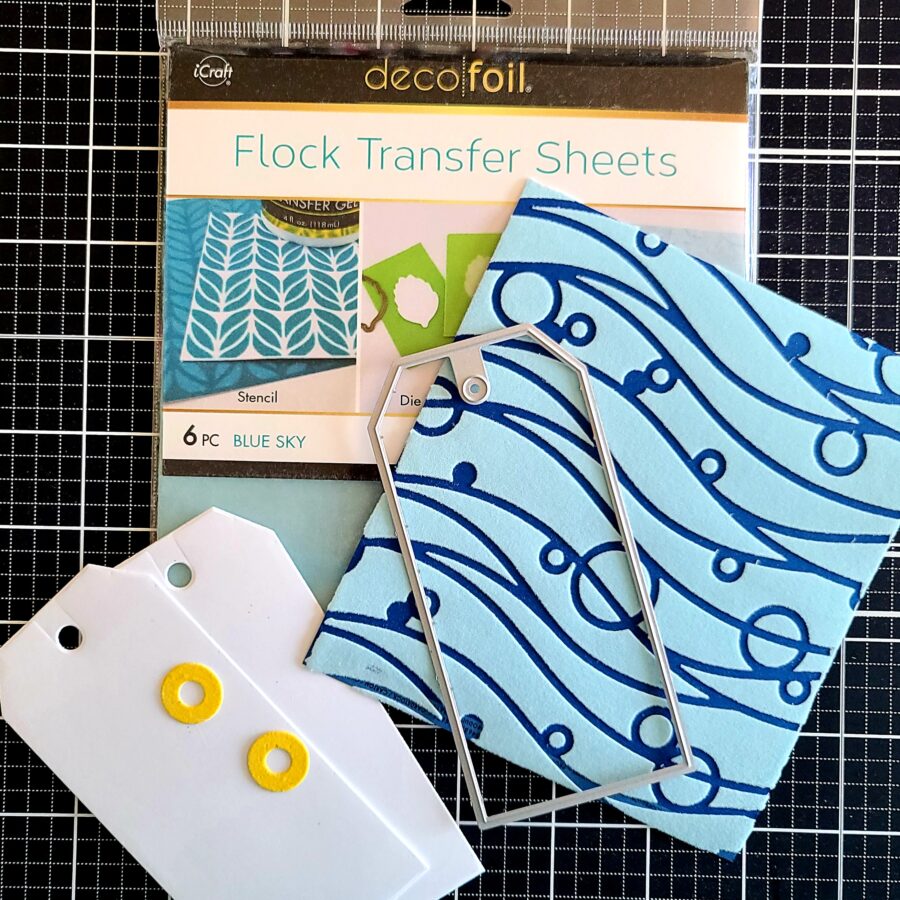 With my transfer gel dry and the laminator heated up, I ran the stenciled panel through with blue sky deco foil flock transfer in a parchment paper cover sheet. Here's what the whole panel looked like before I die cut 2 tags from it. I also cut 2 more tags from white cardstock and hole reinforcers from the sunshine yellow flock. Then I used liquid glue to adhere all the layers together making 2 tags.
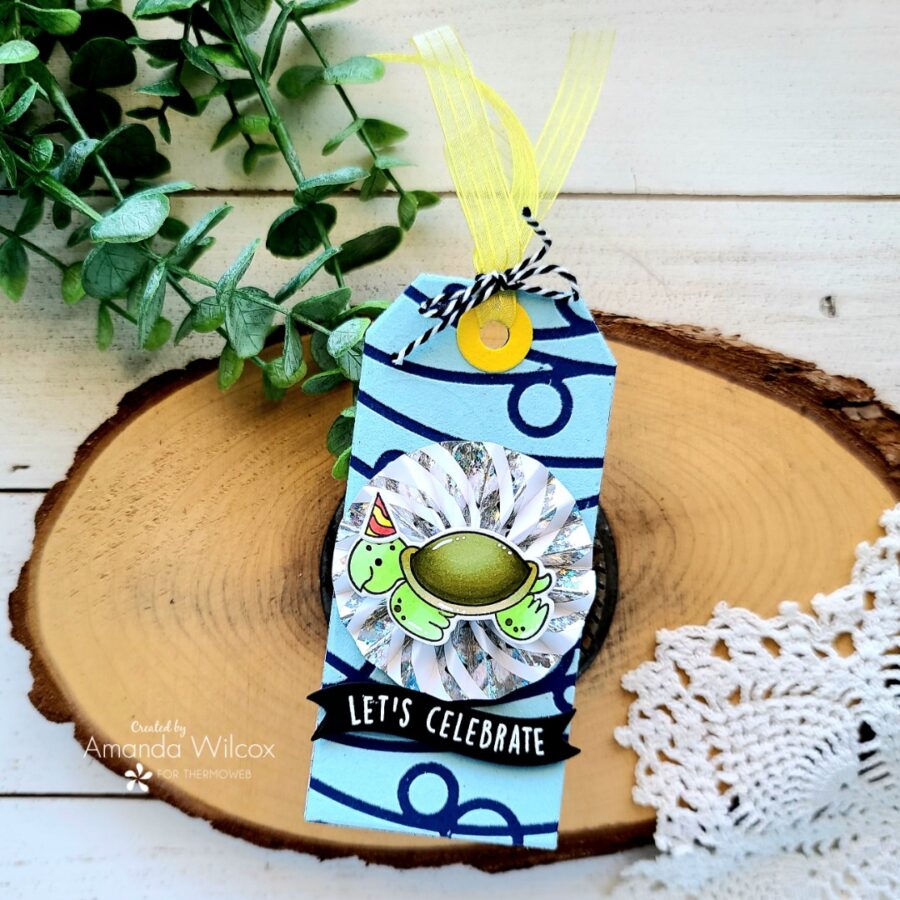 With the tags created, I used liquid glue to adhere the turtle rosettes and threaded some yellow ribbon through the hole tying it with baker's twine. For a sentiment, I used the Wavy Banners stamps and coordinating dies to stamp and heat emboss. They are popped up with foam squares too.
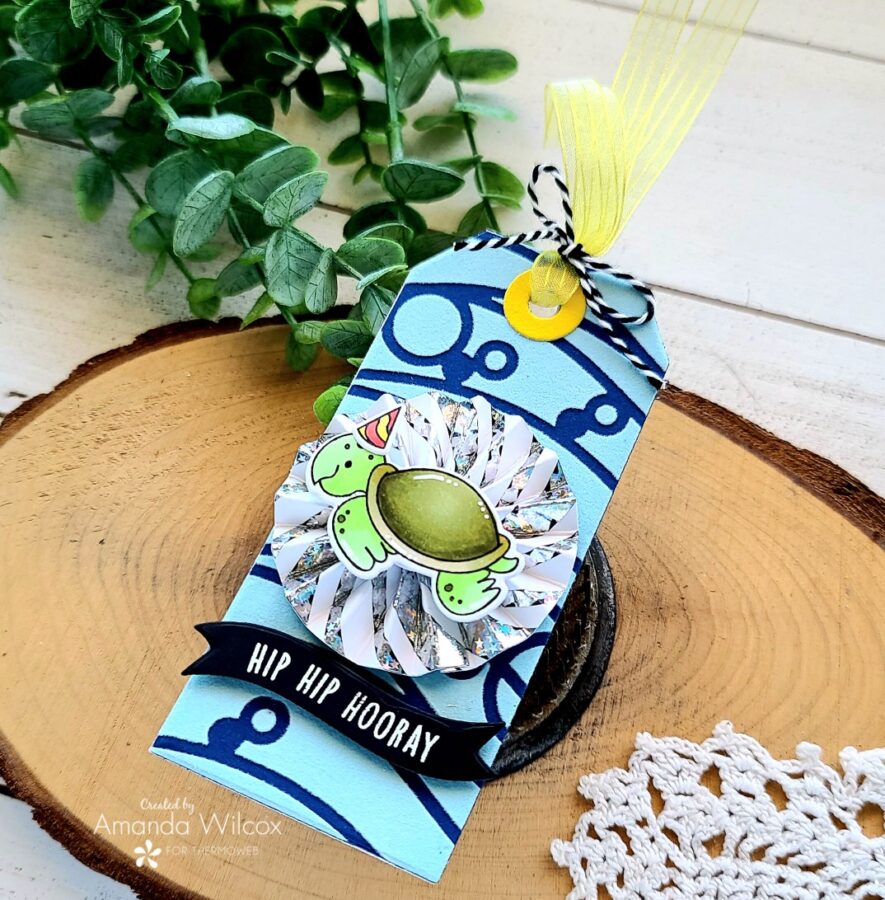 I chose 2 different but generic sentiments so that I could use these tags whenever the occasion arose.
These were so fun to create! I hope you enjoyed them and found a little inspiration to create something wonderful and share it with someone.
I appreciate you sharing your time with me. Have a fabulous day!
I chose 2 different but generic sentiments so that I could use these tags whenever the occasion arose.
These were so fun to create! I hope you enjoyed them and found a little inspiration to create something wonderful and share it with someone.
I appreciate you sharing your time with me. Have a fabulous day!