Hello, hello! I'm so so so excited about the new
Deco Foil Unity Toner Card Fronts! They are SO incredibly easy to use! Shiny, foiled cards are a breeze! And if you cut them up as I do in this video you can stretch them even further and make multiple cards from one foiled
Toner Card Front!
Friendship Cards with Unity
https://youtu.be/6FMiVB7RTrw
I can't say enough how fabulous these
Deco Foil Unity Toner Card Fronts are! I love that they are printed on cardstock that is perfect for a variety of mediums! Today I used Distress Inks to blend ink onto the
Toner Card Fronts, but I have a video coming soon that shows how I colored with alcohol markers as well!
The
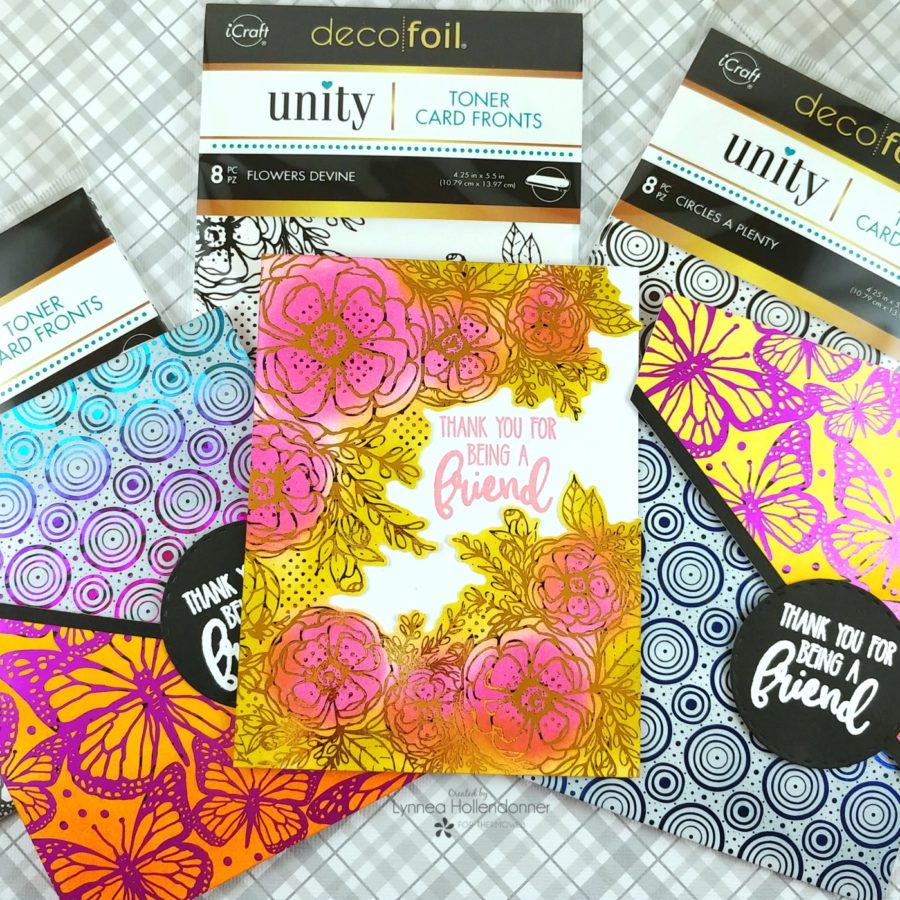
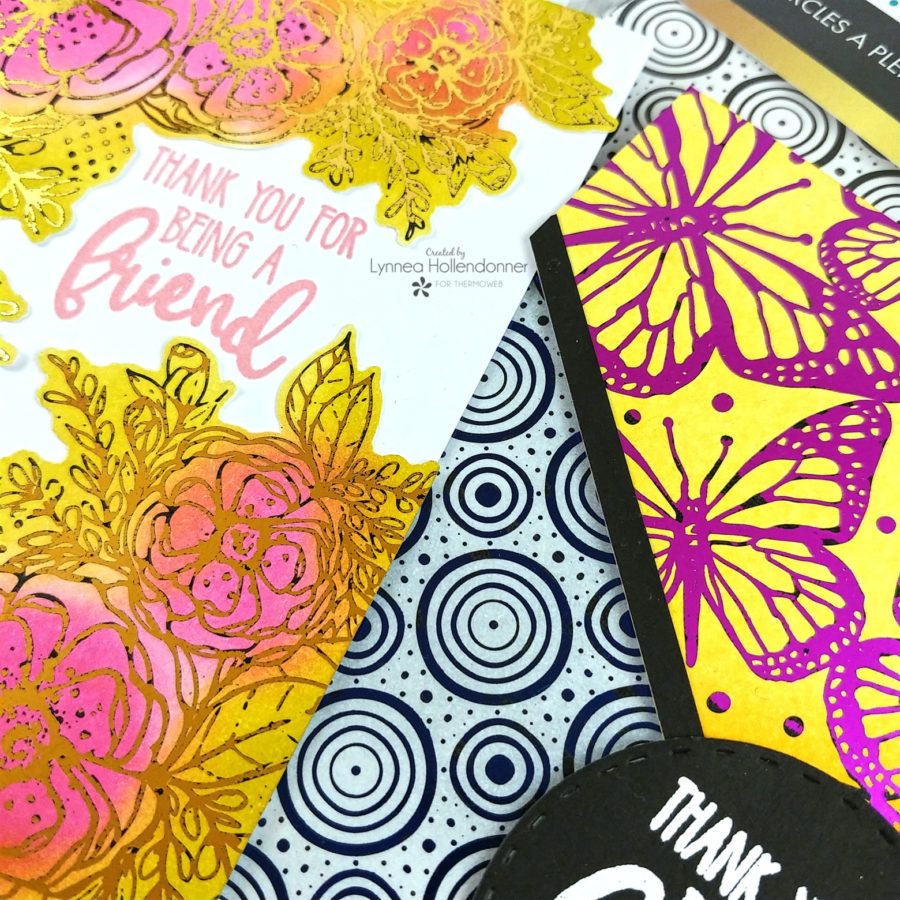
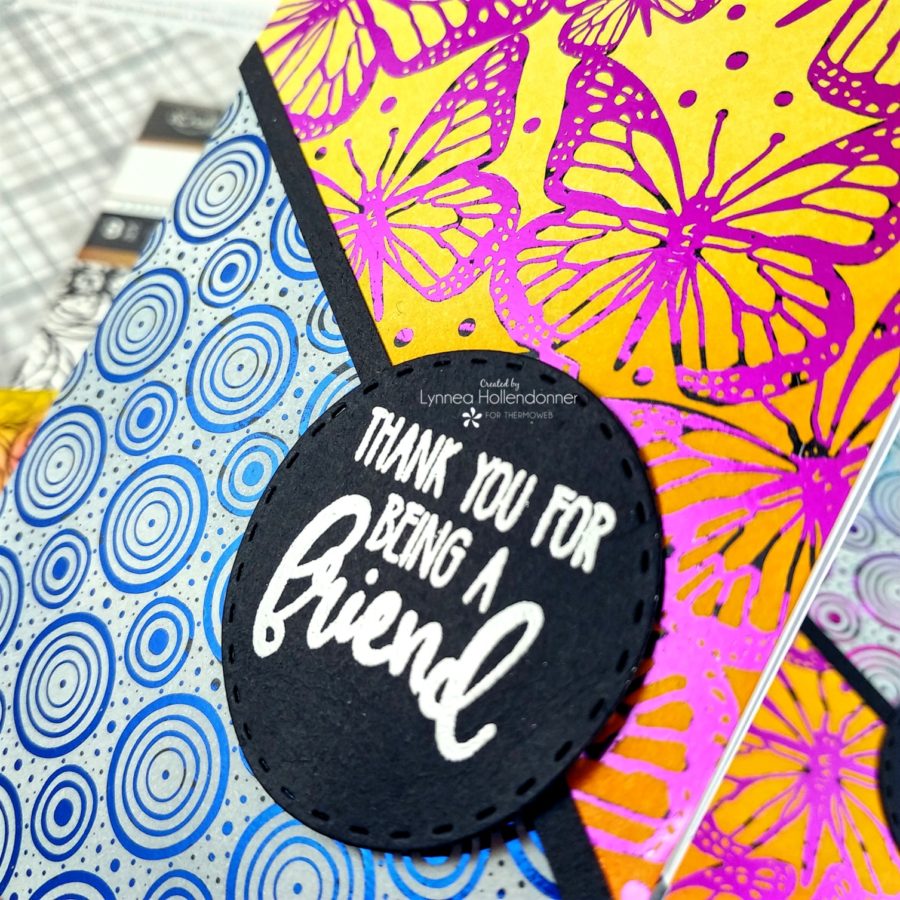
Deco Foil Unity Toner Card Fronts are great for coloring, foiling, and adding it to a card front for a gorgeous simple card. I decided to cut them apart and mix and match the patterns for today's card set. I used three of the patterns -
Circles A Plenty, Flowers Devine, and Butterfly Fly Away. It's hard to pick a favorite! Every time I sat down to grab my favorite pattern I ended up picking more than one!
Unity Card Front
I used Distress Inks and foam blending tools to add quick color to the
Toner Card Front backgrounds. I used orange and yellow on the
Butterfly Fly Away background, gray on the
Circles A Plenty, and pinks and greens on the
Flowers Devine background. I added color before I added the foil and I didn't have any issues with the foil transferring to the
Unity Toner Card Fronts, but if you're concerned you can add foil and then color later. Once all of my backgrounds were inked I added foil to the
Toner Card Fronts with foil and a laminator.
Add Deco Foil
I added
Magenta Deco Foil to the
Butterfly Fly Away background,
Gold Deco Foil to the
Flowers Devine, and
Rainbow Shattered Glass Deco Foil to one
Circles A Plenty background and
Deep Blue Deco Foil to another. I ran each
Toner Card Front and the
Deco Foil through my laminator with a parchment paper carrier sheet and peeled back the foil to reveal my pretty foiled
Toner Card Front backgrounds! Foiling is always an "oooooh" and "aaahhh" moment for me!
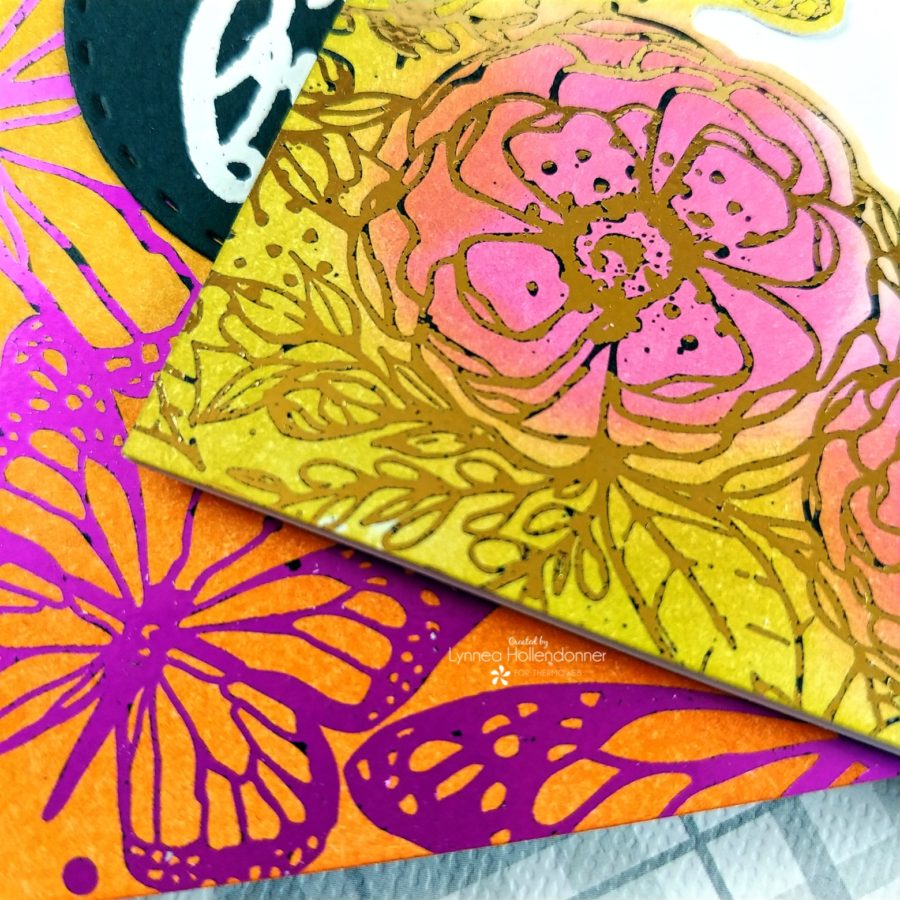
Once the
Toner Card Fronts were foiled I started cutting them apart to pull them into cards. I trimmed around the foiling on the
Flowers Devine background to create a "peek a boo" pattern and added it to a card front with
iCraft Ultra Bond Liquid Adhesive. I stamped a sentiment from the
Gina K Designs Petals and Wings stamp set with pink ink onto the card front in between the foiled cut apart background.
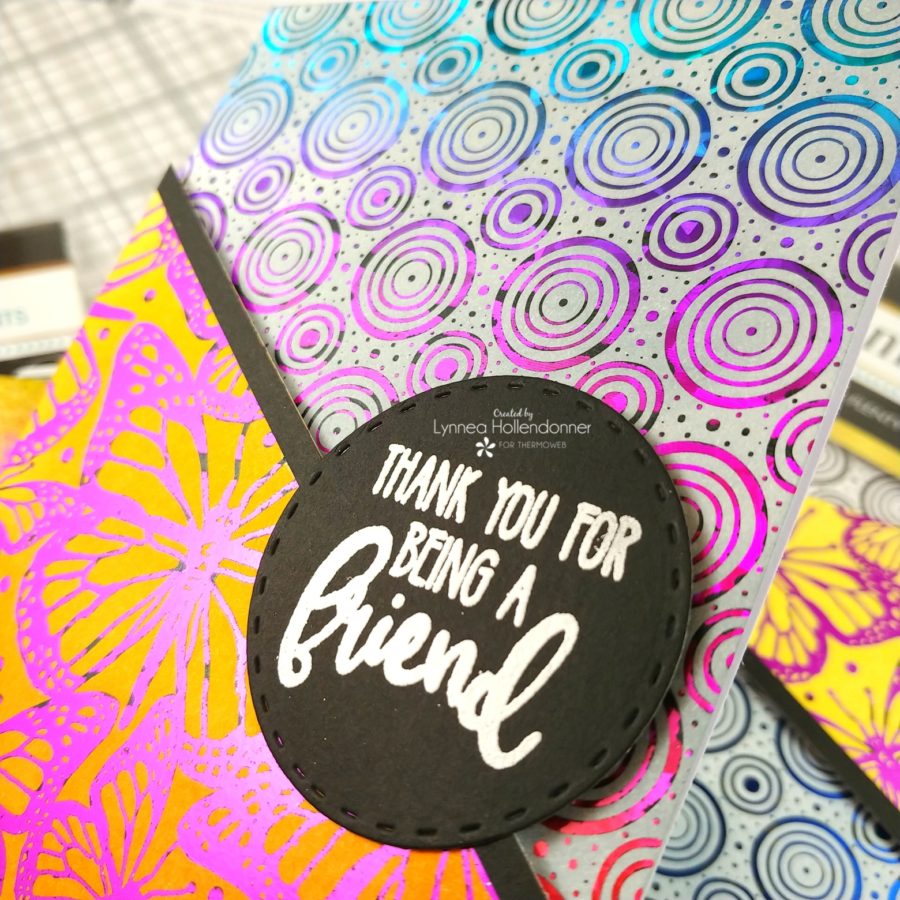
That's one card complete! See what I mean - super easy! I cut the
Butterfly Fly Away background in half diagonally so that I could use one
Toner Card Front to create two cards. I added
Gina K Designs White Foam Tape to the back of each half and added them onto the foiled
Circles A Plenty backgrounds. I used
Gina K Designs Dot Runner Adhesive to adhere the panels onto card fronts.
I finished off the butterfly cards by adding a thin strip of black cardstock to the panel with
iCraft Ultra Bond Liquid Adhesive. I used a stitched circle die to cut out a circle from black cardstock and white heat embossed a sentiment from the
Gina K Designs Petals and Wings stamp set onto the circle and adhered it with
Gina K Designs White Foam Tape. That's it! It's so easy to created beautiful foiled backgrounds with the
Deco Foil Unity Card Fronts! Hopefully, you're inspired to cut them apart and use them in different ways!
ThermOWeb Products Used -
Deco Foil Unity Toner Card Fronts
Magenta Deco Foil Transfer Sheets
Rainbow Shattered Glass Deco Foil Transfer Sheets
Gold Deco Foil Transfer Sheets
Deep Blue Deco Foil Transfer Sheets
Gina K Designs Adhesive Dot Runner
Gina K Designs White Foam Tape
1/2" Purple Tape
Gina K Designs Petals and Wings Stamp Set
iCraft Ultra Bond Liquid Adhesive
Other Products Used -
LDRS Creative Stitched Circle Dies
This post contains affiliate links. For more information, see our disclosure
HERE.