No Products in the Cart
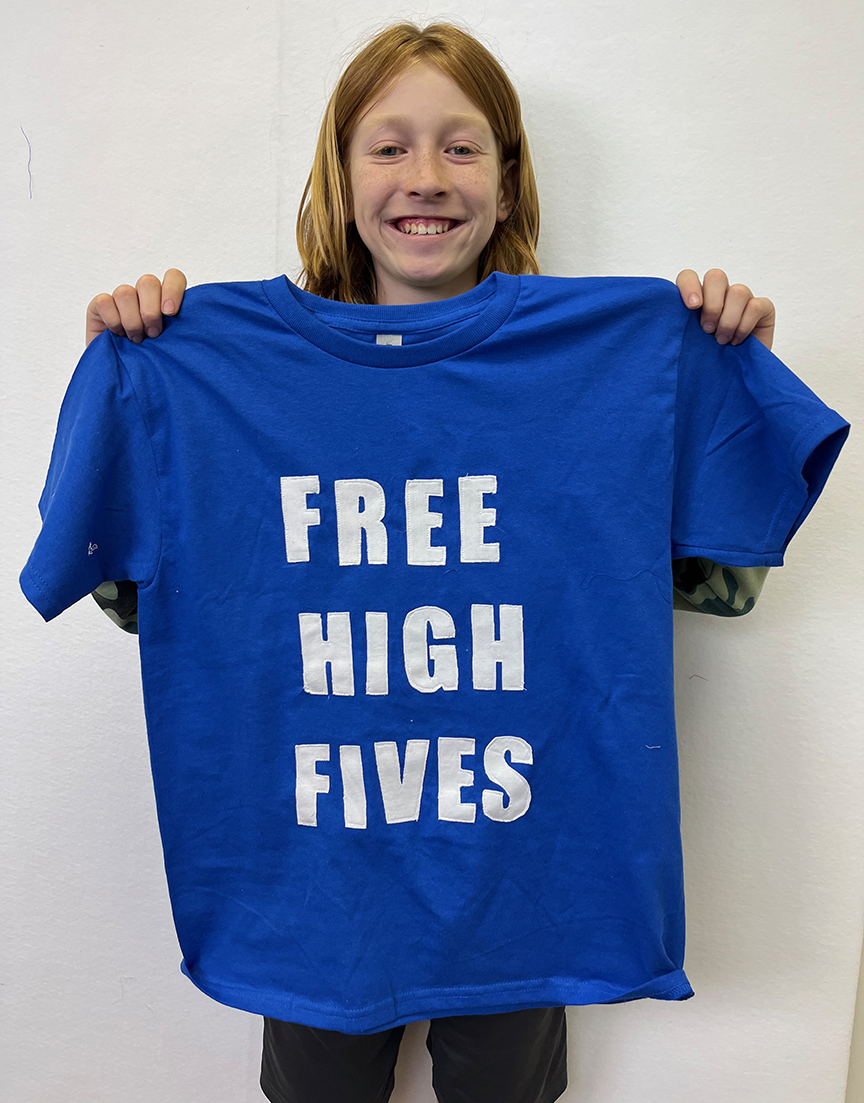
 When I wore the shirt to school after completing it, I got quite a few high fives from anyone including teachers, classmates, and even my bus driver! Keep reading to learn how to make your own version of this shirt!
You’ll Need:
1 (one) Blank t-shirt with your choice of color and size (I got mine from Joann’s because they have lots of color choices)
¼ yard of jersey knit fabric in a contrasting color
Thermoweb Heat n’ Bond fusible adhesive
Thermoweb lightweight fusible interfacing
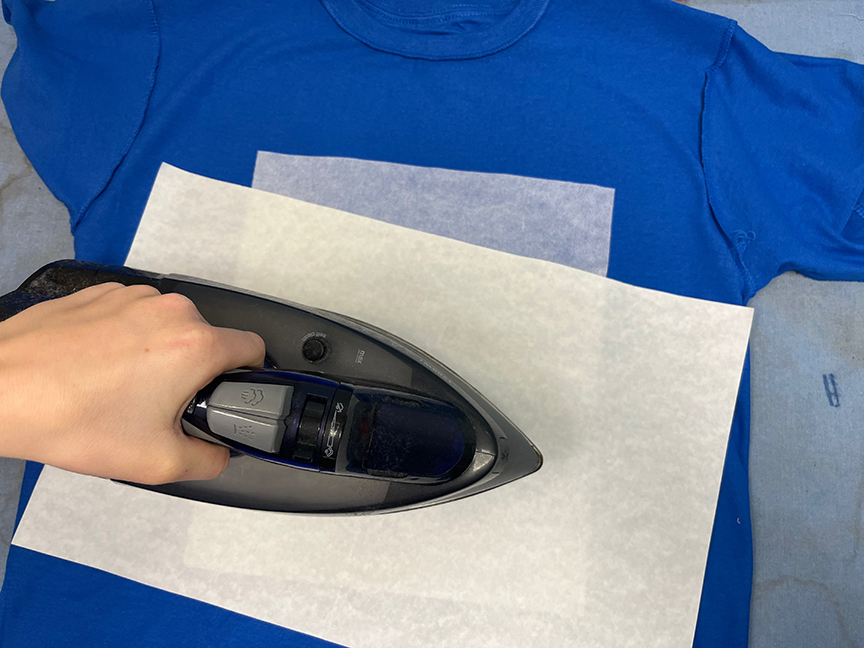
Thermoweb Pressing Paper
Click Here to download the letter templates.
Assemble the Shirt:
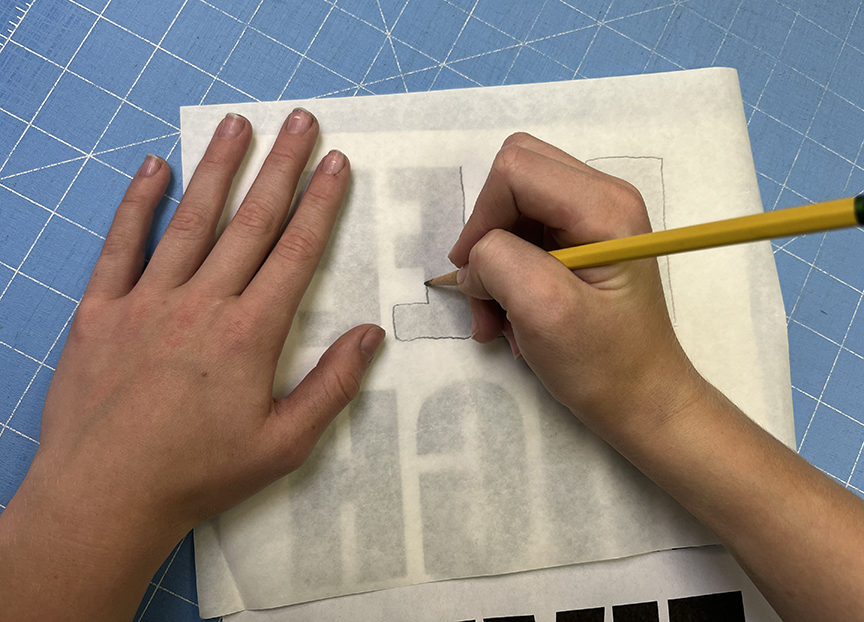
1.Trace the letters onto the paper side of the fusible adhesive (The letters will be backwards, this is correct).
When I wore the shirt to school after completing it, I got quite a few high fives from anyone including teachers, classmates, and even my bus driver! Keep reading to learn how to make your own version of this shirt!
You’ll Need:
1 (one) Blank t-shirt with your choice of color and size (I got mine from Joann’s because they have lots of color choices)
¼ yard of jersey knit fabric in a contrasting color
Thermoweb Heat n’ Bond fusible adhesive
Thermoweb lightweight fusible interfacing
Thermoweb Pressing Paper
Click Here to download the letter templates.
Assemble the Shirt:
1.Trace the letters onto the paper side of the fusible adhesive (The letters will be backwards, this is correct).
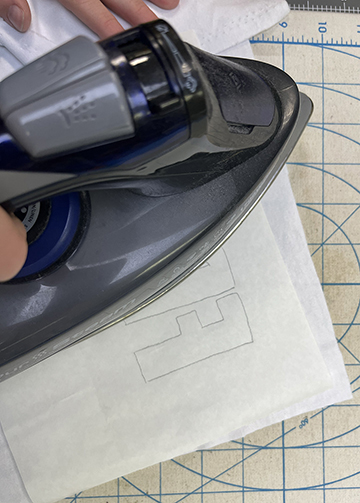
 2. Fuse the traced letters onto the jersey knit fabric (jersey knit does not have a right or wrong side).
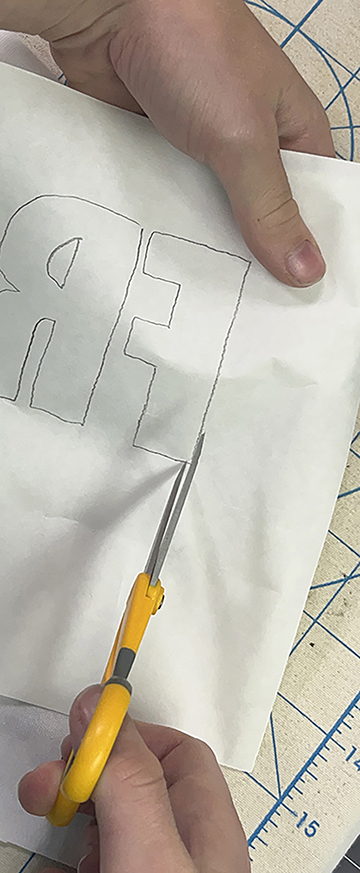
 3. Cut out the letters on drawn lines.
 4. Fold the t-shirt in half from left to right to find center line. Press.
5. Peel paper off the letters.
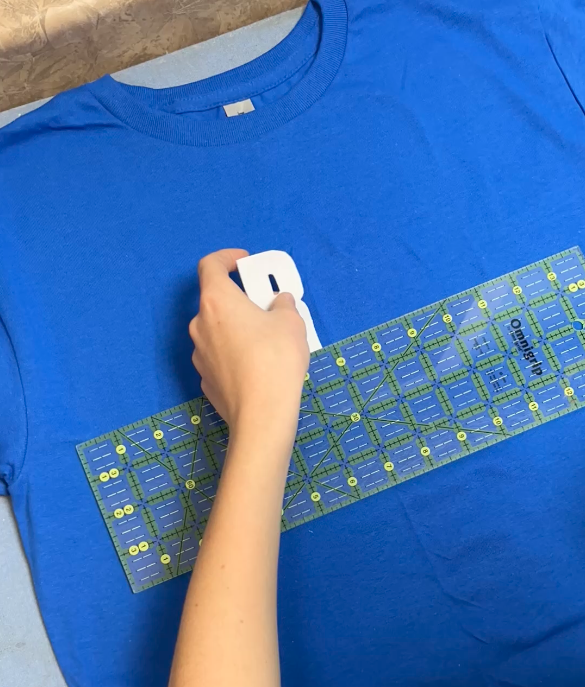
6. Use a ruler to keep the first line of letters straight and position letters using center fold line as a guide. Start by positioning the "R" and "E" around the center line and work out from there. Fuse the first word in place.
4. Fold the t-shirt in half from left to right to find center line. Press.
5. Peel paper off the letters.
6. Use a ruler to keep the first line of letters straight and position letters using center fold line as a guide. Start by positioning the "R" and "E" around the center line and work out from there. Fuse the first word in place.
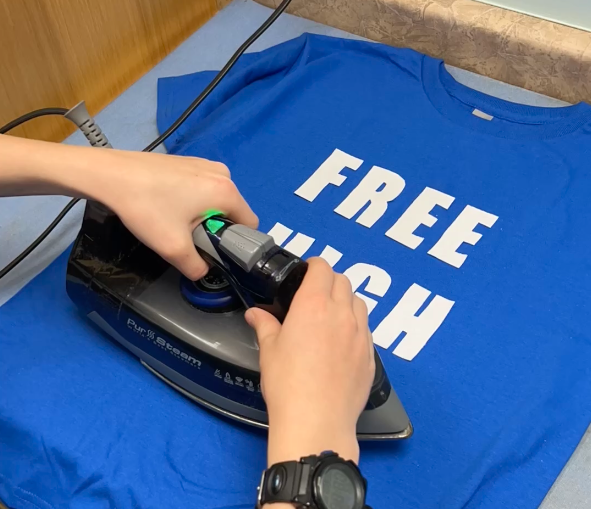 7. Repeat step 6 until all lines of letters are completed. (Try to keep consistent spacing between letters and lines.)
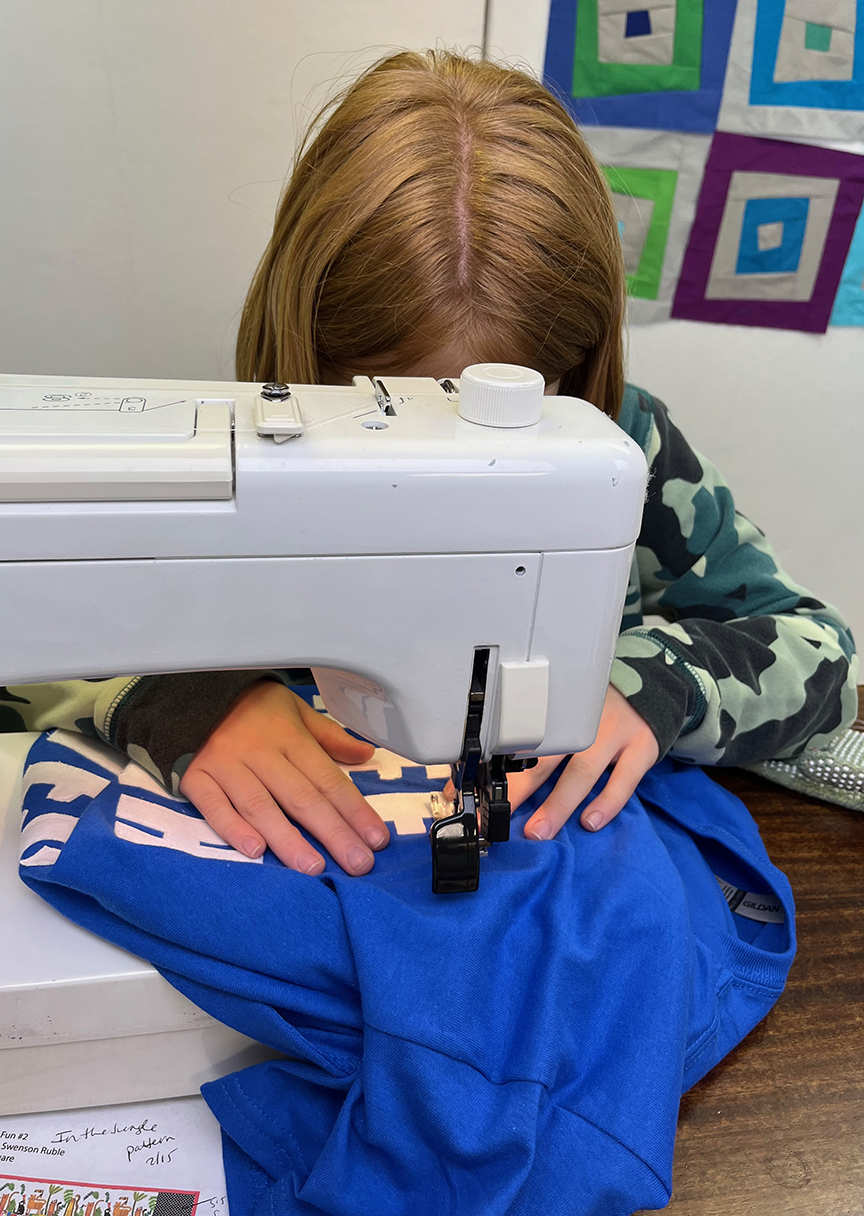
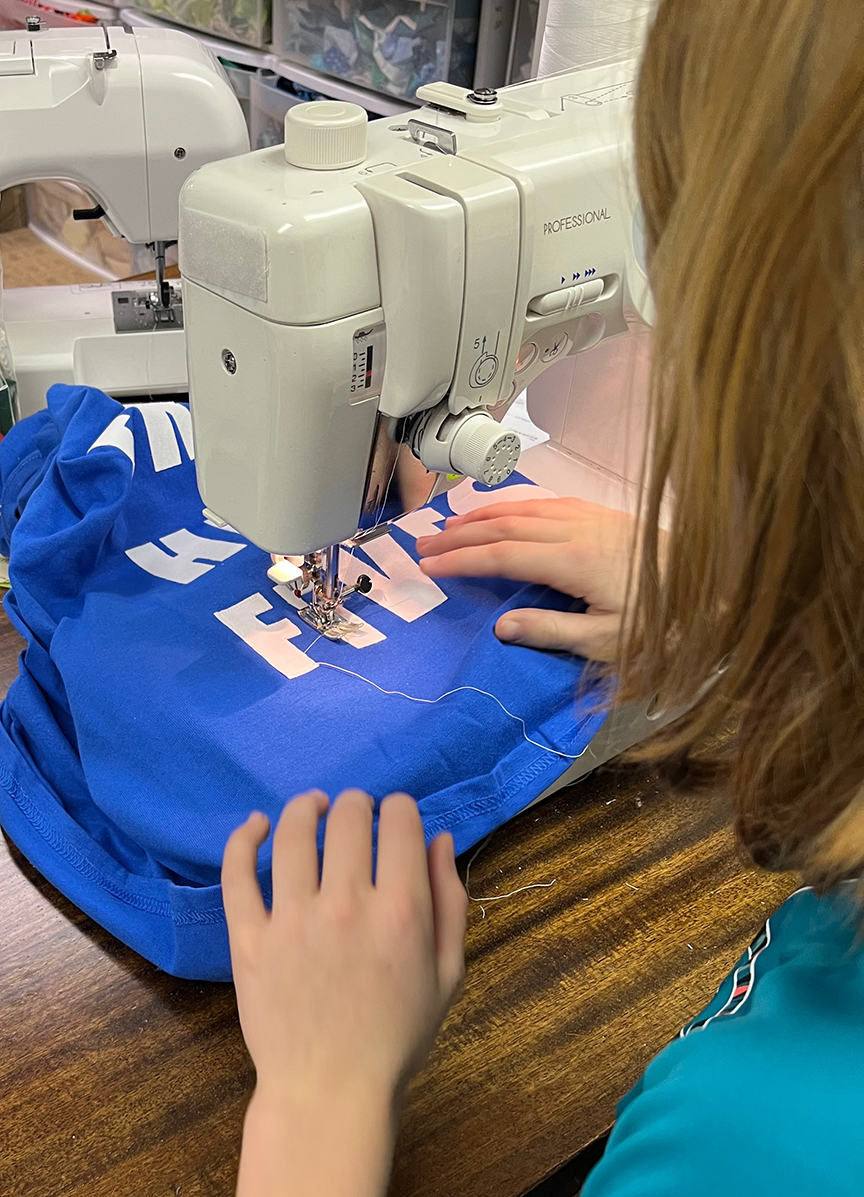
 12. Turn the t-shirt right-side out.
13. On your sewing machine, make sure you have only one layer of t-shirt under the foot, and stitch near the edge of each letter to secure in place and backstitch a few stitches at the beginning and end of each letter.
12. Turn the t-shirt right-side out.
13. On your sewing machine, make sure you have only one layer of t-shirt under the foot, and stitch near the edge of each letter to secure in place and backstitch a few stitches at the beginning and end of each letter.
 Enjoy your new t-shirt!
 My younger brother liked this idea so much and decided to copy me with a small variation in words and my mom made a third shirt for my older brother as well.
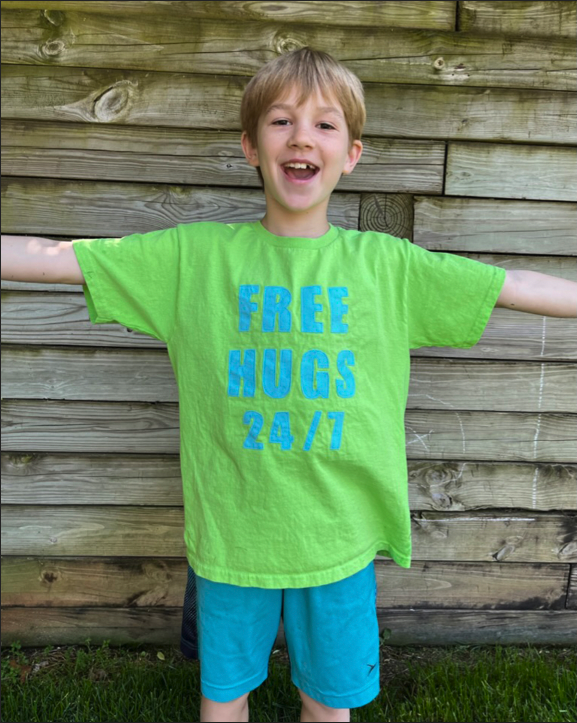
 To find templates for these other two t-shirts go to my mom’s website at QuiltyZest.com. If you want other messages, look for letters to trace online or make your own. Thanks for reading my first tutorial!
Jojo Ruble
To find templates for these other two t-shirts go to my mom’s website at QuiltyZest.com. If you want other messages, look for letters to trace online or make your own. Thanks for reading my first tutorial!
Jojo Ruble