No Products in the Cart
 Foiled Christmas Wreath Card with Gina K. Designs
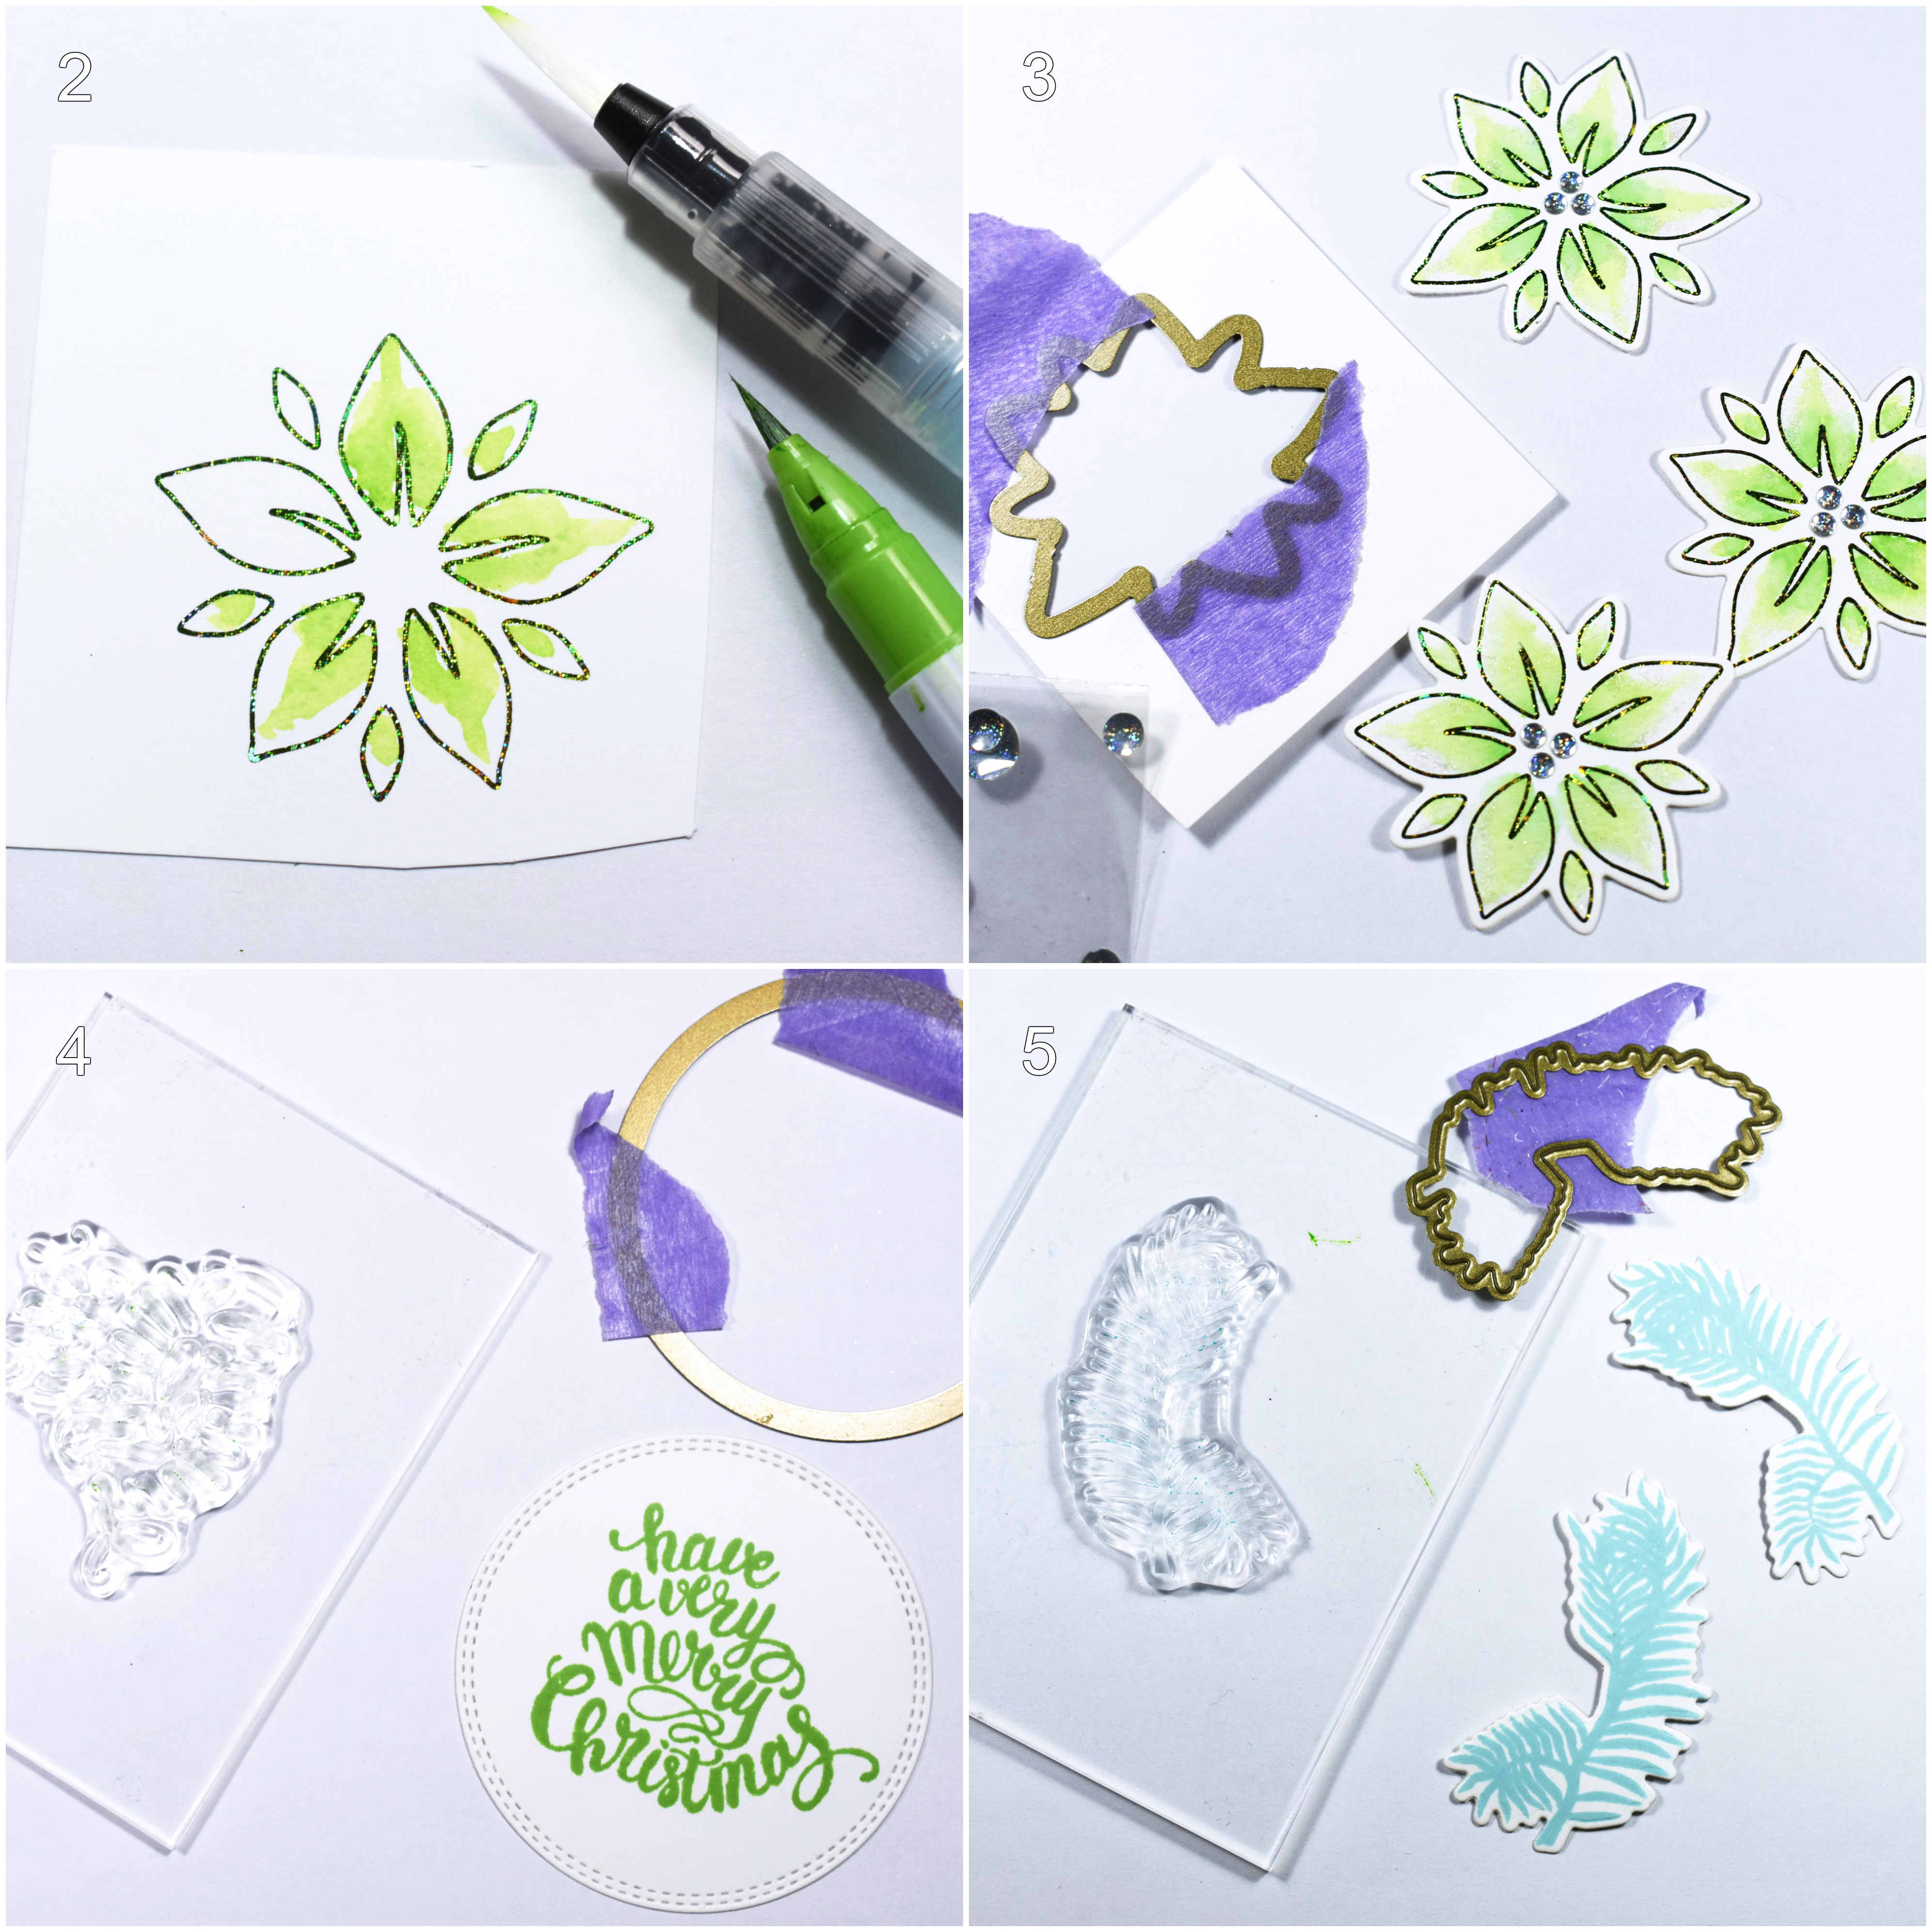
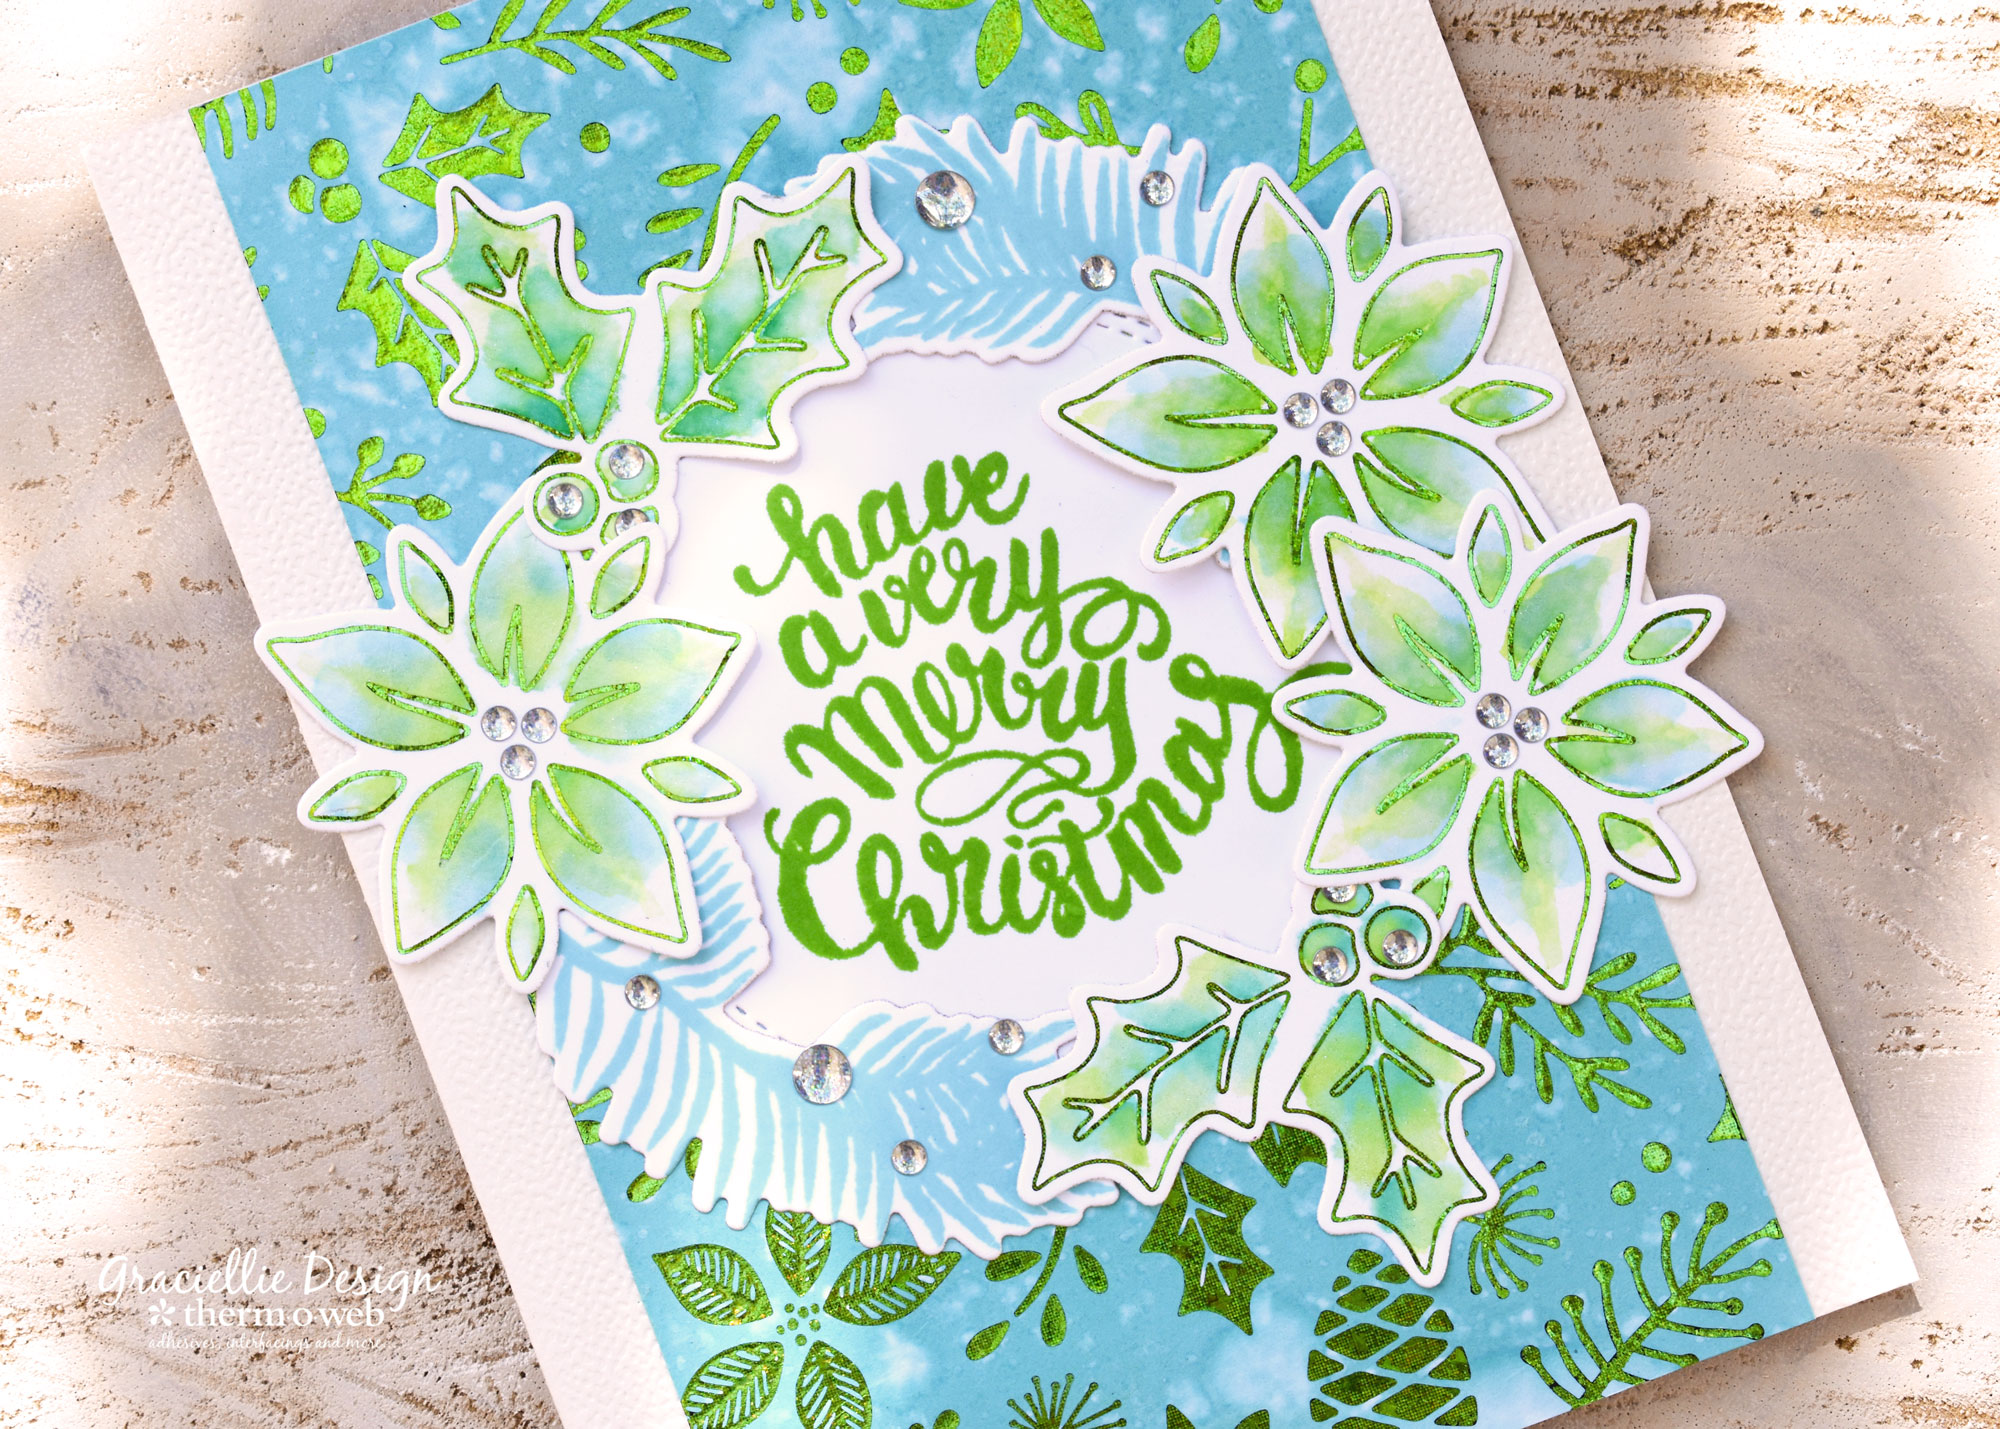
 Step 2. Color each of the poinsettias using a water reactive marker and a little water from a water brush to blend out the color. The paper from the Foil-Mates will hold water well, just be careful not to add too much!
Step 3. Use the coordinating StampnFoil Die Set, Holly Jolly to cut each of the foiled and colored poinsettias.
Step 4. Stamp a sentiment from the StampnFoil Stamp Set, Holly Jolly using Lucky Clover Premium Dye Ink and cut it using the largest circle die from the Nested Circle Dies • Double Stitch Design • Small Set
Step 5. Also, stamp a couple of pine branches from the same set using Ocean Mist Premium Dye Ink.
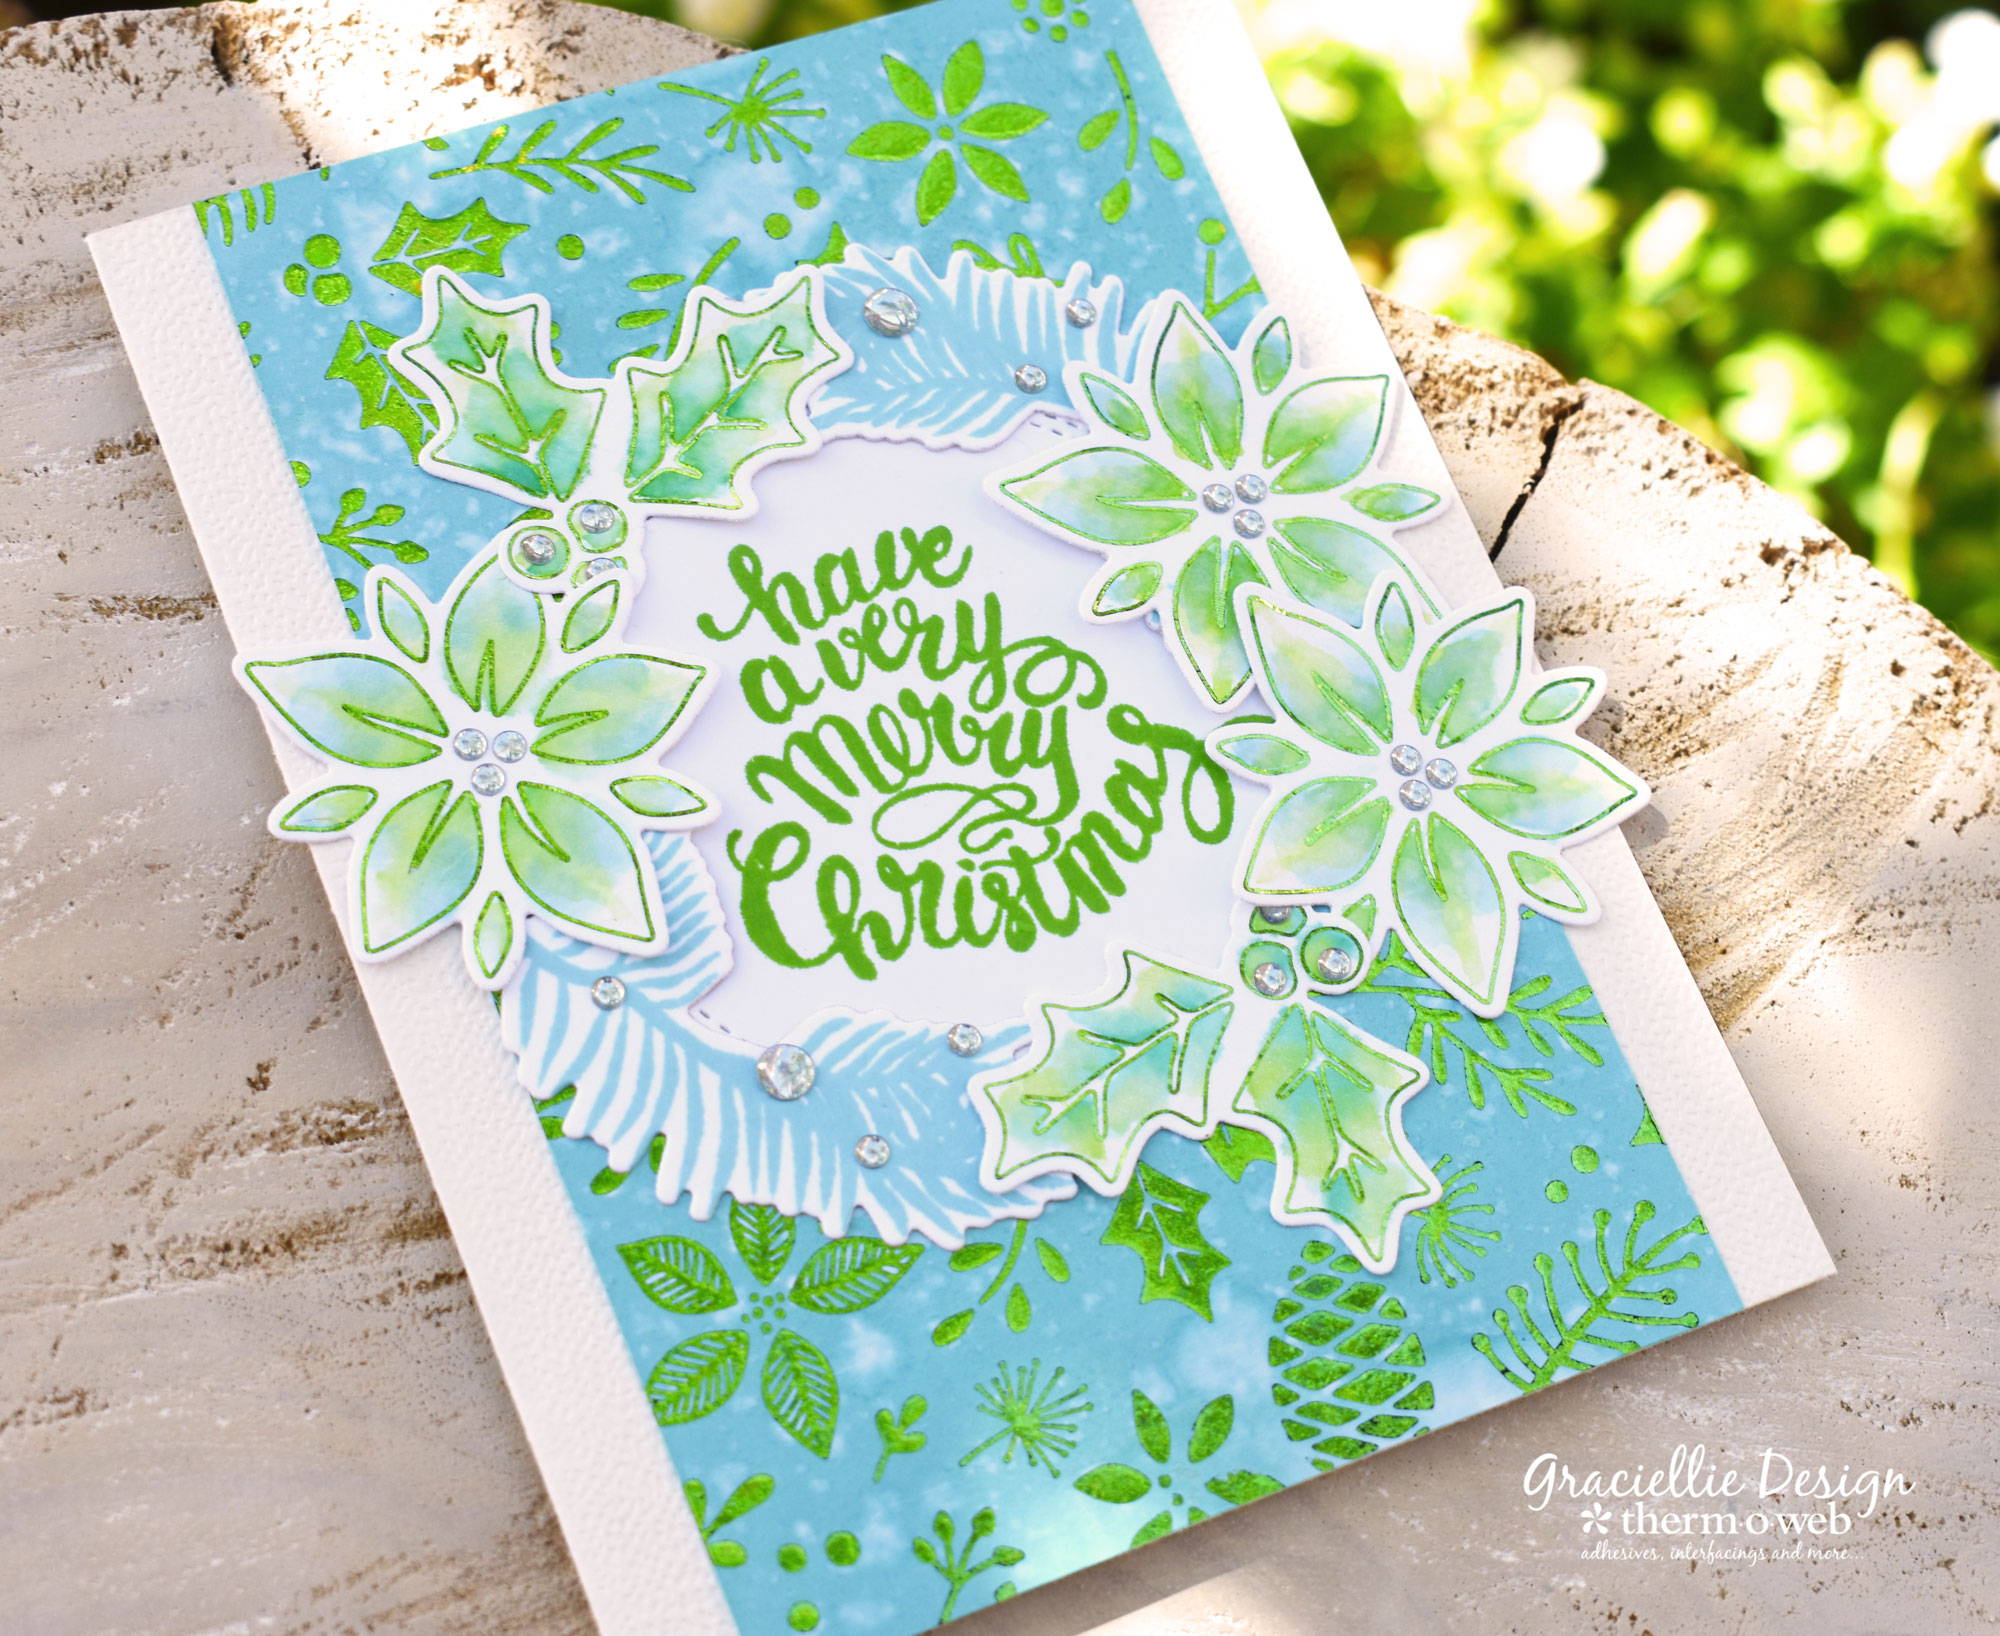
Step 2. Color each of the poinsettias using a water reactive marker and a little water from a water brush to blend out the color. The paper from the Foil-Mates will hold water well, just be careful not to add too much!
Step 3. Use the coordinating StampnFoil Die Set, Holly Jolly to cut each of the foiled and colored poinsettias.
Step 4. Stamp a sentiment from the StampnFoil Stamp Set, Holly Jolly using Lucky Clover Premium Dye Ink and cut it using the largest circle die from the Nested Circle Dies • Double Stitch Design • Small Set
Step 5. Also, stamp a couple of pine branches from the same set using Ocean Mist Premium Dye Ink.
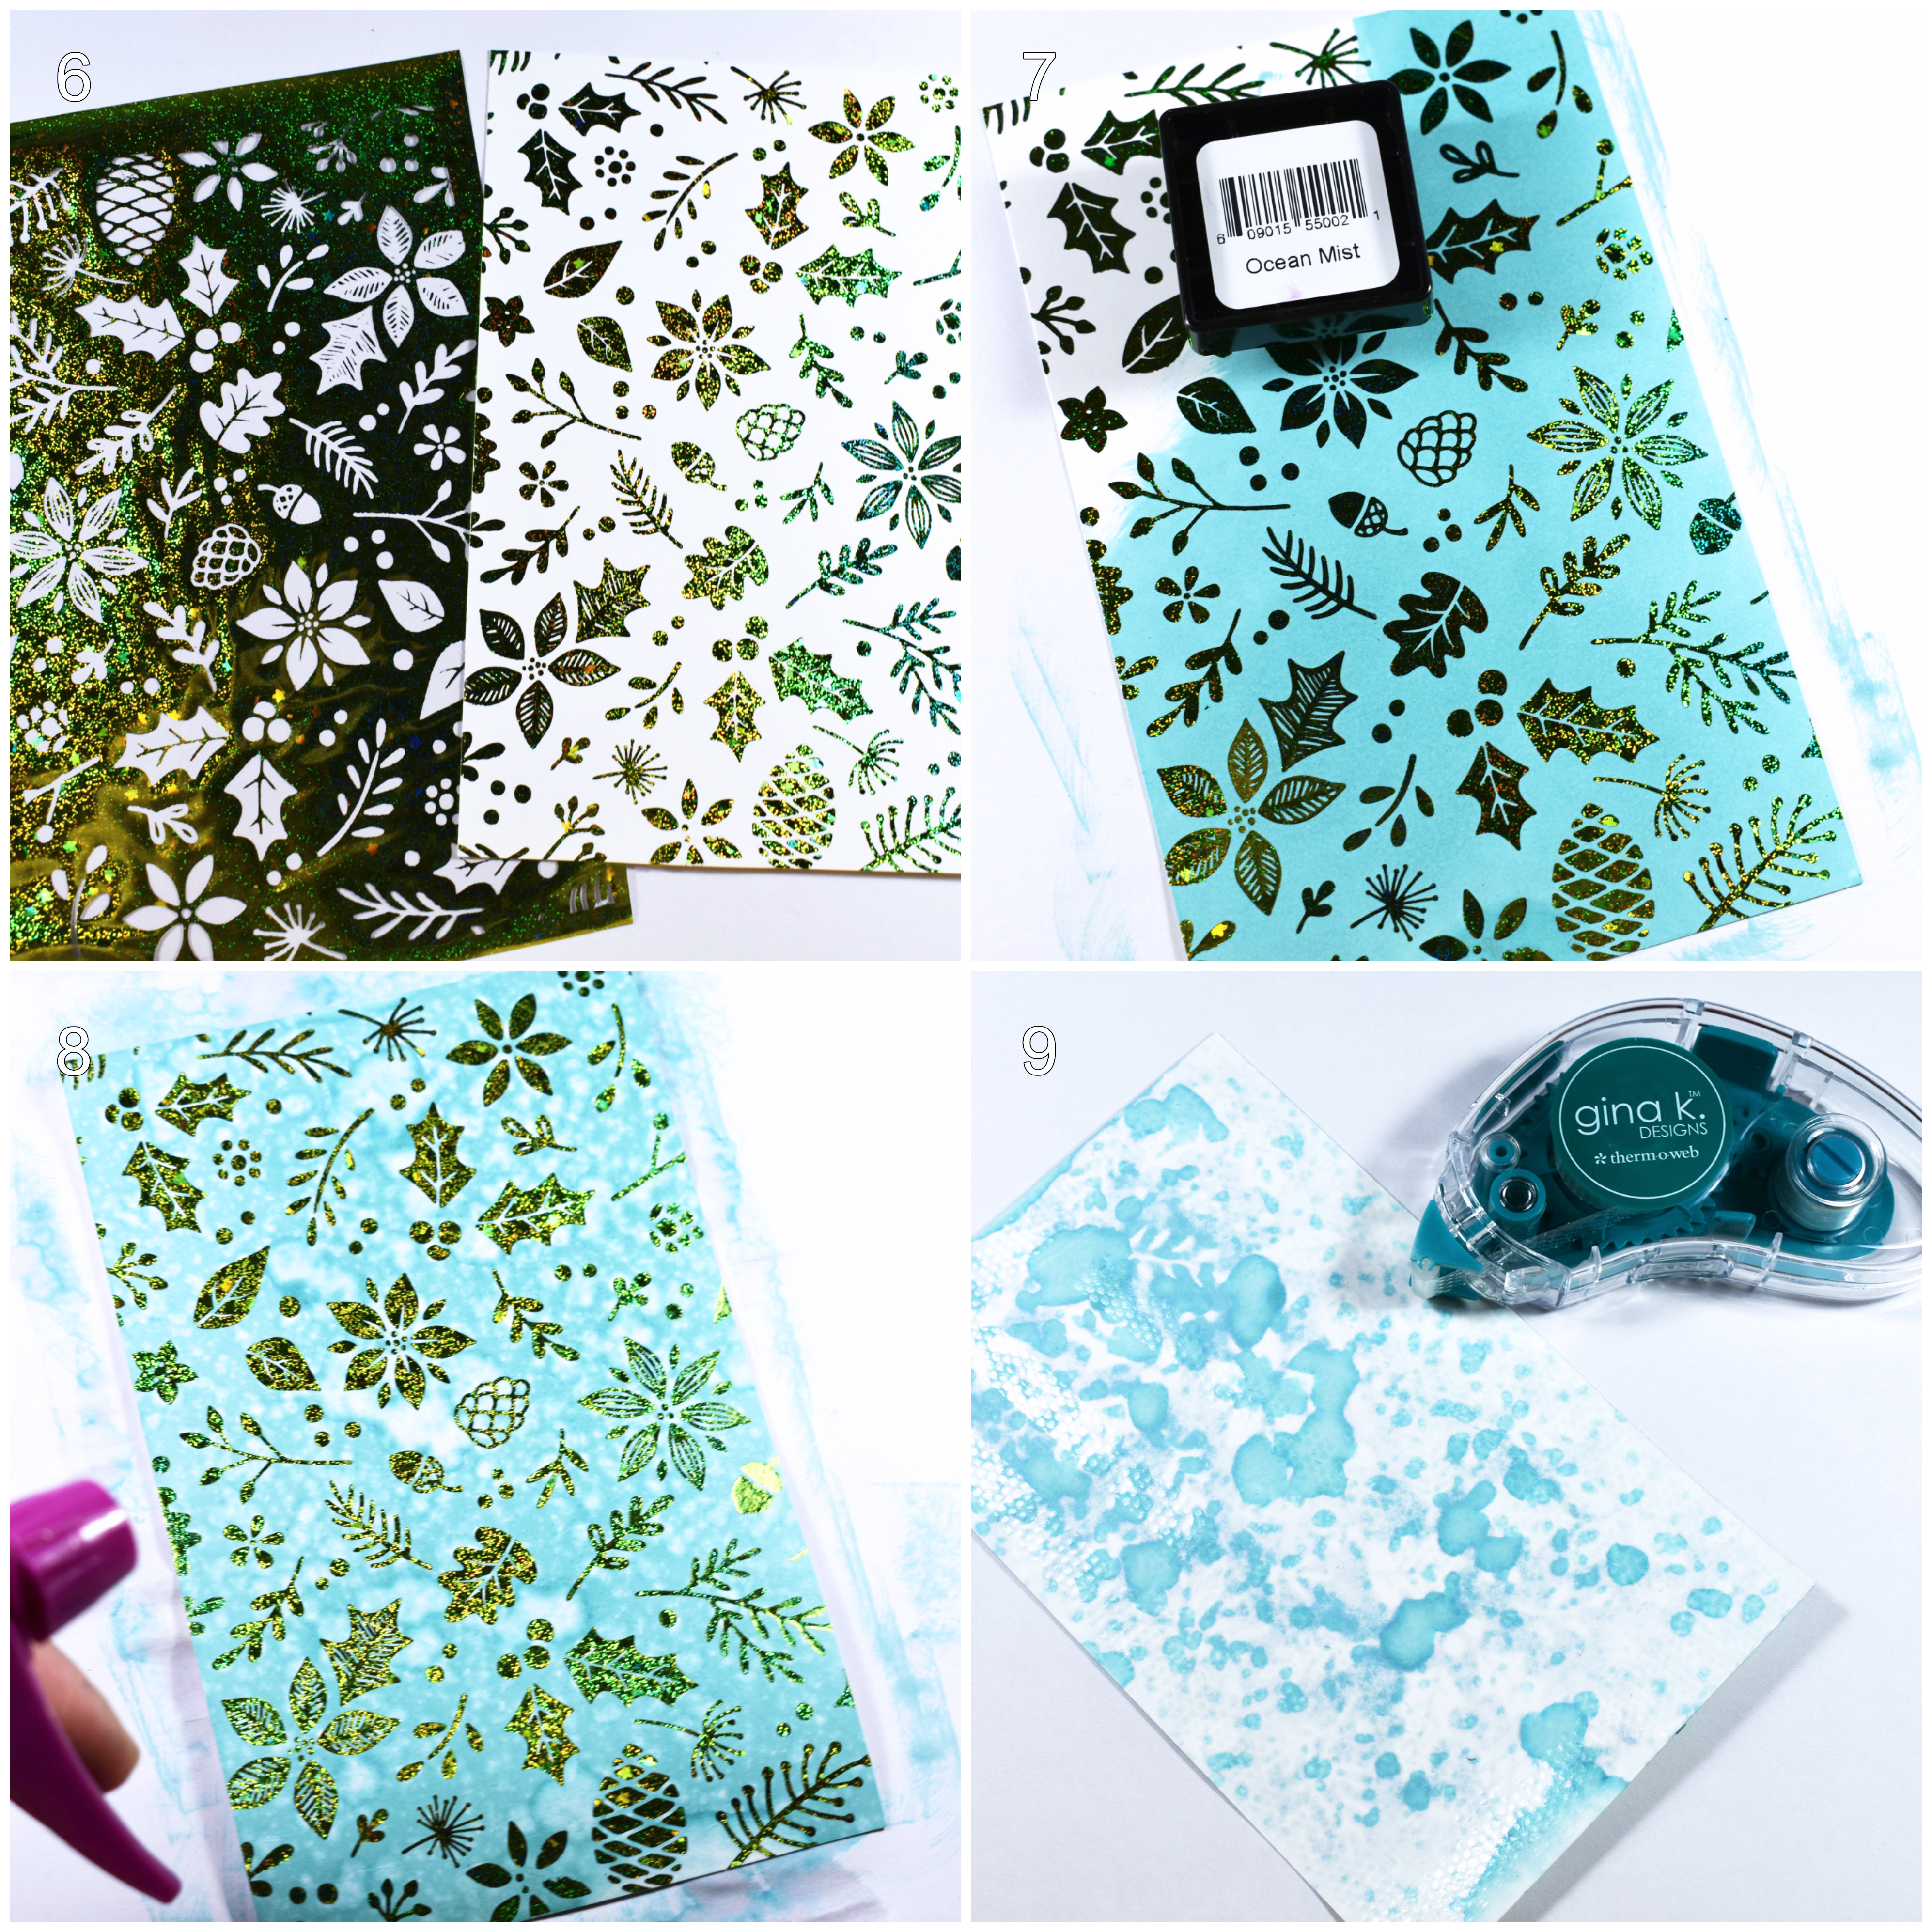
 Step 6. Foil a piece of Foil-Mates™ Backgrounds • Ornamental Holiday with Glittering Green Fancy Foil, using a laminator.
Step 7. Ink the background with Ocean Mist Premium Dye Ink.
Step 8. Add splatters to the foiled and inked background with a water mister.
Step 9. Attach the background to a white card base using Gina K. Designs Permanent Adhesive Dot Runner.
Step 6. Foil a piece of Foil-Mates™ Backgrounds • Ornamental Holiday with Glittering Green Fancy Foil, using a laminator.
Step 7. Ink the background with Ocean Mist Premium Dye Ink.
Step 8. Add splatters to the foiled and inked background with a water mister.
Step 9. Attach the background to a white card base using Gina K. Designs Permanent Adhesive Dot Runner.
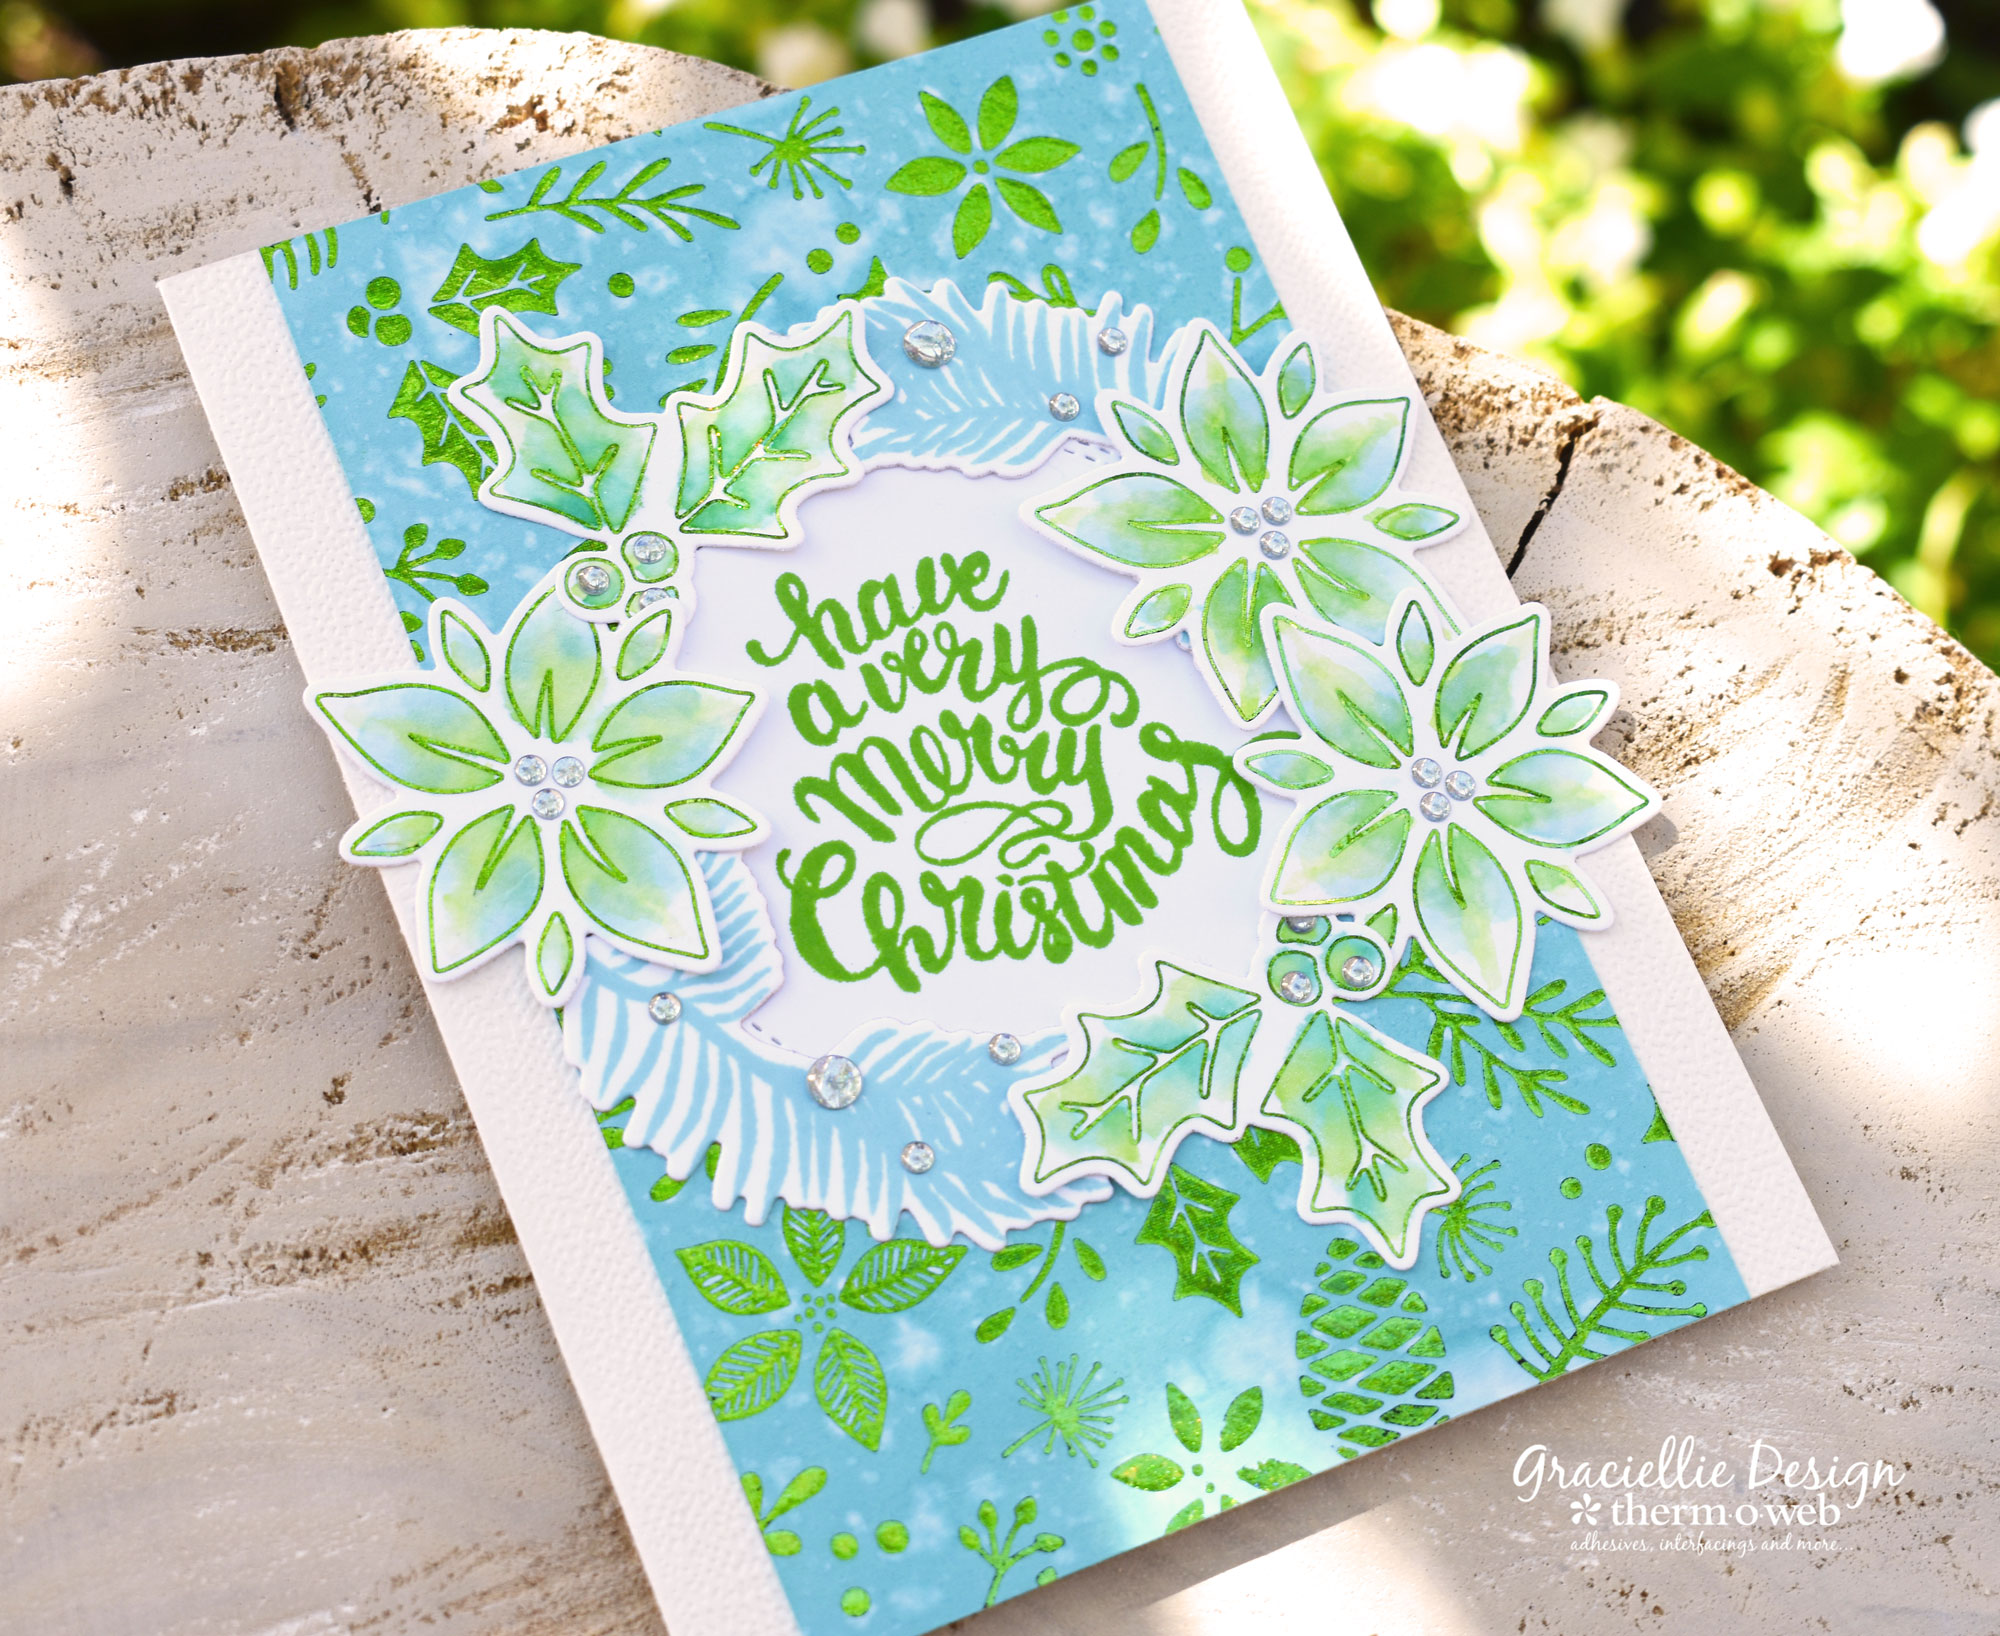
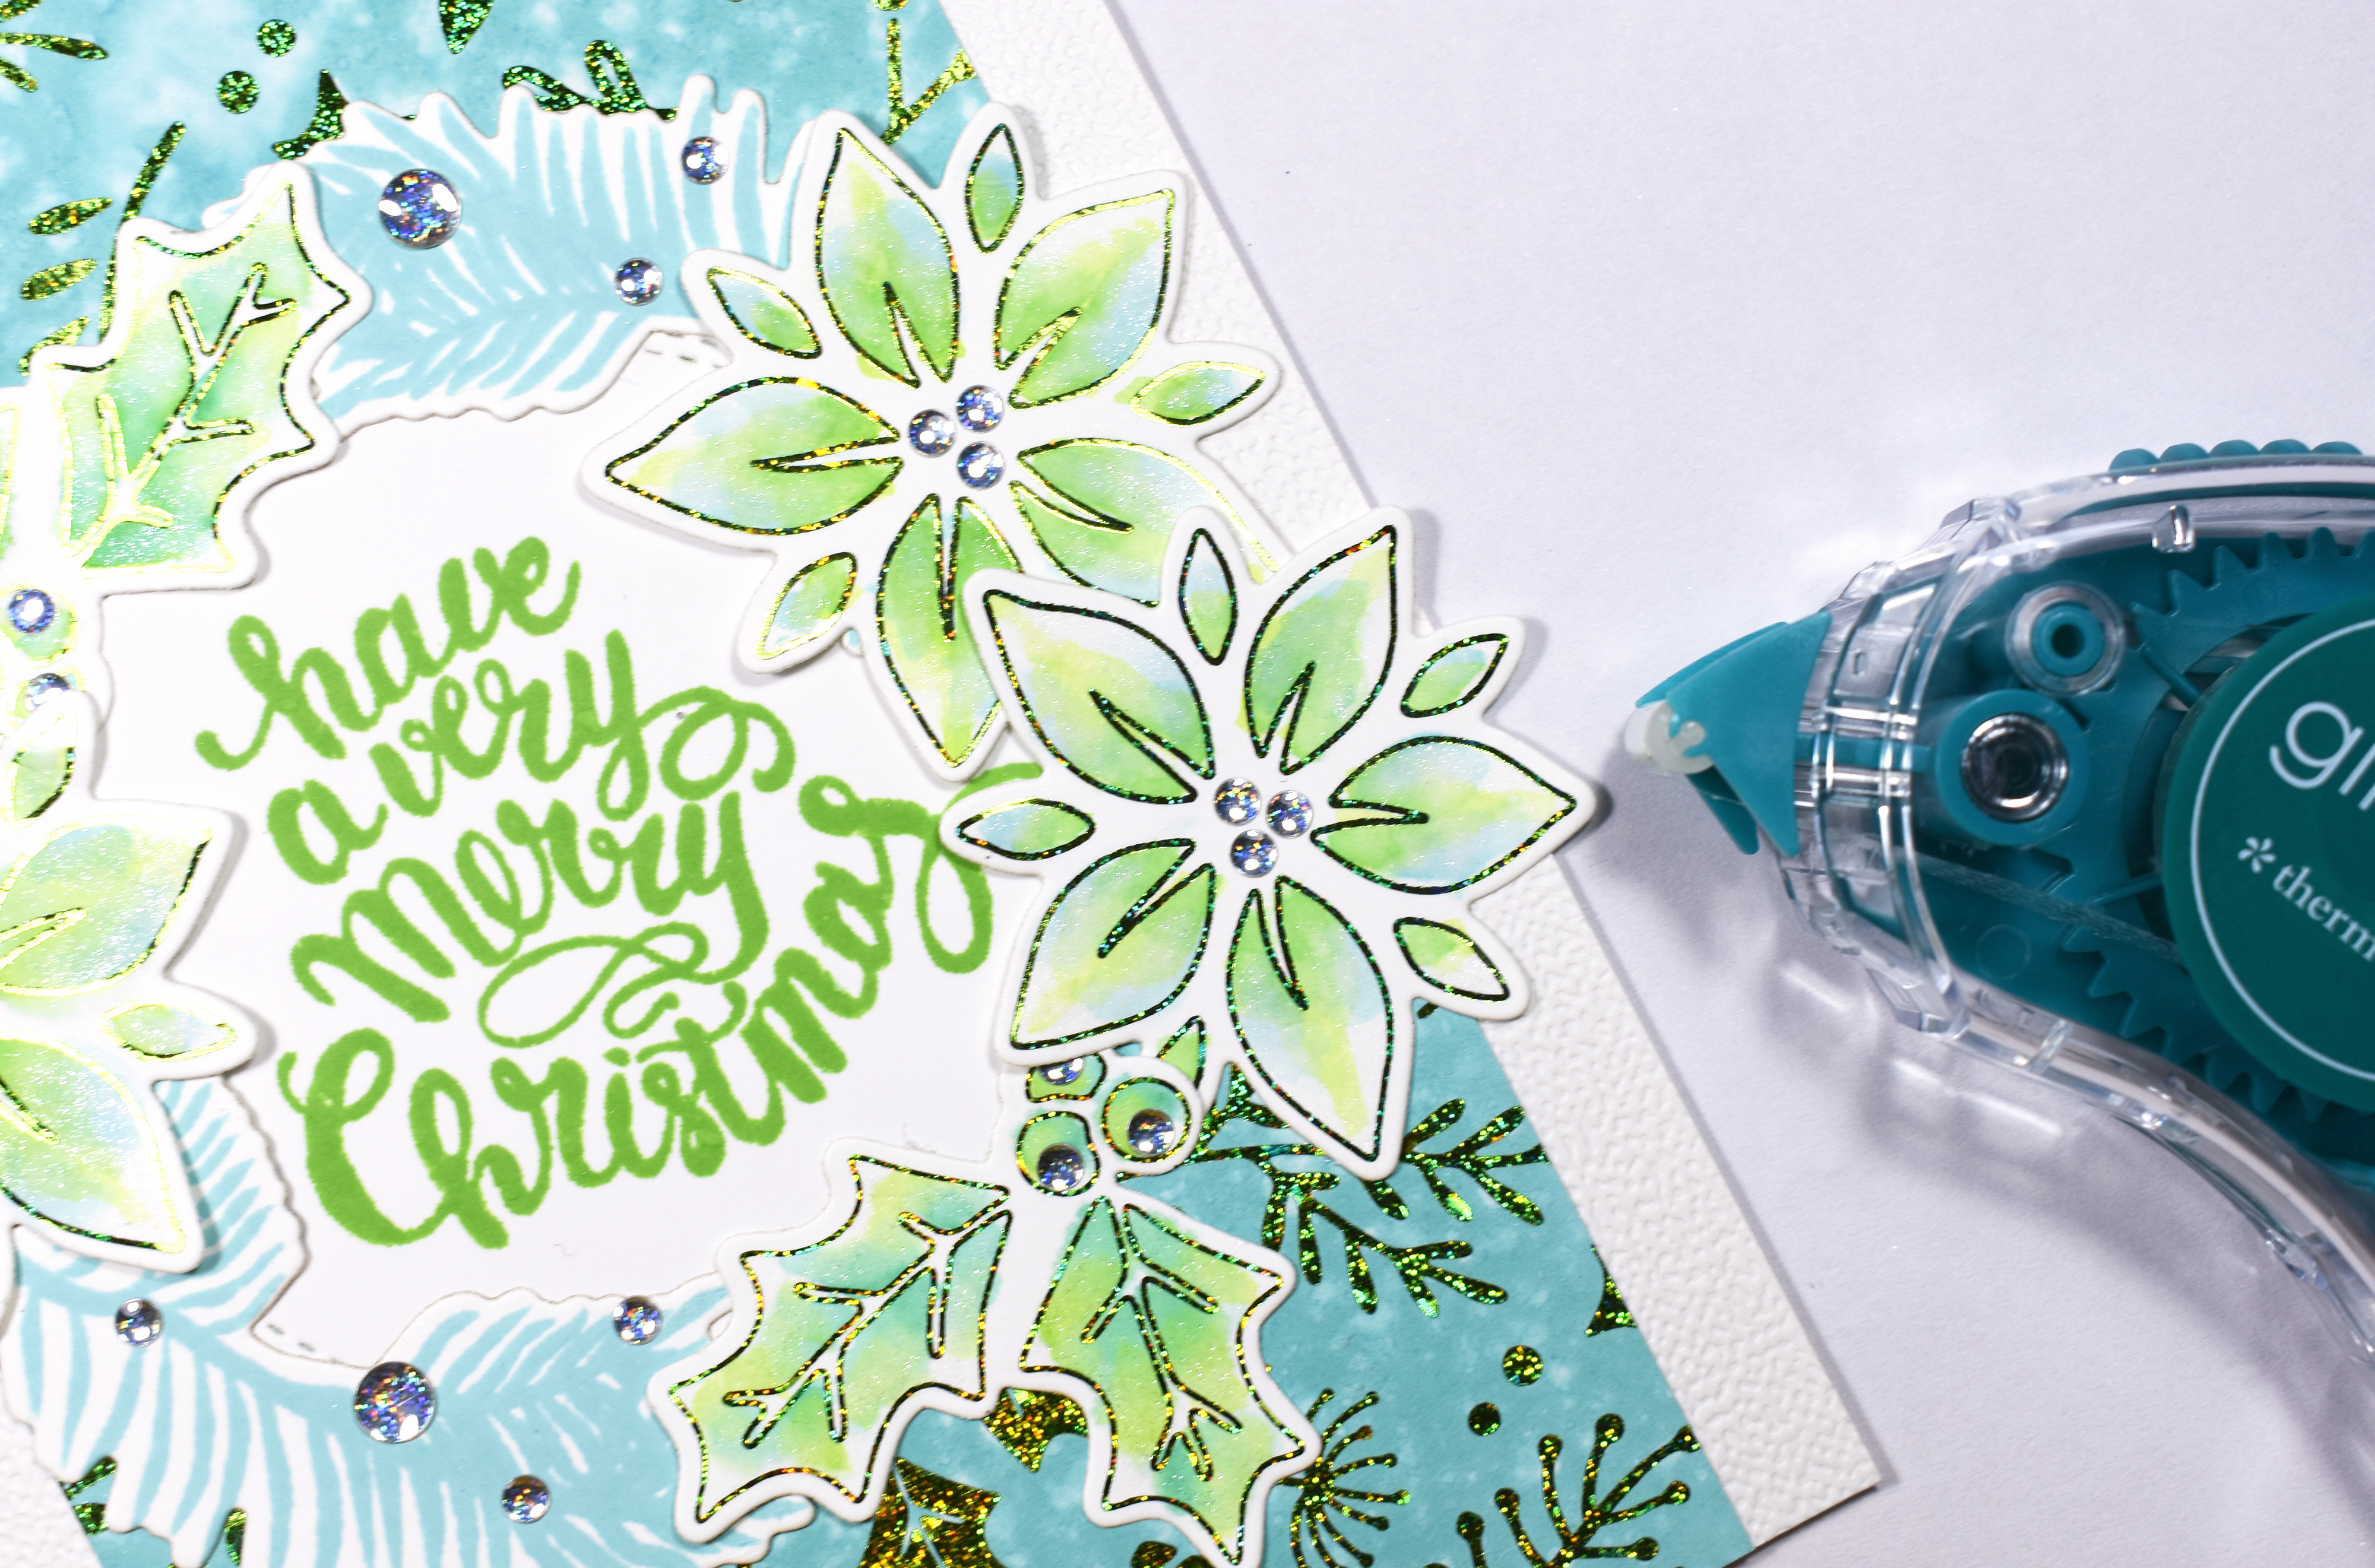
 Step 10. Attach the rest of the elements to the card front, using the same tape runner, and adding each element in the shape of a wreath around the double stitch circle sentiment.
 I hope you enjoyed this tutorial! Love how all the products in Gina K. Holiday Line match! It makes the job easier! That is all for now. Thanks for stopping by. Until next time!