No Products in the Cart
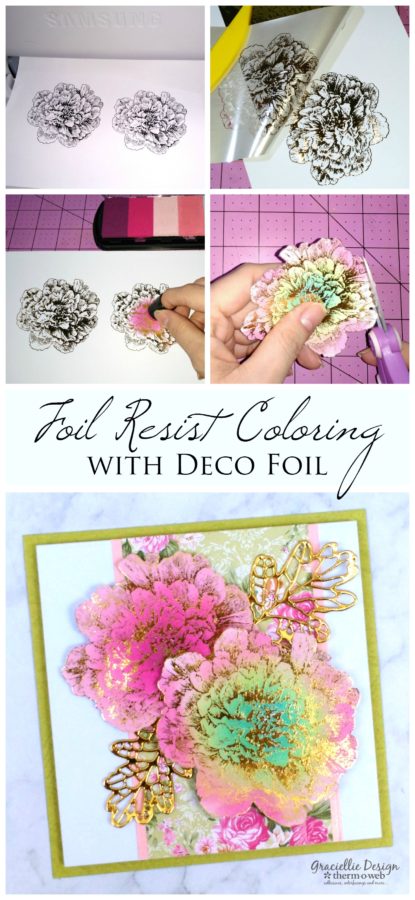
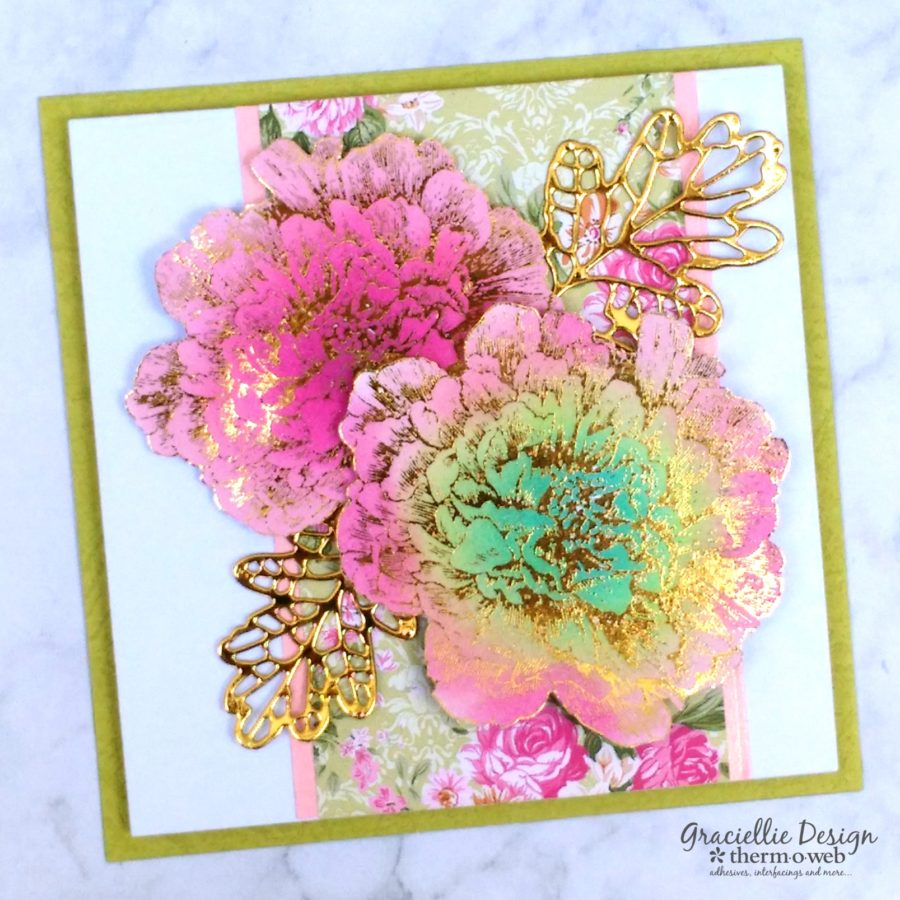 Hello! It's Gracie Chavez from Graciellie Design and today I have a super easy, fun DIY Foil Resist Coloring technique that will give you gorgeous results every time! Although the technique is quick, I'll guide you through the entire process to show you how I put together my card.
 Therm O Web Supplies:
Deco Foil™ Transfer Sheets • Gold
Deco Foil™ Toner Sheets
iCraft Mixed Media Adhesive 2.1 fl oz
3D White Foam Sticky Strips • 1/2 in
3D White Foam Squares • Combo Pack
Zots™ Singles • 3-D
12" Foil Laminator
Other Supplies:
Digital Flower Stamp
Pigment inks in different colors
Small sponge dauber
Leaf Dies
Floral Patterned Paper
White, Pink and Light Green cardstock
Laser Printer
Die Cutting Machine
Therm O Web Supplies:
Deco Foil™ Transfer Sheets • Gold
Deco Foil™ Toner Sheets
iCraft Mixed Media Adhesive 2.1 fl oz
3D White Foam Sticky Strips • 1/2 in
3D White Foam Squares • Combo Pack
Zots™ Singles • 3-D
12" Foil Laminator
Other Supplies:
Digital Flower Stamp
Pigment inks in different colors
Small sponge dauber
Leaf Dies
Floral Patterned Paper
White, Pink and Light Green cardstock
Laser Printer
Die Cutting Machine
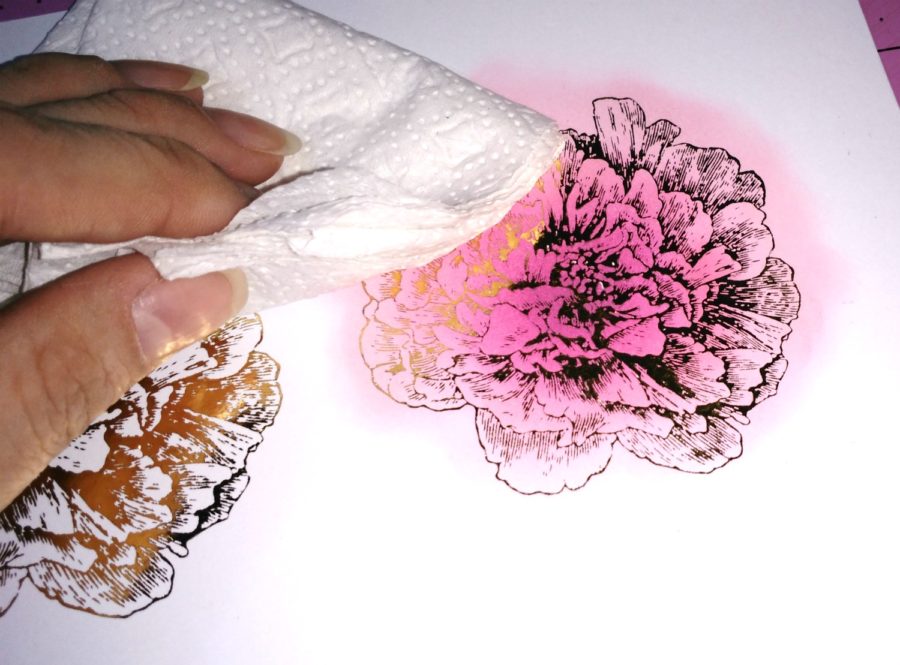
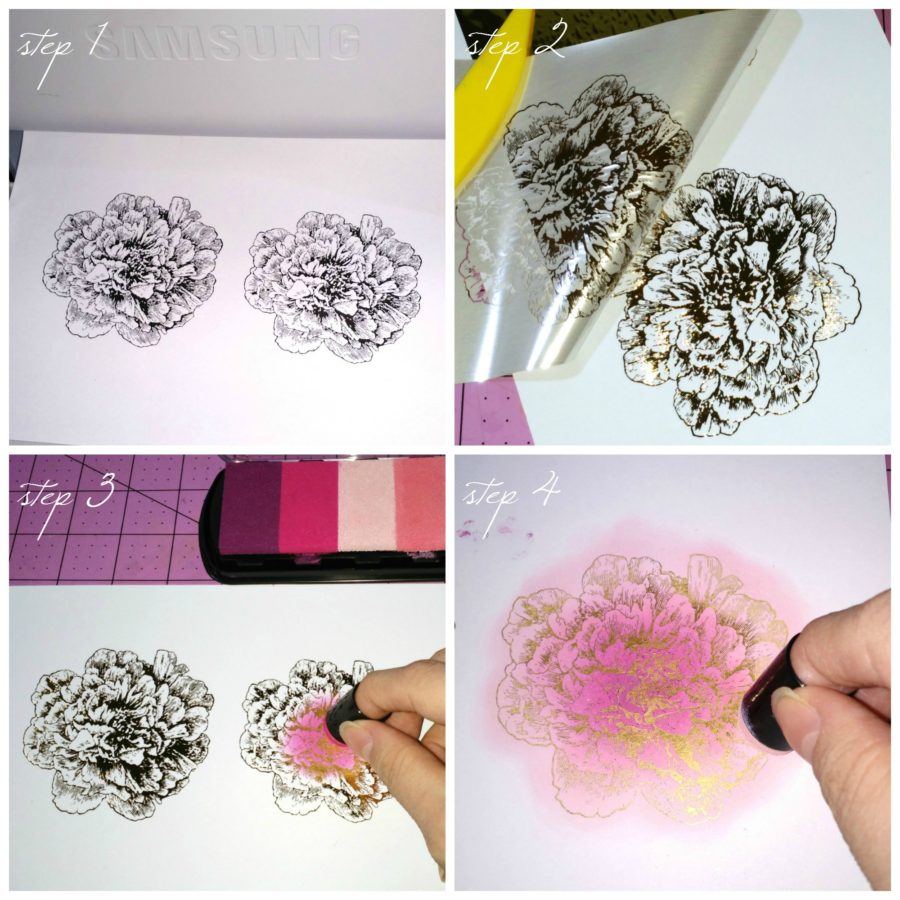 Step 4b. If you wish, clean the image with a paper towel to remove any ink excess.
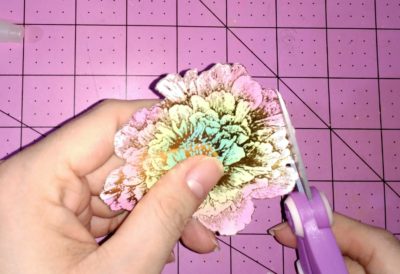
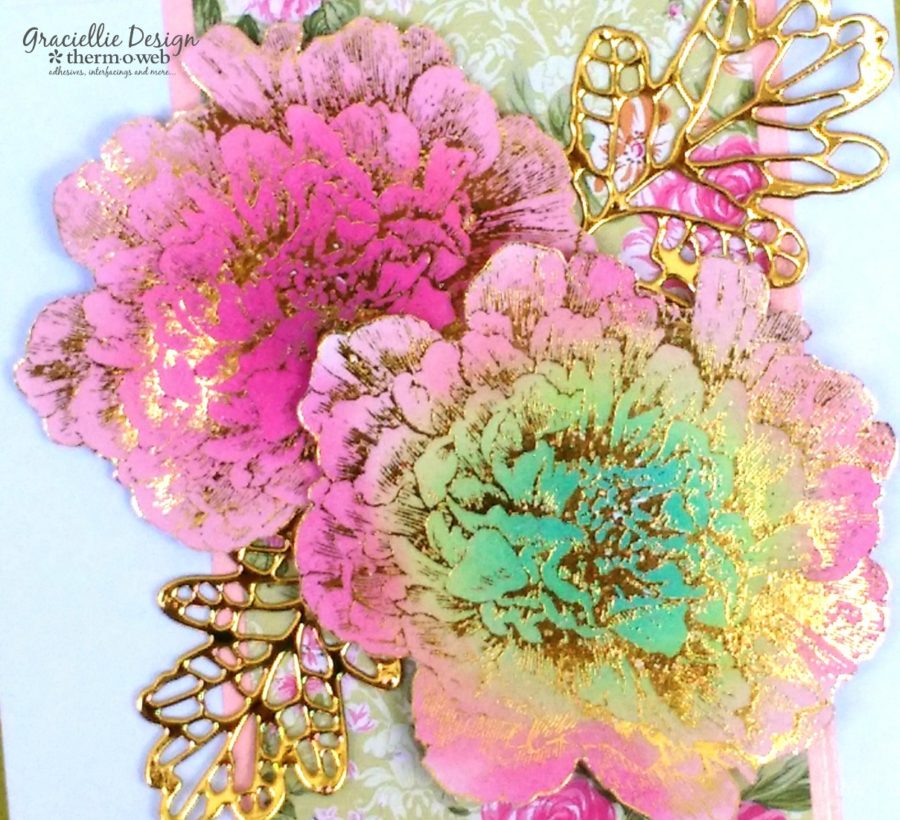
 Step 5. Fussy cut the flowers carefully.
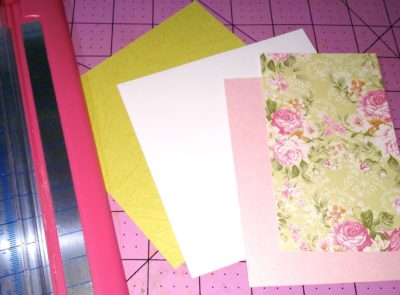
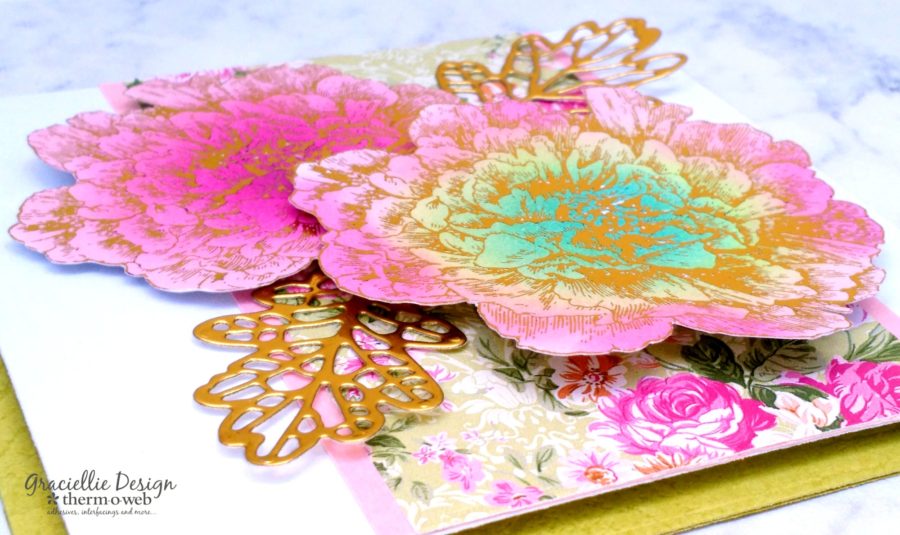
 Now that your foil resist coloring is done, it's time to put together your card! So prepare different layerings to create your card front... I used a paper trimmer to cut 2 vertical panels, one from patterned paper ( 4 3/4" x 2 3/4") and another from pink metallic cardstock (4 3/4" x 3 1/8"); a white mat (4 3/4" x 4 3/4"); and, a green card base (5 2/8" by 5 2/8").
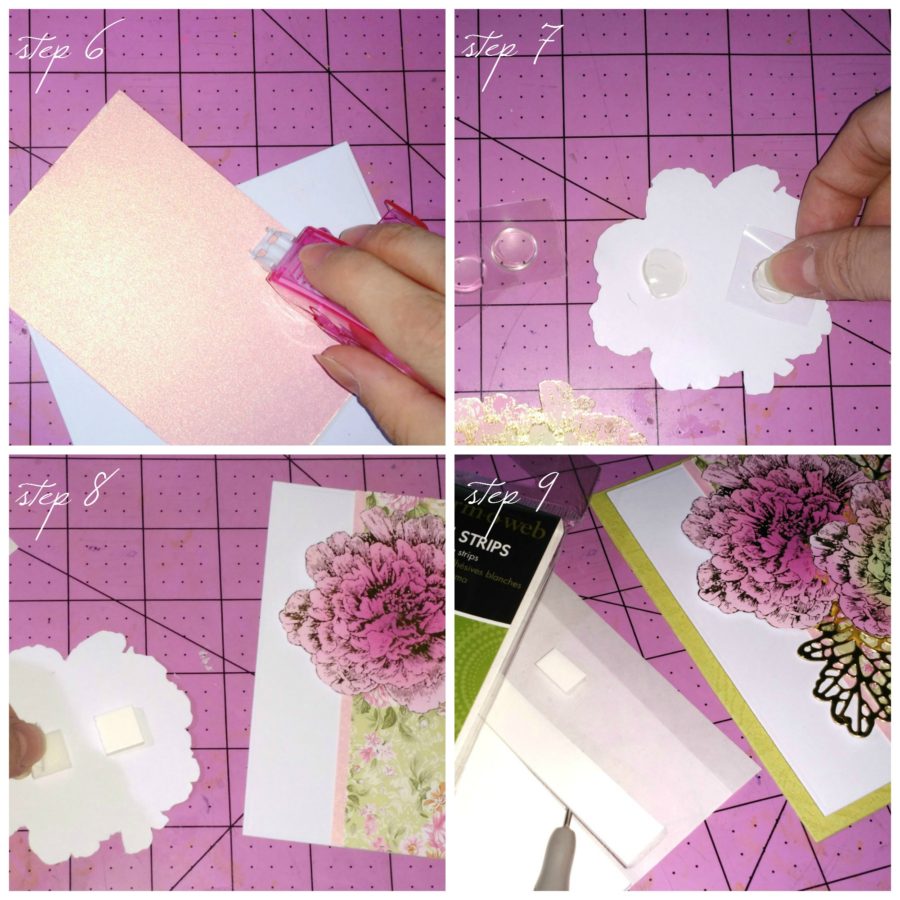
 Step 6. Use Memory Tape Runner XL™ to attach the panels to the white mat.
Step 7. Use Zots™ Singles • 3-D (an absolute favorite) to adhere and add dimension to the first flower.
Step 8. Next use 3D White Foam Squares to the second flower and attach it covering beside the first flower, covering it a little.
Step 9. Adhere the nearly finished mat to your green card base using 3D White Foam Sticky Strips • 1/2 in.
Note: The dimension that these adhesives gave the card is incredible!
Step 6. Use Memory Tape Runner XL™ to attach the panels to the white mat.
Step 7. Use Zots™ Singles • 3-D (an absolute favorite) to adhere and add dimension to the first flower.
Step 8. Next use 3D White Foam Squares to the second flower and attach it covering beside the first flower, covering it a little.
Step 9. Adhere the nearly finished mat to your green card base using 3D White Foam Sticky Strips • 1/2 in.
Note: The dimension that these adhesives gave the card is incredible!
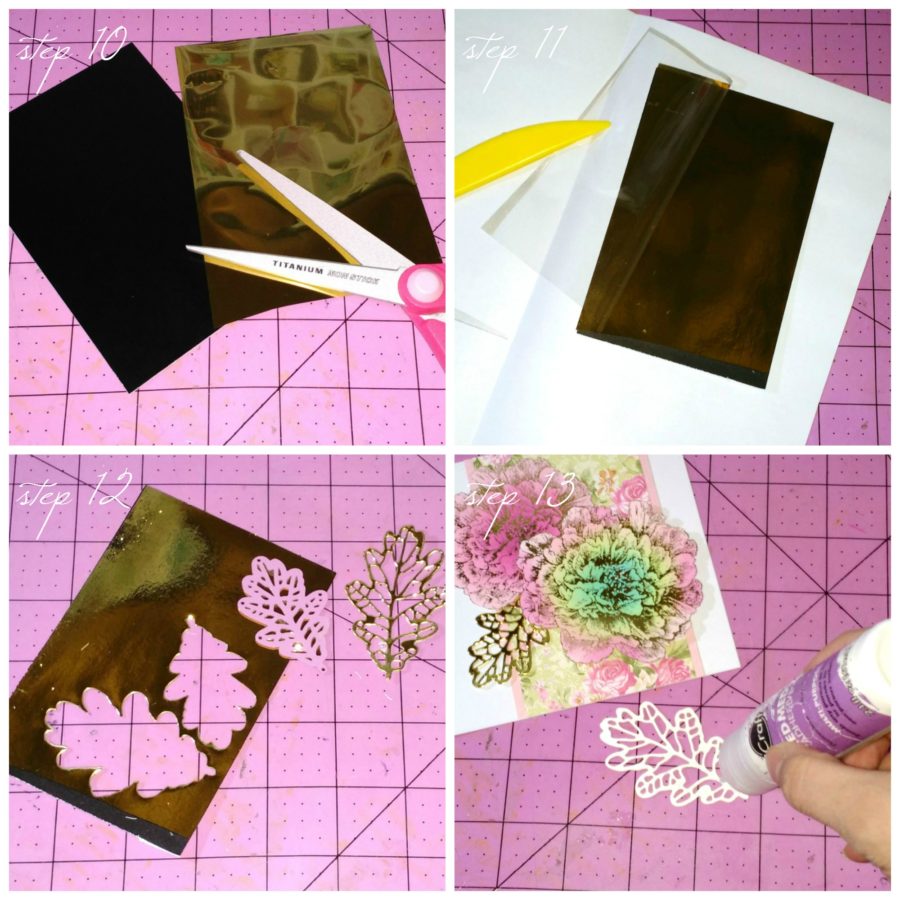
 To finish the card you can create your own foiled leaves using Deco Foil™ Toner Sheets and a detailed leaf die cut of your choice...
Step 10. Cut a small piece of Deco Foil™ Toner Sheet and Deco Foil™ Transfer Sheet • Gold.
Step 11. Cover the piece of toner sheet with the foil, cover with parchment or copy paper and run through the laminator. Remove the foil's backing.
Step 12. Place leaf die cuts on the foiled paper and run through a die cutting machine.
Step 13. Finally use iCraft Mixed Media Adhesive 2.1 fl oz to adhere the leaf die cuts underneath the flowers.
To finish the card you can create your own foiled leaves using Deco Foil™ Toner Sheets and a detailed leaf die cut of your choice...
Step 10. Cut a small piece of Deco Foil™ Toner Sheet and Deco Foil™ Transfer Sheet • Gold.
Step 11. Cover the piece of toner sheet with the foil, cover with parchment or copy paper and run through the laminator. Remove the foil's backing.
Step 12. Place leaf die cuts on the foiled paper and run through a die cutting machine.
Step 13. Finally use iCraft Mixed Media Adhesive 2.1 fl oz to adhere the leaf die cuts underneath the flowers.
 And that's it! Coloring has never been easier and as I mentioned at the beginning of this post, the results are amazing! You can try this technique out with other types of inks too and get the same great effect.
 I will come back soon with more Foil Resist ideas, so make sure to subscribe and stay tuned! Thanks so much for stopping by. Until next time.