No Products in the Cart
 Therm O Web Supplies:
Rebekah Meier Designs Mixed Media Medium Jar 4 fl oz
Rebekah Meier Designs Transfer Foil 6" x 6" (12 sheets per pack) • Patina
Gina K. Designs Fancy Foils™ 6" x 8" • Silver Sequins
Deco Foil™ Transfer Sheets • Pewter
Gina K. Designs Premium Cardstock 8.5" x 11" • White
Gina K. Designs Foil-Mates™ Sentiments • True Friend
Gina K. Designs (3) Nested Circle Dies • Double Stitch Design • Small Set
Zots™ Singles • 3-D
iCraft Adhesive™ Tape • 1/4 in
Foil Laminator • 12 inch
Other Supplies:
Mini Cell Theory stencil
Vellum
Silver glitter
Palette knife
Die cutting machine
Scissors
Paper Trimmer
Foil and Glitter Stenciled Cards with Mixed Media Medium[line]
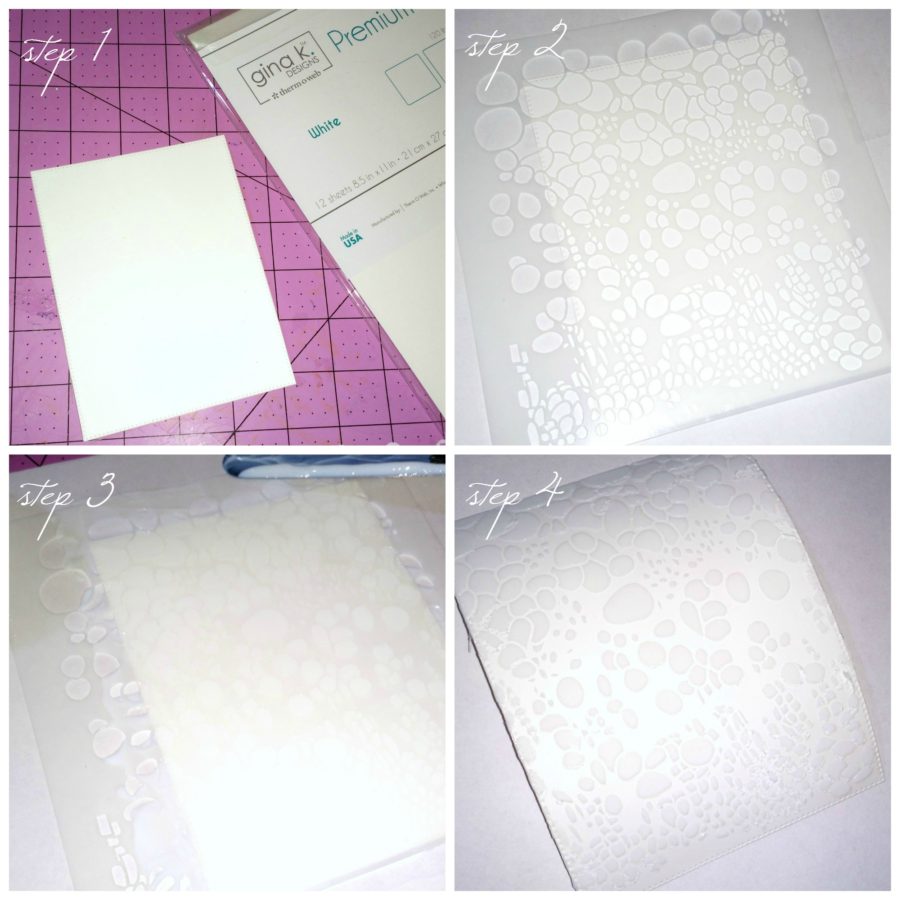
Step 1. Cut a card front from Gina K. Designs Premium Cardstock 8.5" x 11" • White
Step 2. Place a stencil on top of the white mat.
Step 3. Use a palette knife to apply Rebekah Meier Designs Mixed Media Medium through the stencil
Step 4. Remove the stencil to reveil the pattern created with the medium.
Therm O Web Supplies:
Rebekah Meier Designs Mixed Media Medium Jar 4 fl oz
Rebekah Meier Designs Transfer Foil 6" x 6" (12 sheets per pack) • Patina
Gina K. Designs Fancy Foils™ 6" x 8" • Silver Sequins
Deco Foil™ Transfer Sheets • Pewter
Gina K. Designs Premium Cardstock 8.5" x 11" • White
Gina K. Designs Foil-Mates™ Sentiments • True Friend
Gina K. Designs (3) Nested Circle Dies • Double Stitch Design • Small Set
Zots™ Singles • 3-D
iCraft Adhesive™ Tape • 1/4 in
Foil Laminator • 12 inch
Other Supplies:
Mini Cell Theory stencil
Vellum
Silver glitter
Palette knife
Die cutting machine
Scissors
Paper Trimmer
Foil and Glitter Stenciled Cards with Mixed Media Medium[line]
Step 1. Cut a card front from Gina K. Designs Premium Cardstock 8.5" x 11" • White
Step 2. Place a stencil on top of the white mat.
Step 3. Use a palette knife to apply Rebekah Meier Designs Mixed Media Medium through the stencil
Step 4. Remove the stencil to reveil the pattern created with the medium.
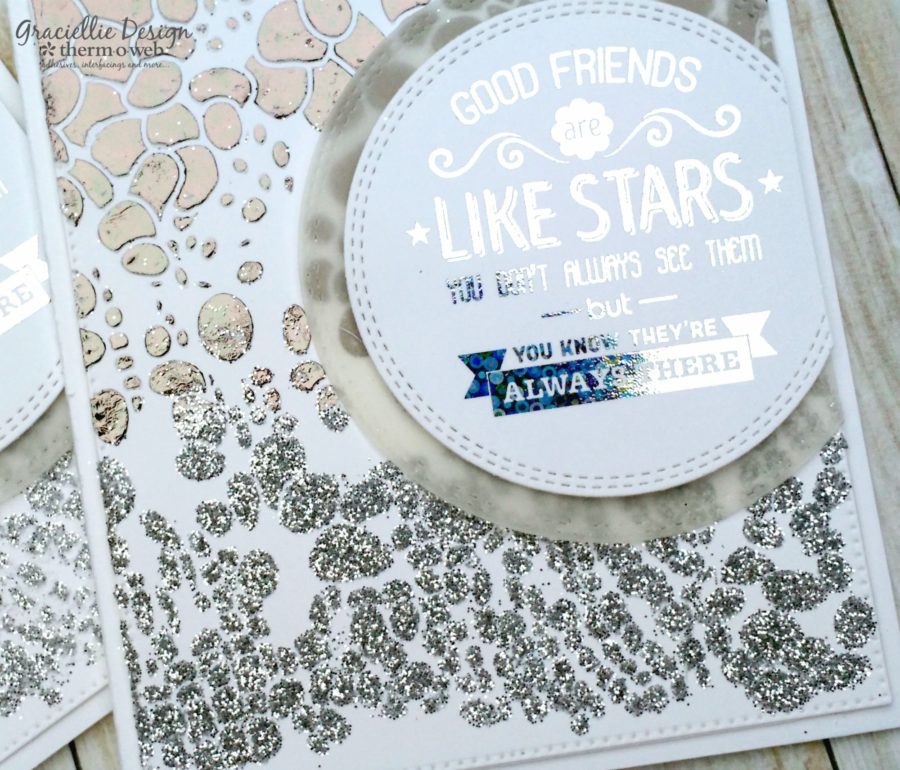
 Step 5. Pour silver glitter to the bottom of the stenciled mat.
Step 6. Shake excess carefully trying not to get glitter stuck to the rest of the piece.
Step 7. Let the rest of the medium dry -until it is clear and tacky- and then place a sheet of Rebekah Meier Designs Transfer Foil • Patina on top. Burnish with your fingers to transfer the foil completely.
Step 8. Peel off the sheet to reveal the foiled pattern.
Step 5. Pour silver glitter to the bottom of the stenciled mat.
Step 6. Shake excess carefully trying not to get glitter stuck to the rest of the piece.
Step 7. Let the rest of the medium dry -until it is clear and tacky- and then place a sheet of Rebekah Meier Designs Transfer Foil • Patina on top. Burnish with your fingers to transfer the foil completely.
Step 8. Peel off the sheet to reveal the foiled pattern.
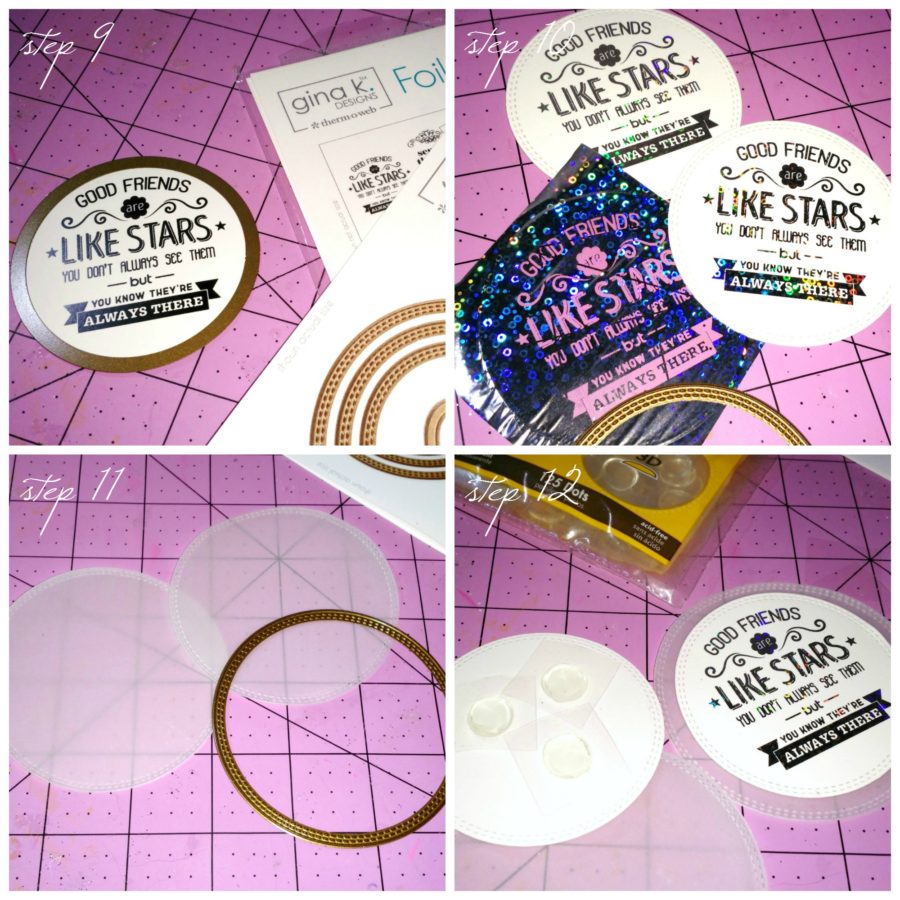
 Step 9. Use a die cutting machine to cut a sentiment from Gina K. Designs Foil-Mates™ Sentiments • True Friend using the medium size Gina K. Designs (3) Nested Circle Dies • Double Stitch Design • Small Set
Step 10. Cover the sentiment with a piece of Gina K. Designs Fancy Foils™ • Silver Sequins and run it through a laminator.
Step 11. Cut a large size Gina K. Designs (3) Nested Circle Dies • Double Stitch Design • Small Set from vellum.
Step 12. Layer the sentiment on top of the vellum large circle using Zots™ Singles • 3-D
Step 9. Use a die cutting machine to cut a sentiment from Gina K. Designs Foil-Mates™ Sentiments • True Friend using the medium size Gina K. Designs (3) Nested Circle Dies • Double Stitch Design • Small Set
Step 10. Cover the sentiment with a piece of Gina K. Designs Fancy Foils™ • Silver Sequins and run it through a laminator.
Step 11. Cut a large size Gina K. Designs (3) Nested Circle Dies • Double Stitch Design • Small Set from vellum.
Step 12. Layer the sentiment on top of the vellum large circle using Zots™ Singles • 3-D
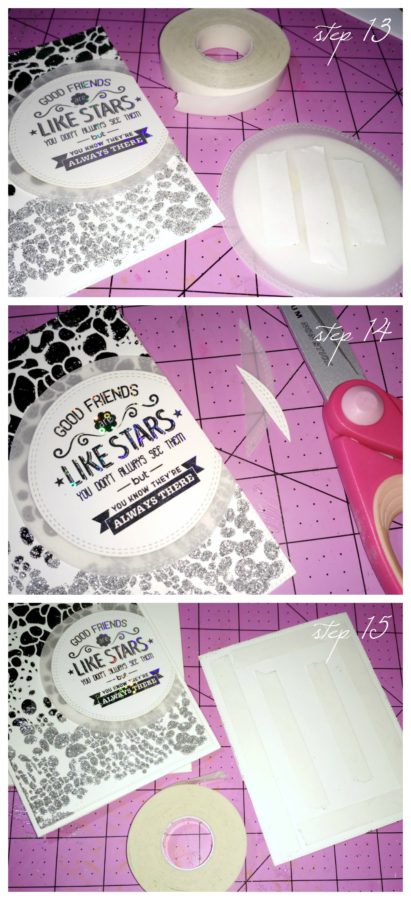
 Step 13. Use iCraft Adhesive™ Tape • 1/4 in to attach the layered sentiment to one side of the stenciled mat.
Step 14. Cut the excess from the circles.
Step 15. Use again iCraft Adhesive™ Tape • 1/4 in and adhere the stenciled mat to an A2 card base cut from Gina K. Designs Premium Cardstock 8.5" x 11" • White
Step 13. Use iCraft Adhesive™ Tape • 1/4 in to attach the layered sentiment to one side of the stenciled mat.
Step 14. Cut the excess from the circles.
Step 15. Use again iCraft Adhesive™ Tape • 1/4 in and adhere the stenciled mat to an A2 card base cut from Gina K. Designs Premium Cardstock 8.5" x 11" • White
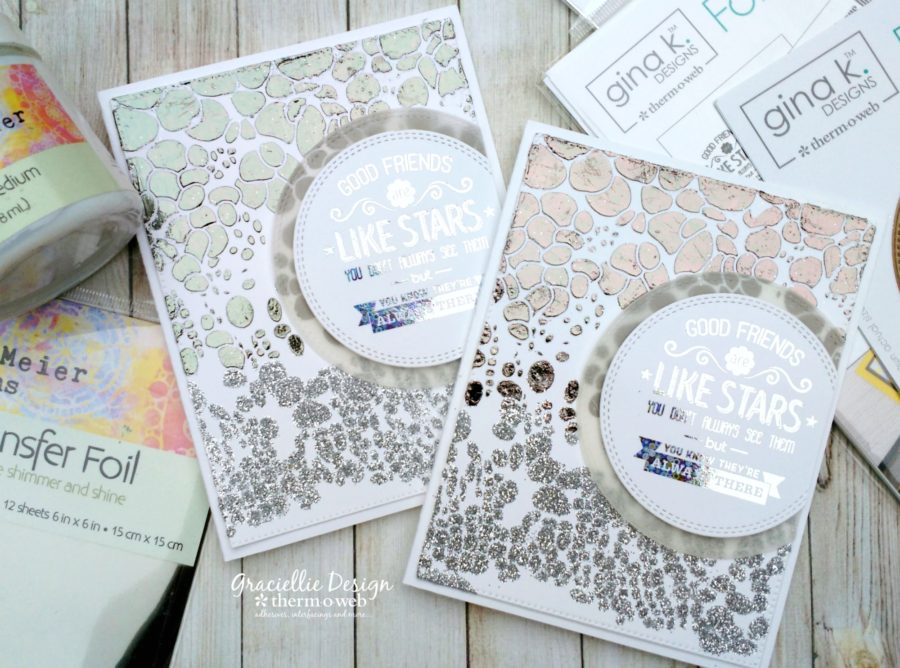
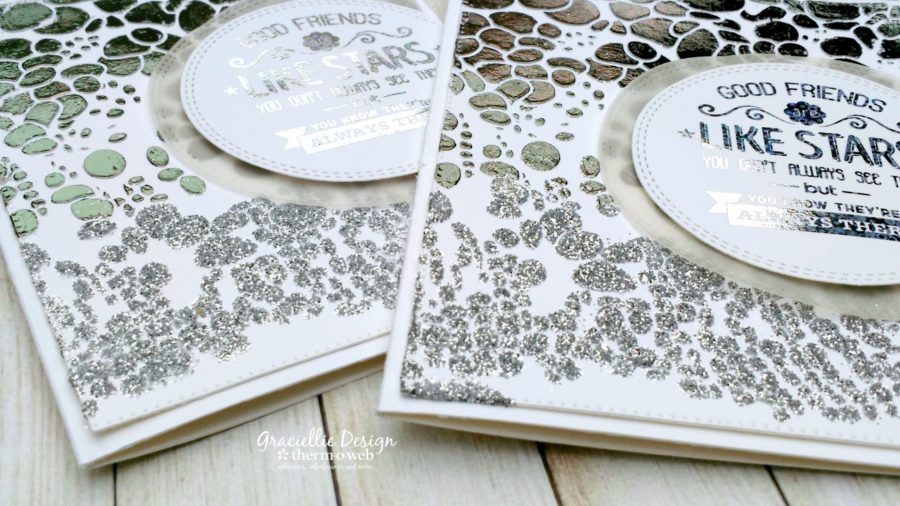 And you're done! These cards not only have texture and shine but they also sparkle! I love the tone on tone look, it gives the card an ombre effect with the two hues of silver. I used Pewter Transfer foil for my first card and the new color Patina for the second (which is a warmer tone). You can try this technique mixing different colors of foil and glitter and even with a black background for more contrast! Can't wait to see what you come up with!