No Products in the Cart
 Hey, everyone, Carla here from Creatin' in the Sticks. It's "Guy Talk" week on the Thermoweb blog and I'm excited to share a new quilt pattern and tutorial for you to make a super fun quilt. My guy loves to watch airplanes and this quilt is perfect for him.
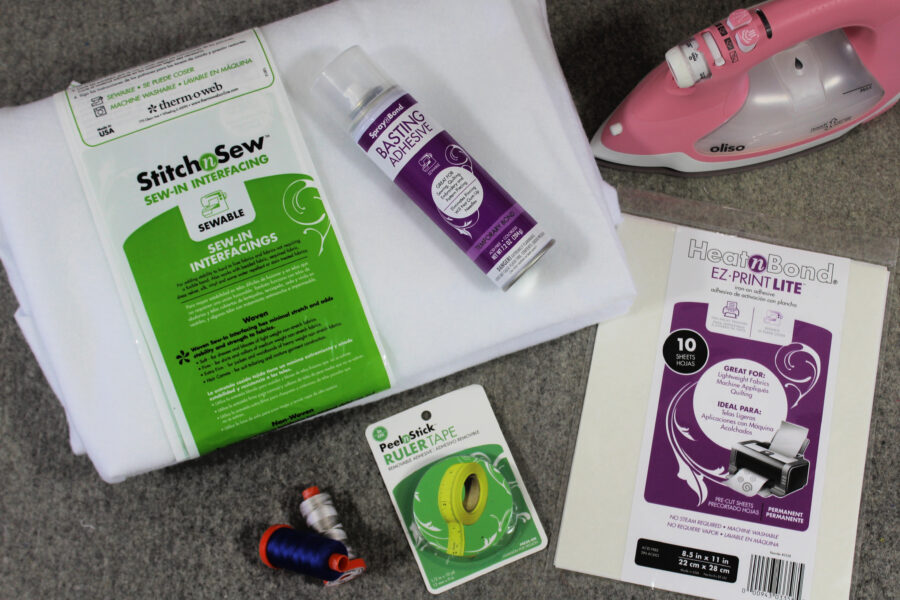
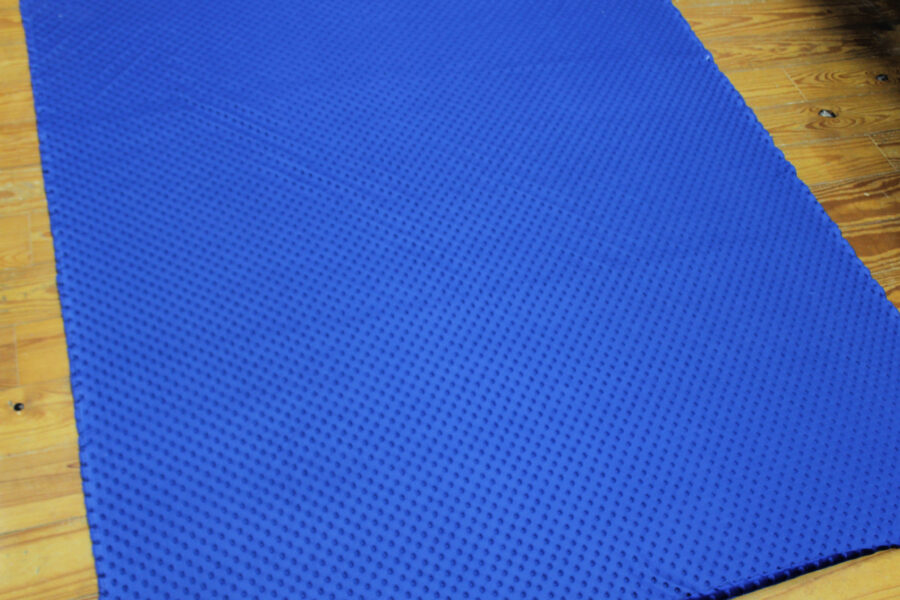
One of my favorite ways to back quilts is to use soft, cuddle fabrics to make the quilts super cozy. Let me show you how to use the new 60" StitchnSew High Loft Sew-In Fleece between this quilt top and Minky backing to make one cozy quilt for the guy in your life. The quilting is done with straight lines on a domestic sewing machine. By basting with SpraynBond Basting Spray everything stays in place with no stretching. Let me show you how.
Hey, everyone, Carla here from Creatin' in the Sticks. It's "Guy Talk" week on the Thermoweb blog and I'm excited to share a new quilt pattern and tutorial for you to make a super fun quilt. My guy loves to watch airplanes and this quilt is perfect for him.
One of my favorite ways to back quilts is to use soft, cuddle fabrics to make the quilts super cozy. Let me show you how to use the new 60" StitchnSew High Loft Sew-In Fleece between this quilt top and Minky backing to make one cozy quilt for the guy in your life. The quilting is done with straight lines on a domestic sewing machine. By basting with SpraynBond Basting Spray everything stays in place with no stretching. Let me show you how.
PeelnStick Removable Ruler Tape
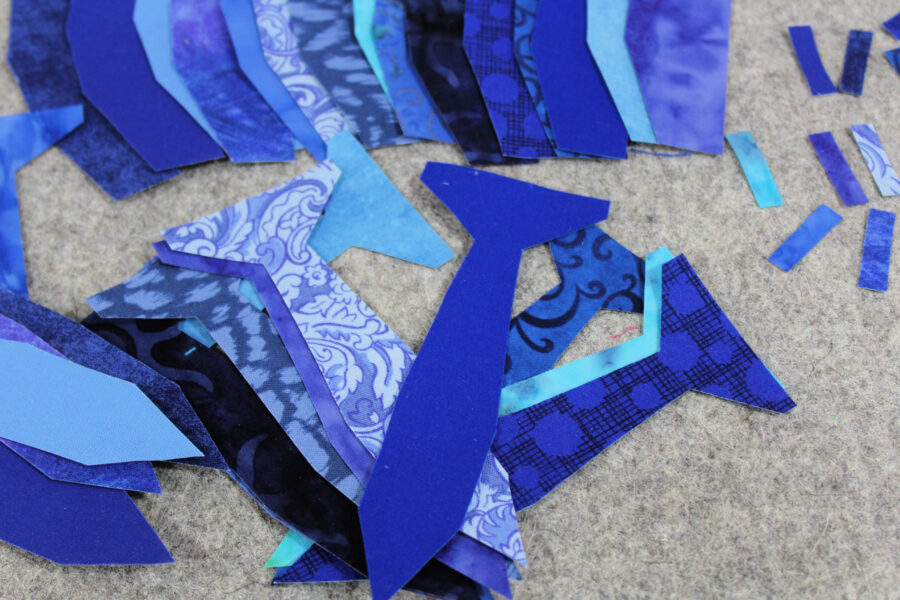
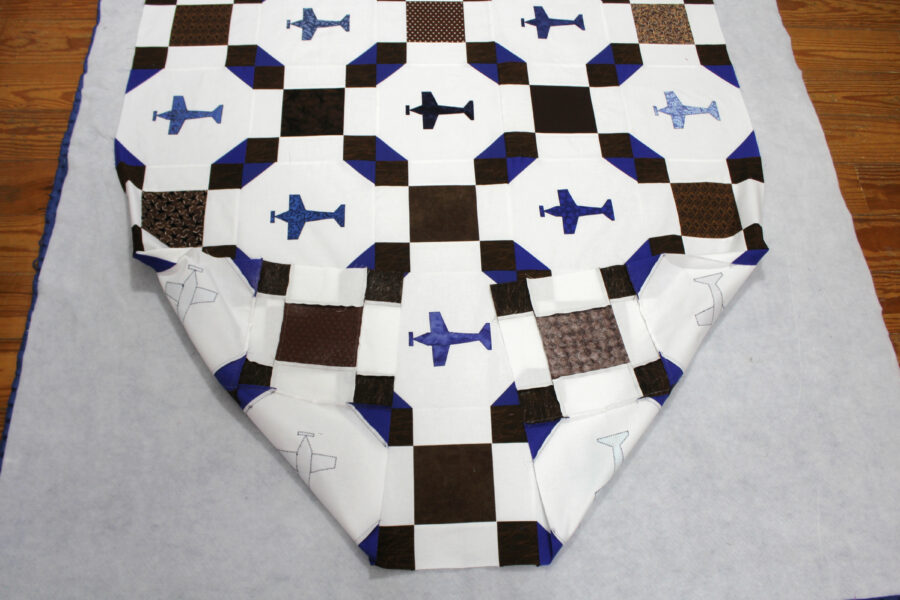
 Follow the pattern to make the blocks.
 If you are using HeatnBond EZ Print Lite sheets, print the applique pattern pieces (the last sheet of the pattern) with your inkjet printer. There are 3 airplane templates on the page, so print the templates on 5 sheets for 15 airplanes.
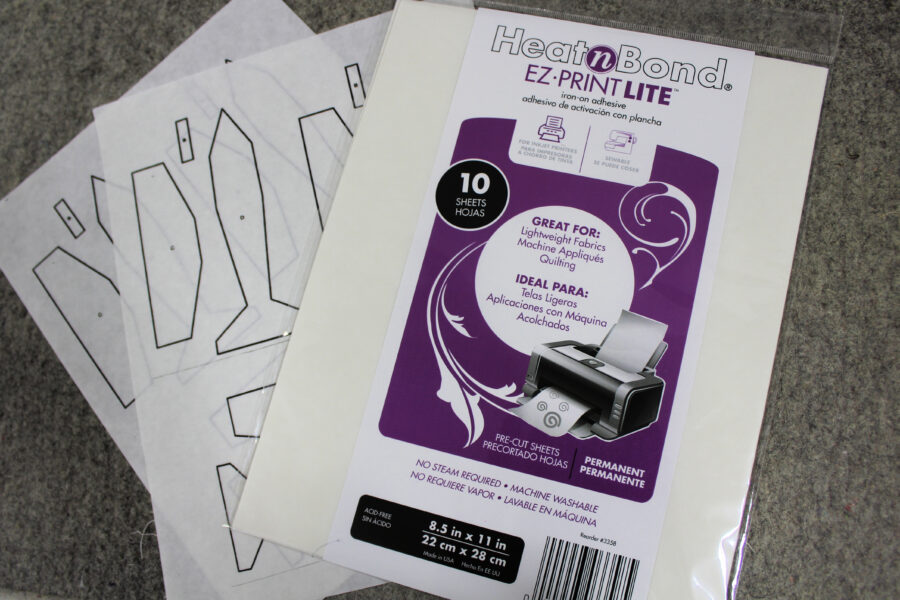 Follow the package instructions for printing and bonding to the wrong side of the fabrics. NO TRACING! How awesome is that?
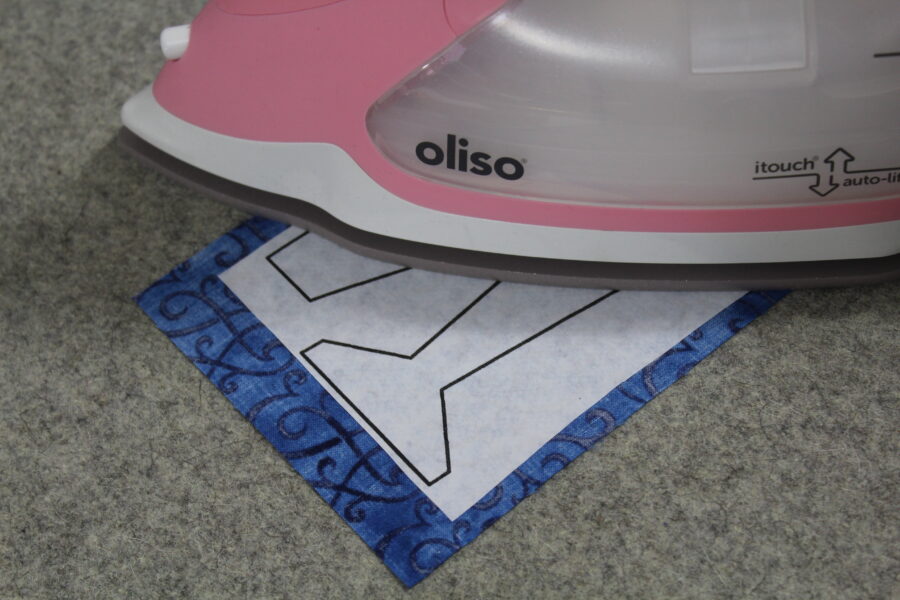 With HeatnBond Lite, the pattern pieces will need to be traced on the paper side of the adhesive. Follow the manufacturer’s instructions for tracing the patterns and bonding to the wrong side of the blue fabrics. The patterns have been reversed for you.
Finger press the 10 ½” white background square in half twice to find the center of the fabric. Unfold and lay the square on an iron safe surface, right side up. Cut out all applique pieces on the solid black lines.
With HeatnBond Lite, the pattern pieces will need to be traced on the paper side of the adhesive. Follow the manufacturer’s instructions for tracing the patterns and bonding to the wrong side of the blue fabrics. The patterns have been reversed for you.
Finger press the 10 ½” white background square in half twice to find the center of the fabric. Unfold and lay the square on an iron safe surface, right side up. Cut out all applique pieces on the solid black lines.
 Peel off the backing paper, and place the applique with the adhesive side down as shown below on the background fabric. Place the wings first (B), then the body (A), and finally the prop (C).
Bond the Applique Pieces to the Background. Following the package instructions, work in sections to press the entire applique to the background until the entire applique is fused.
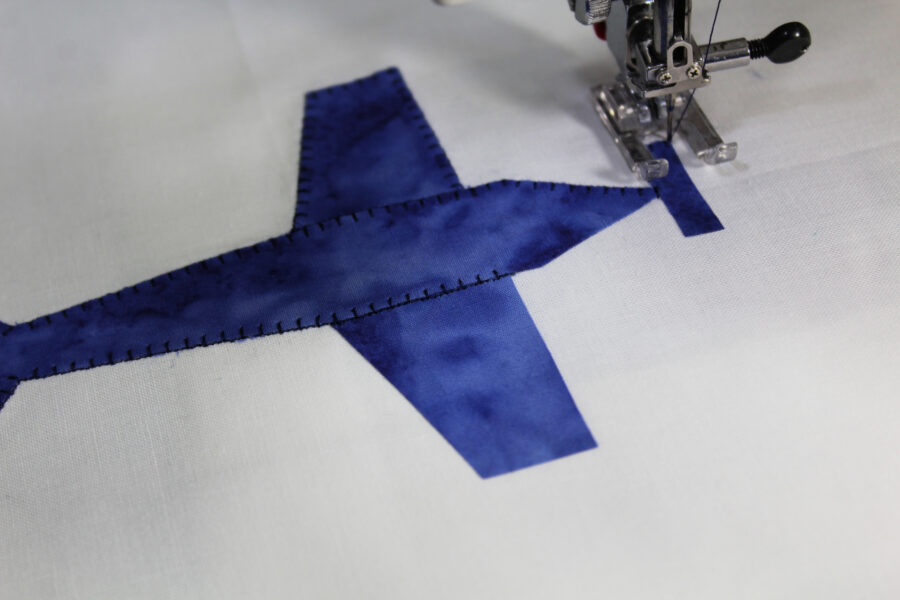
Stitch around the applique pieces with a blanket stitch with Aurifil thread.
Peel off the backing paper, and place the applique with the adhesive side down as shown below on the background fabric. Place the wings first (B), then the body (A), and finally the prop (C).
Bond the Applique Pieces to the Background. Following the package instructions, work in sections to press the entire applique to the background until the entire applique is fused.
Stitch around the applique pieces with a blanket stitch with Aurifil thread.
 Finish the Applique Airplane Block following the pattern instructions for adding the blue corners.
 Place the StitchnSew Fleece on top of the fabric. Fold one side down and spray the fabric with SpraynBond basting adhesive. Lay the folded side down over the spray and smooth the fleece with your hands. Next, fold the other side over and spray the wrong side of the Minky fabric.
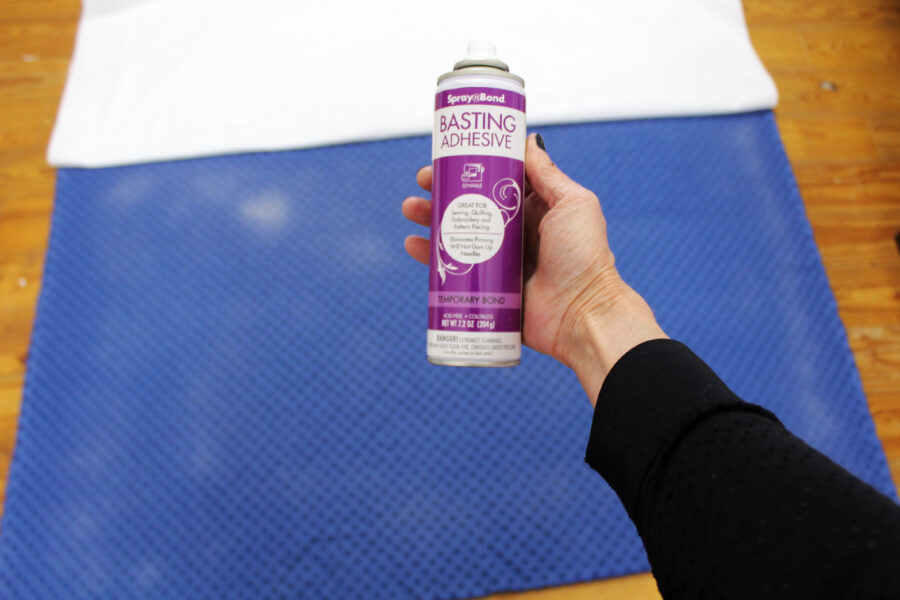 Smooth the fleece over the sprayed Minky fabric. The last step to make the "sandwich" is to add the quilt top. Center the quilt top on the fleece with the right side up. As was done with the fleece, fold one side of the quilt top over and spray the back of the quilt top with SpraynBond basting adhesive. Lay the sprayed half of the quilt top back over the fleece and smooth. TIP: Smooth the middle first and then the corners.
 Repeat spraying and smoothing on the other half of the quilt top. Finally, give the "sandwich" one last smoothing by pressing it with your hands. In case of any wrinkles, just pull it apart and smooth it again with your hands. Smooth until the "sandwich" lays completely flat.
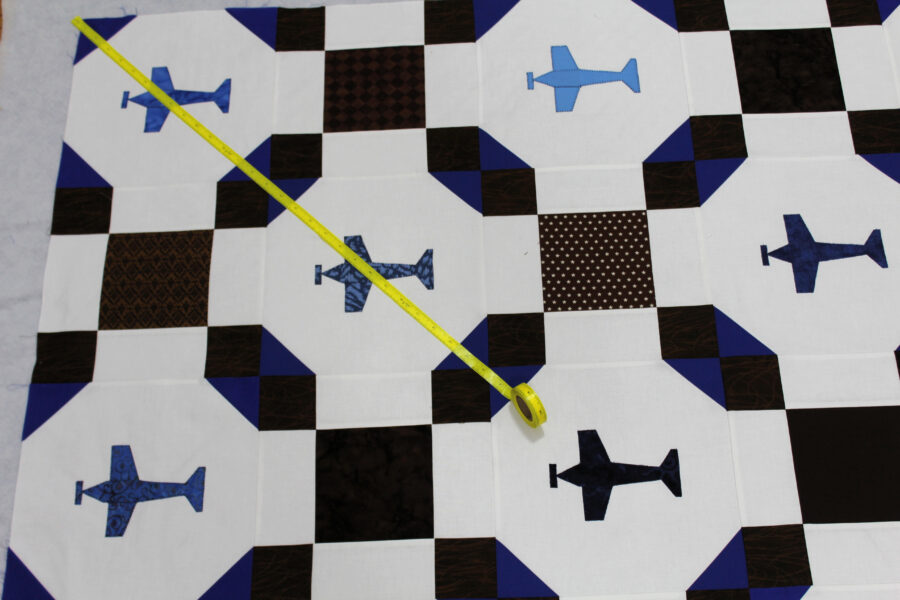
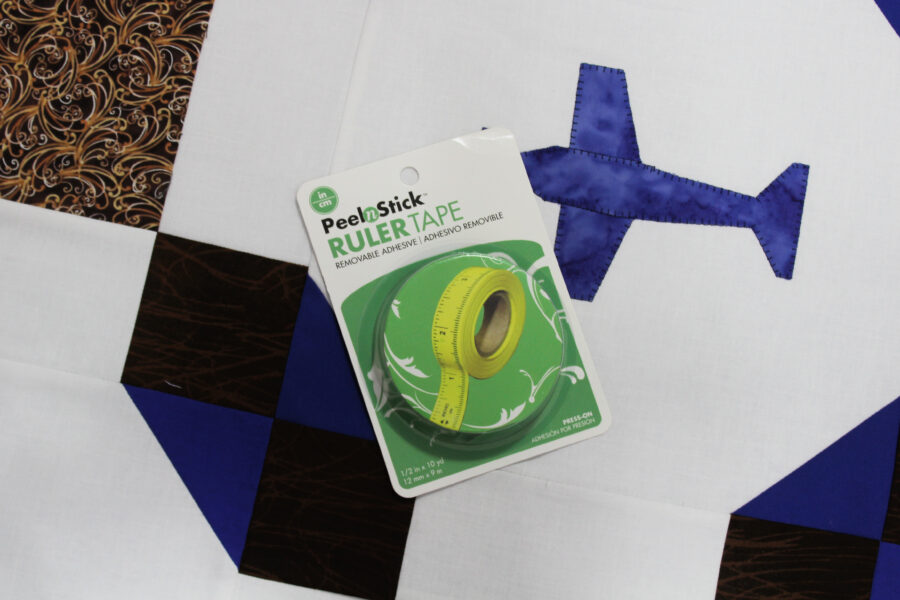 Place the tape from one corner of the quilt to the other corner making a diagonal line across the quilt.
 Use a walking foot on the sewing machine to quilt the diagonal lines. Set the sewing machine for a slightly longer stitch length, roll up the sides of the quilt sandwich, and stitch along one side of the tape to make the first diagonal line of stitching across the quilt. Remove the PeelnStick Removable Ruler Tape and continue making diagonal lines by using the stitching and walking foot as a guide for the next line of stitching.
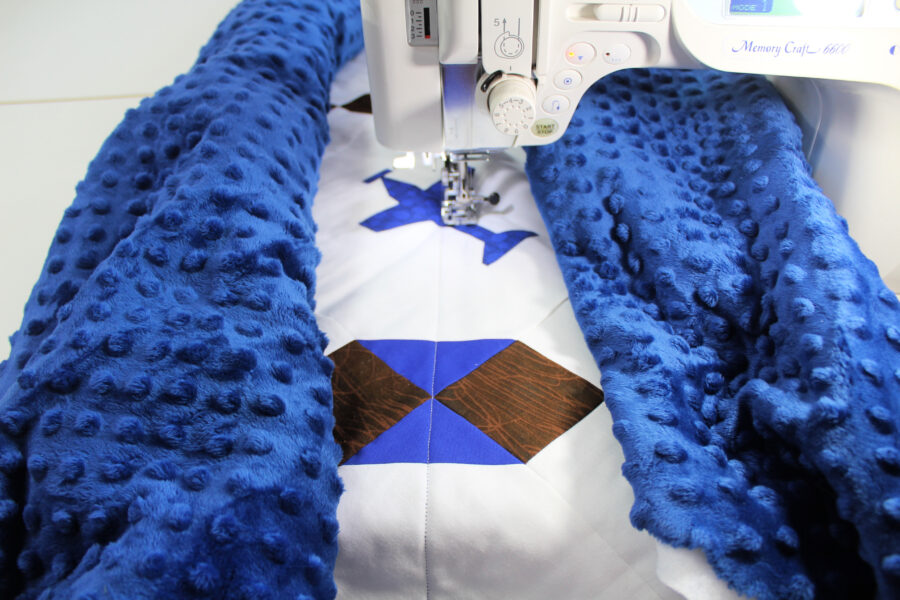 Complete the quilting by adjusting the rolled-up sides and stitching lines. The "sandwich will stay in place through the process with the SpraynBond basting adhesive.
The Minky fabric will quilt just as nicely as the front.
Complete the quilting by adjusting the rolled-up sides and stitching lines. The "sandwich will stay in place through the process with the SpraynBond basting adhesive.
The Minky fabric will quilt just as nicely as the front.

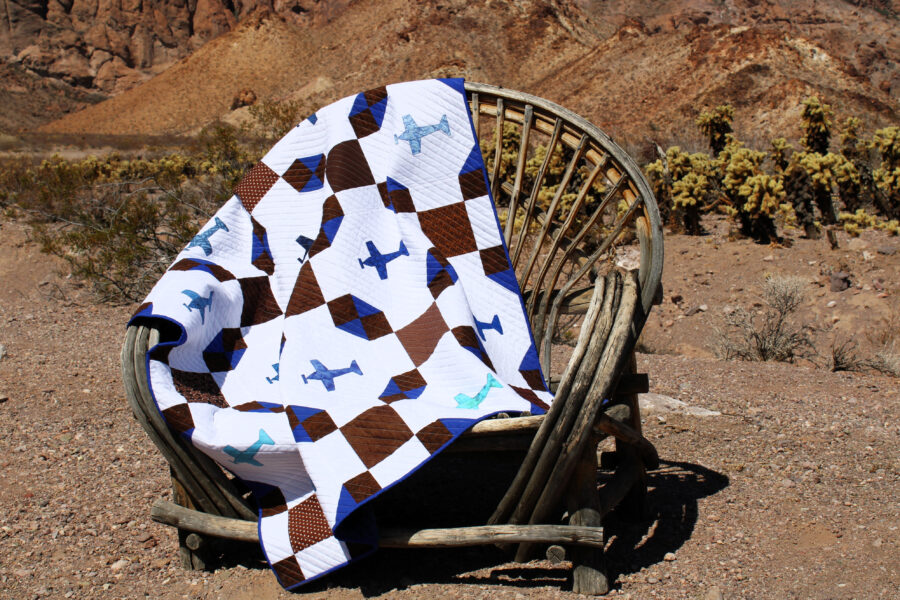 Cozy up and watch the planes "Fly Over"!
Carla
Cozy up and watch the planes "Fly Over"!
Carla