No Products in the Cart

This post uses affiliate links at no additional cost to you! By clicking the links in this post, I earn a small commission should you make a purchase. Thank you in advance!
Hello everyone! Justin here, and today I have baked up a trio of flocked gift tags that fit so perfectly into our Cake Week fun! Before we get into the Step by Step Process, I have a list of products below that were used when creating these tags!Therm O Web Products Used: Transfer Gel Blanco Deco Foil Flock Transfer Sheets - Think Pink Deco Foil Flock Transfer Sheets - Yellow Sunshine Deco Foil Flock Transfer Sheets - Blue Diamond UltraBond Permanent Adhesive iCraft 3D Foam Tape 1/16", White
Other Key Products Used: Layered Cupcake Stamp Set by Altenew Warp Speed Stencil by Altenew Catherine Pooler Inks: Chiffon, Tiara, Glitz, It's a Boy, Cummerbund, All That Jazz, It's a Girl, Be Mine, Pucker Up & Sand Castle Distress Oxide Inks: Mustard Seed, Picked Raspberry & Peacock Feathers Shaker Basics 2 Builder Dies by Stamp Anniething Colored Cardstock Clear Iridescent Bubbles by Studio Katia
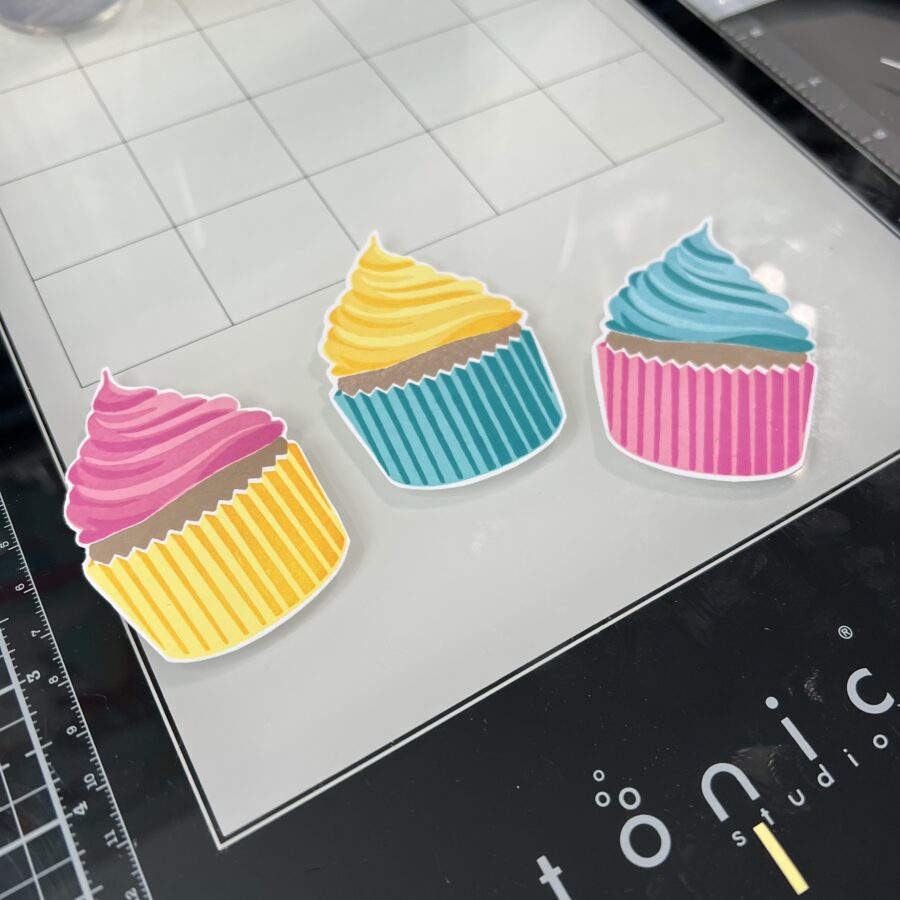 Using my Cupcake Layered Stamp Set by Altenew, I stamped out 3 cupcakes. The color combos used are:
Yellows: Chiffon, Tiara & Glitz Blues: It's a Boy, Cummerbund & All That Jazz Pinks: It's a Girl, Be Mine & Pucker Up Tans: Sandcastle
I fussy cut out my cupcakes and set them aside.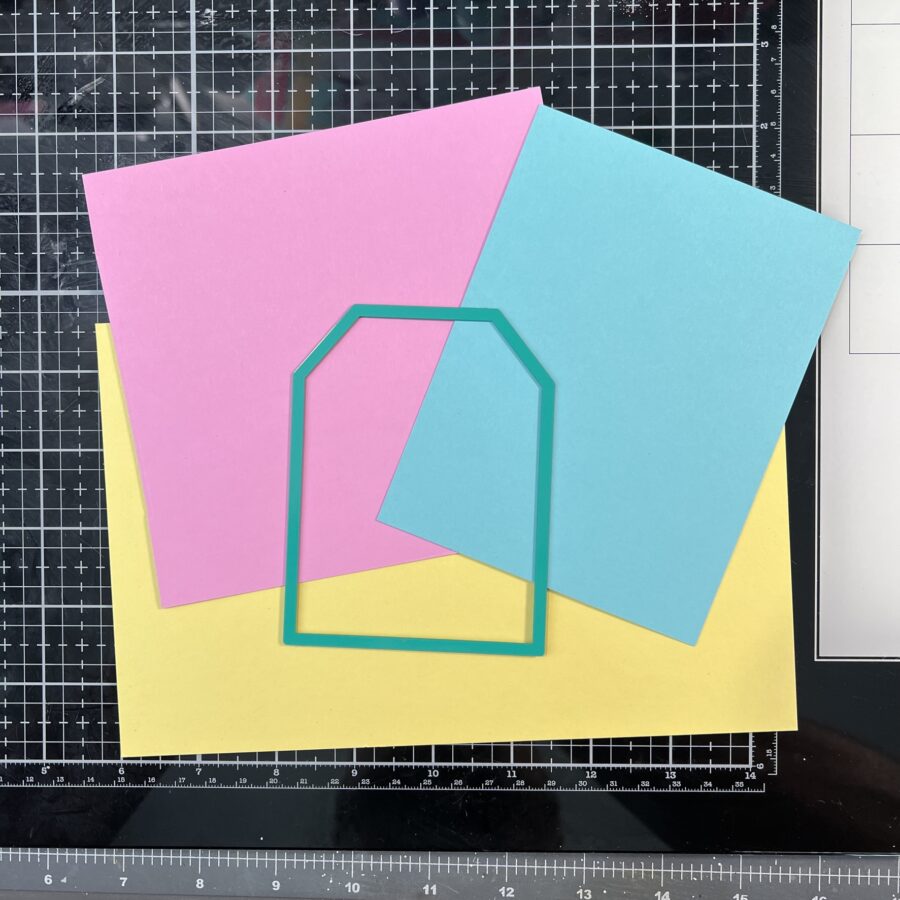 Using the tag die from the Shaker Basics 2 Builder Die set, I die cut a tag from light blue, light pink & light yellow cardstock.
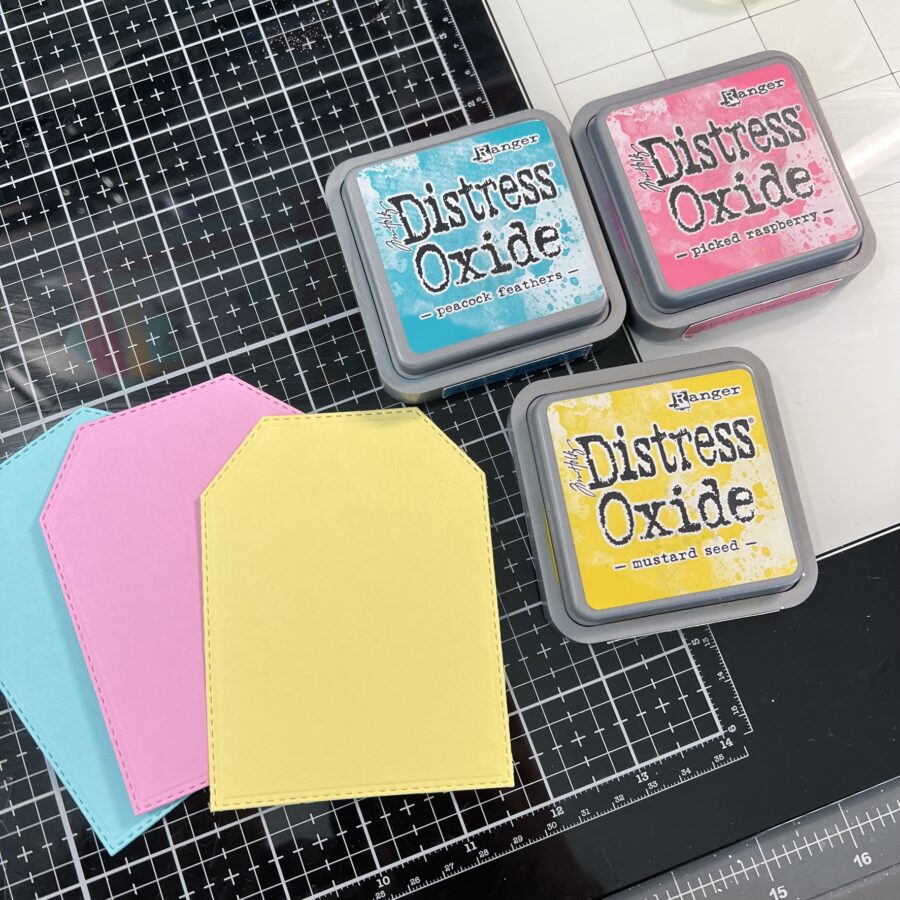 I distressed the edges of the cardstock with a corresponding Distress Oxide color. I used Mustard Seed for Yellow, Picked Raspberry for Pink & Peacock Feathers for Blue.
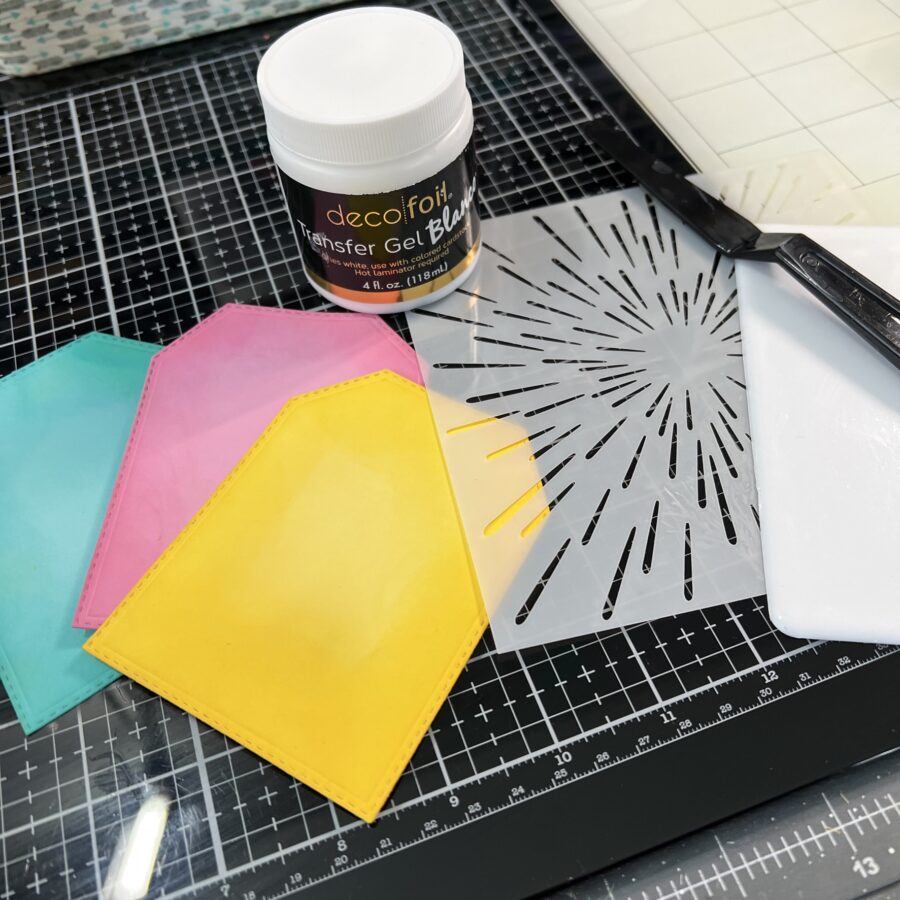 Using Deco Foil Transfer Gel Blanco & my stencil pal, I placed the Warp Speed Stencil over each die-cut tag, and spread a solid layer of Blanco gel. I set the tags aside to dry completely.
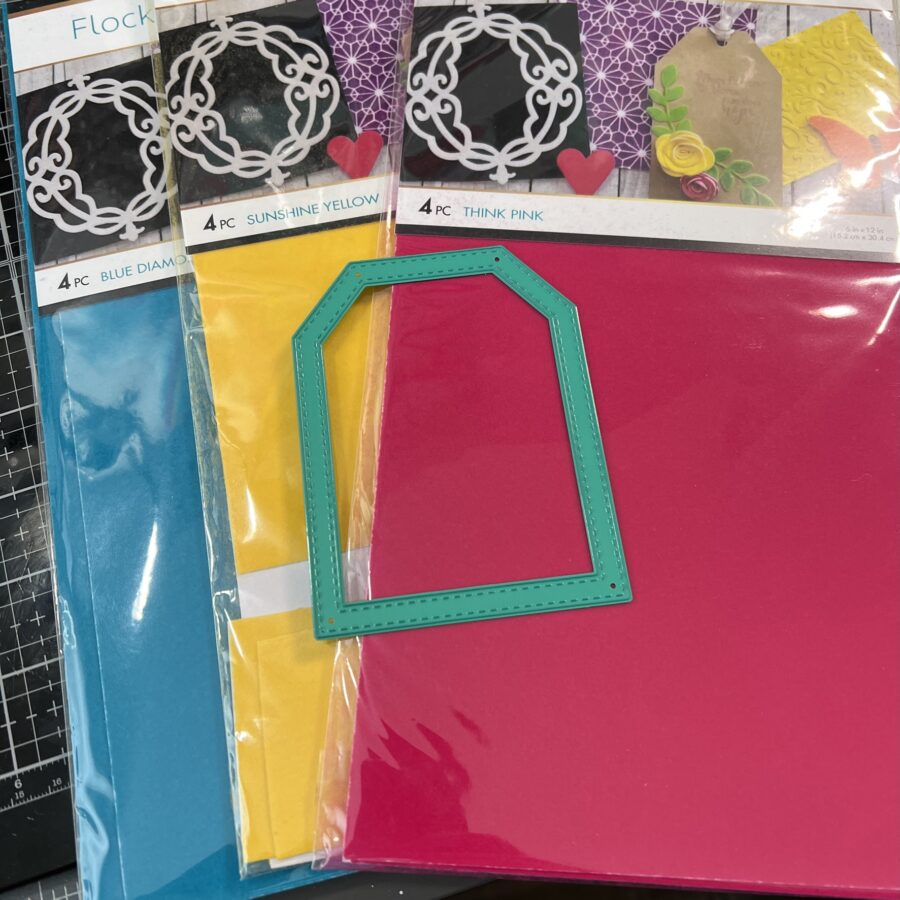 Meanwhile, I used the Shaker Basics 2 Builder Die Set's Tag Outline Die to die cut a frame from Think Pink, Sunshine Yellow & Blue Diamond Flock Transfer Sheets.
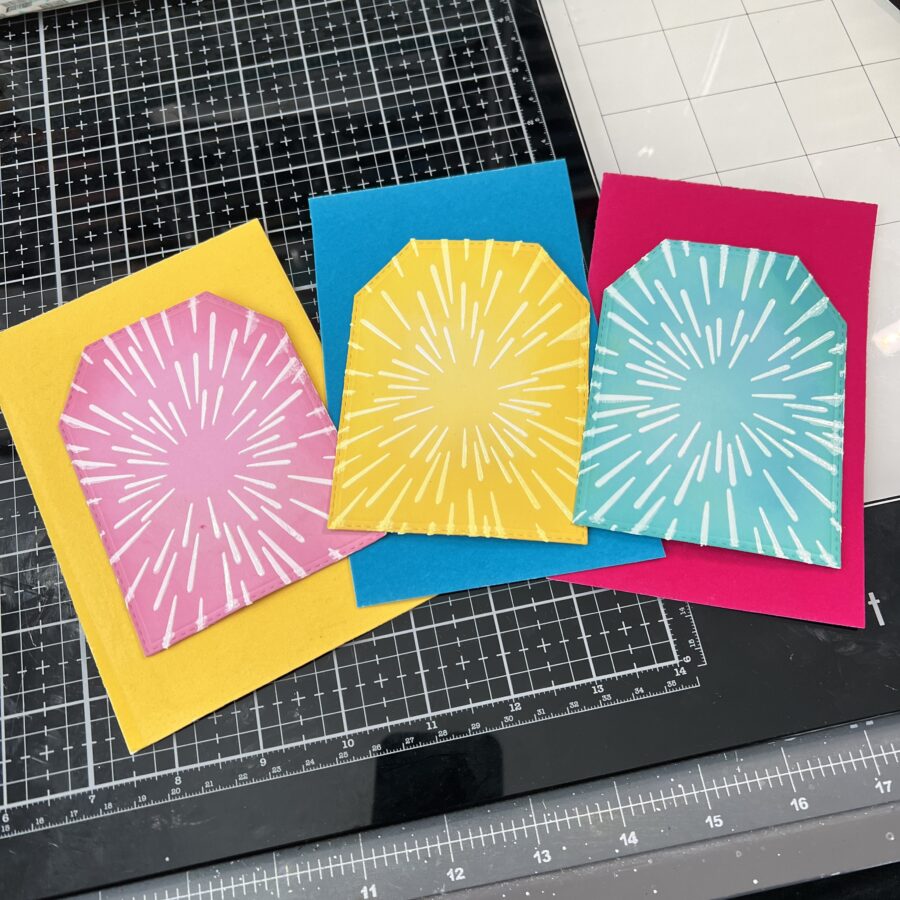 Once my Transfer Gel Blanco was entirely dry, I processed each tag through my laminator with Think Pink, Sunshine Yellow & Blue Diamond Flock Transfer Sheets.
 Using Ultrabond Permanent Adhesive, I adhered the flocked frame die cut to each tag.
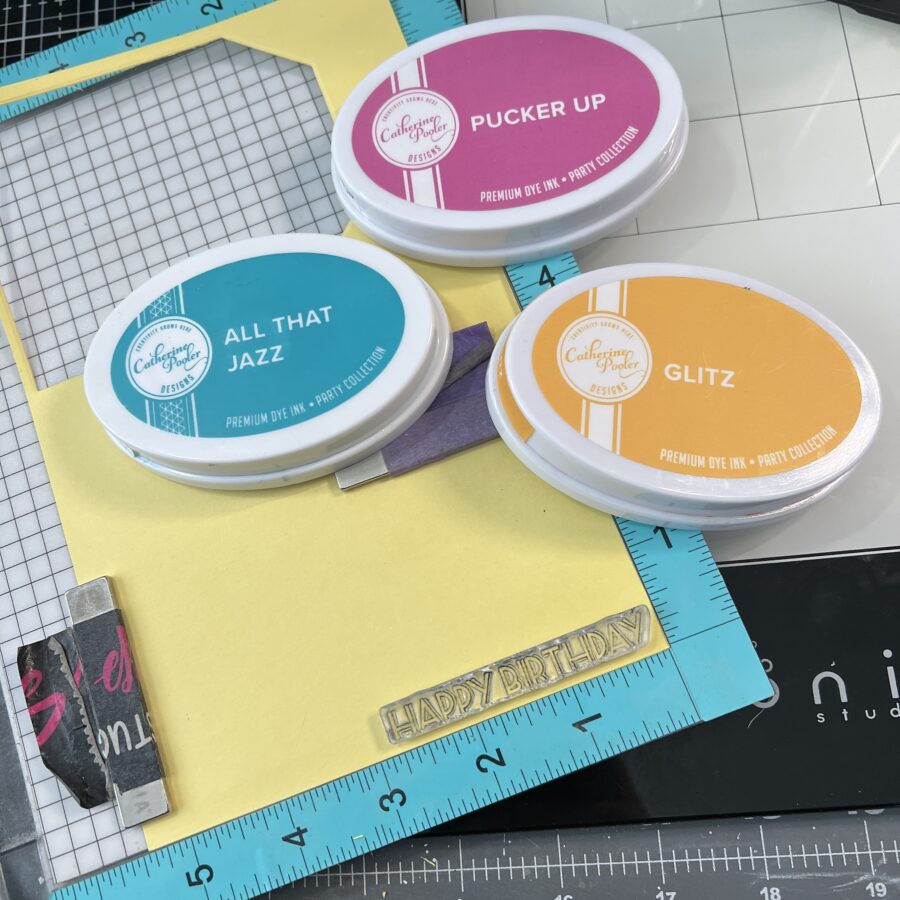 I stamped out the sentiment "Happy Birthday" onto a piece of corresponding colored cardstock, using All That Jazz, Pucker Up, and Glitz ink. I then cut the sentiments into banners.
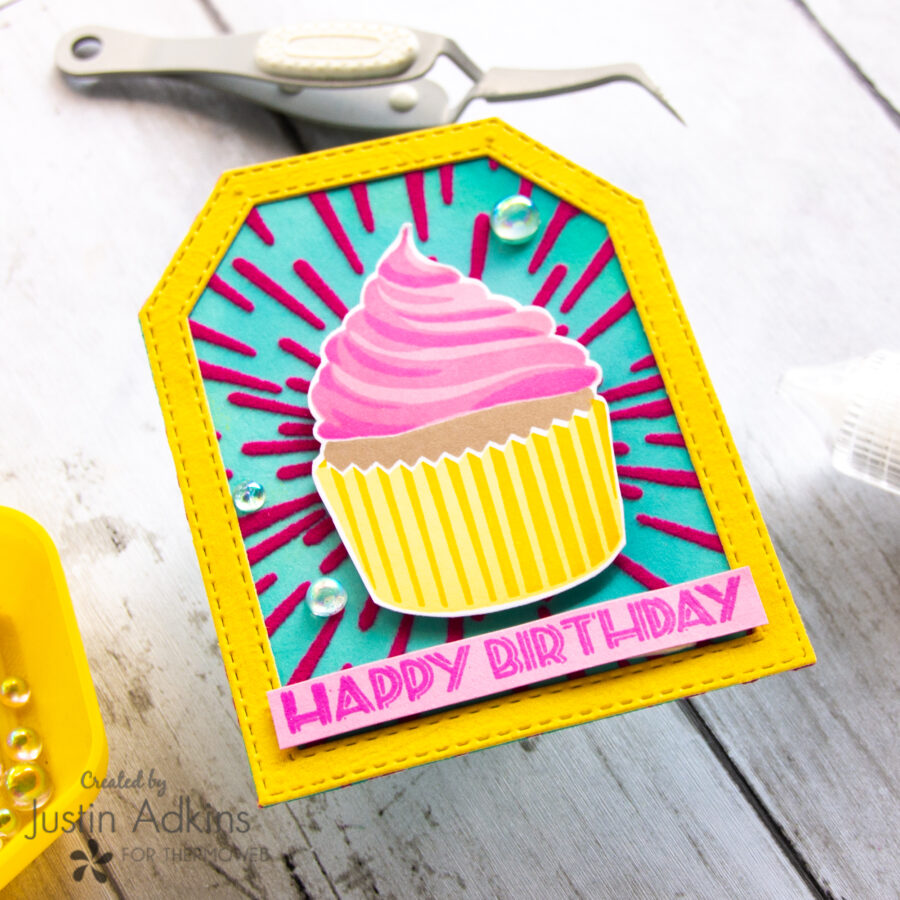
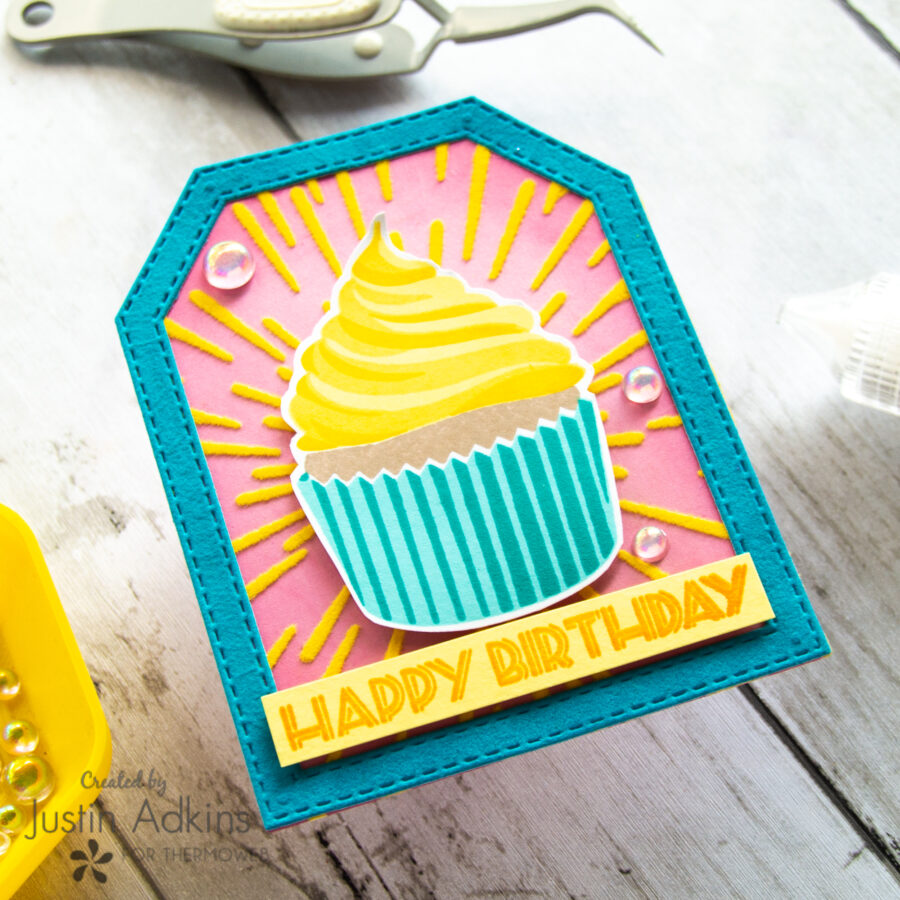
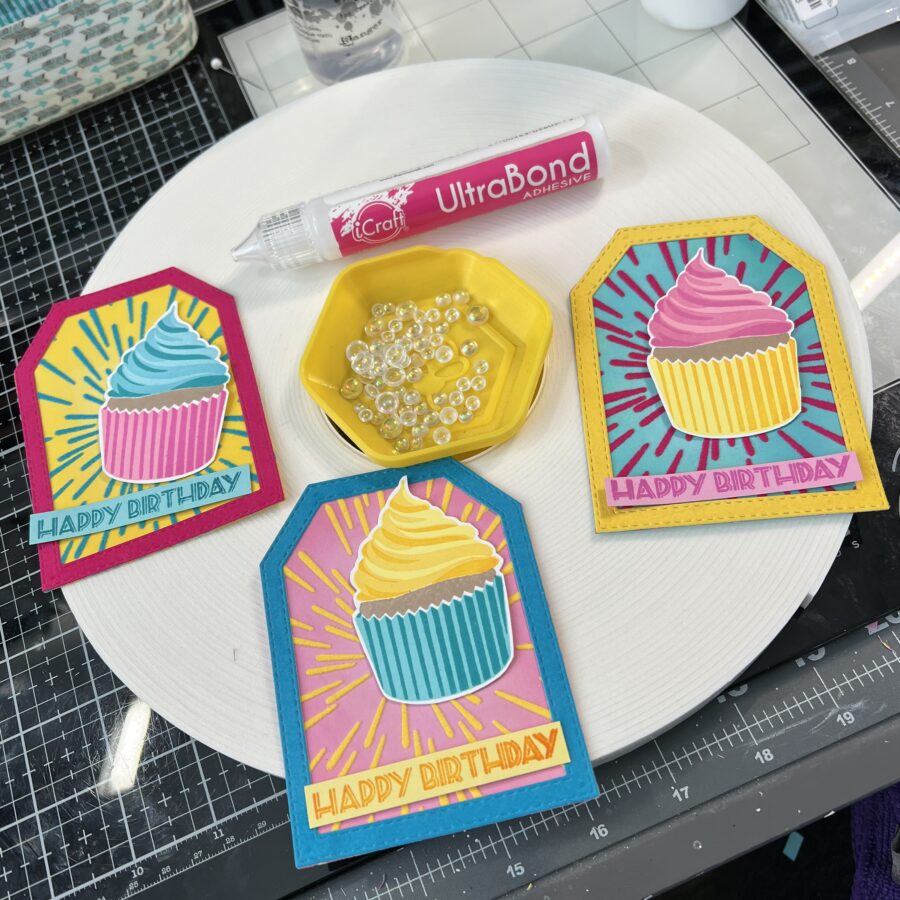 Finally, it was time to put all the pieces together. I adhered my sentiment banners and cupcakes using iCraft 3D 1/16" White Foam Tape, and some iridescent embellishments with UltraBond Permanent Adhesive!
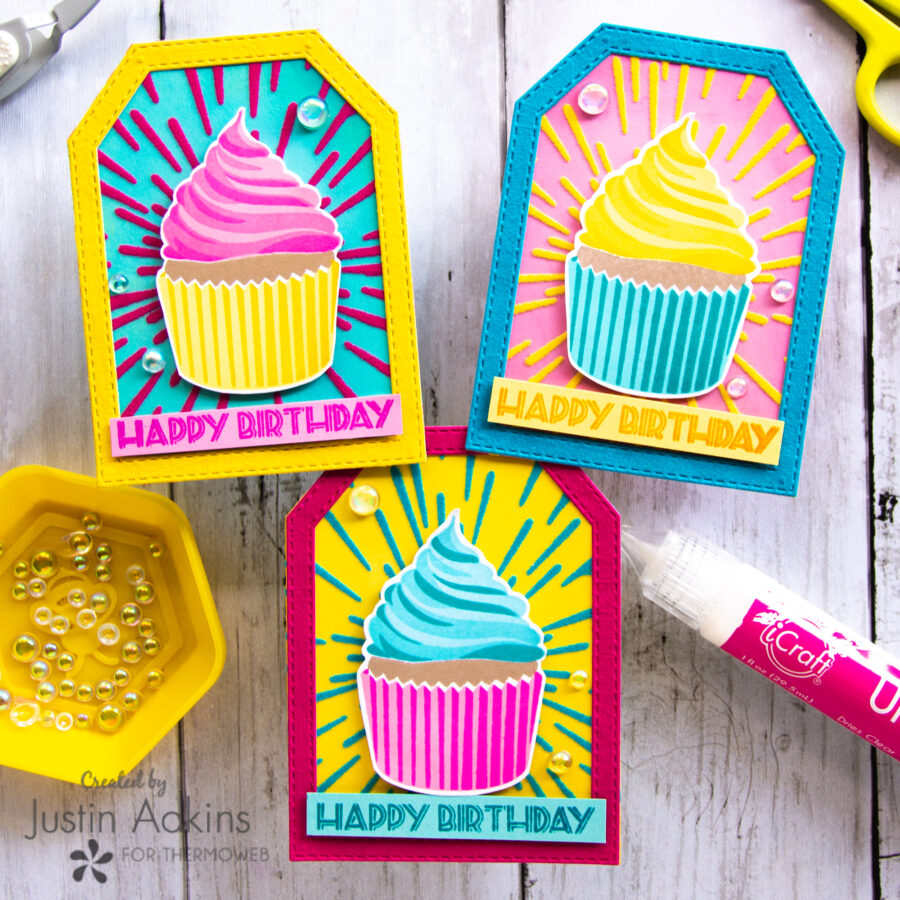
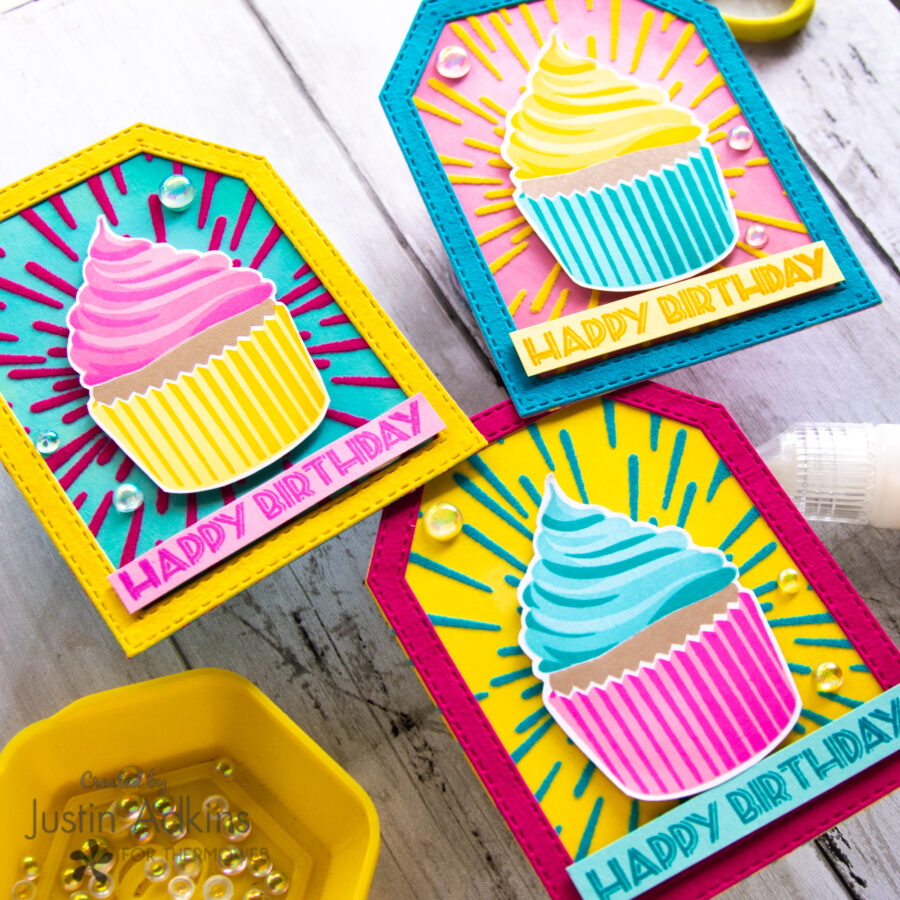
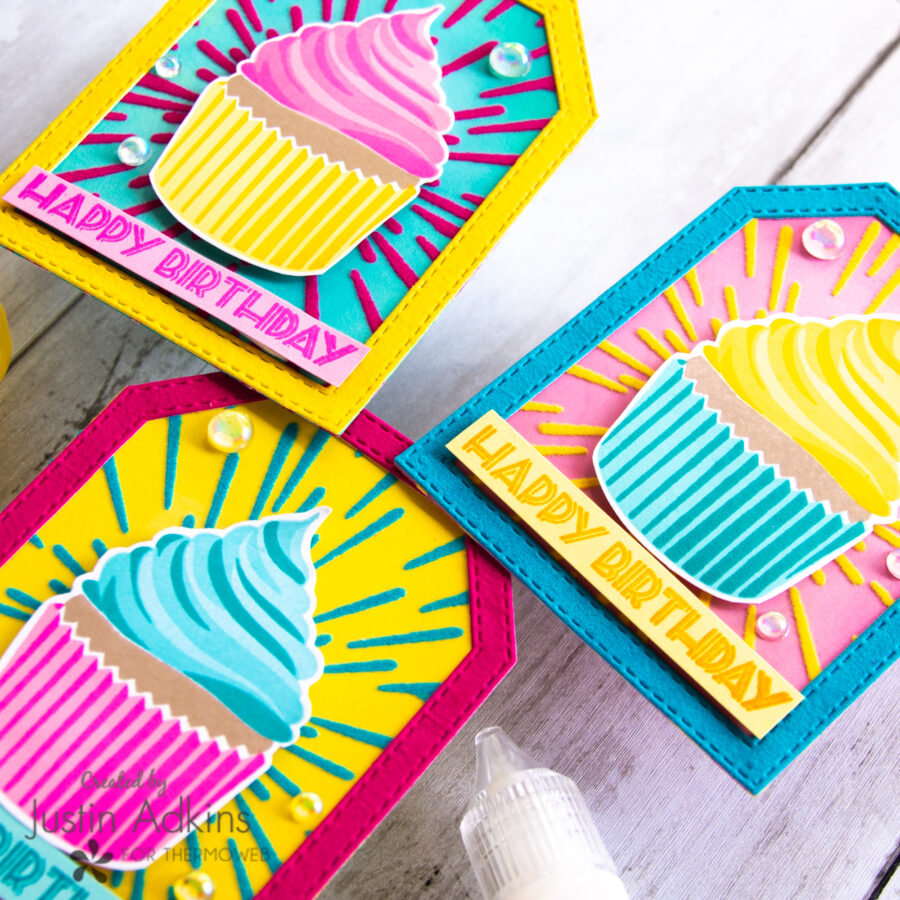
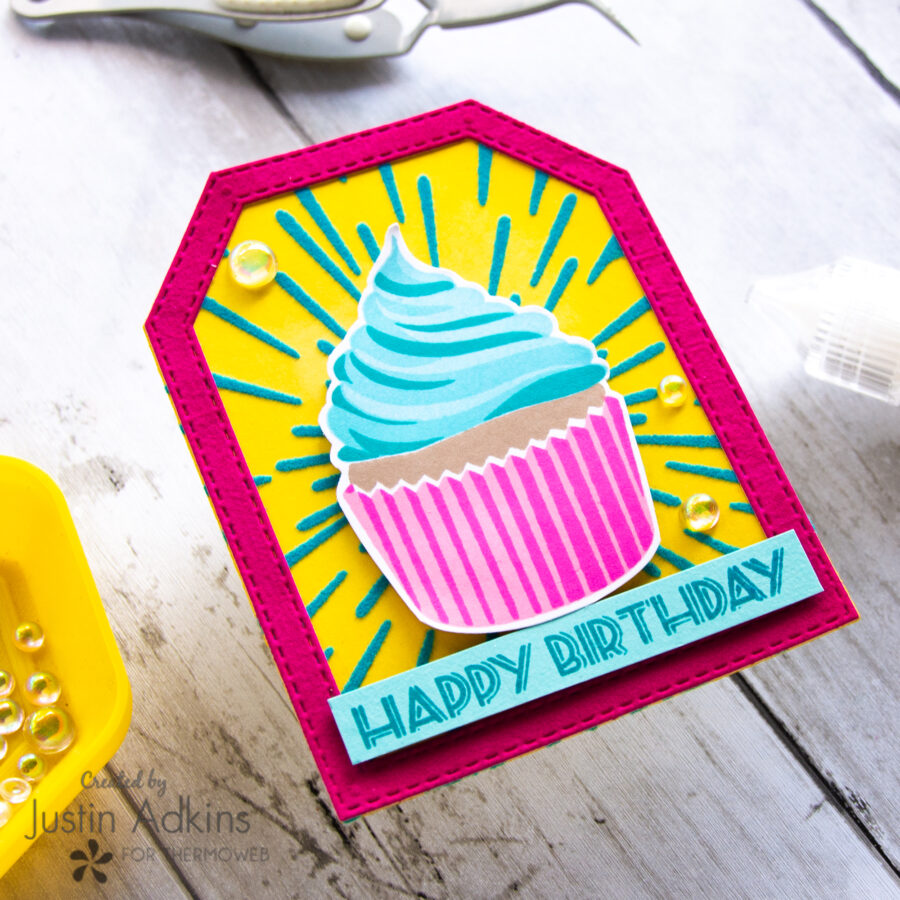
And there you have it! 3 cupcake tags that are ready for you to punch a whole in to tie onto a gift bag, or even use a Pixie Dot to just adhere to your next wrapped gift!
Below are a few more images of my final tags!
Finally, it was time to put all the pieces together. I adhered my sentiment banners and cupcakes using iCraft 3D 1/16" White Foam Tape, and some iridescent embellishments with UltraBond Permanent Adhesive!
And there you have it! 3 cupcake tags that are ready for you to punch a whole in to tie onto a gift bag, or even use a Pixie Dot to just adhere to your next wrapped gift!
Below are a few more images of my final tags!
 Thank you so much for stopping by the Therm O Web blog today! I hope these gift tags leave your sweet tooth craving a baked-goods-inspired crafty session with your favorite Therm O Web goodies!
For more crafty inspiration, please follow me on Instagram and check out my personal blog as well!
Thank you again and happy crafting!
Justin
Thank you so much for stopping by the Therm O Web blog today! I hope these gift tags leave your sweet tooth craving a baked-goods-inspired crafty session with your favorite Therm O Web goodies!
For more crafty inspiration, please follow me on Instagram and check out my personal blog as well!
Thank you again and happy crafting!
Justin