No Products in the Cart
 Hi, I'm Lisa Ruble from Quilty Zest and I'm here to share a little snowflake love. I live in southwest Michigan, so we get plenty of snow - in fact, we had 24" in one day back in November, and another storm is headed our way right now!
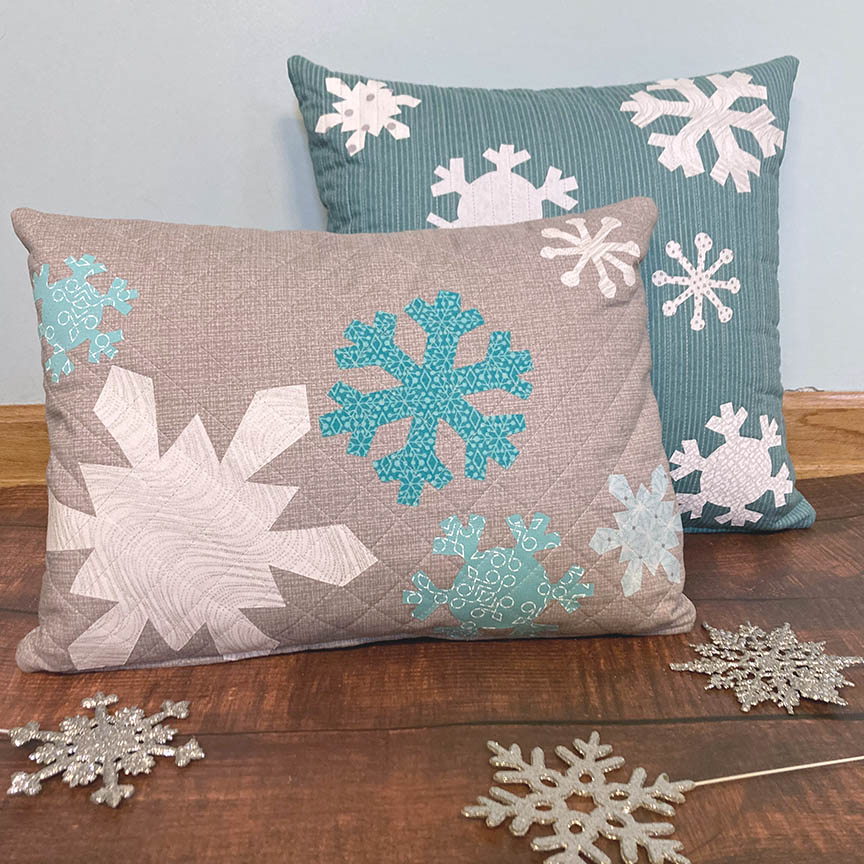
I created these Flurry Pillows using a variety of snowflake shapes and appliqued them onto a tonal background for fun winter pillows.
Hi, I'm Lisa Ruble from Quilty Zest and I'm here to share a little snowflake love. I live in southwest Michigan, so we get plenty of snow - in fact, we had 24" in one day back in November, and another storm is headed our way right now!
I created these Flurry Pillows using a variety of snowflake shapes and appliqued them onto a tonal background for fun winter pillows.
 These pillows are quick to make - the longest part of the process is cutting out the snowflake shapes!
Let's get started!
You'll Need:
1/2 yard gray tonal for pillow background
Scraps of 5-6 white and light aqua prints
HeatnBond Fusible Fleece
HeatnBond Lite Iron-On Adhesive
(1) 14" long gray zipper
12" x 16" pillow insert
Cutting:
From the gray tonal:
(2) 13" x 17" rectangles
From the Fusible Fleece:
(2) 13" x 17" rectangles
Download the snowflake templates here.
Make the Pillow:
Step 1: Trace the desired snowflake shapes onto the paper side of iron-on adhesive, leaving at least 1/4" between snowflakes.
These pillows are quick to make - the longest part of the process is cutting out the snowflake shapes!
Let's get started!
You'll Need:
1/2 yard gray tonal for pillow background
Scraps of 5-6 white and light aqua prints
HeatnBond Fusible Fleece
HeatnBond Lite Iron-On Adhesive
(1) 14" long gray zipper
12" x 16" pillow insert
Cutting:
From the gray tonal:
(2) 13" x 17" rectangles
From the Fusible Fleece:
(2) 13" x 17" rectangles
Download the snowflake templates here.
Make the Pillow:
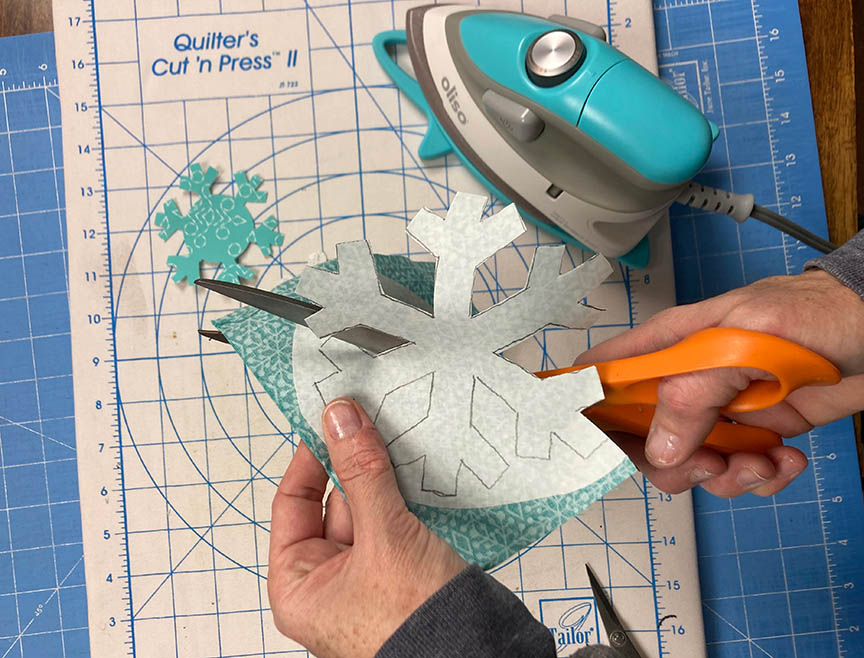
Step 1: Trace the desired snowflake shapes onto the paper side of iron-on adhesive, leaving at least 1/4" between snowflakes.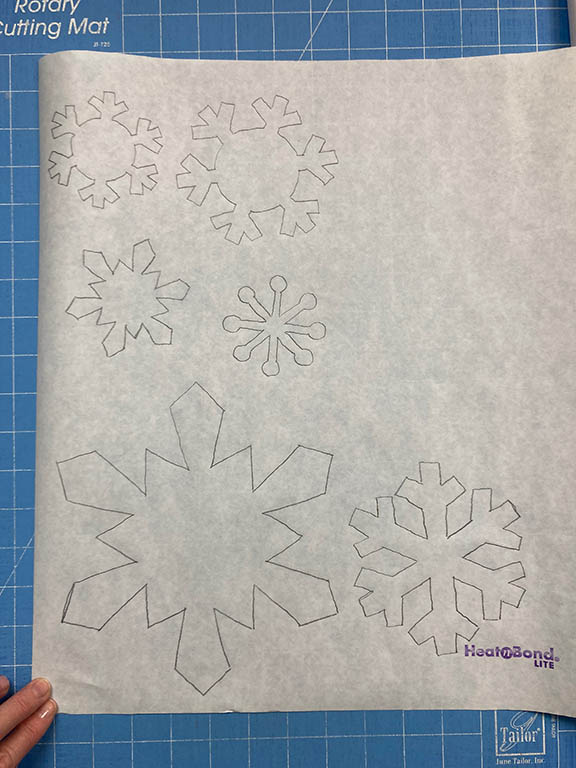 Step 2: Fuse each snowflake onto the back side of an aqua or white scrap. Cut out snowflakes on the drawn lines.
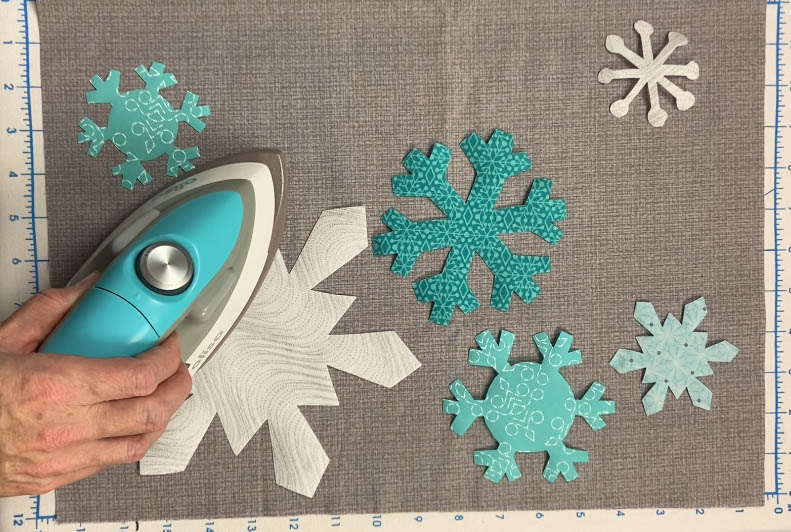
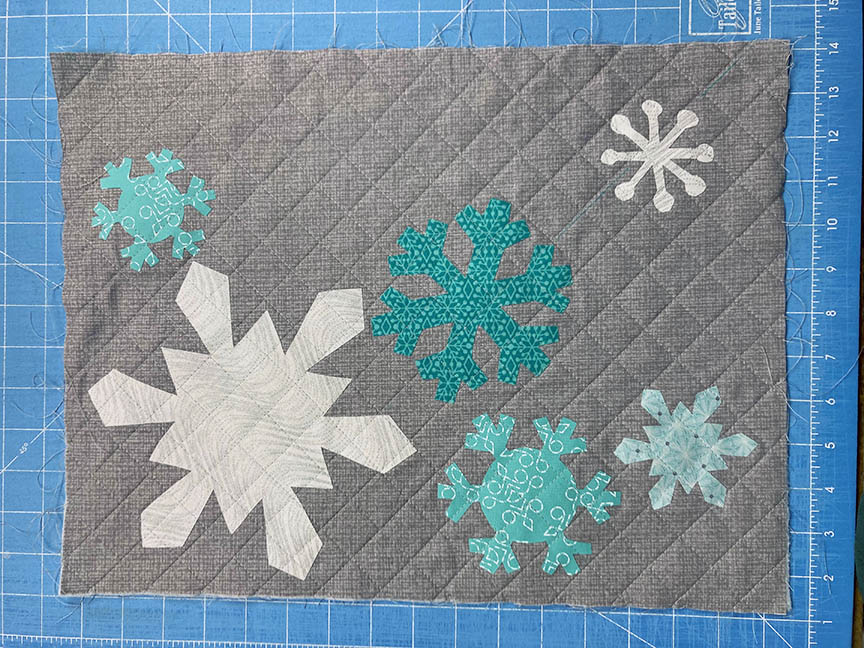
 Step 3: Lay out the snowflake appliques on (1) 13" x 17" gray rectangle and fuse in place.
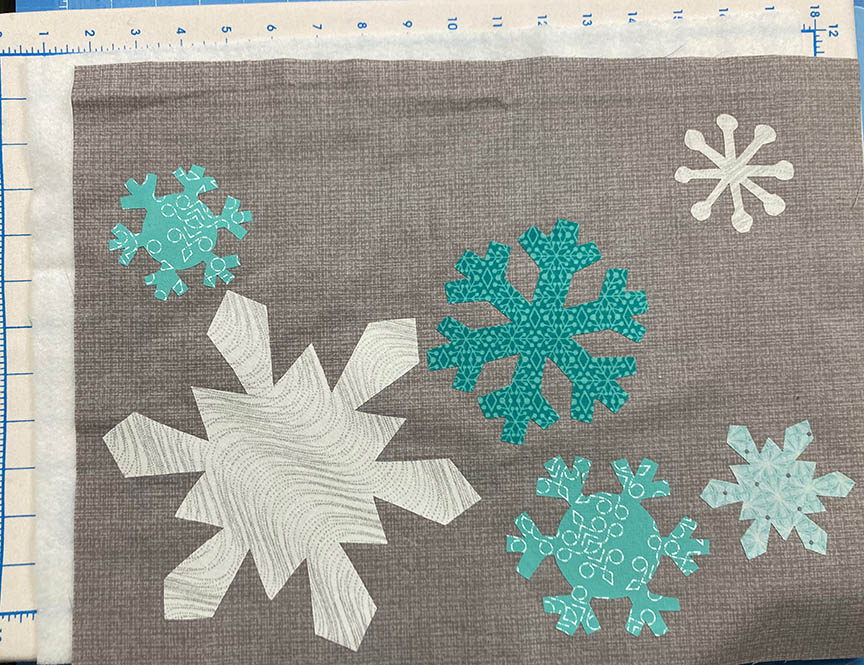
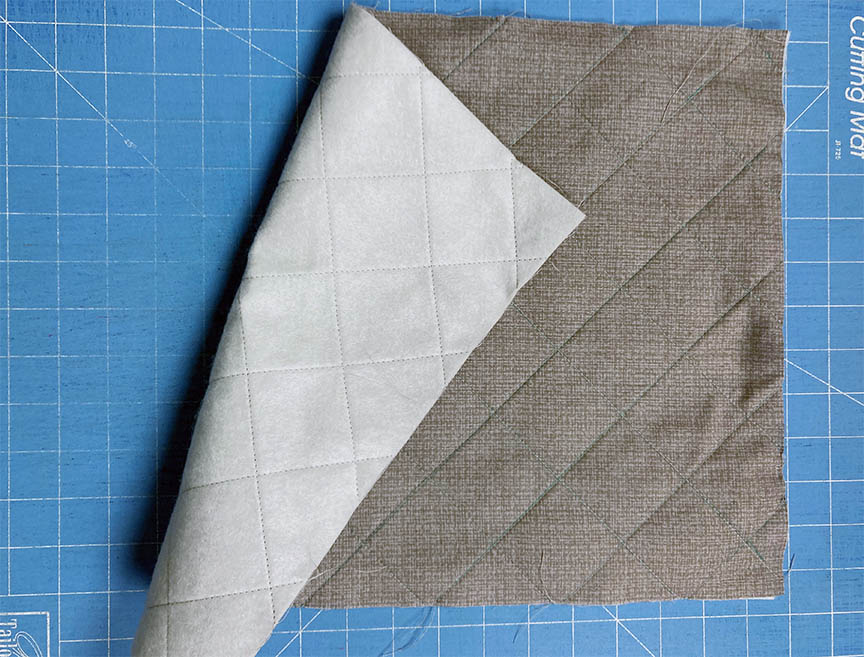
 Step 4: Layer (1) fusible fleece rectangle on the wrong side of the snowflake rectangle and fuse in place.
 Step 5: Use a decorative or straight stitch around the edges of each snowflake shape if desired.
Step 6: Machine quilt the pillow front. I used a crosshatch design at 1" intervals.
Step 5: Use a decorative or straight stitch around the edges of each snowflake shape if desired.
Step 6: Machine quilt the pillow front. I used a crosshatch design at 1" intervals.
 Step 7: In the same way, fuse the remaining fusible fleece rectangle to the wrong side of the remaining gray rectangle. Machine quilt (I used a 2" crosshatch grid for the back).
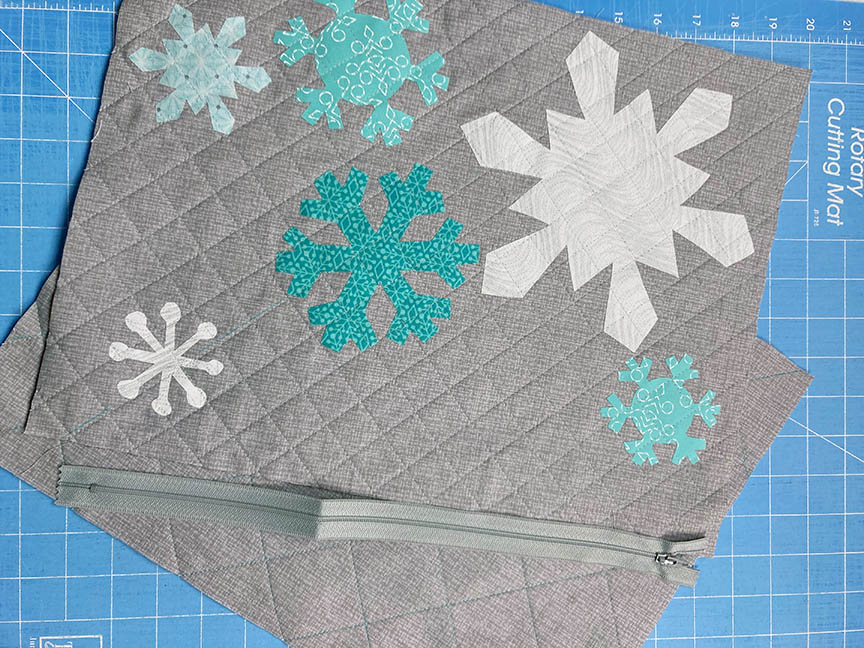
 Step 8: Square up each quilted rectangle to measure 16-1/2" x 12-1/2". Add a zipper and assemble the pillow back and front. Need a zipper insertion tutorial? Head over to my blog to find one!
 Step 9: Turn the pillow cover right side out and stuff the pillow insert inside. And your pillow is done!
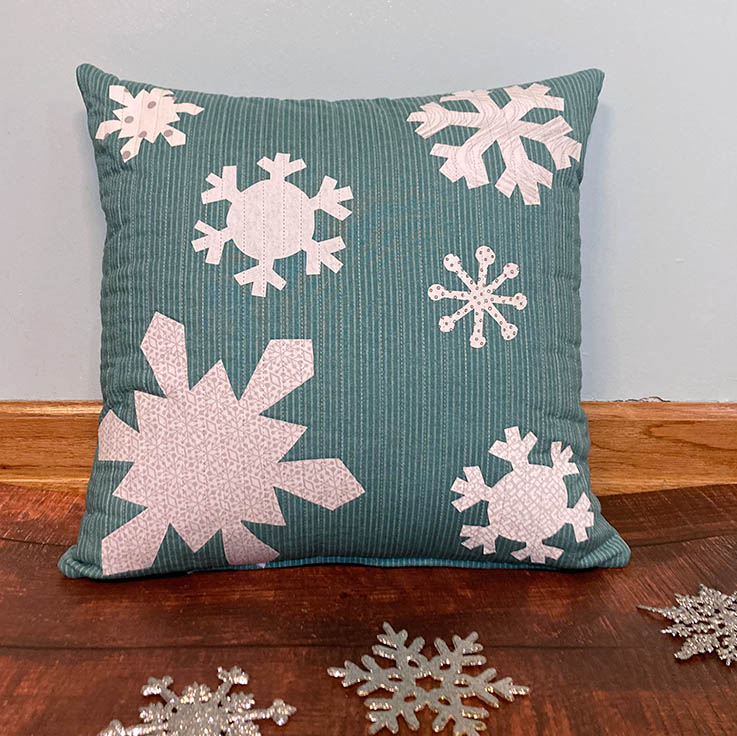
 You can use this technique on a variety of pillow sizes and in a variety of wintry color palettes. I made a second pillow using (2) 17" squares (for a 16" square pillow insert), and cut all the snowflakes from white low volume prints to pop up a medium aqua background.
 Happy pillow making! I hope you enjoy this opportunity to bring snowflakes inside!
 https://youtu.be/U4xgzCjXGOA
Written by Lisa Ruble