Oh, happy day! Fairytale Deco Foil dreams do come true! Yes, that's right... Therm O Web is so excited to announce the release of a new line of iCraft Deco Foils including five new fairytale-inspired shimmery colors of Transfer Sheets. We hope you'll join us throughout the week as we share project ideas, tips, and different techniques for using these amazing foils.
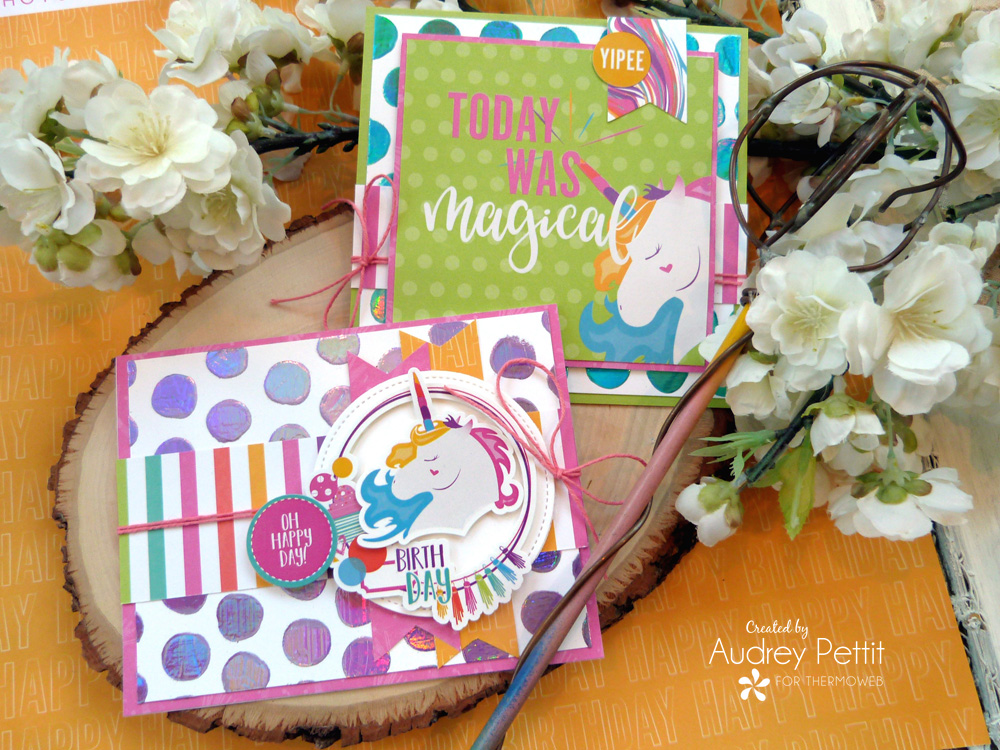
Magical Card Set
by Designer Audrey Pettit
ThermOWeb Supplies:
iCraft Deco Foil Transfer Sheets: Prince Periwinkle, Glass Slipper
iCraft Deco Foil Transfer Gel Duo
Pixie Spray
Stencil Pal
Memory Tape Runner XL
3D Foam Squares
Therm O Web Gina K Designs Wafer Thin Dies: Stitched Circles Large
Gina K Designs Premium Cardstock: Luxury White, Jellybean Green
Other Supplies:
Photo Play Paper Cake Rainbow Sprinkles 12x12 Collection Kit
Ranger Simon Hurley Create 6x6 Stencil Bubble Wrap
Twine
Royal Sovereign Laminator
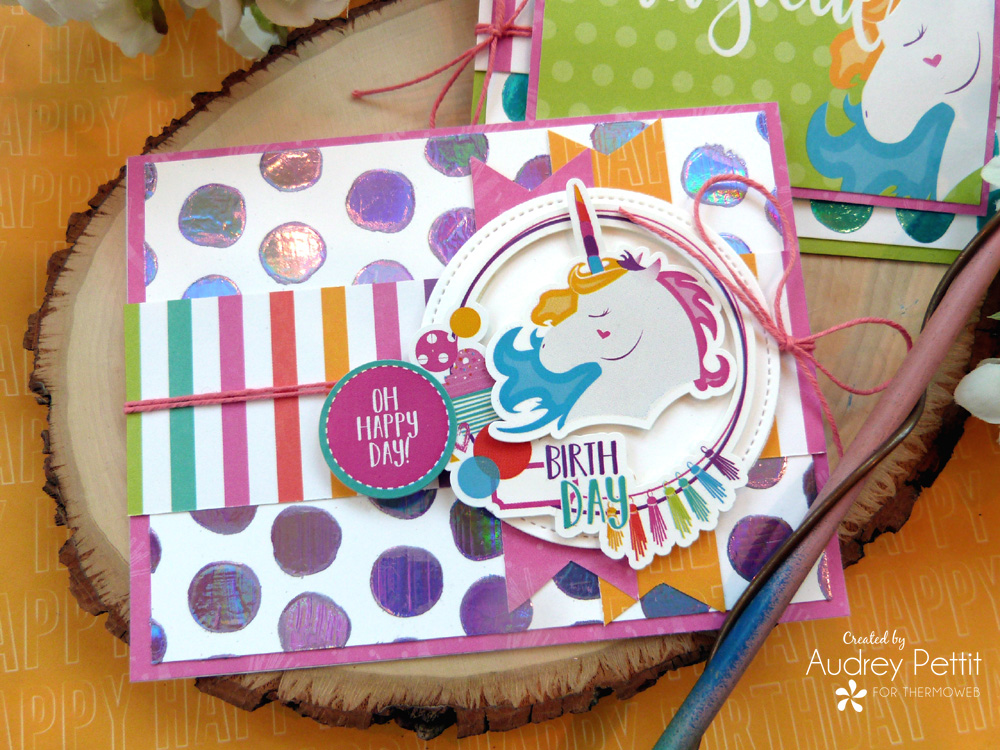
Dreams Come True Cards with Deco Foil
Today I have a set of cards to share featuring two of the new fairytale-inspired colors of iCraft Deco Foil, Prince Periwinkle and Glass Slipper. The paper collection I've used is an older one from PhotoPlay Paper but talk about a perfect color match for the new foils, and so perfect for our theme this week. I have combined papers, stickers, and cut-apart journaling cards with my current favorite polka dot stencil to create fun and whimsical party cards with amazing foiled backgrounds. Let's take a closer look.
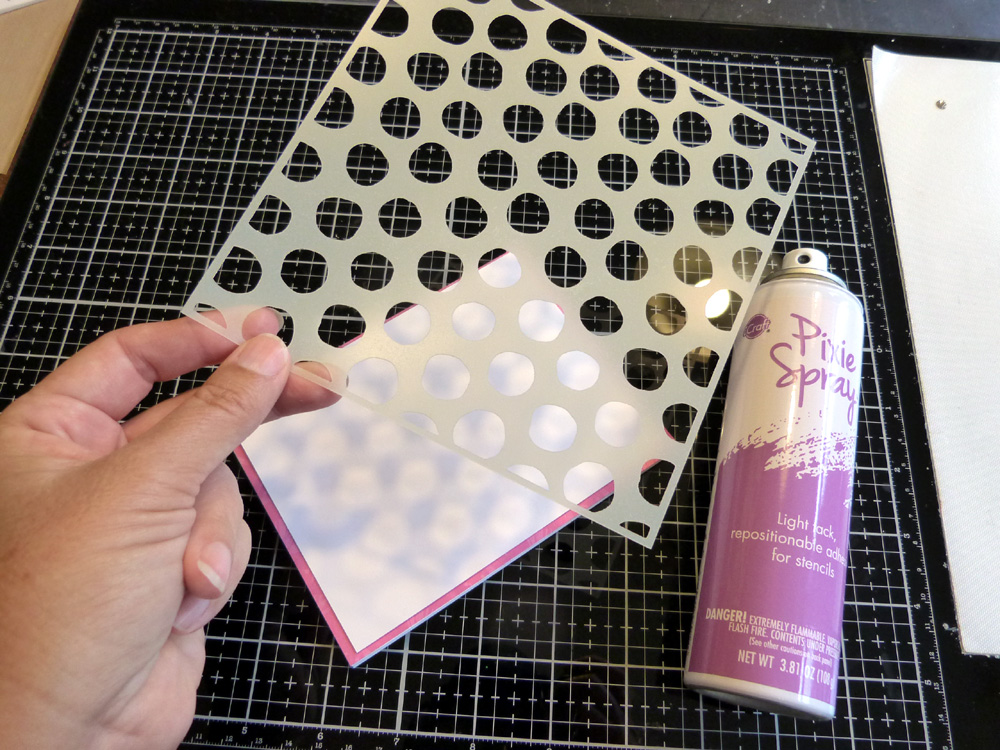
Spray with Pixie Spray
To begin, cut panels of white cardstock. I cut one piece at 4" x 5.25" to fit a standard A2 card base, and a second piece at 4.75" square to fit a 5" square card base. Spray the back of the stencil with Pixie Spray, and set it aside for about five minutes until the spray is dry and tacky to the touch.
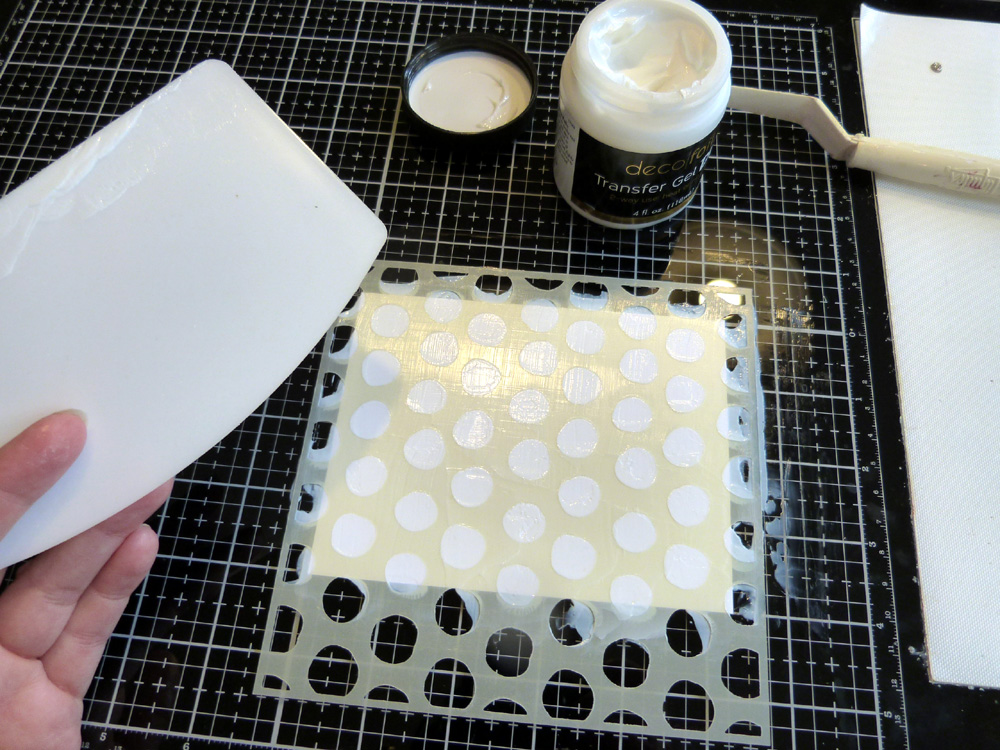
Working one at a time, place the sticky side of the stencil down onto the cardstock. Use a palette knife to transfer some Deco Foil Transfer Gel Duo onto the straight edge of the Stencil Pal. Scrape the gel across the stencil. Continue to add Gel and scrape until all the areas of the stencil have been filled in.
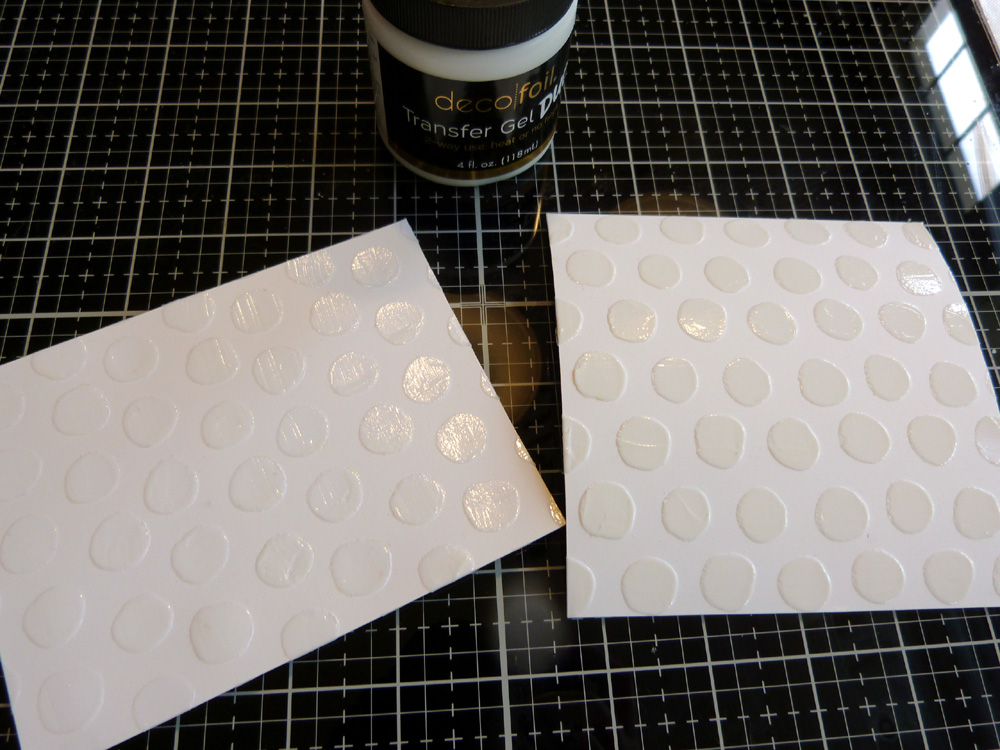
Liftoff the stencil, and wash it, and the tools immediately in warm soapy water. Return any excess gel from the craft mat or work surface back to the jar, and then wipe down the work surface. Repeat the process with the second cardstock panel. Set the panels aside to dry for at least an hour, or until the gel is completely dry.
Deco Foil Transfer Gel DUO
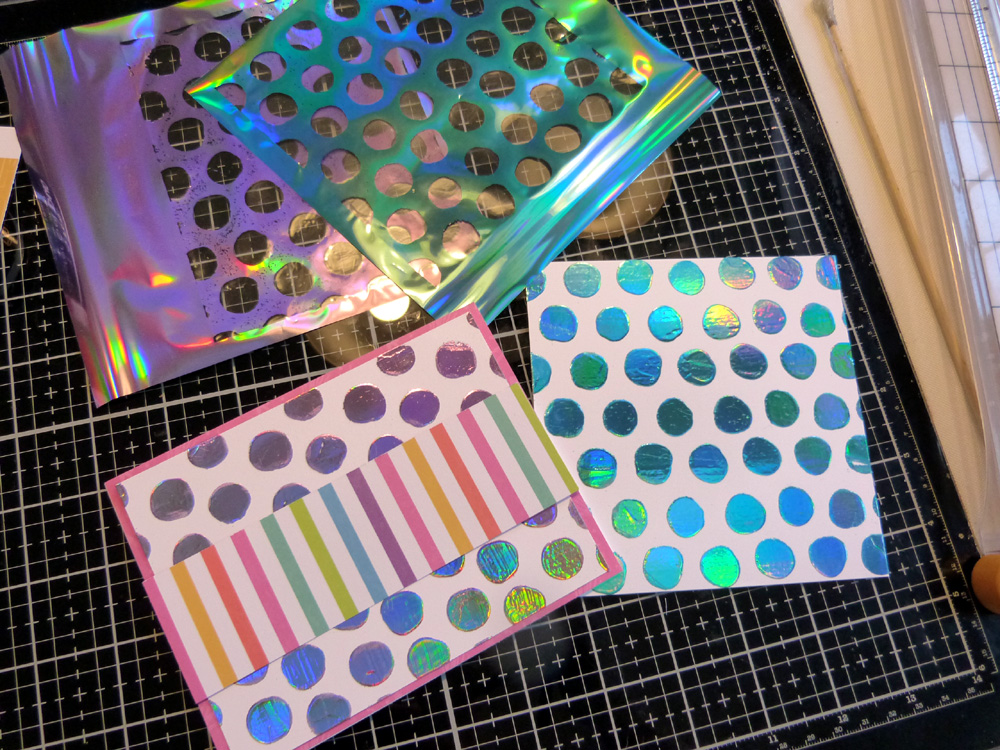
The Deco Foil Transfer Gel Duo will adhere to the foil with either heat from a laminator, or pressure from a die cutting machine. If you're using a laminator, turn it on and let it heat up. Once ready, place a sheet of foil down onto the gelled cardstock with the silver side down and the colored side up.
If running through a laminator, place the foil and cardstock between the sheets of a folded piece of parchment paper before running through. If using a die cutting machine, place the foil and cardstock between two cutting pads and run through your machine as if you were die-cutting. Peel up the foil transfer sheet to reveal your beautiful foiled backgrounds.
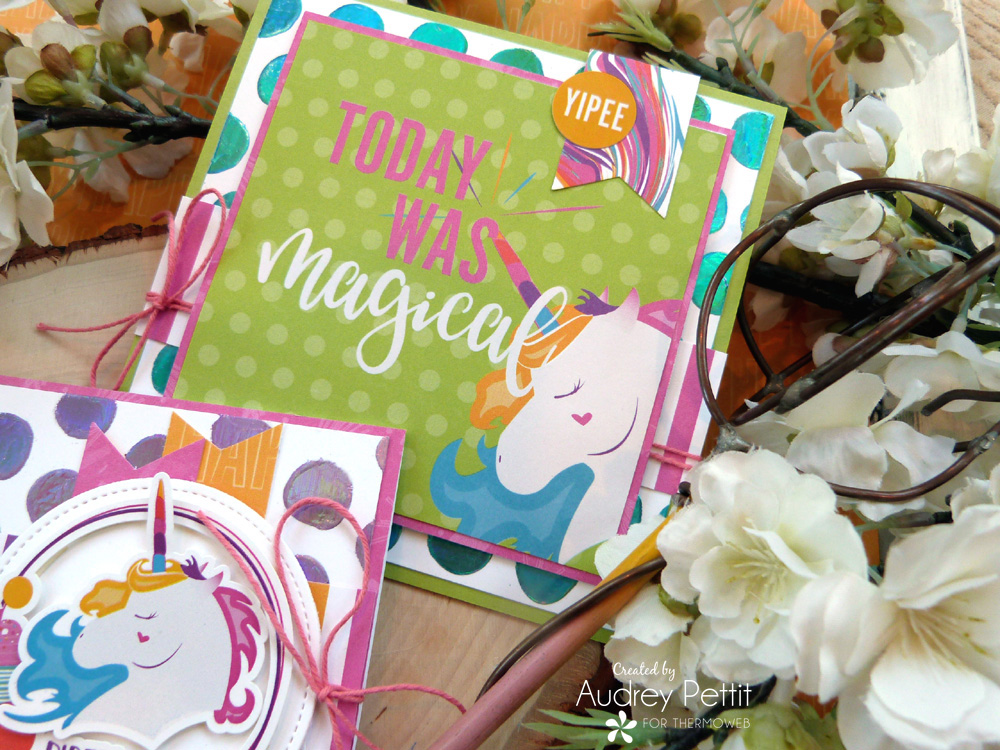
Add the foiled backgrounds to card bases. Layer with strips of patterned papers, cut-apart journaling cards, and stickers as desired. Tie twine around the cards before adding the final layers. And be sure to use some Therm O Web 3D Foam Squares to add a bit of depth and dimension to the final designs.
Enjoy!
This post contains affiliate links. For more information, see our disclosure
HERE.