No Products in the Cart
 Supplies:
3 Fat Quarters (one for front background, one for backing and one for binding)
Fabric scraps (Fat Eighth or larger) for penguins and heart (black solid-body, black and white printed-face, grey-tummy, orange–beak and pink-heart)
Buttons or beads for embellishments
Heat N Bond® Ultra Hold Fusible Adhesive
Fabric Fuse™ Liquid Adhesive
Directions:
*Before cutting any of the scrap fabrics for penguins, attached Heat N Bond® to the wrong side of all the fabrics needed for penguins and heart.
Supplies:
3 Fat Quarters (one for front background, one for backing and one for binding)
Fabric scraps (Fat Eighth or larger) for penguins and heart (black solid-body, black and white printed-face, grey-tummy, orange–beak and pink-heart)
Buttons or beads for embellishments
Heat N Bond® Ultra Hold Fusible Adhesive
Fabric Fuse™ Liquid Adhesive
Directions:
*Before cutting any of the scrap fabrics for penguins, attached Heat N Bond® to the wrong side of all the fabrics needed for penguins and heart.
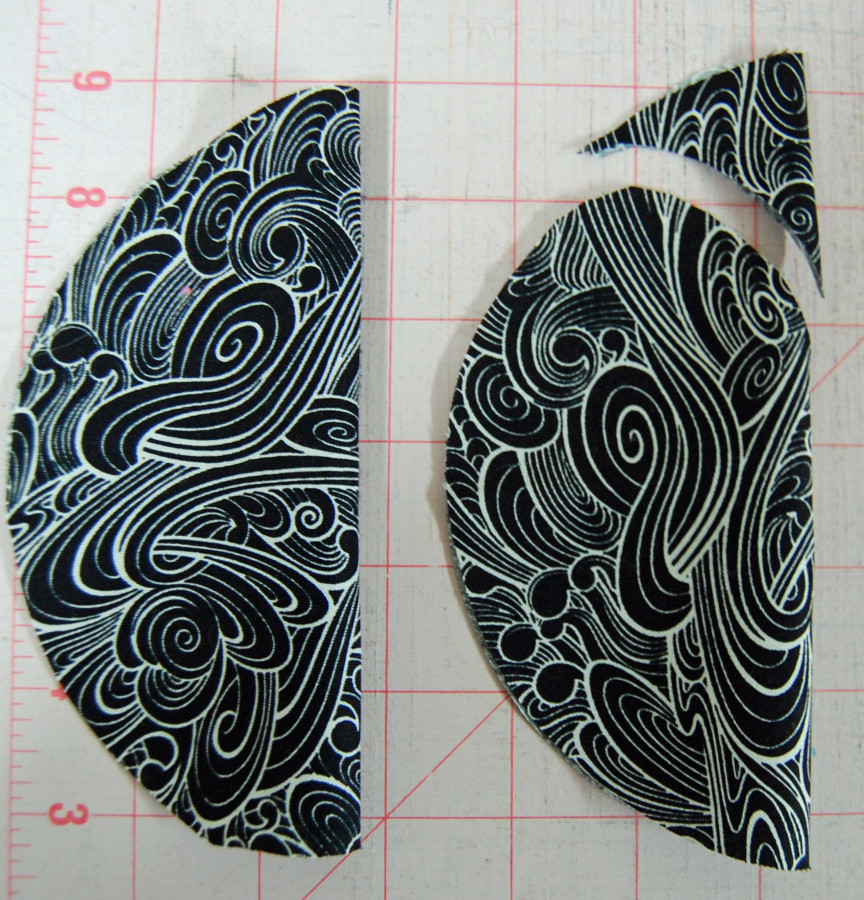
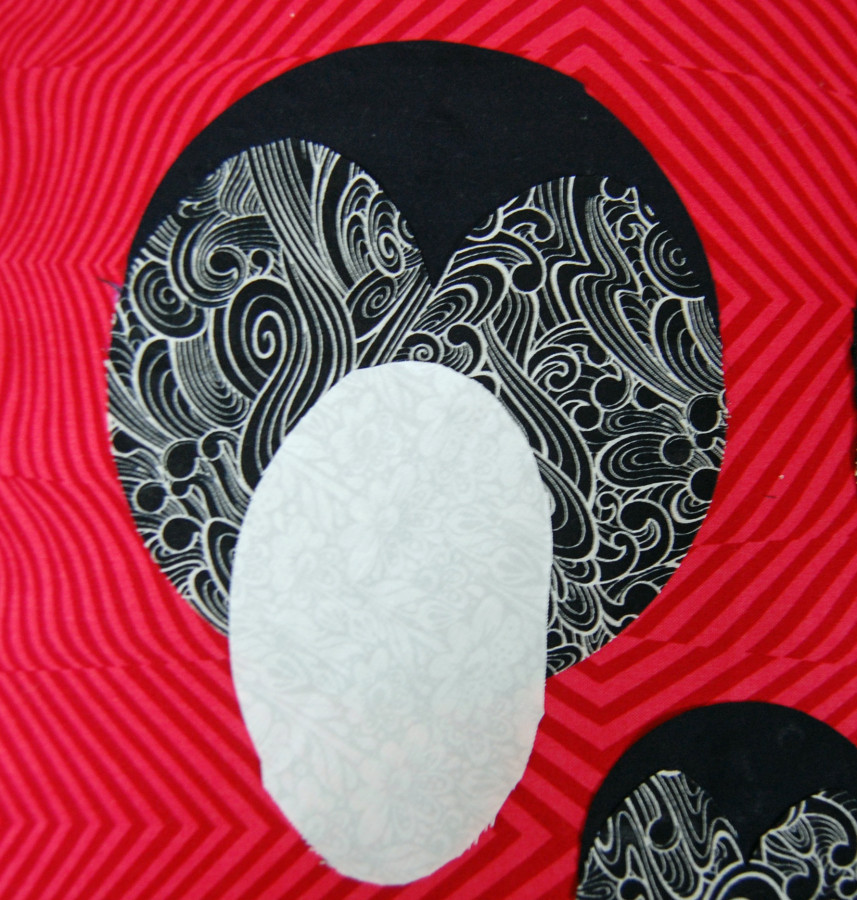
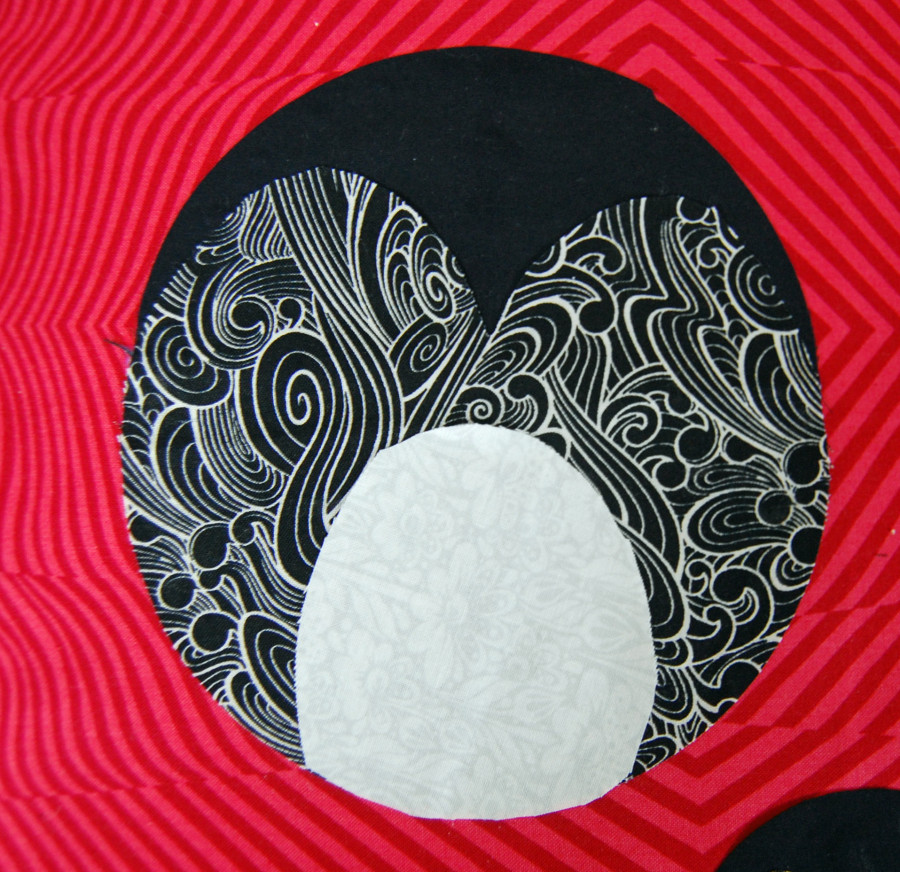
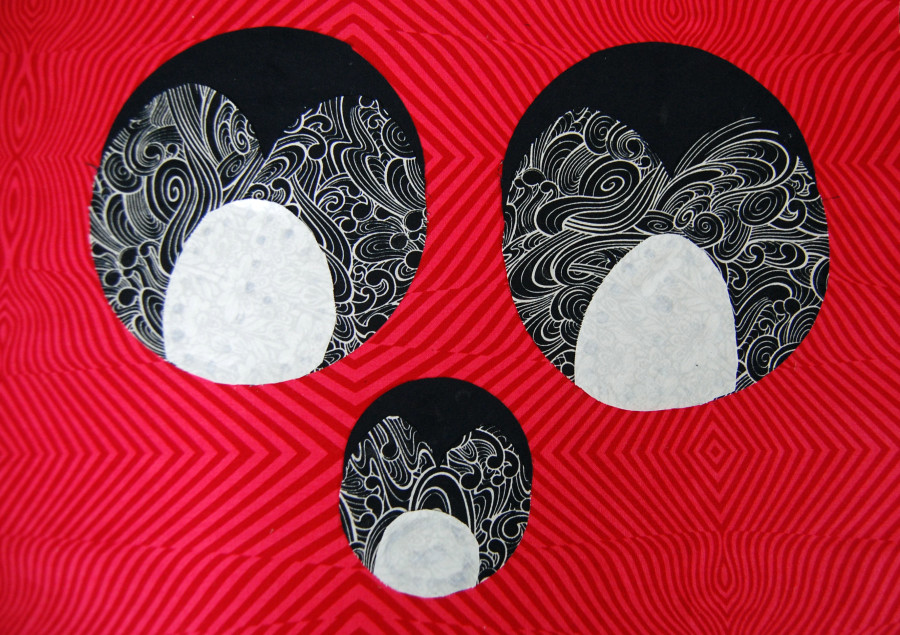
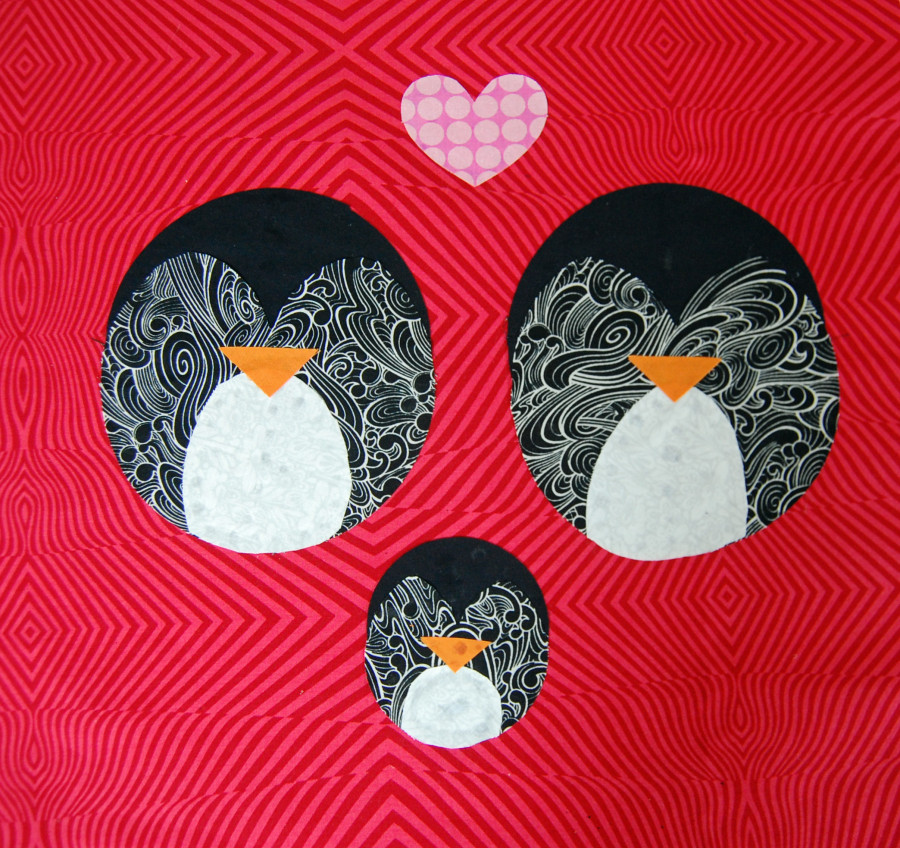
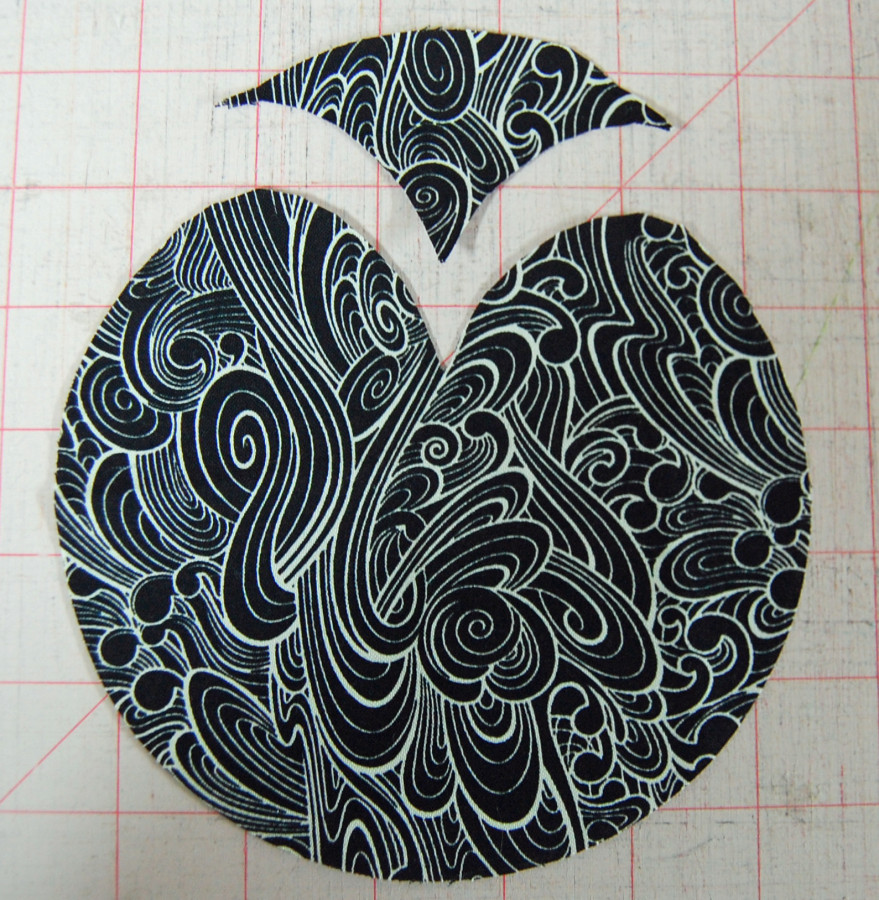 4. With a grey fabric cut 2 large ovals (smaller than the circles); I don’t have a specific size, I just eyeballed it. With the same fabric cut 1 smaller oval. You should have 3 ovals for all 3 penguins tummies. Lay oval on top of face circle heart to measure where to cut the oval to make the tummy shape. Repeat with all 3 ovals.
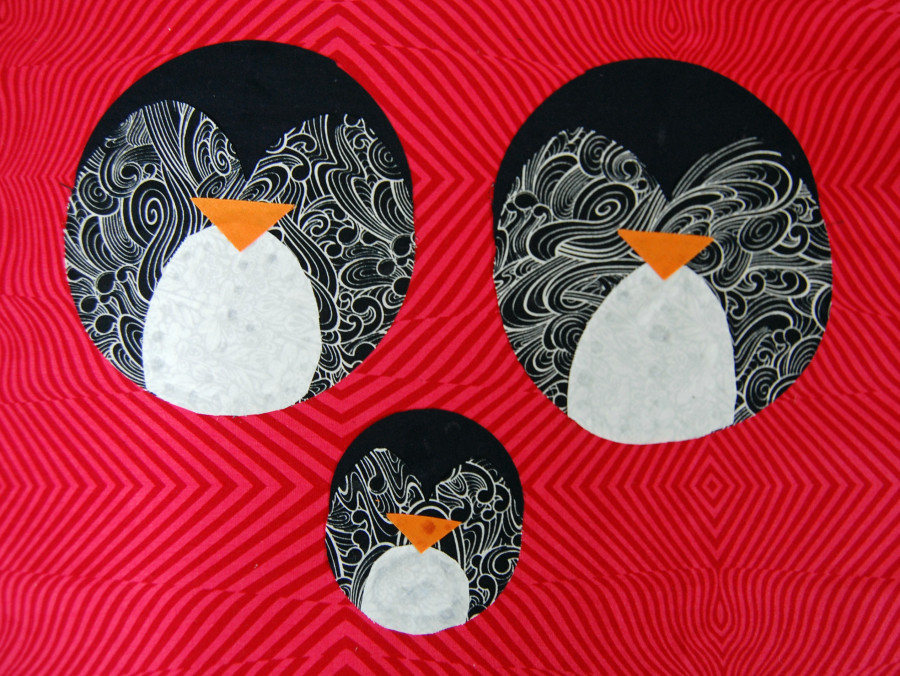
 5. With an orange fabric cut 2 triangles for the larger penguins beaks and 1 triangle for the smaller penguins beak.
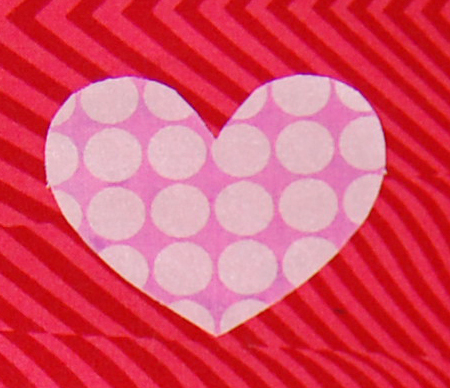
 6. With a pink fabric, cut a small heart (mine was about 2” wide).
 7.Cut background Fat Quarter to 16” X 20”.
Layout for Quilt:
7.Cut background Fat Quarter to 16” X 20”.
Layout for Quilt:
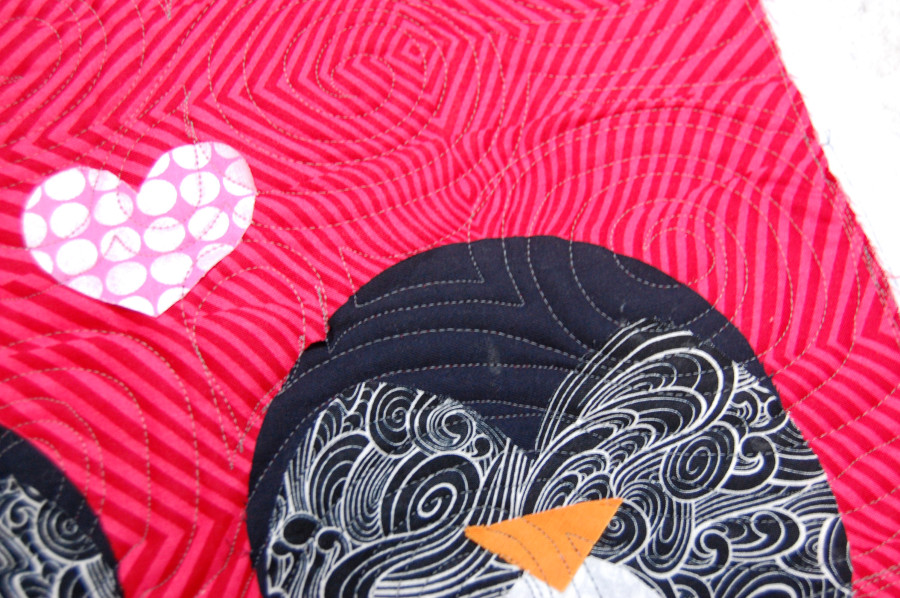
 2. Follow instructions on Heat N Bond® packaging to iron all penguin pieces and heart in place.
*TIP: for extra strength you can appliqué around all pieces. You can appliqué them down by using a zigzag stitch on your sewing machine. I didn’t do this as I just quilted over the entire project.
Finishing the Quilt:
2. Follow instructions on Heat N Bond® packaging to iron all penguin pieces and heart in place.
*TIP: for extra strength you can appliqué around all pieces. You can appliqué them down by using a zigzag stitch on your sewing machine. I didn’t do this as I just quilted over the entire project.
Finishing the Quilt:
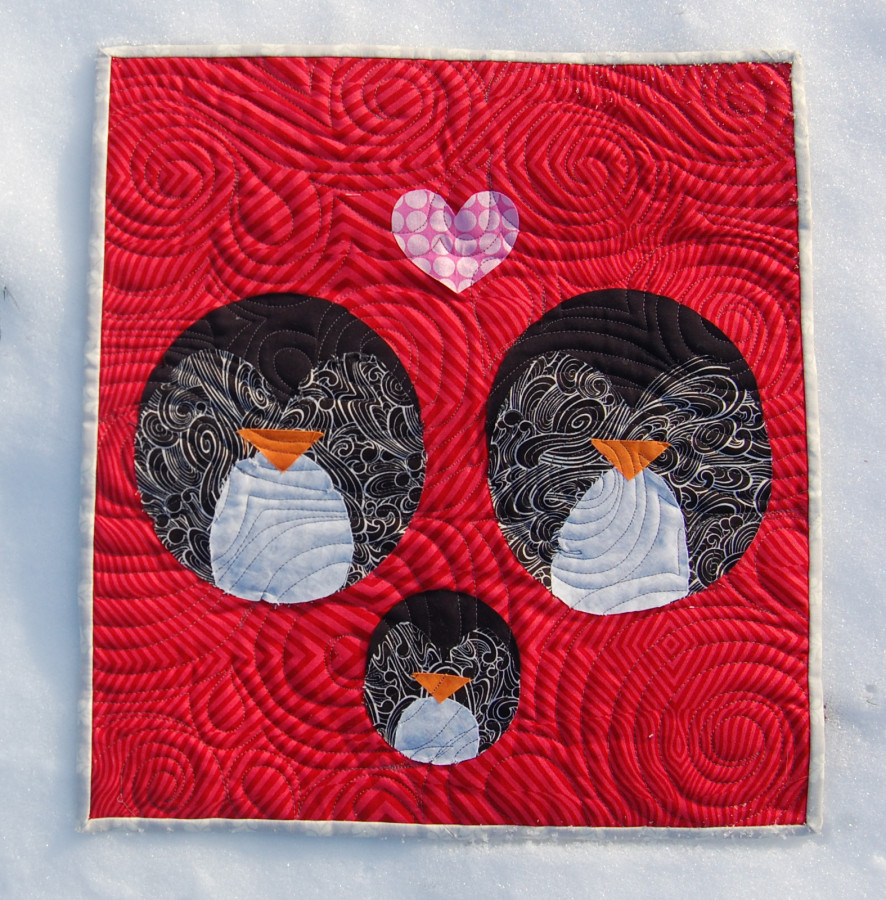
 2. Trim your quilted mini to desired size.
3. Bind mini quilt using remaining fat quarter.
2. Trim your quilted mini to desired size.
3. Bind mini quilt using remaining fat quarter.
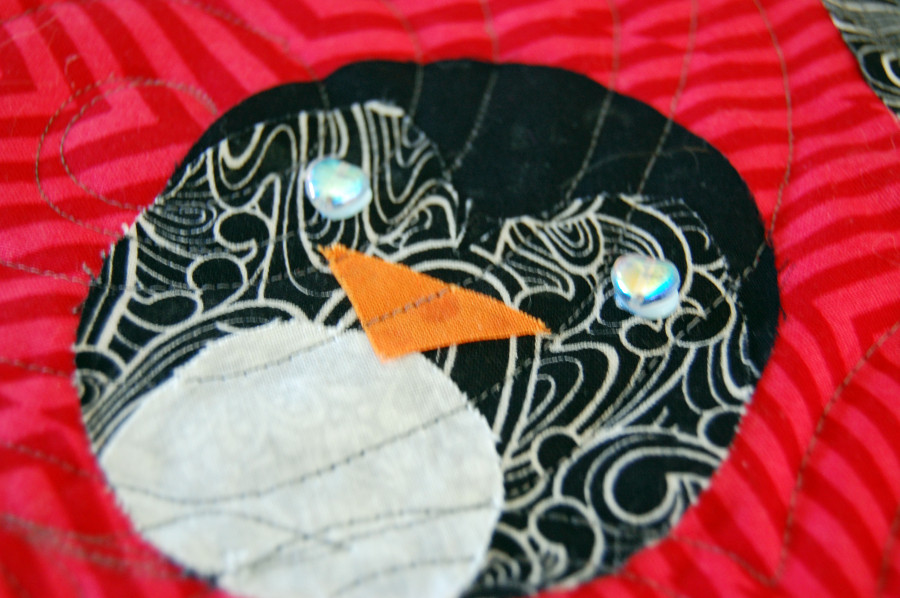
 Embellishments for Quilt:
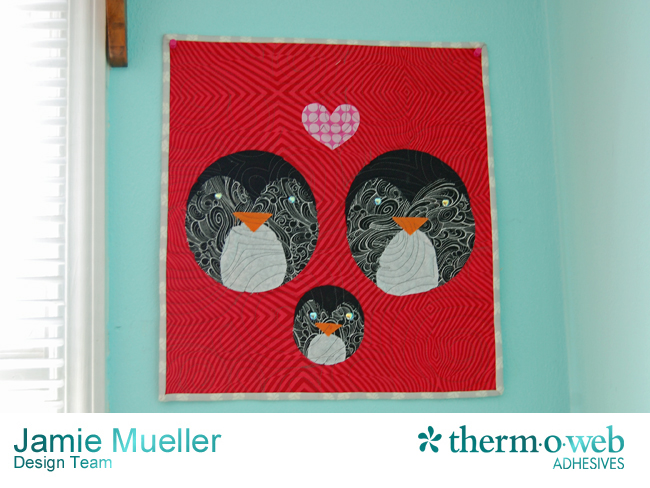
 I hope you enjoy your Valentine’s Penguins and I can’t wait to see what you make! Please tag me using #sunflowerquilts if you make one and spread the love!