No Products in the Cart
 Christmas Cards
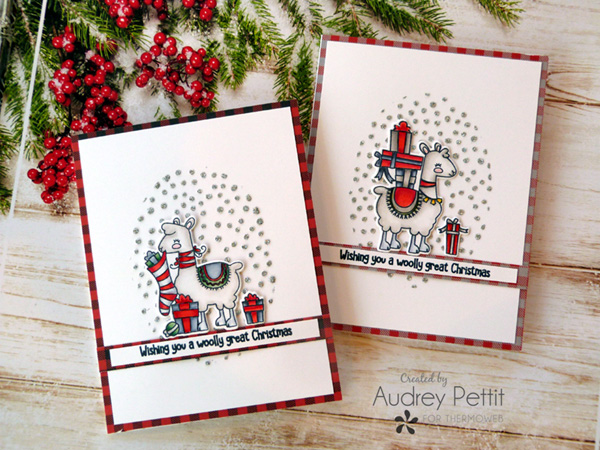
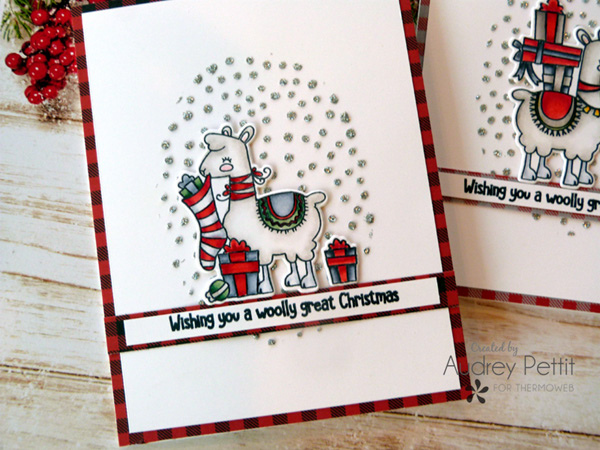
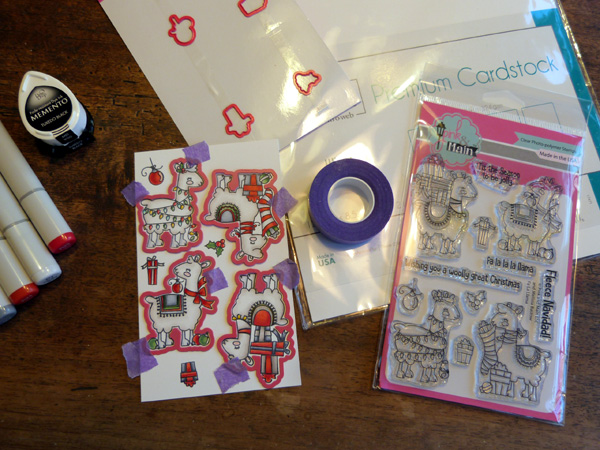 To begin, stamp the images onto Luxury White cardstock using Memento Tuxedo Black ink, and then color the images with Copic markers. Die-cut all the images using the coordinating dies.
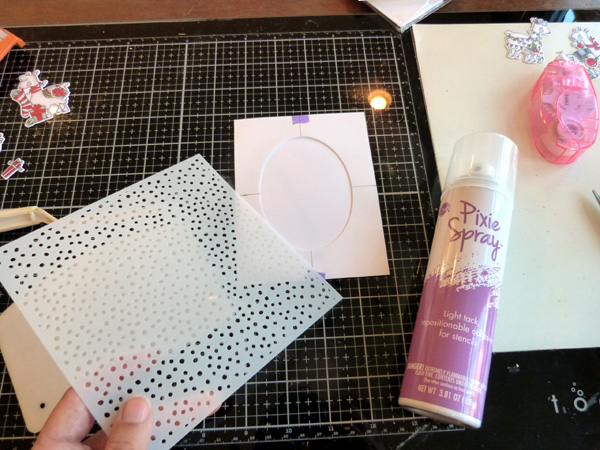
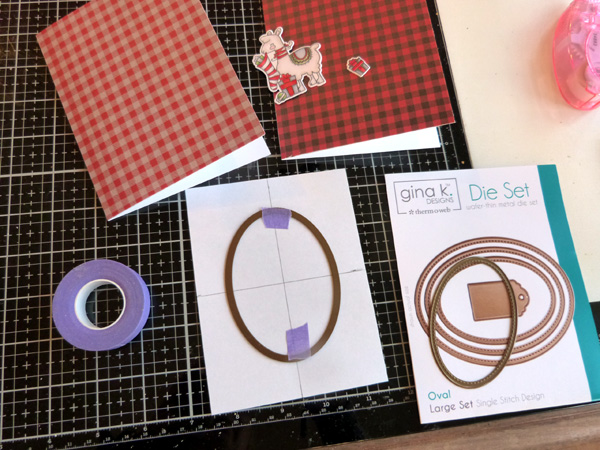 Cover the front of an A2 card base with plaid patterned paper. Cut a smaller layer from Luxury White cardstock. To create the mask, cut a 4" x 5.25" piece of scrap paper or copy paper. Using a pencil and ruler, mark the center of the paper. Place the middle-sized die from the Large Oval die set so that it is centered on the mask. Hold the die in place with Purple Tape, and then die cut the paper. Remove the center oval.
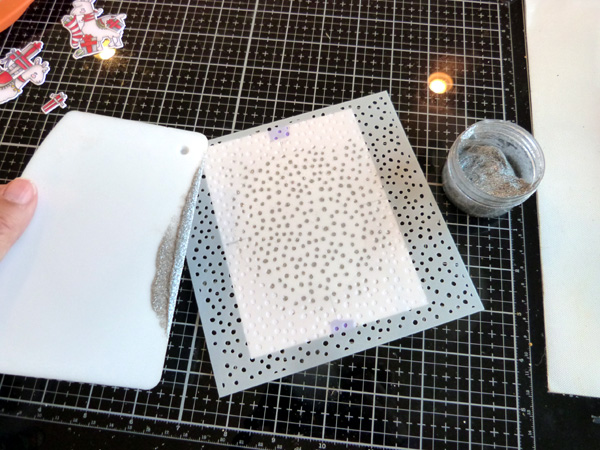 Place the stencil down onto the masked paper. Spread silver Glitz Glitter Gel over the stencil using the Stencil Pal tool.
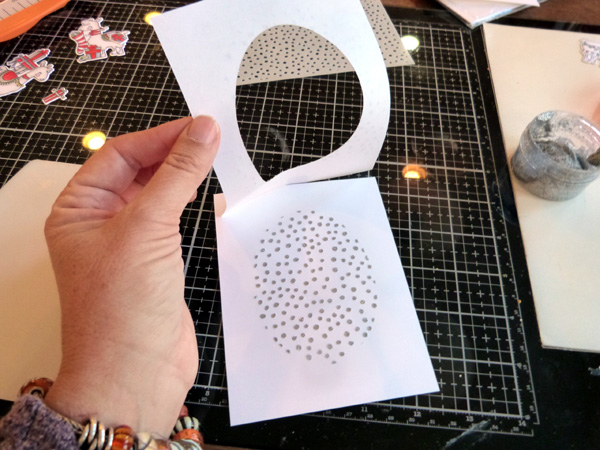 Remove the stencil immediately and wash it and the tools in warm soapy water. Liftoff the mask. Set the cardstock aside to dry.
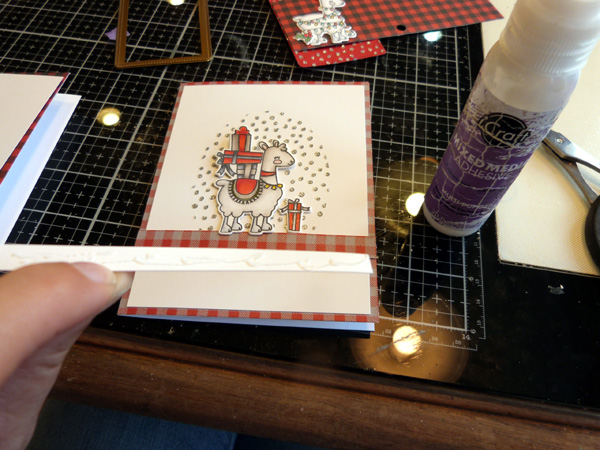 Adhere the cardstock panel to the card base. Add a thin strip of patterned paper across the bottom of the oval design. Stamp a sentiment onto a strip of Luxury White cardstock. Add the sentiment strip and the stamped images to the card using iCraft Mixed Media Adhesive.
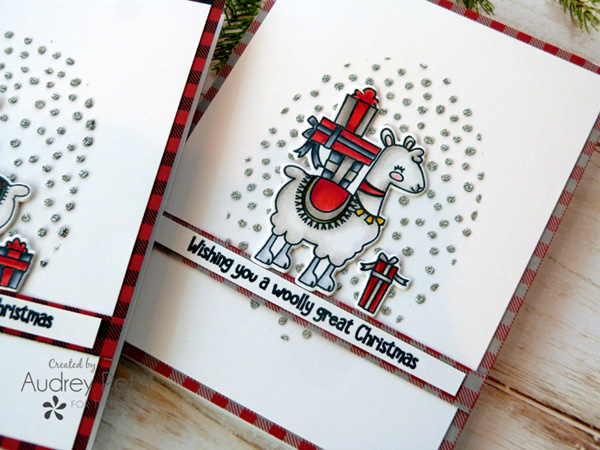 This masked design is so simple, yet really striking with the shine and texture of the Glitz gel. I love how it adds dimension without adding too much bulk and keeps cards flat for mailing. The gel also looks amazing on colored cardstock, which I'll show next on a pair of festive holiday tags.
 ThermOWeb Supplies:
Gina K Designs Premium Cardstock: Luxury White, Red Velvet
Gina K Designs Wafer - Thin Die Set: Decorative Tag
Gina K Designs Glitz Glitter Gel: Silver
Pixie Spray
iCraft Mixed Media Adhesive
XL Memory Tape Runner
Purple Tape 1/2"
Stencil Pal
Pink & Main Fa La Llama Stamp Set & Dies
Patterned Paper: Photo Play Paper
Stencil: Echo Park Paper
Twine: Doodlebug
Ink: Memento Tuxedo Black
Copic Markers
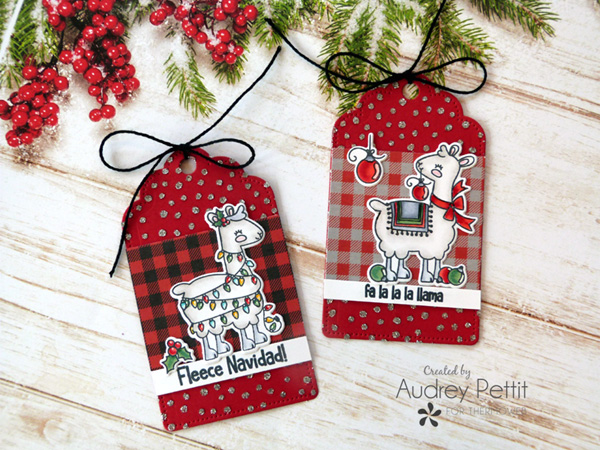
These gift tags make a great matching set to the cards, and utilize many of the same elements.... fun plaid patterned paper, Copic coloring, simple sentiment strips, and silver stenciled dots.
ThermOWeb Supplies:
Gina K Designs Premium Cardstock: Luxury White, Red Velvet
Gina K Designs Wafer - Thin Die Set: Decorative Tag
Gina K Designs Glitz Glitter Gel: Silver
Pixie Spray
iCraft Mixed Media Adhesive
XL Memory Tape Runner
Purple Tape 1/2"
Stencil Pal
Pink & Main Fa La Llama Stamp Set & Dies
Patterned Paper: Photo Play Paper
Stencil: Echo Park Paper
Twine: Doodlebug
Ink: Memento Tuxedo Black
Copic Markers
These gift tags make a great matching set to the cards, and utilize many of the same elements.... fun plaid patterned paper, Copic coloring, simple sentiment strips, and silver stenciled dots.
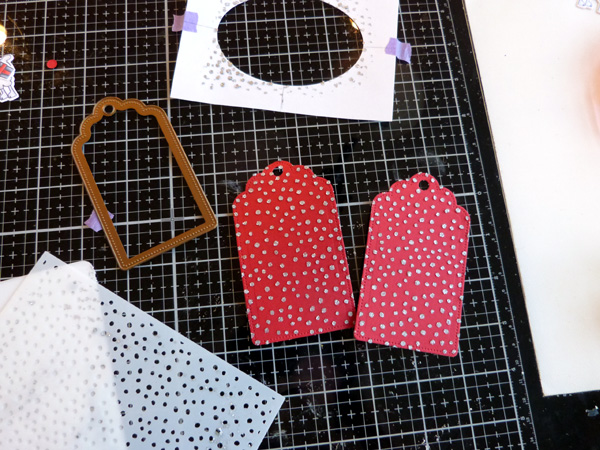 To make the tags, die-cut the largest tag shape from Red Velvet cardstock. Lay the tags side by side and place the dot stencil down onto them. *The stencil should still be tacky from the Pixie Spray added before. Spread silver Glitz Glitter Gel over the stencil using the Stencil Pal. Remove the stencil, and set the tags aside to dry. Wash the stencil and tools with warm soapy water.
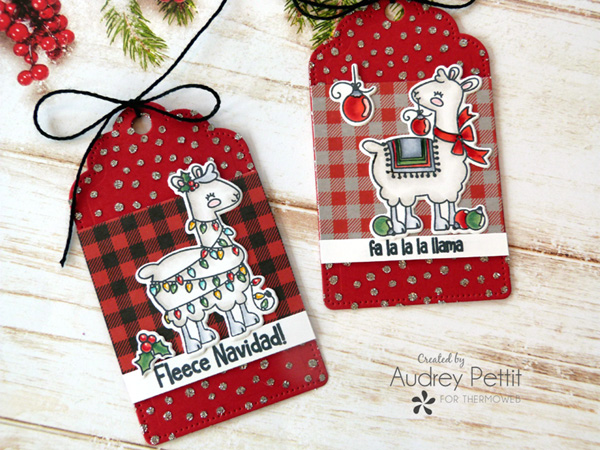 Then simply add blocks of leftover patterned papers, stamped images, and sentiment strips. Using the iCraft Mixed Media Adhesive helps when adhering elements to slightly textured surfaces, liked the gelled tags. Add twine to the top of the tags to tie.
Enjoy!
We'd like to invite you to enter to win a $25 Gift Card to shop with us! Be sure to follow the Rafflecopter to get yourself entered to win! And that's not all! Our friends at Pink & Main are offering a chance to win a surprise package valued at $50!! Visit their blog for more details and to see the projects their talented team made with our products as well! It's going to be an amazing week!
a Rafflecopter giveaway
Then simply add blocks of leftover patterned papers, stamped images, and sentiment strips. Using the iCraft Mixed Media Adhesive helps when adhering elements to slightly textured surfaces, liked the gelled tags. Add twine to the top of the tags to tie.
Enjoy!
We'd like to invite you to enter to win a $25 Gift Card to shop with us! Be sure to follow the Rafflecopter to get yourself entered to win! And that's not all! Our friends at Pink & Main are offering a chance to win a surprise package valued at $50!! Visit their blog for more details and to see the projects their talented team made with our products as well! It's going to be an amazing week!
a Rafflecopter giveaway
