No Products in the Cart



6

 Cut 19 inch square from t-shirt, press Heatn'Bond® Fusible Tricot to back side with Oliso Iron.
Press HeatN'Bond® Soft Stretch to the back side of green and gray knit fabric, I cut pieces out of old t-shirts. You only need about 6" square for the green and 11" square from gray.
Cut 19 inch square from t-shirt, press Heatn'Bond® Fusible Tricot to back side with Oliso Iron.
Press HeatN'Bond® Soft Stretch to the back side of green and gray knit fabric, I cut pieces out of old t-shirts. You only need about 6" square for the green and 11" square from gray.
 Using and electronic cutter cut the star circle from green knit. I leave the paper backing on when I put my fabric on the cutting mat, it allows me to use the paper backing as a pacer when pressing.
 Cut rings from gray fabric.
 Use paper backing as a spacer for proper ring placement, pretty handy right!?.
 Add a green star to center and press in place with Oliso iron.
 Stitch around the edges of each piece about 1/16-inch from the edge. If you prefer a cleaner look use HeatnBond® Soft Stretch™ Ultra and skip the stitching.
Cut 19 inch square from the front and the back of Camo Jacket or Military top.
Spray baste with SpraynBond Basting Spray the StitchnSew™ Sew-In High Loft Fleece to the wrong side of T-shirt with Captain America star and wrong side of jacket back
Stitch around the edges of each piece about 1/16-inch from the edge. If you prefer a cleaner look use HeatnBond® Soft Stretch™ Ultra and skip the stitching.
Cut 19 inch square from the front and the back of Camo Jacket or Military top.
Spray baste with SpraynBond Basting Spray the StitchnSew™ Sew-In High Loft Fleece to the wrong side of T-shirt with Captain America star and wrong side of jacket back
 Trim about 3/4 inch of zipper teeth from both sides of zipper, this will eliminate any broken needles. I will still recommend going slowly over these zipper areas due to the reinforcements on the zips.
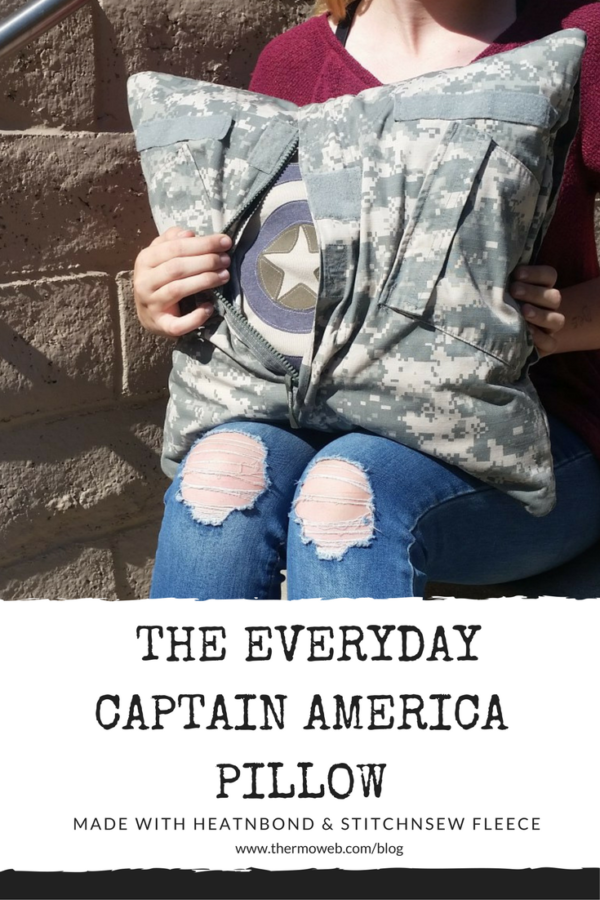
 Jacket zipper should be pulled towards the center of the jacket and velcro closures all pressed together. Lay jacket front on T-shirt fleece layer with both right sides facing up. Baste around edges.
With right sides of pillow front and pillow back facing stitch around all 4 sides of pillow leaving an opening at the bottom to turn and fill. Clip excess fabric from the corners then turn pillow right side out. Fill and hand stitched closed.
The zipper will still move freely up and down as you desire to reveal the hero inside.
In honor of the many who have served to and the families who have sacrificed. Thank You.
Happy Sewing,
Jennifer Davey
Jacket zipper should be pulled towards the center of the jacket and velcro closures all pressed together. Lay jacket front on T-shirt fleece layer with both right sides facing up. Baste around edges.
With right sides of pillow front and pillow back facing stitch around all 4 sides of pillow leaving an opening at the bottom to turn and fill. Clip excess fabric from the corners then turn pillow right side out. Fill and hand stitched closed.
The zipper will still move freely up and down as you desire to reveal the hero inside.
In honor of the many who have served to and the families who have sacrificed. Thank You.
Happy Sewing,
Jennifer Davey