No Products in the Cart

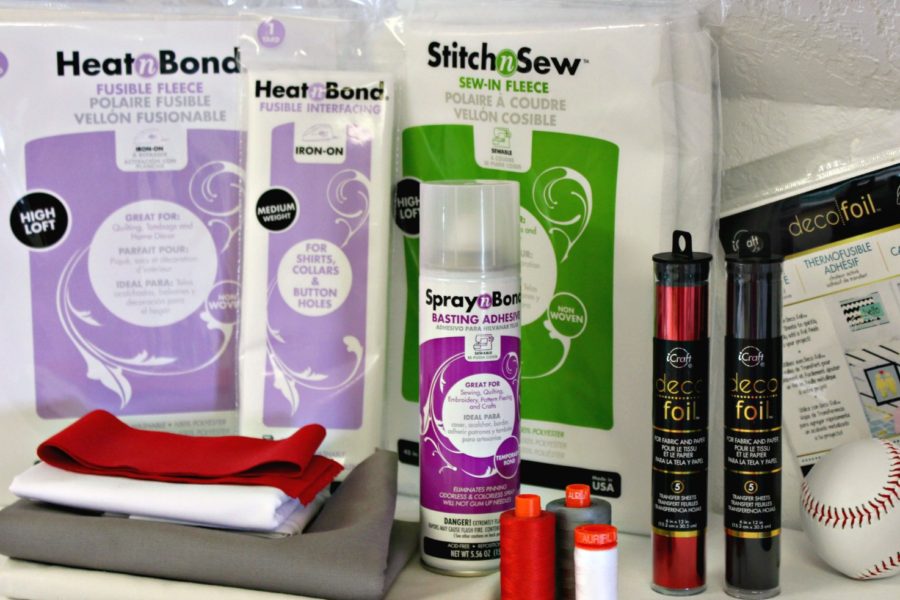 HeatNBond® Fusible Fleece 4 ½” x 4 ½”
HeatNBond® Fusible light or medium weight interfacing 4 ½” x 4 ½”
StitchNSew™ Fleece Sew-In Hi Loft 18 ½” x 18 ½”
Deco Foil™ Hot Melt Adhesive
Deco Foil™ Transfer Sheets (Black and Red)
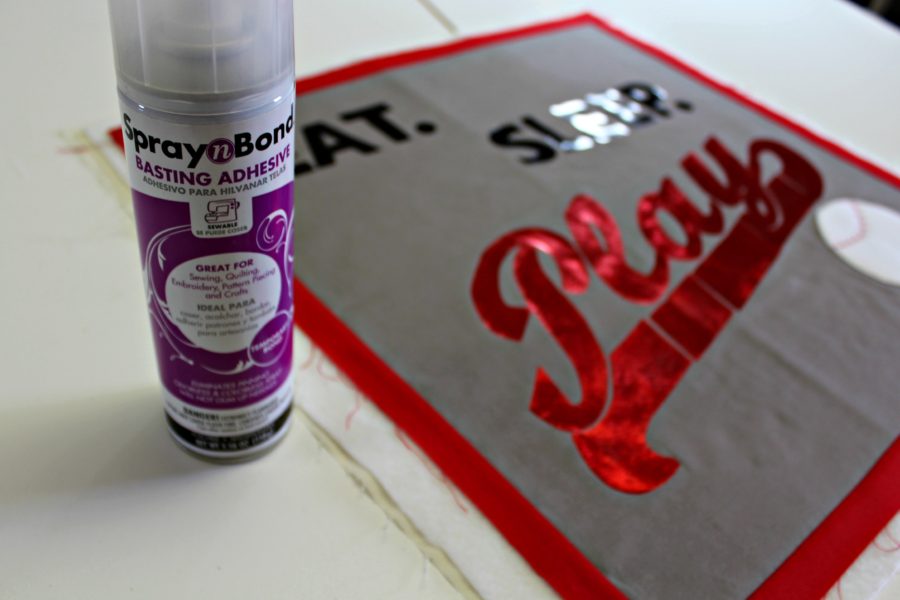
SpraynBond® Basting Adhesive
Aurifil Thread – 50 wt. (2270, 2024, 2620)
Iron – (I love my Oliso Pro)
Fabric
1 - 16 ½” x 16 ½” – Gray
2 – 17 ½” x 11 ½” Gray for pillow back
2 Strips 1” x 16 ½” - Red
2 Strips 1” x 17 ½” - Red
1 - 4 ½” x 4 ½” – White
Other fabric:
1 - 19” x 19” Muslin (will not be seen in final project)
Other Supplies
Ruler, erasable marking pen, permanent marker, sharp scissors,
Sewing machine with a walking foot and other general sewing supplies
16” pillow form
Pattern for the applique -visit the Creatin’ in the Sticks pattern shop at Craftsy for the full PDF pattern
Sewing
**All seams are stitched at ¼” unless otherwise stated
HeatNBond® Fusible Fleece 4 ½” x 4 ½”
HeatNBond® Fusible light or medium weight interfacing 4 ½” x 4 ½”
StitchNSew™ Fleece Sew-In Hi Loft 18 ½” x 18 ½”
Deco Foil™ Hot Melt Adhesive
Deco Foil™ Transfer Sheets (Black and Red)
SpraynBond® Basting Adhesive
Aurifil Thread – 50 wt. (2270, 2024, 2620)
Iron – (I love my Oliso Pro)
Fabric
1 - 16 ½” x 16 ½” – Gray
2 – 17 ½” x 11 ½” Gray for pillow back
2 Strips 1” x 16 ½” - Red
2 Strips 1” x 17 ½” - Red
1 - 4 ½” x 4 ½” – White
Other fabric:
1 - 19” x 19” Muslin (will not be seen in final project)
Other Supplies
Ruler, erasable marking pen, permanent marker, sharp scissors,
Sewing machine with a walking foot and other general sewing supplies
16” pillow form
Pattern for the applique -visit the Creatin’ in the Sticks pattern shop at Craftsy for the full PDF pattern
Sewing
**All seams are stitched at ¼” unless otherwise stated
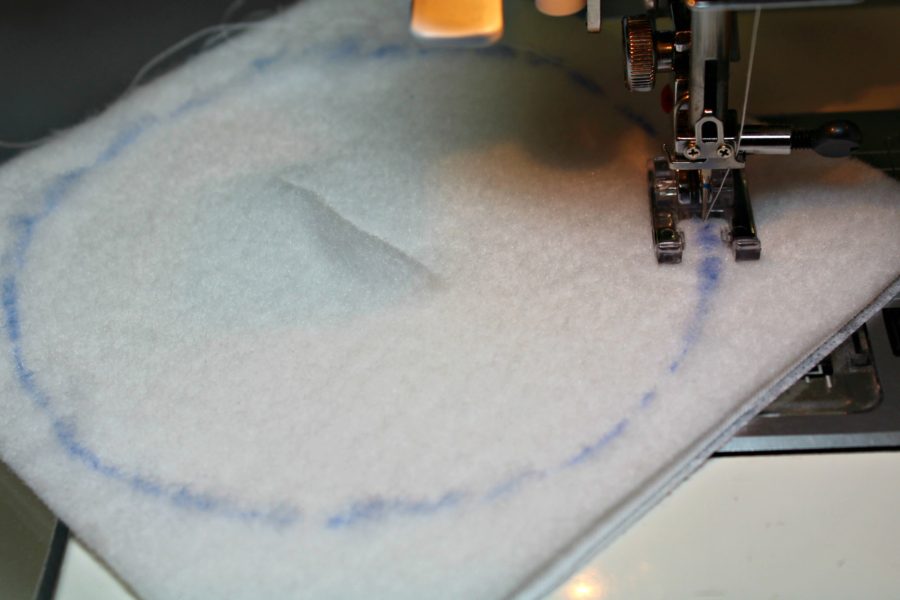 Stitch around the traced baseball, backstitching at the beginning and the end. Trim close to stitching and use the 2” slit to turn the baseball right side out. Carefully push the edges out. The fusible side of the fleece is now on the bottom and the circle is perfectly round.
[tooltip text="TooltipText"]Tip: This technique is also great for the middle of Dresden blocks.[/tooltip]
Set the baseball aside.
Stitch around the traced baseball, backstitching at the beginning and the end. Trim close to stitching and use the 2” slit to turn the baseball right side out. Carefully push the edges out. The fusible side of the fleece is now on the bottom and the circle is perfectly round.
[tooltip text="TooltipText"]Tip: This technique is also great for the middle of Dresden blocks.[/tooltip]
Set the baseball aside.
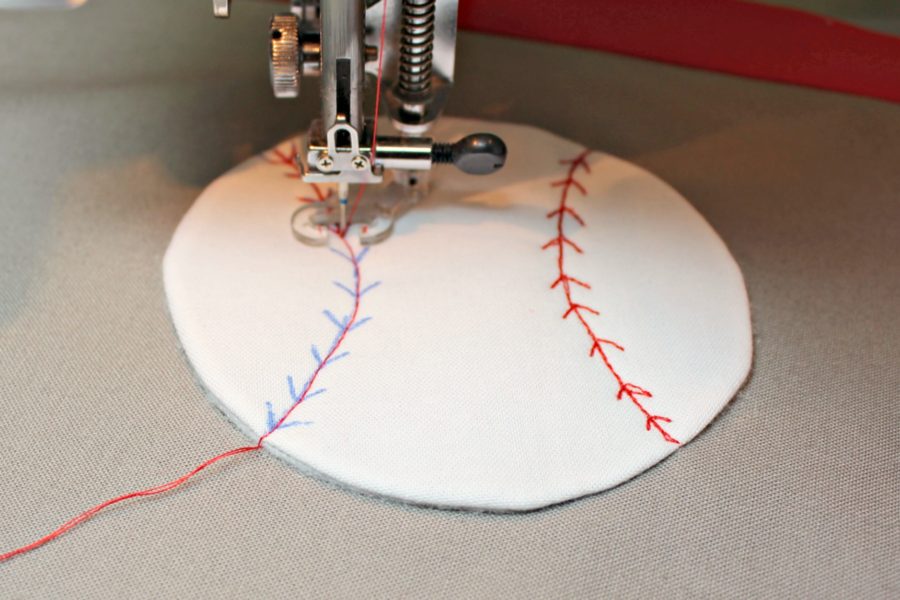
 Let the ball cool then mark the half circles with an erasable pen according to the pattern. Mark stitch lines on the half circles as pictured. Stitch on the marked lines with Aurifil 50 wt. thread (#2270) with a straight stitch on the sewing machine or hand embroider.
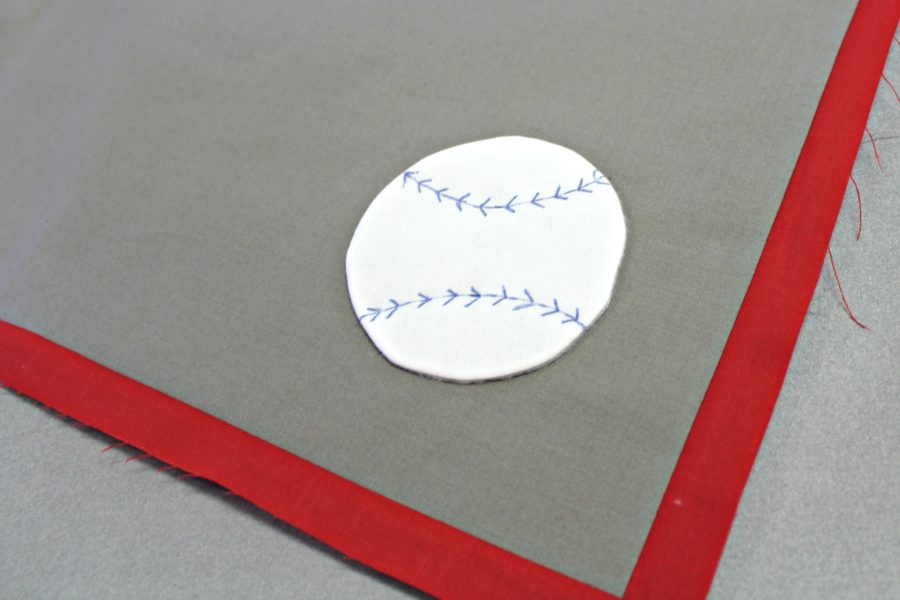
 Stitch around the baseball with a straight, zigzag, or blanket stitch with Aurifl 50 wt. thread (#2024).
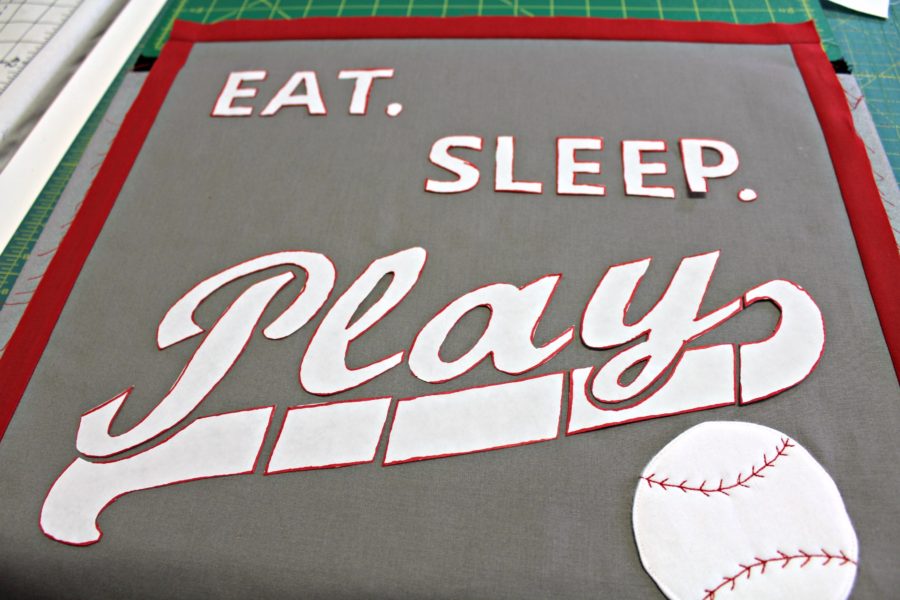 Follow the manufacturer’s instructions to apply the hot melt letters.
 Let the letters cool and peel off the paper.
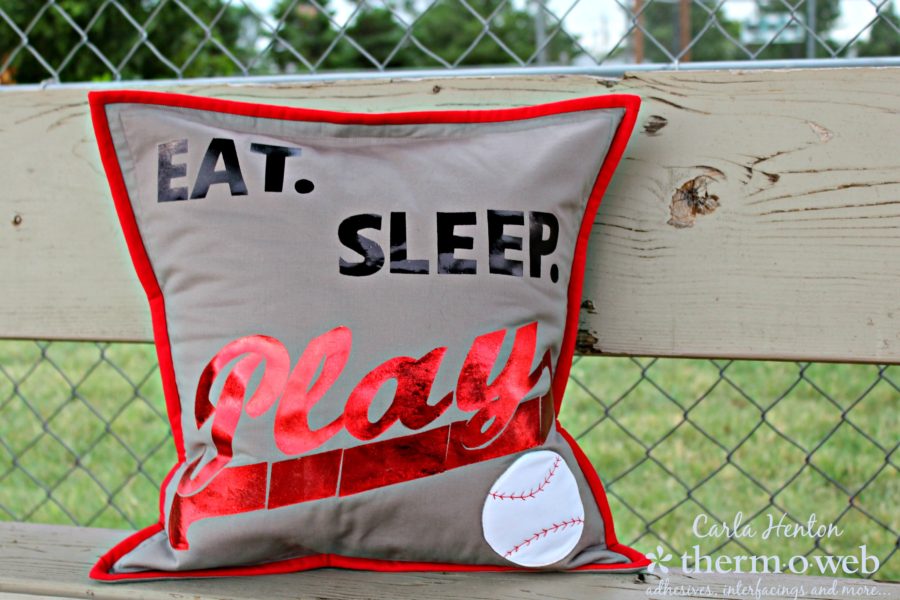
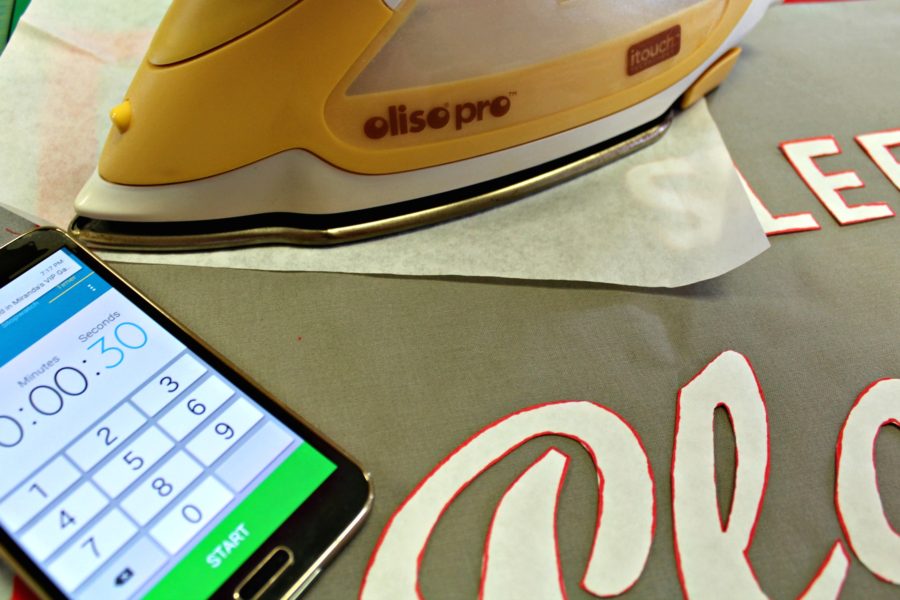
Apply the Deco Foil™ to the letters following the instructions by the manufacturer. The “Play” will need several sheets of red Deco Foil transfer sheets. Iron by sections. This example was ironed in 5 sections. 1 for “Eat”, 1 for “Sleep”, and 3 for “Play.”
[tooltip text="TooltipText"]Tip: Pressure is key here. Really press the iron down. Ironing for a full 30 seconds with your iron on the medium/wool setting.[/tooltip]
Let the letters cool completely before removing the foil transfer sheets.
Step 4:
Let the letters cool and peel off the paper.
Apply the Deco Foil™ to the letters following the instructions by the manufacturer. The “Play” will need several sheets of red Deco Foil transfer sheets. Iron by sections. This example was ironed in 5 sections. 1 for “Eat”, 1 for “Sleep”, and 3 for “Play.”
[tooltip text="TooltipText"]Tip: Pressure is key here. Really press the iron down. Ironing for a full 30 seconds with your iron on the medium/wool setting.[/tooltip]
Let the letters cool completely before removing the foil transfer sheets.
Step 4:
 Prepare the quilted pillow top by making a quilt sandwich with muslin, high loft StitchNSew™ Fleece and the baseball top. Protect the work surface and place the muslin down. Spray it with SprayNBond basting spray, then place the StitchNSew Fleece on top and smooth all the wrinkles out with your hands. Spray the back of the pillow top and place on top of the fleece and smooth to baste the layers together. Next, quilt as desired with Aurifil thread (#2620) and trim to 17½” x 17 ½”.
Step 5:
Prepare the quilted pillow top by making a quilt sandwich with muslin, high loft StitchNSew™ Fleece and the baseball top. Protect the work surface and place the muslin down. Spray it with SprayNBond basting spray, then place the StitchNSew Fleece on top and smooth all the wrinkles out with your hands. Spray the back of the pillow top and place on top of the fleece and smooth to baste the layers together. Next, quilt as desired with Aurifil thread (#2620) and trim to 17½” x 17 ½”.
Step 5:
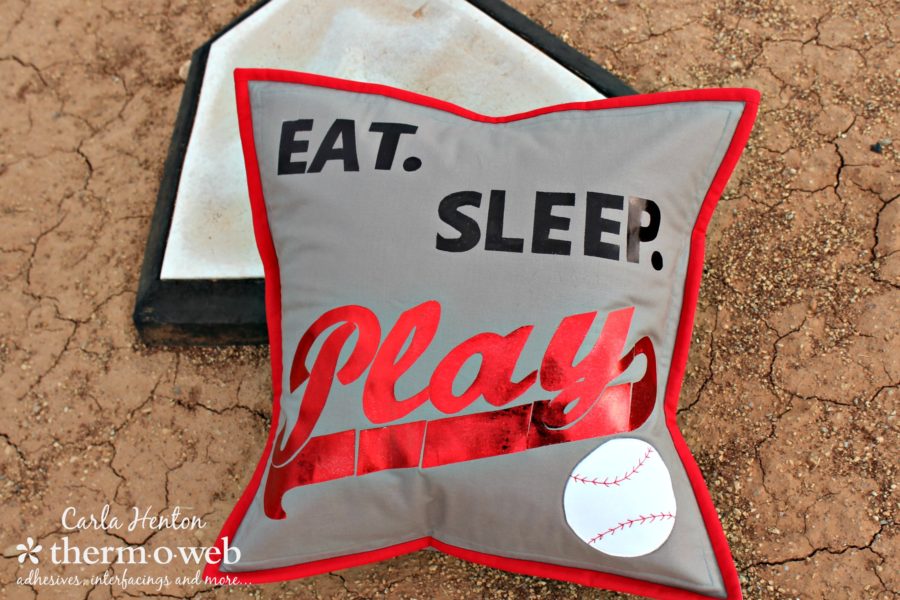
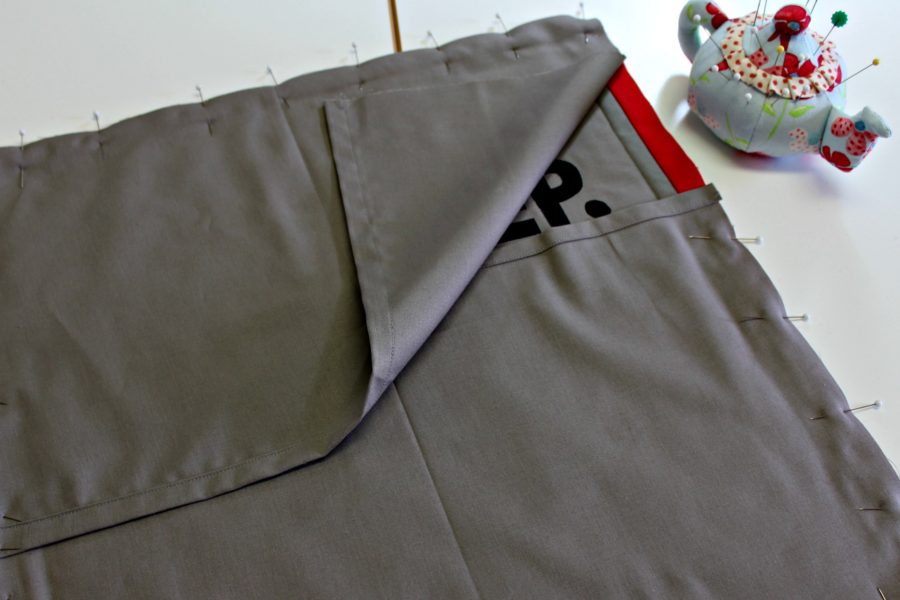 Hem one of the long ends of both 17 ½” x 11½” gray pillow backing pieces by turning under ½” and pressing and then turning under again, pressing, and stitching in place. Lay one of the hemmed pieces right side down on the pillow top with the hem in the center. Overlap the other hemmed back piece. right side down with the hemmed edge in the middle. Pin the edges of the pillow top and stitch with a ¼” seam all around using a walking foot. Clip the corner seam allowances off and turn the pillow cover right side out. Push the corners out and pin the red edge.
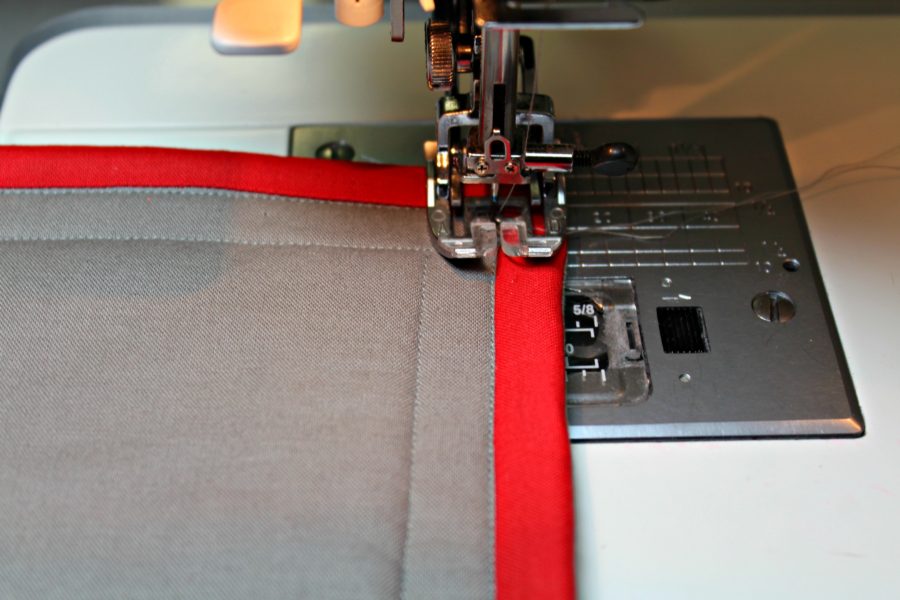 Stitch in the ditch between the red border
and the gray top to form a faux piping and encase the raw edges inside.
Insert the 16” x 16” pillow form and it’s a home run!
Stitch in the ditch between the red border
and the gray top to form a faux piping and encase the raw edges inside.
Insert the 16” x 16” pillow form and it’s a home run!