No Products in the Cart
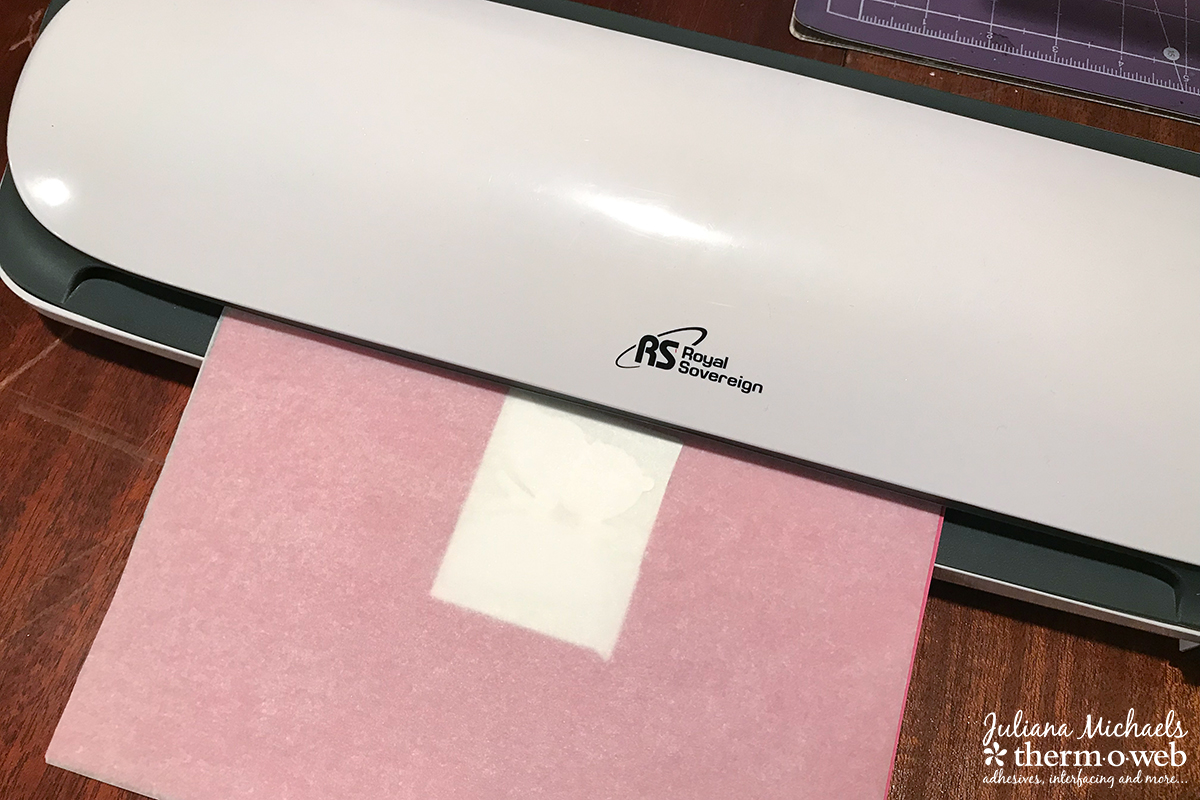
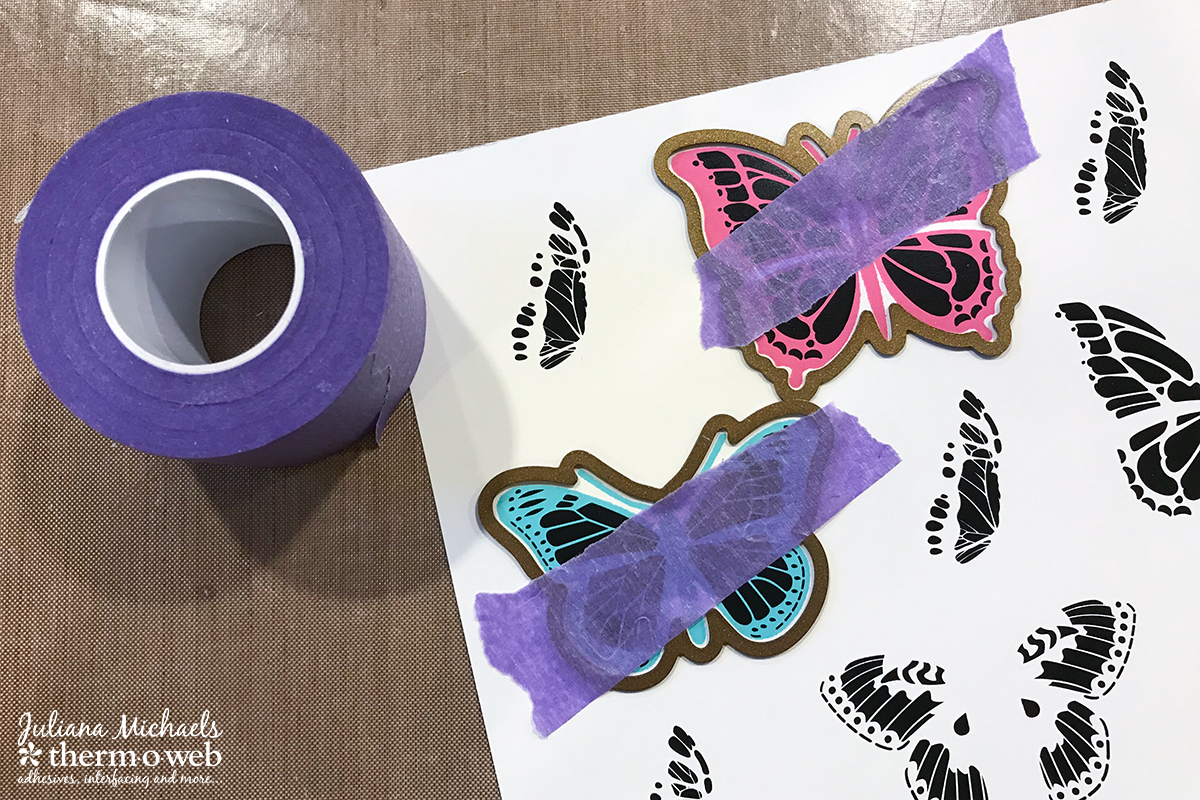 Look at how perfectly die cut these images are! You will never again have to worry about the dies sliding around when you are die cutting. Another wonderful thing about the Purple Tape is that it doesn't tear your paper. Now, if it does leave any residue, it easily rubs off using an Adhesive Pick-Up Square. In my experience, I have only had this happen when I reused the tape for multiple die cuts.
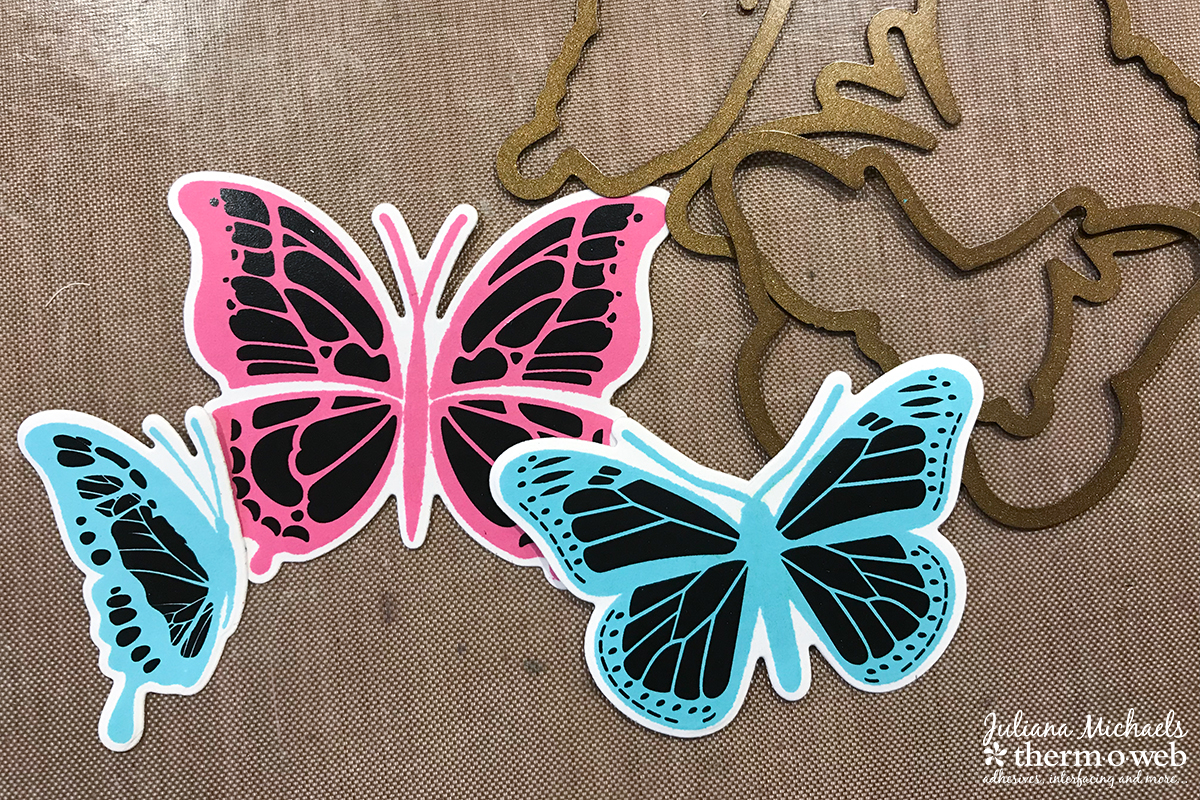
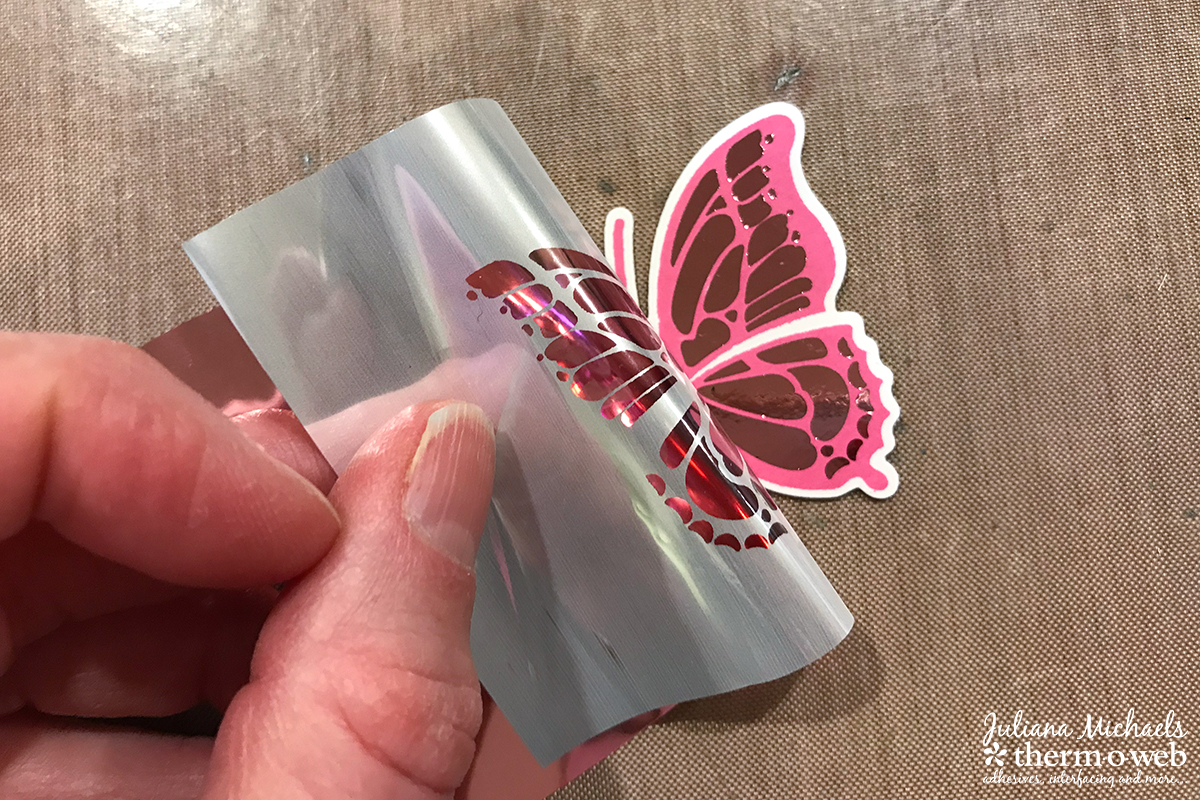
 After it comes through the laminator, peel back the transfer sheet to reveal the beautifully foiled image! Isn't it gorgeous?!
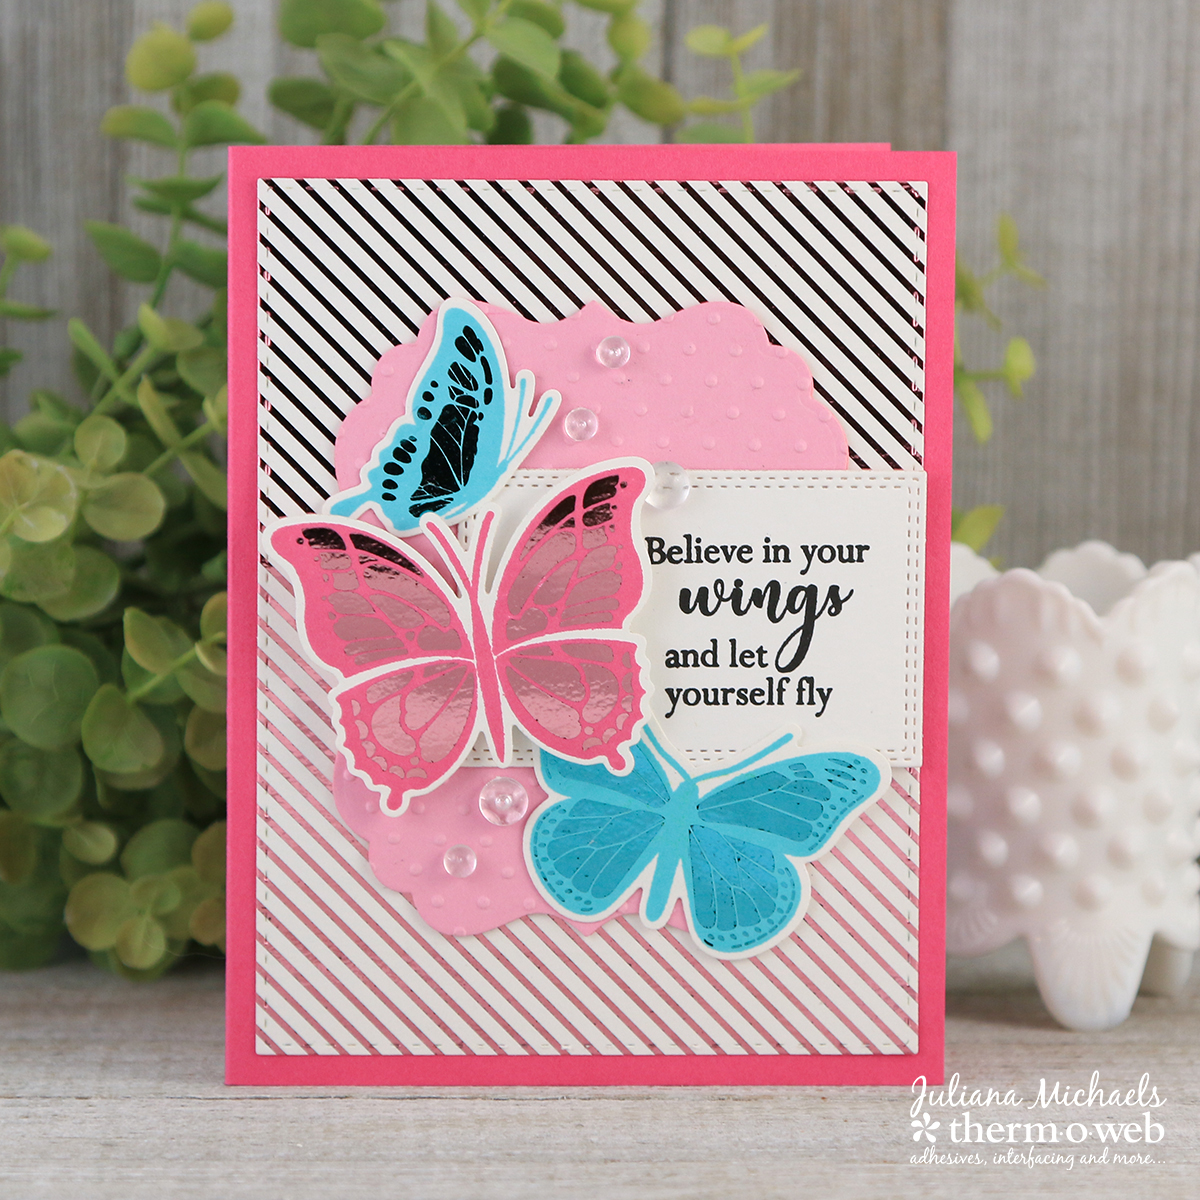
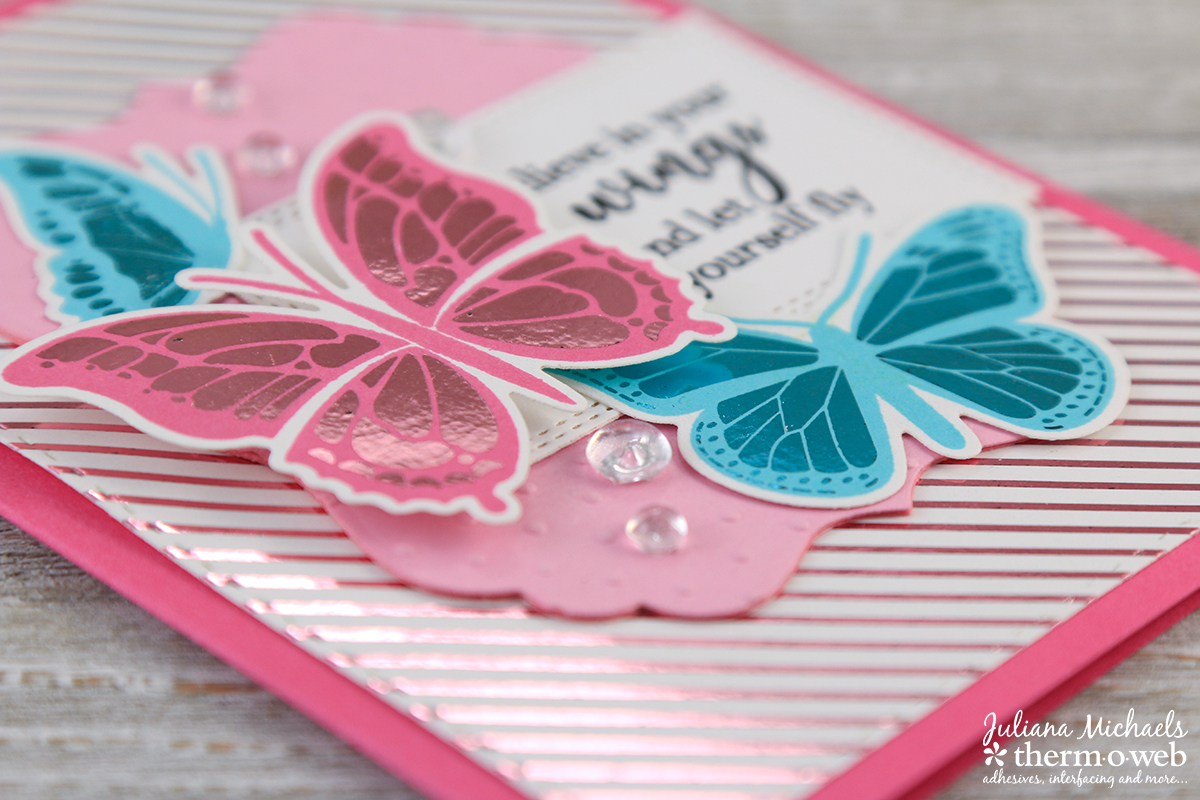
 To create the background of the card, use the Pinstripes from the new Bold Backdrops Foil-Mates™ Background. Foil this using Bubblegum Pink Fancy Foils™.
Stamp the sentiment using black ink onto a piece of White Premium Cardstock die cut using one of the dies from the Gina K Designs Nested Double Stitched Rectangles.
To create the background of the card, use the Pinstripes from the new Bold Backdrops Foil-Mates™ Background. Foil this using Bubblegum Pink Fancy Foils™.
Stamp the sentiment using black ink onto a piece of White Premium Cardstock die cut using one of the dies from the Gina K Designs Nested Double Stitched Rectangles.
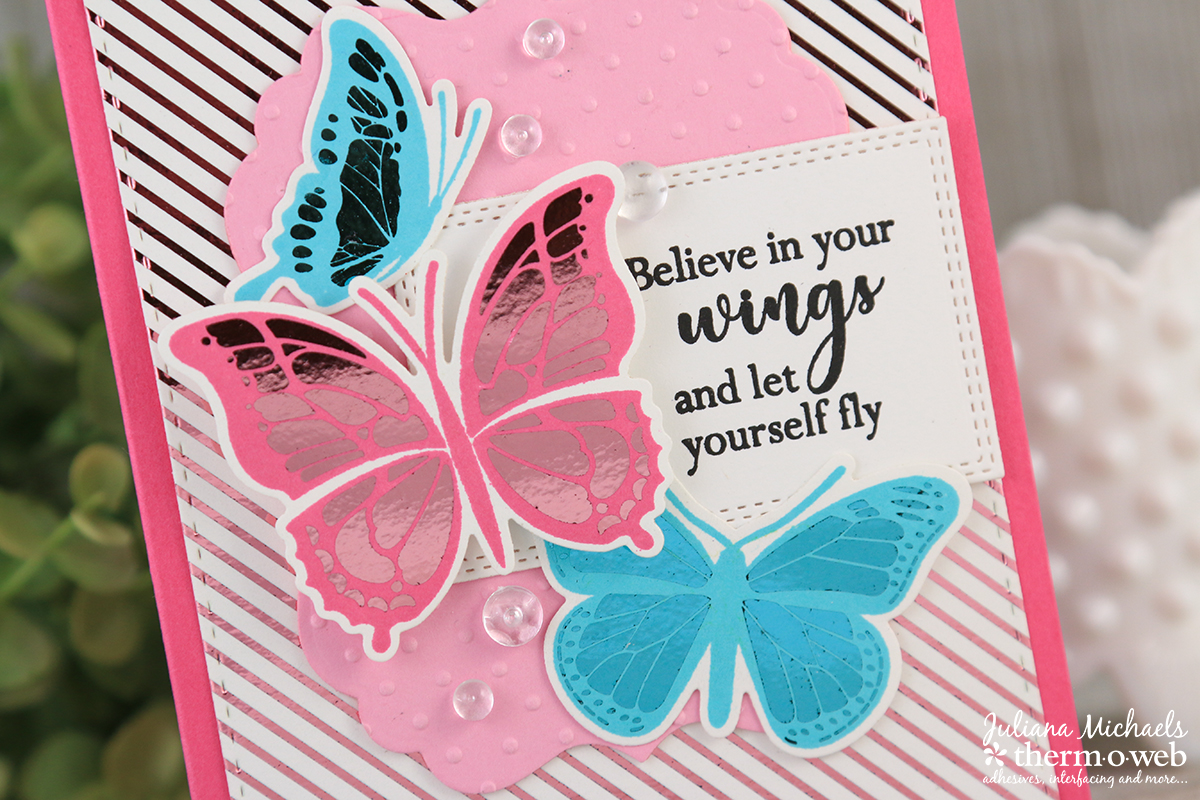 Die cut a piece of light pink cardstock using the large label die from the Gina K Designs Nested Label Dies. Dry emboss this with a small polka dot embossing folder.
Use the Memory Tape Runner XL to adhere all your layers to the card base. Adhere two of the stamped and foiled butterflies using the Memory Tape Runner XL. Give the main butterfly some dimension by adhering it with a 3D Foam Square.
Finally, adhere a few clear gems using Zots Adhesive Dots.
Die cut a piece of light pink cardstock using the large label die from the Gina K Designs Nested Label Dies. Dry emboss this with a small polka dot embossing folder.
Use the Memory Tape Runner XL to adhere all your layers to the card base. Adhere two of the stamped and foiled butterflies using the Memory Tape Runner XL. Give the main butterfly some dimension by adhering it with a 3D Foam Square.
Finally, adhere a few clear gems using Zots Adhesive Dots.
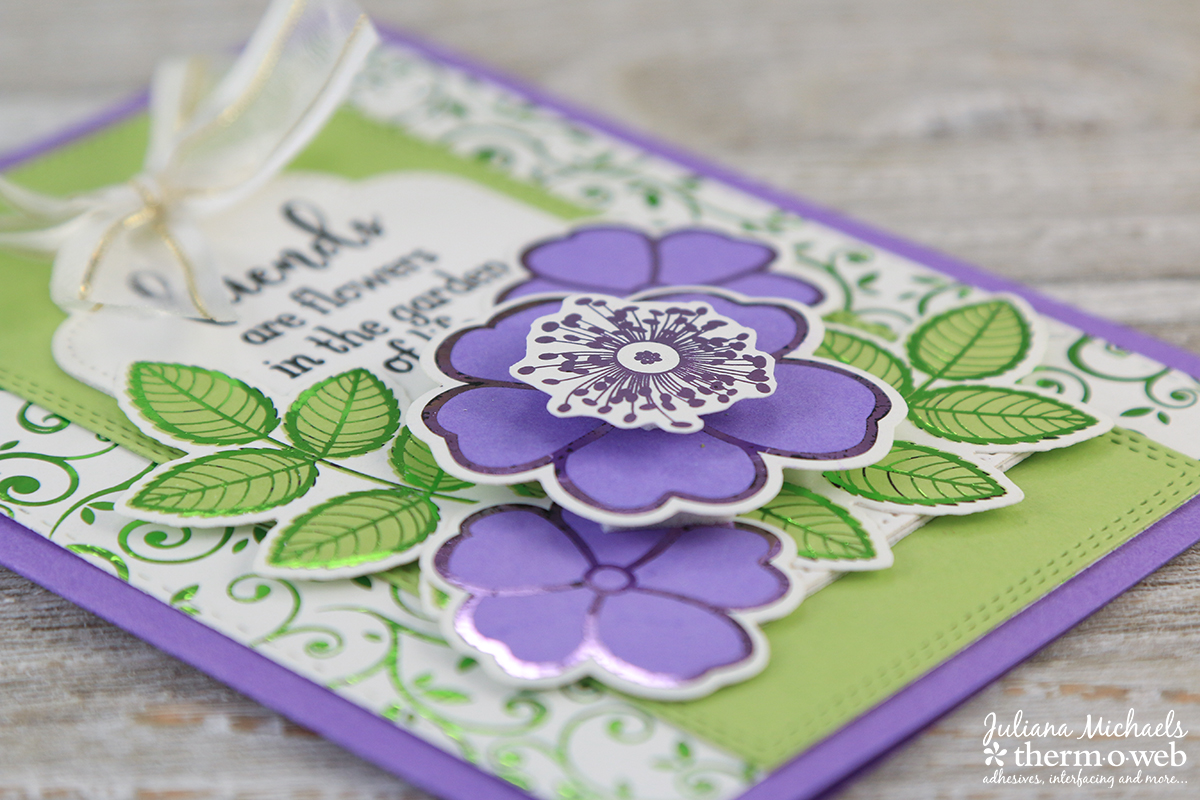
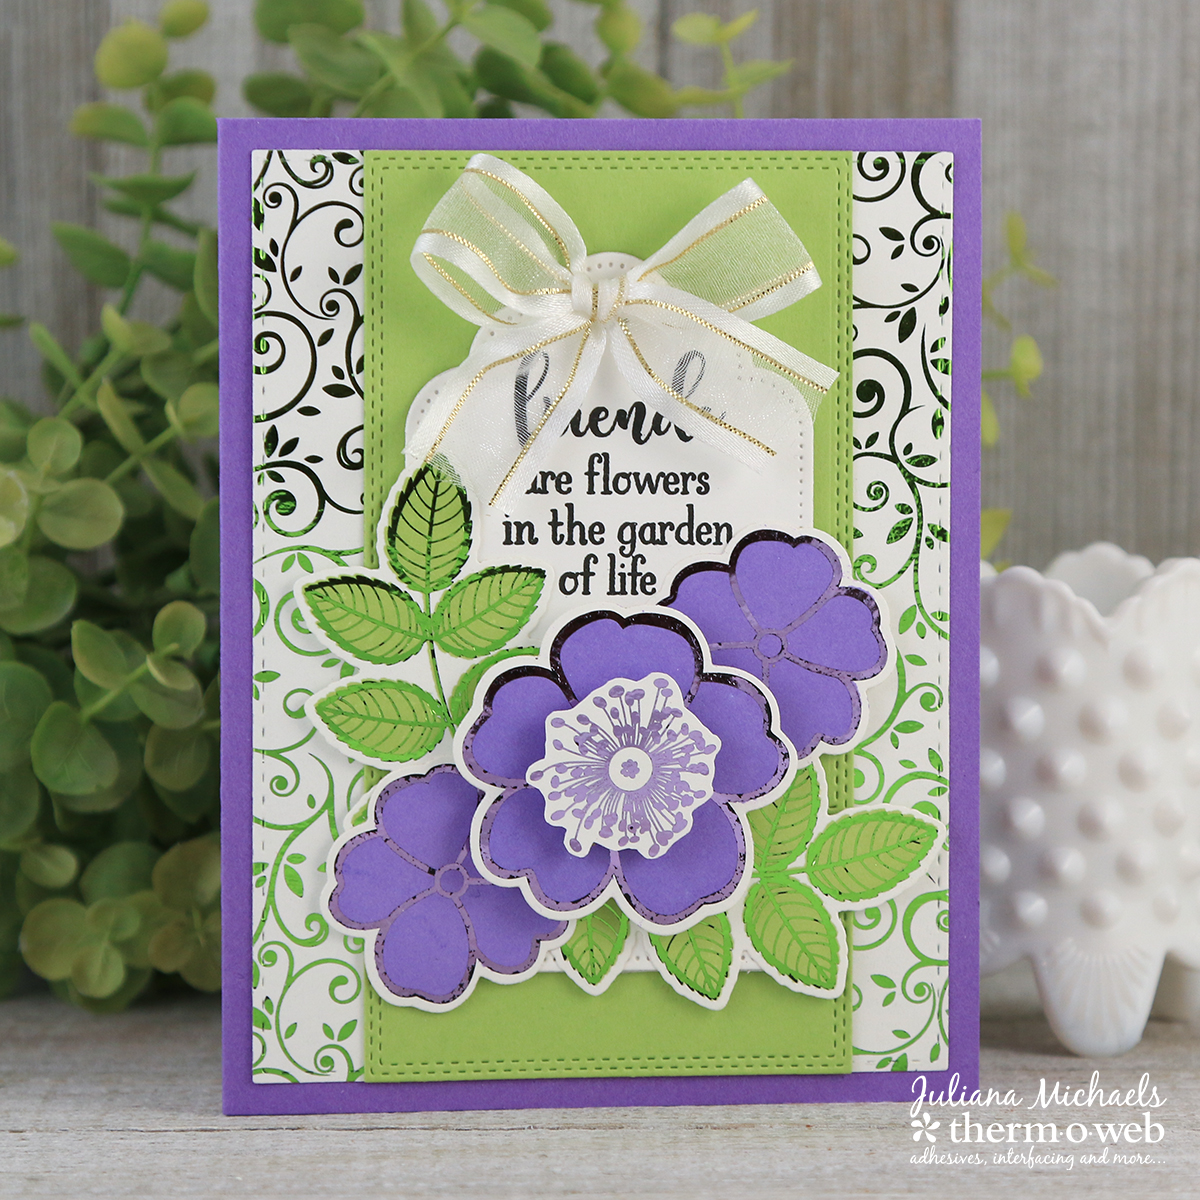 To create the background for this card, foil Branching Out from the Vibrant Vines Foil-Mates™ Background with Grass Green. Foil the leaves with the same color foil and foil the flowers with Wild Lilac.
Stamp the sentiment onto a tag die cut using the Gina K Designs Nested Tag Dies. Attach a bow made from Gina K Designs Sheer Satin Fancy Ribbon in White Gold and adhere it with a Zot.
To create the background for this card, foil Branching Out from the Vibrant Vines Foil-Mates™ Background with Grass Green. Foil the leaves with the same color foil and foil the flowers with Wild Lilac.
Stamp the sentiment onto a tag die cut using the Gina K Designs Nested Tag Dies. Attach a bow made from Gina K Designs Sheer Satin Fancy Ribbon in White Gold and adhere it with a Zot.
 I hope you enjoyed learning more about some of the new products from Therm O Web and about die cutting with Purple Tape!