No Products in the Cart

 Hello friends! Today's project combines stamps and dies from Reverse Confetti with some of Thermoweb's fabulous products to bring you some fun inspiration for card making. So, let's dive in and see if we can learn something new together.
 Other Supplies: Cardstock, watercolor paper, markers or paints, scissors, ink, embossing powder, heat tool, embossing folder, acrylic paint, brayer, ribbon, and die-cut machine.
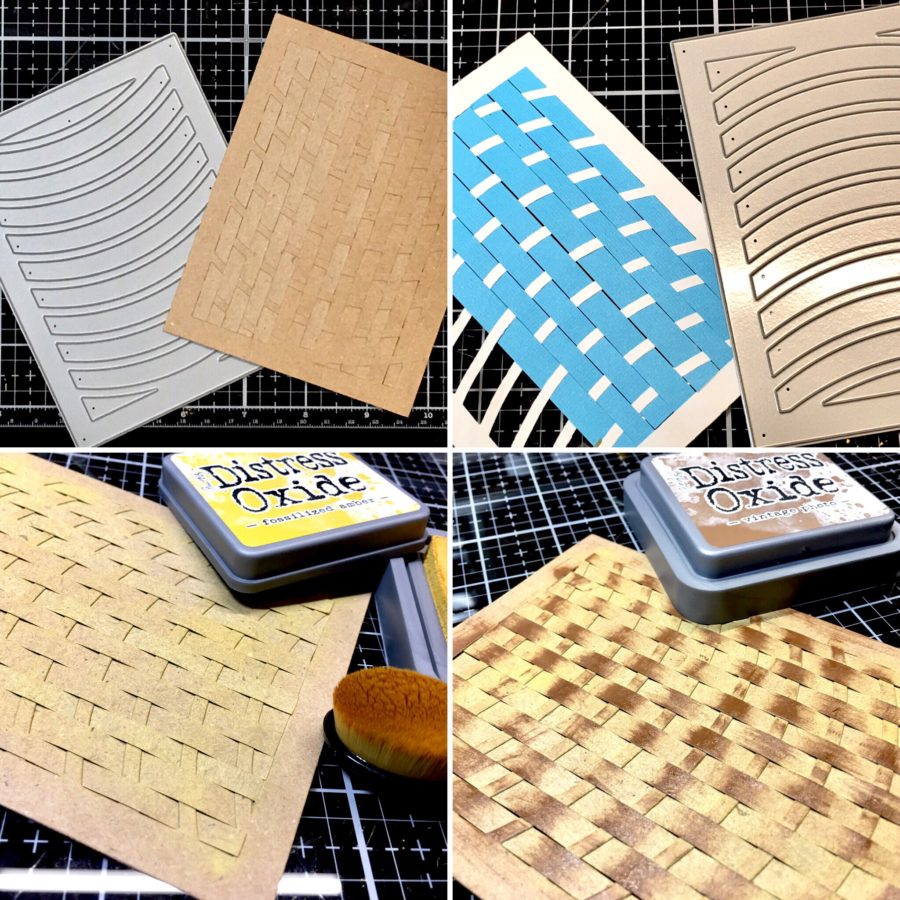
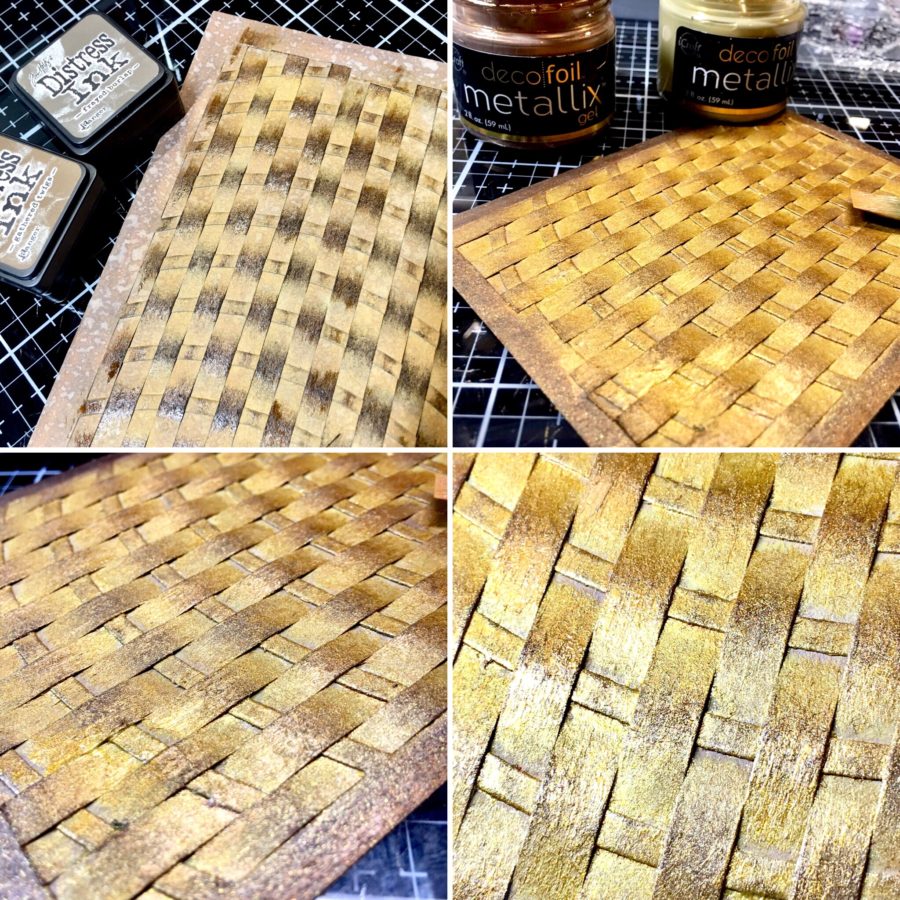
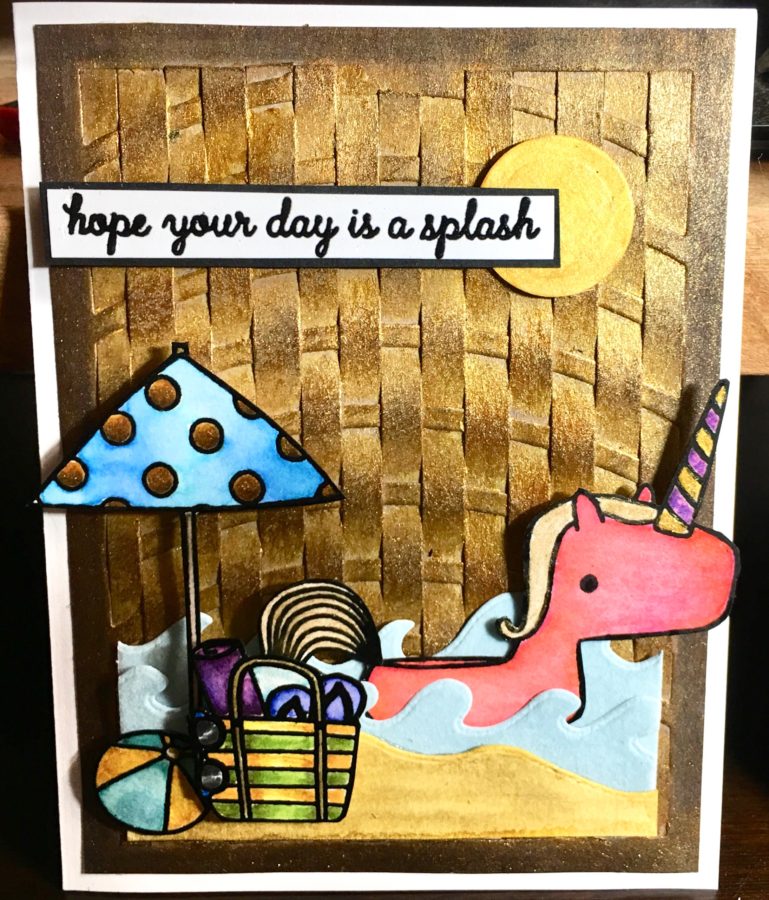 Using the Reverse Confetti "On the Curve Cover Panel" create a background by weaving strips of paper through the openings in the die-cut. The blue and white version in the below photo was my test to see if it would work (and it did!). I was going for a tiki beach feel and I think I've accomplished it. Die-cut the background from kraft cardstock and then color it using Distress Oxide inks and Distress Inks. Finish up the background by adding some Pure Gold Metallix for a bit of shimmer. Check out the close-up in the second photo - I think I achieved a bamboo mat look.
Hint: You could also achieve this look by using watercolor paper and adding color using paints or markers.
Using the Reverse Confetti "On the Curve Cover Panel" create a background by weaving strips of paper through the openings in the die-cut. The blue and white version in the below photo was my test to see if it would work (and it did!). I was going for a tiki beach feel and I think I've accomplished it. Die-cut the background from kraft cardstock and then color it using Distress Oxide inks and Distress Inks. Finish up the background by adding some Pure Gold Metallix for a bit of shimmer. Check out the close-up in the second photo - I think I achieved a bamboo mat look.
Hint: You could also achieve this look by using watercolor paper and adding color using paints or markers.
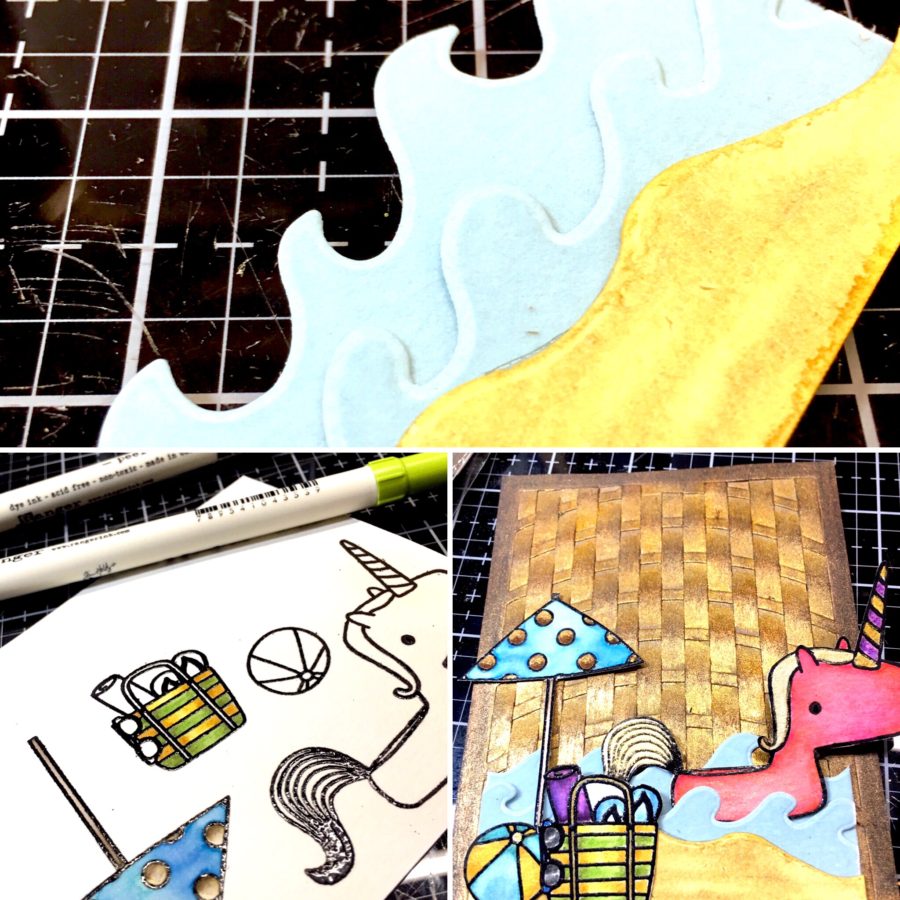
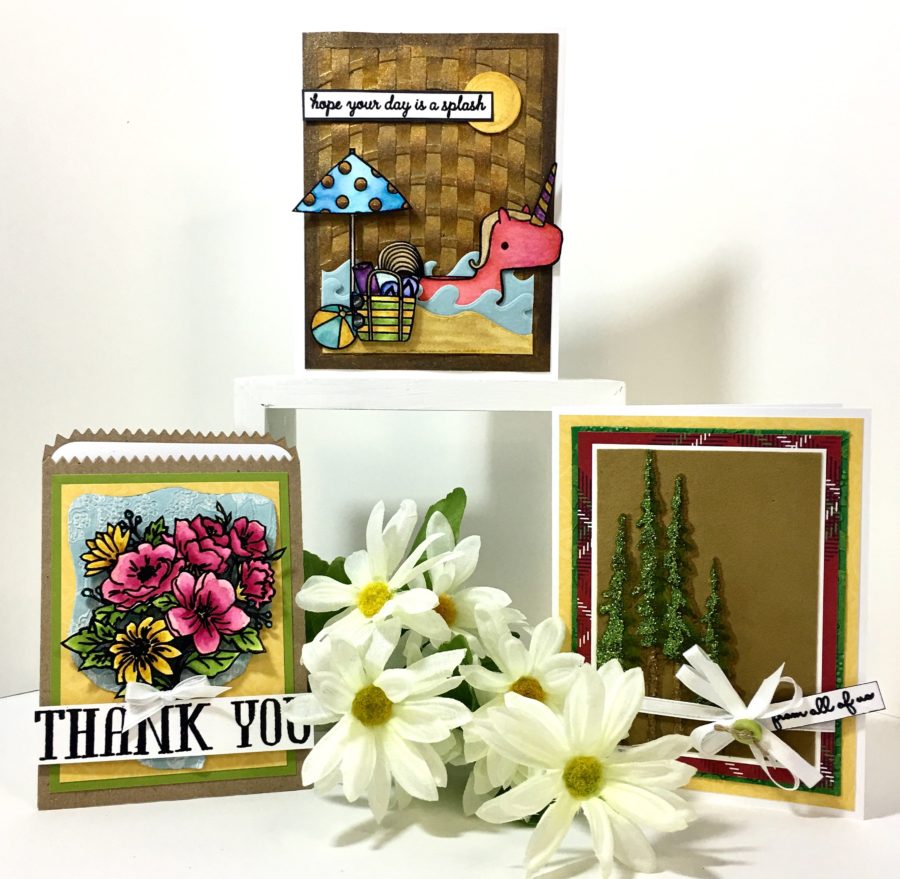
 Stamp your images on watercolor paper and heat emboss. Color images using Distress Markers and water/brush or your desired medium. Die-cut waves from Blue Sky Flock Transfer Sheets and sand and sun from cardstock. Layer your pieces together and add a Reverse Confetti sentiment to complete card one.
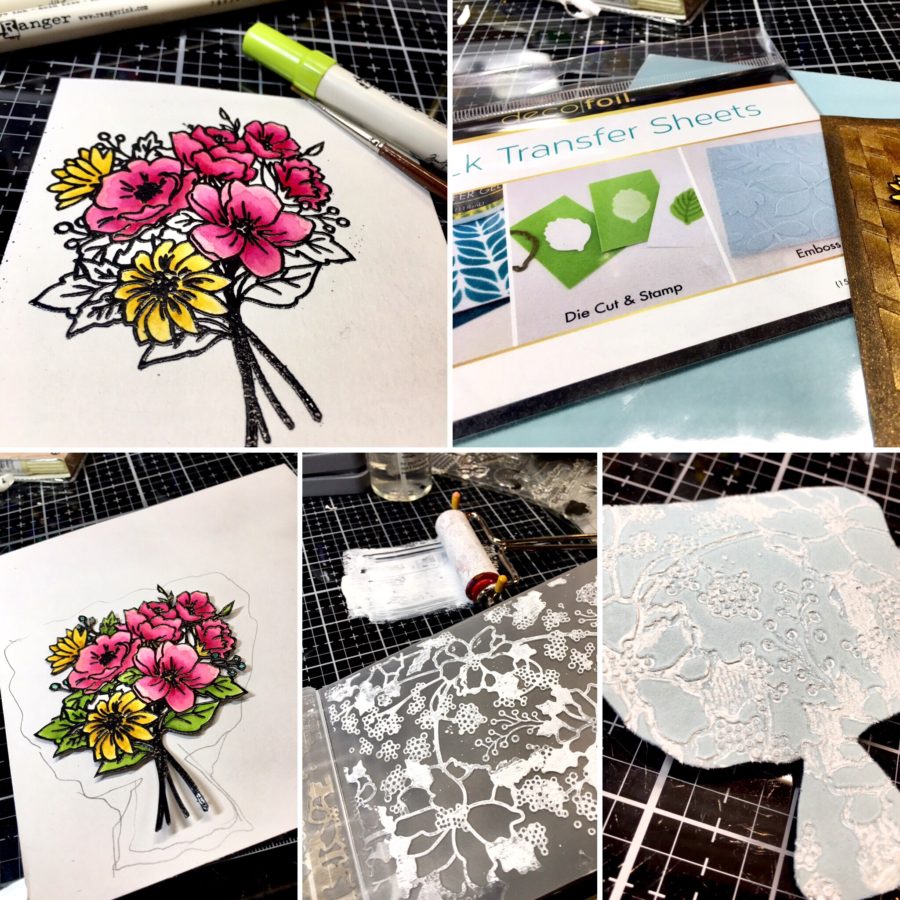
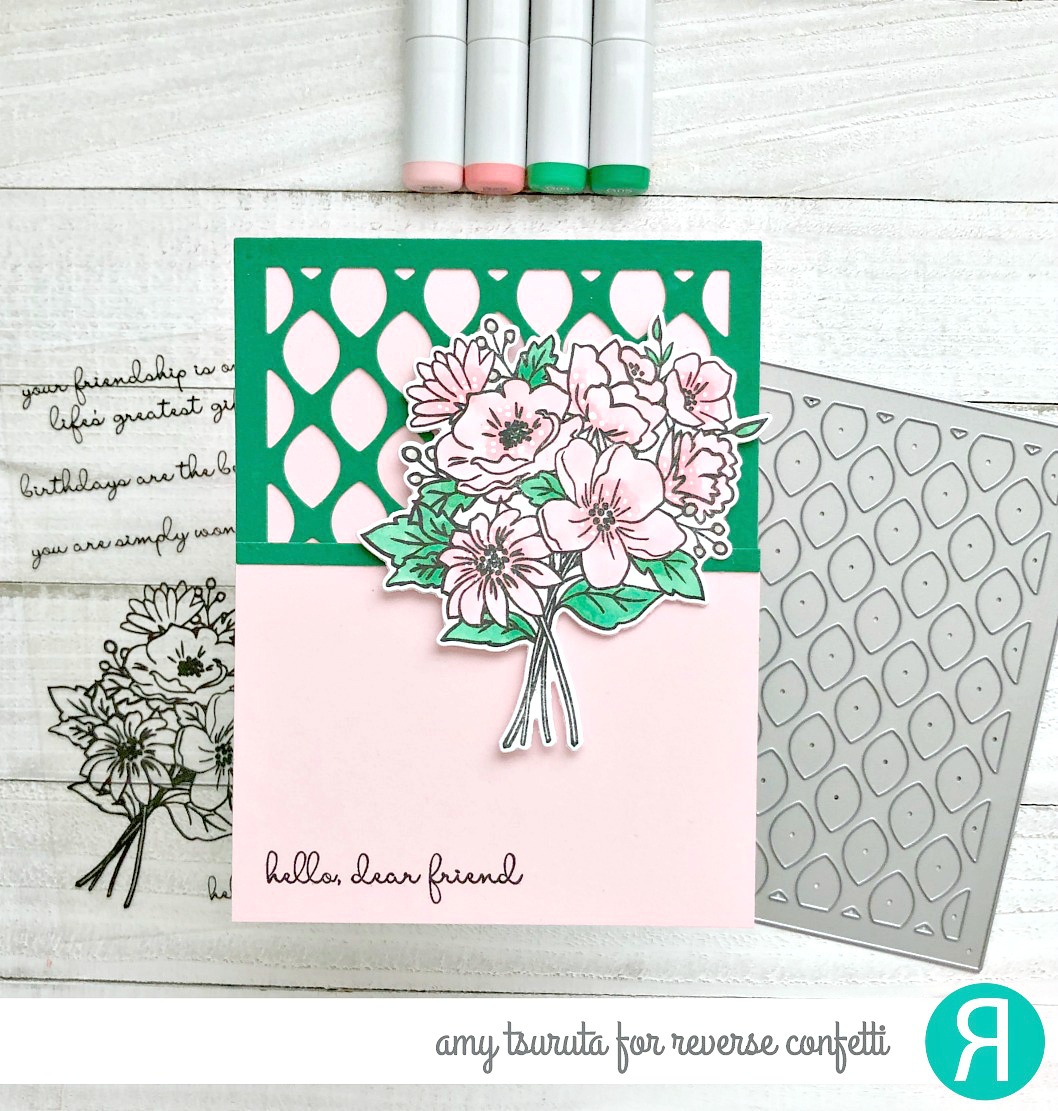
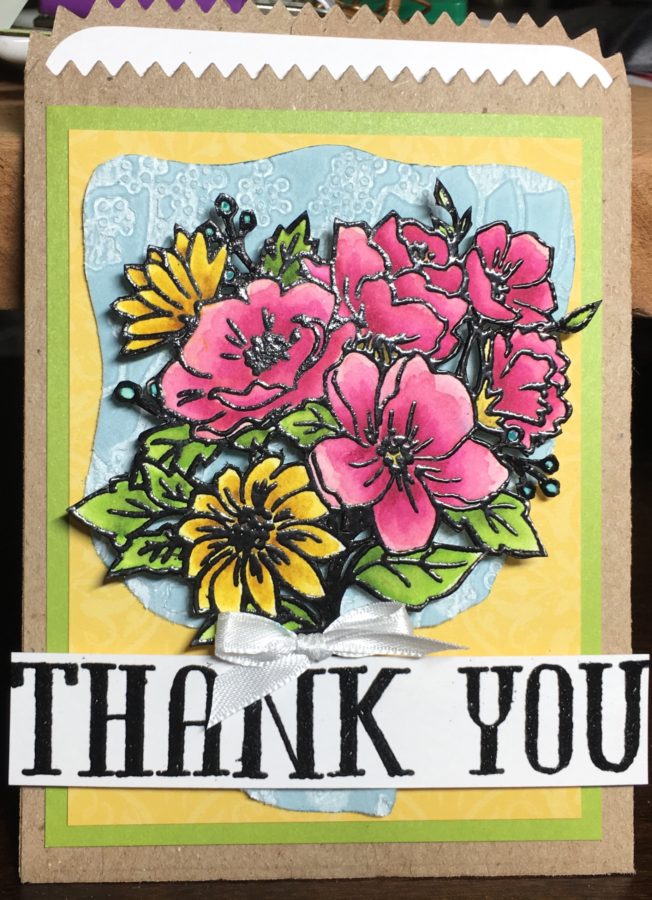 Stamp your Reverse Confetti image on watercolor paper in black ink and heat emboss. Color using your desired medium and fussy cut with scissors. Once you have your image cut out lay it on the backside of a Flock Transfer Sheet and loosely trace around it to create a bouquet wrap; cut out the wrap.
Using a brayer, add white paint to an embossing folder of your choice. Place your Flock wrap face side against the paint in the embossing folder and run through your machine. Layer your pieces together and add a Reverse Confetti sentiment to complete your card. Note: This card uses an open envelope for a card base with a blank sheet inside for your message.
Hint: If you do not have a die-cutting or embossing machine, try stamping with paint onto Flock Transfer Sheets for a similar effect.
Stamp your Reverse Confetti image on watercolor paper in black ink and heat emboss. Color using your desired medium and fussy cut with scissors. Once you have your image cut out lay it on the backside of a Flock Transfer Sheet and loosely trace around it to create a bouquet wrap; cut out the wrap.
Using a brayer, add white paint to an embossing folder of your choice. Place your Flock wrap face side against the paint in the embossing folder and run through your machine. Layer your pieces together and add a Reverse Confetti sentiment to complete your card. Note: This card uses an open envelope for a card base with a blank sheet inside for your message.
Hint: If you do not have a die-cutting or embossing machine, try stamping with paint onto Flock Transfer Sheets for a similar effect.
 This card happened while playing around with my Flock Transfer Sheets and shows that you can add a Reverse Confetti sentiment from the new "Thanks" set to almost any image to create a card.
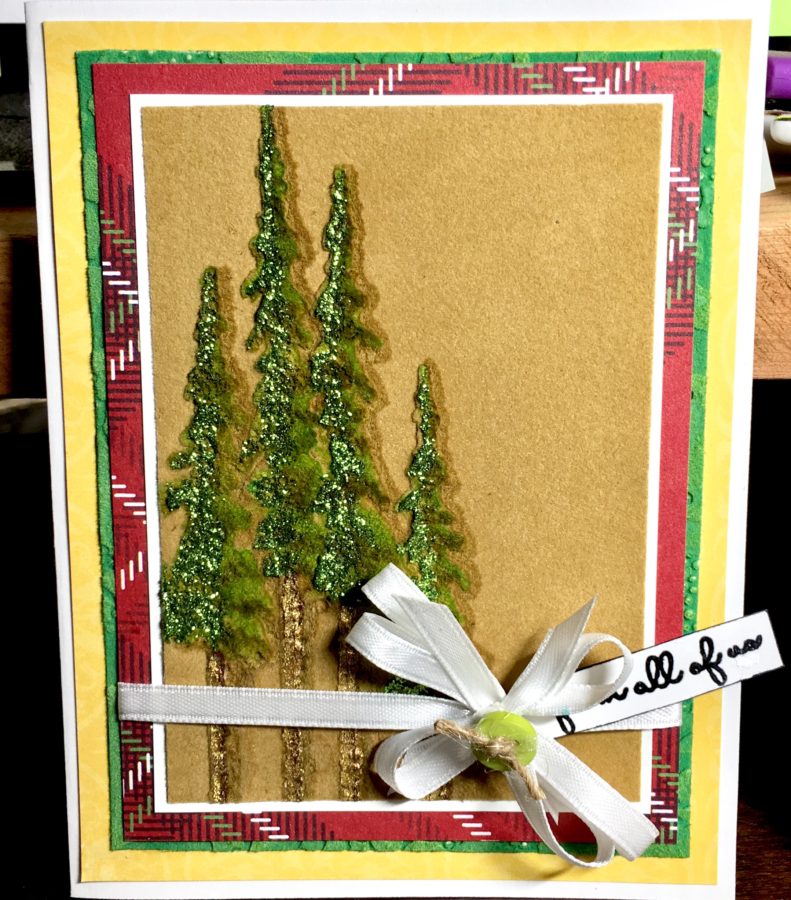
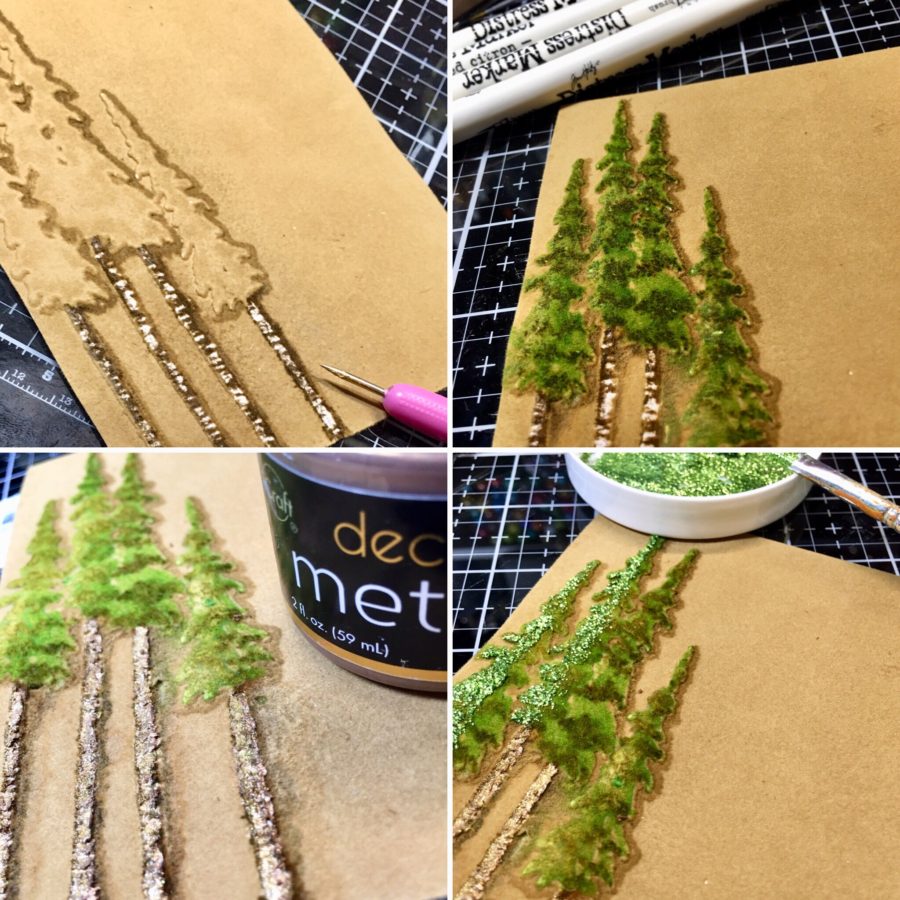
I started by embossing a Tuscan Gold Flock Transfer Sheet and used a Distress Marker to create shadows and to color the tree trunks.
This card happened while playing around with my Flock Transfer Sheets and shows that you can add a Reverse Confetti sentiment from the new "Thanks" set to almost any image to create a card.
I started by embossing a Tuscan Gold Flock Transfer Sheet and used a Distress Marker to create shadows and to color the tree trunks.
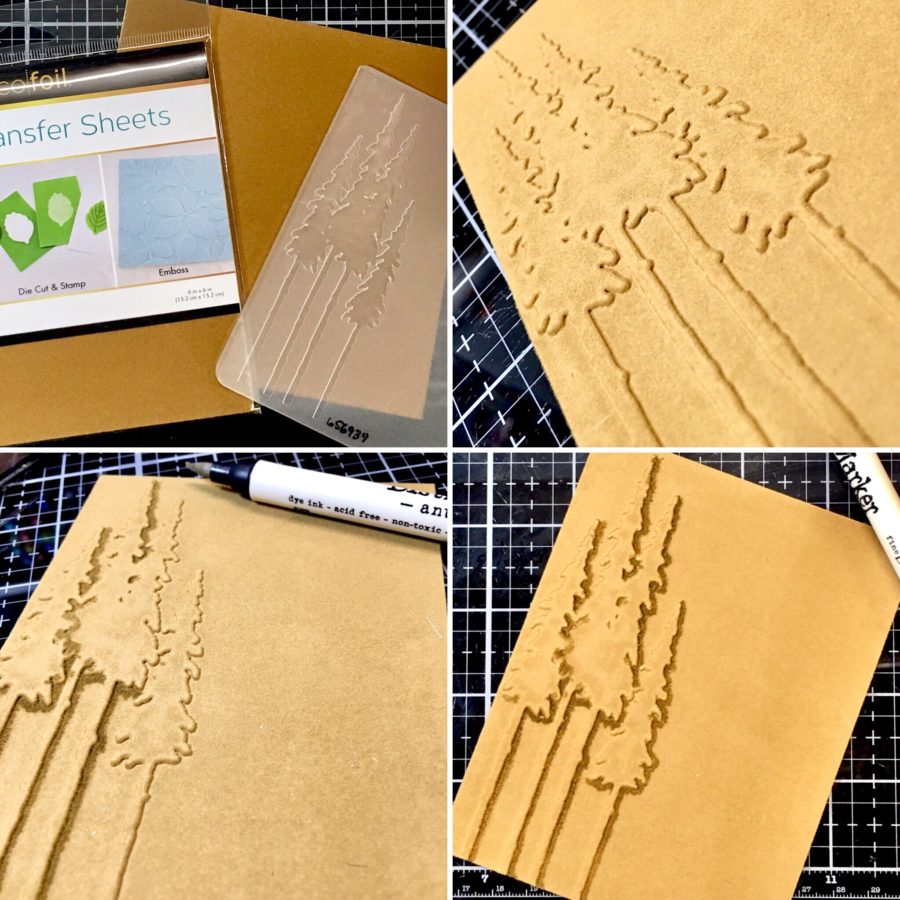 After the trunks were colored I used a paper piercer to scratch off portions of the flock from the trucks to add texture. Distress Markers were the perfect medium to add color.
I added Metallix to the tree trunks and Glitz Glitter Gel to the green treetops and adhered the flock piece to a card base and added some ribbon, a button and the Reverse Confetti sentiment "from all of us" to complete the card.
Hint: Play with your embossing folders and Flock Transfer Sheets. The possibilities are endless.
After the trunks were colored I used a paper piercer to scratch off portions of the flock from the trucks to add texture. Distress Markers were the perfect medium to add color.
I added Metallix to the tree trunks and Glitz Glitter Gel to the green treetops and adhered the flock piece to a card base and added some ribbon, a button and the Reverse Confetti sentiment "from all of us" to complete the card.
Hint: Play with your embossing folders and Flock Transfer Sheets. The possibilities are endless.
 Thanks for stopping by; I hope you found something new to take away with you!
Wendy
Thanks for stopping by; I hope you found something new to take away with you!
Wendy

 Amy's Supply List: