No Products in the Cart
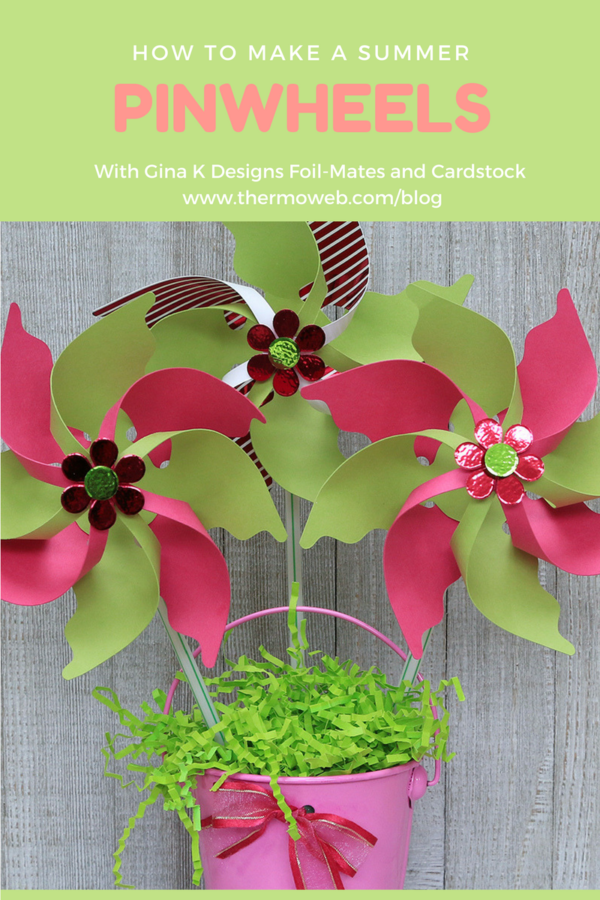
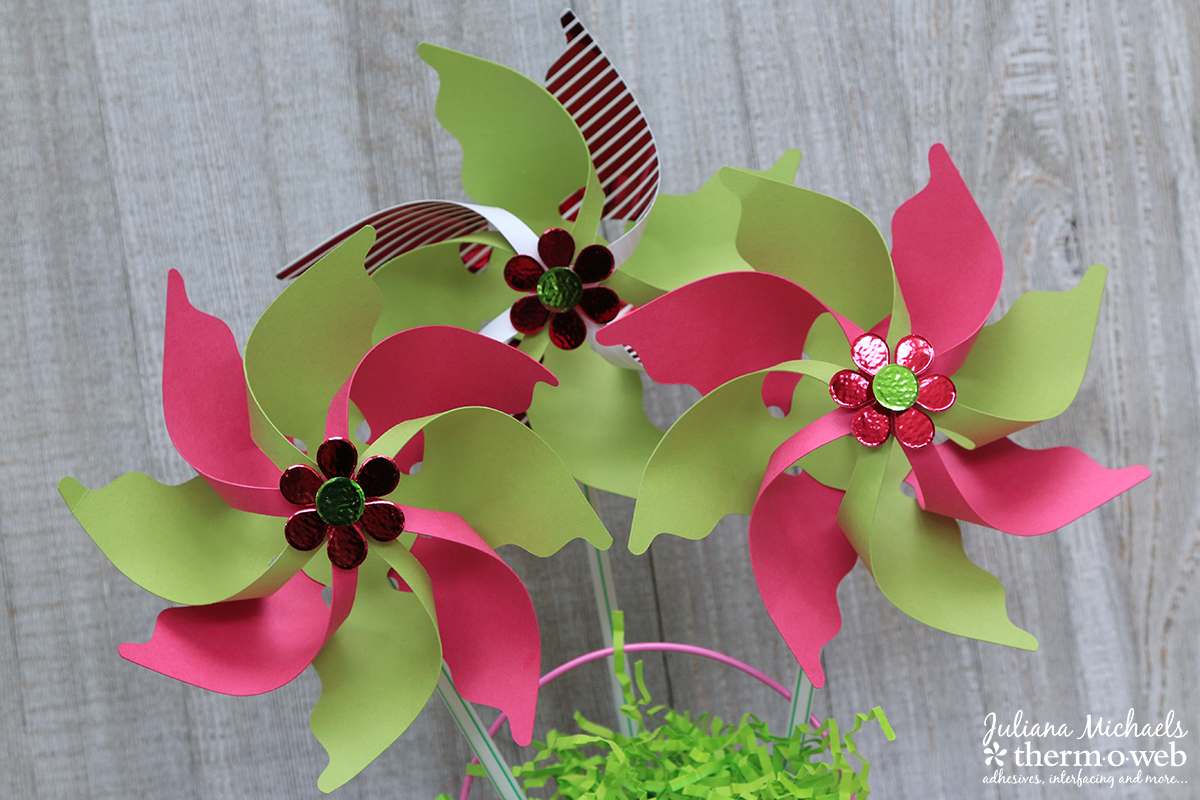
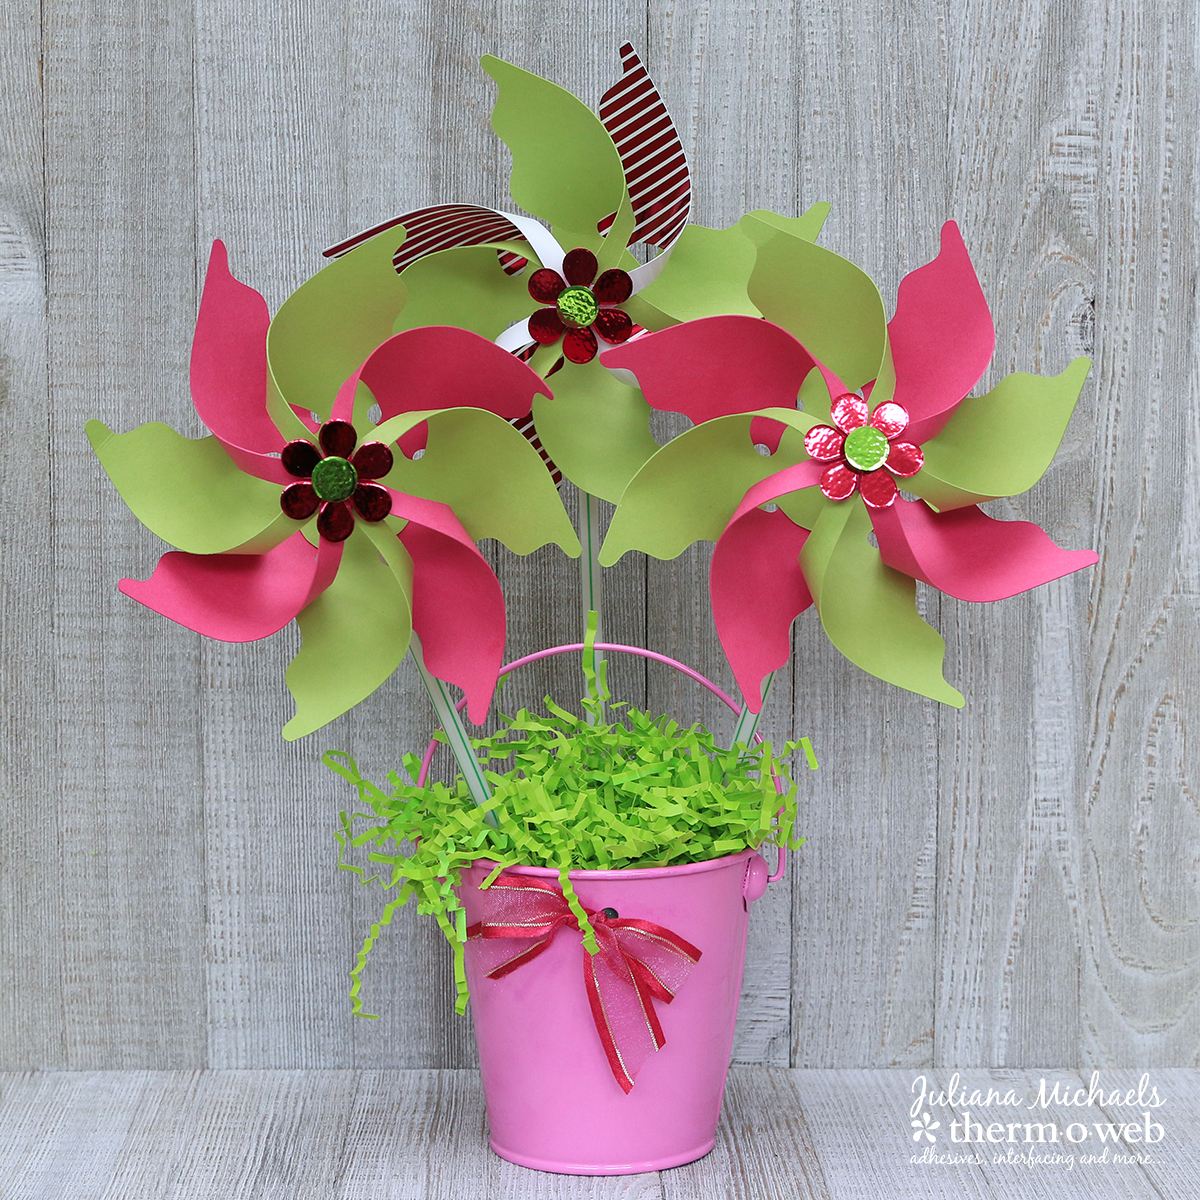
 As you can see, I made some of the pinwheels with just cardstock and I made one of them using a mix of cardstock and Gina K Designs Foil Mates. In the directions below, I'm sharing how to create them using cardstock only. If you want to create them with the Foil-Mates, simply cut the Foil-Mate and foil it first before you assemble the pinwheel.
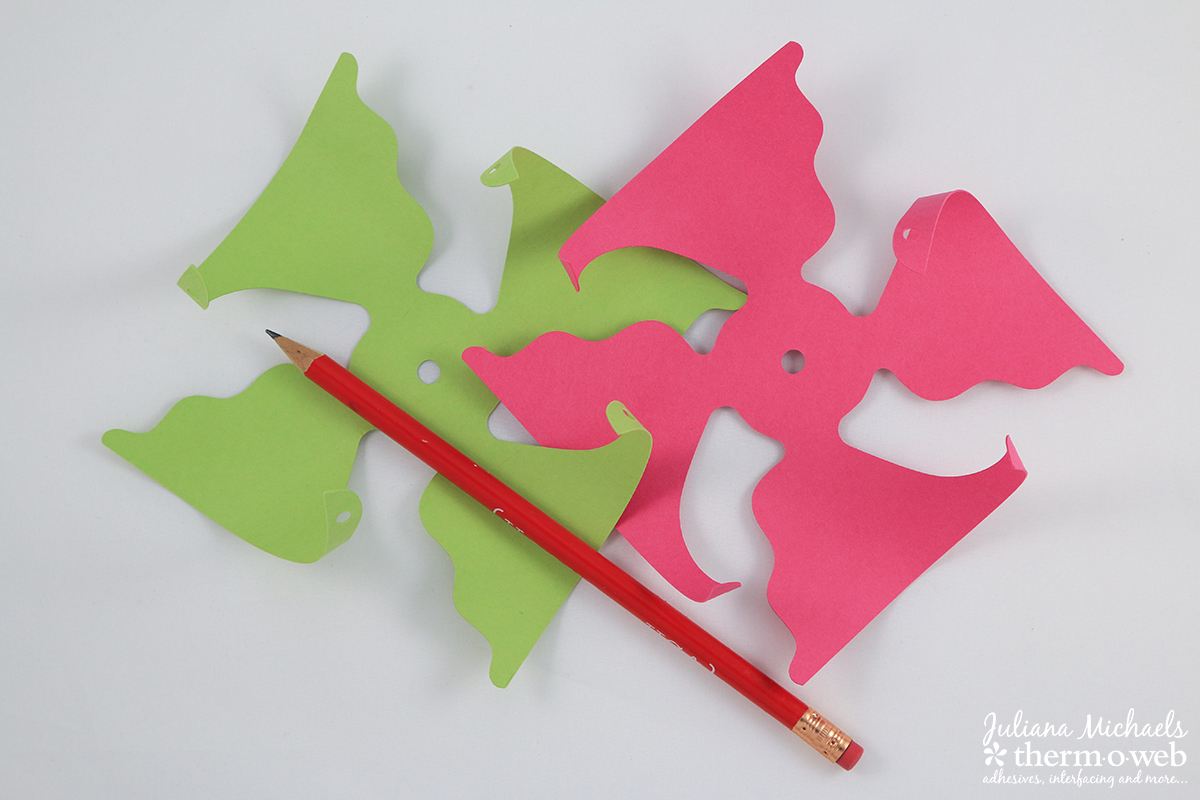
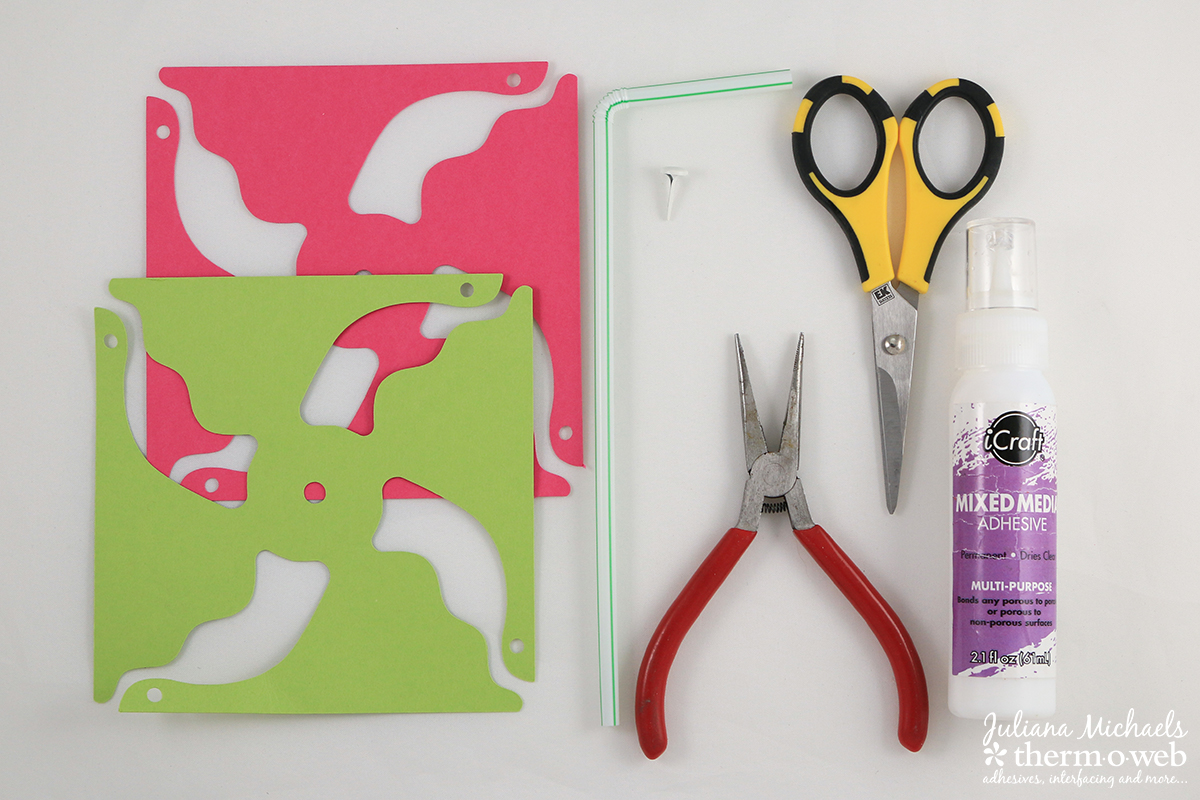 Cut one pinwheel shape from each color of cardstock. Because the cardstock is rather thick, I recommend using a pencil to curl the edges of each corner. Doing this will help prevent the cardstock from bending when you go to put the pinwheels together.
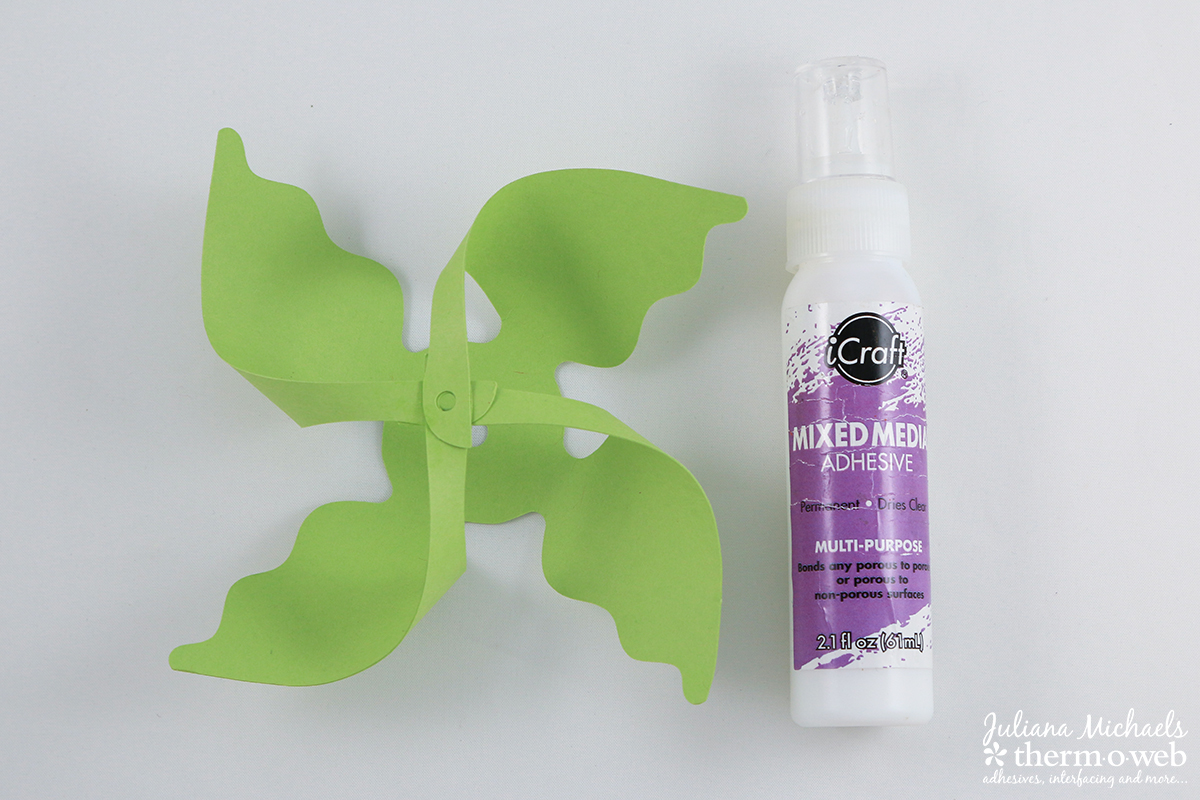
 To create the first layer, bring the opposite ends of the pinwheel toward the center and glue them together using iCraft Mixed Media Adhesive. Make sure to line up the circles as you are gluing the ends together.
 For the second layer, place the other color of cardstock behind the first layer. Then bring the ends over the top of the first pinwheel layer.
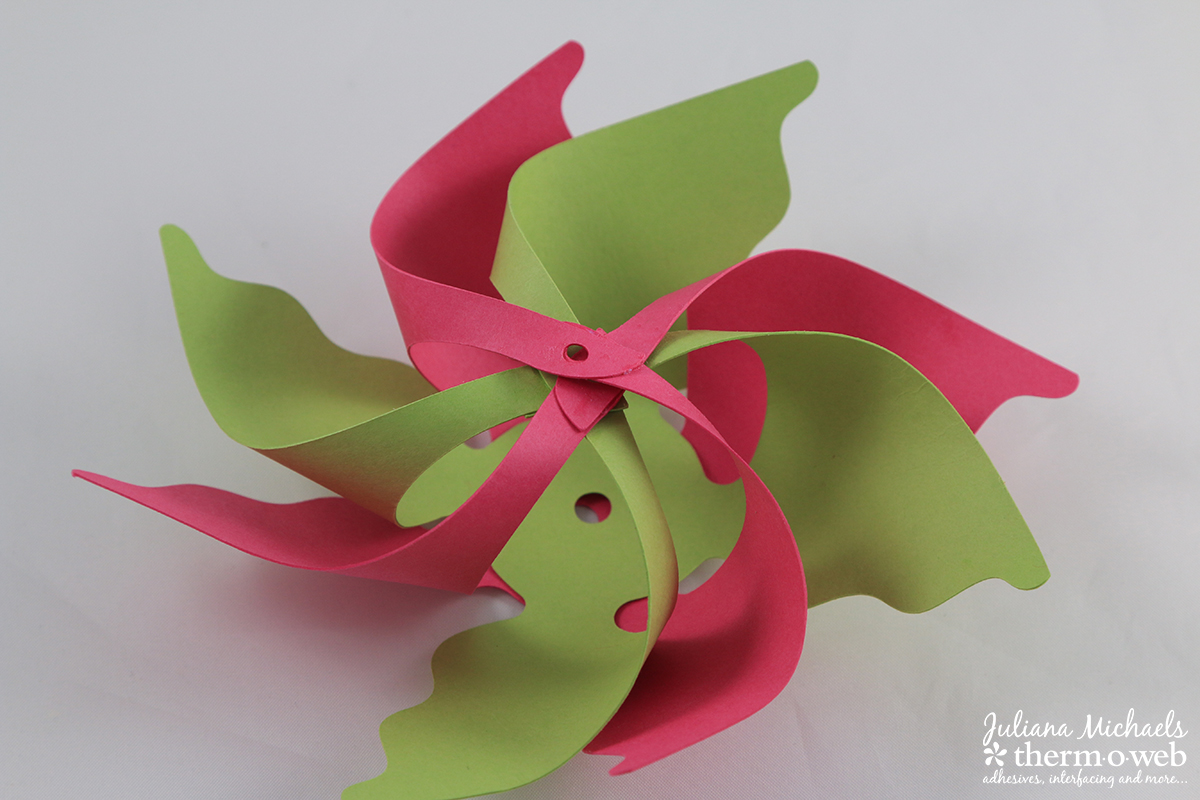
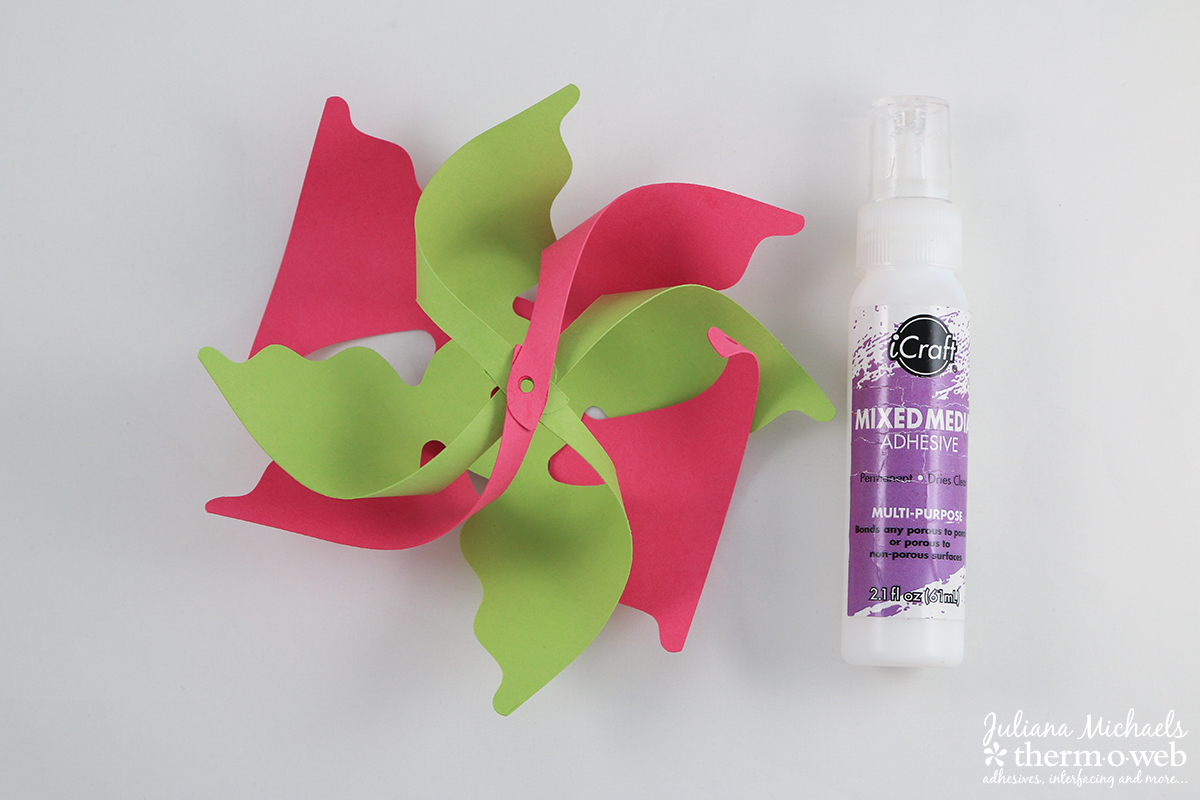 Glue the ends together and again make sure all the little holes line up with each other.
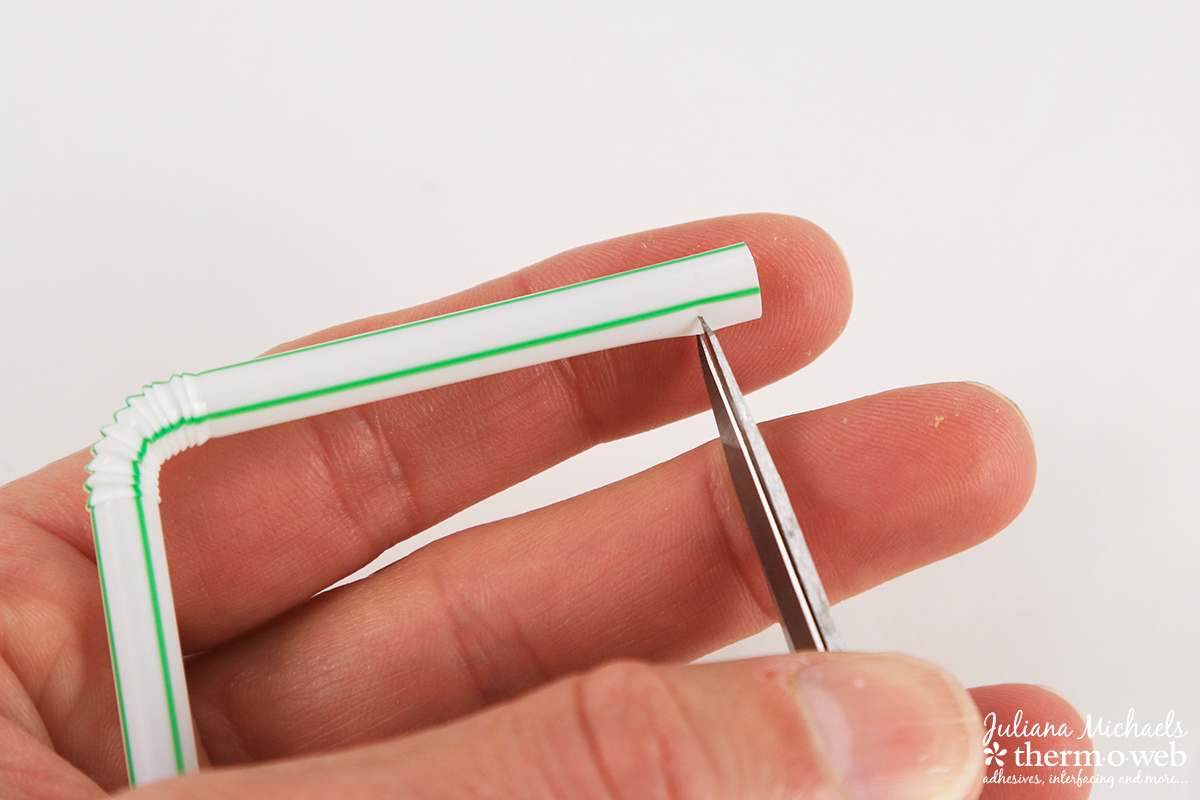
 Take the straw and bend it to 90 degrees. Use a pair of scissors and cut a tiny slit on the top and bottom of the straw.
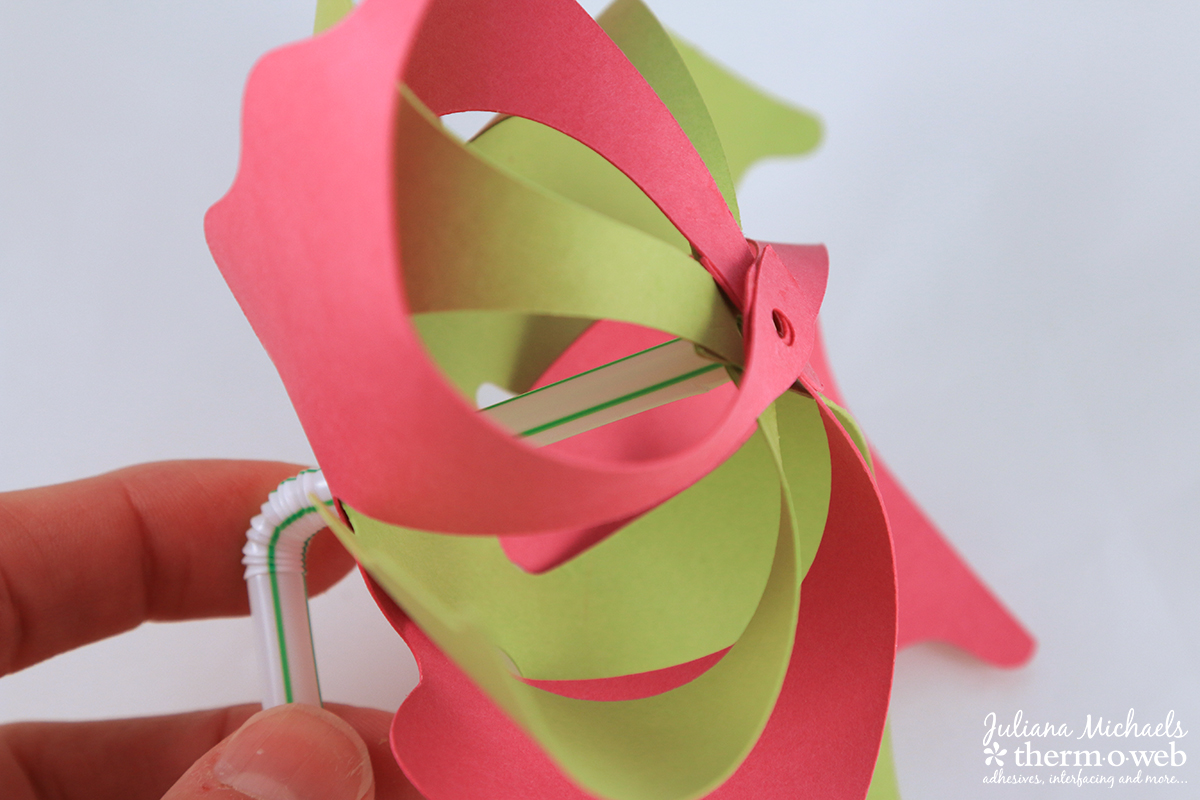
 Insert the straw through the hole on the back side of the pinwheel.
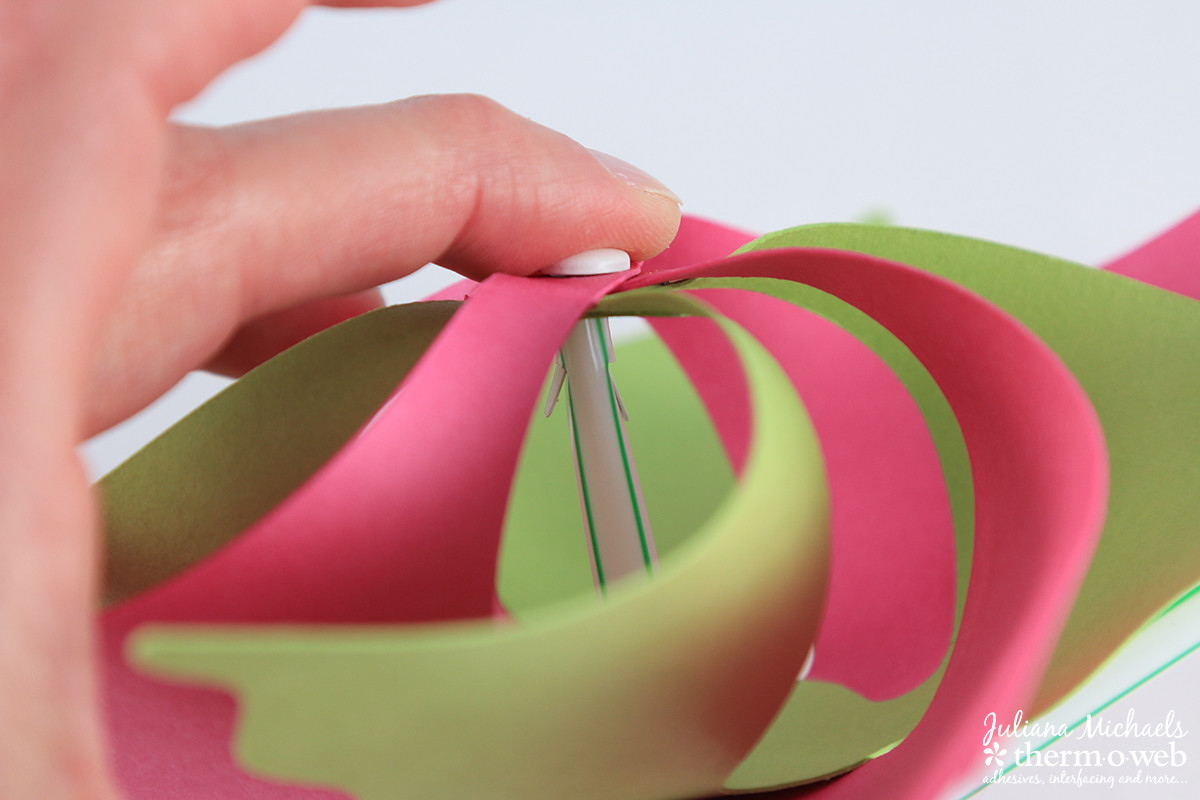
 Use the pliers to slightly spread the tips of the brad apart. Then insert the brad through the hole on the front of the pinwheel and guide the ends of the brad through the slits in the straw.
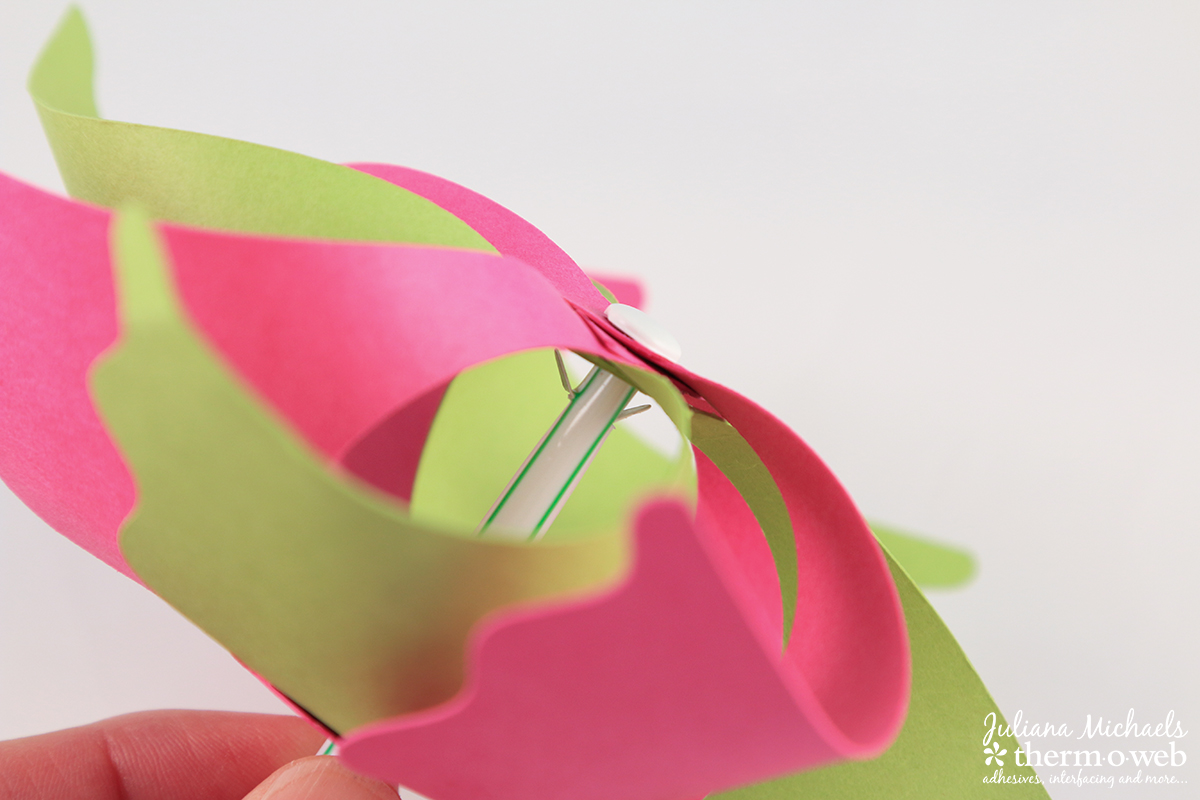
 Once the ends are through the slits in the straw, use the pliers to bend the tips to help hold the straw in place. Your pinwheel is now complete.
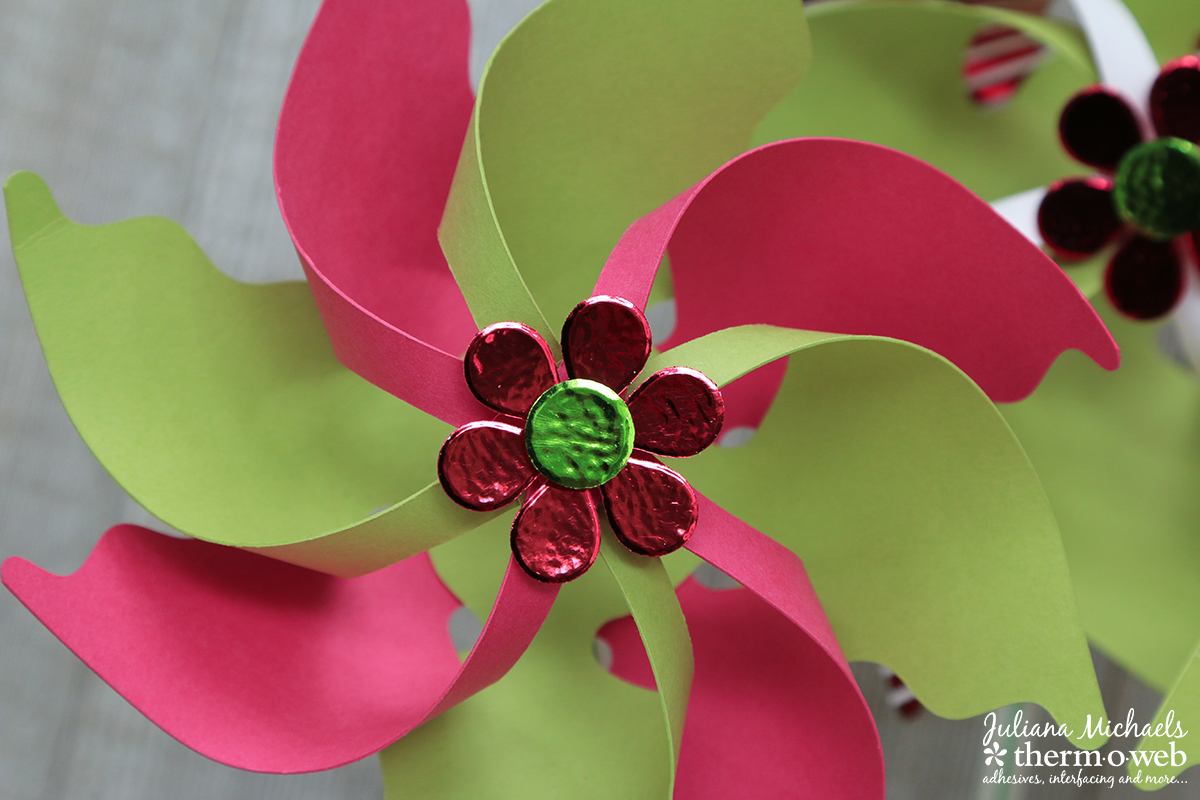 Once the foiled flowers were created, I adhered them to the front of each pinwheel using Therm O Web Zots.
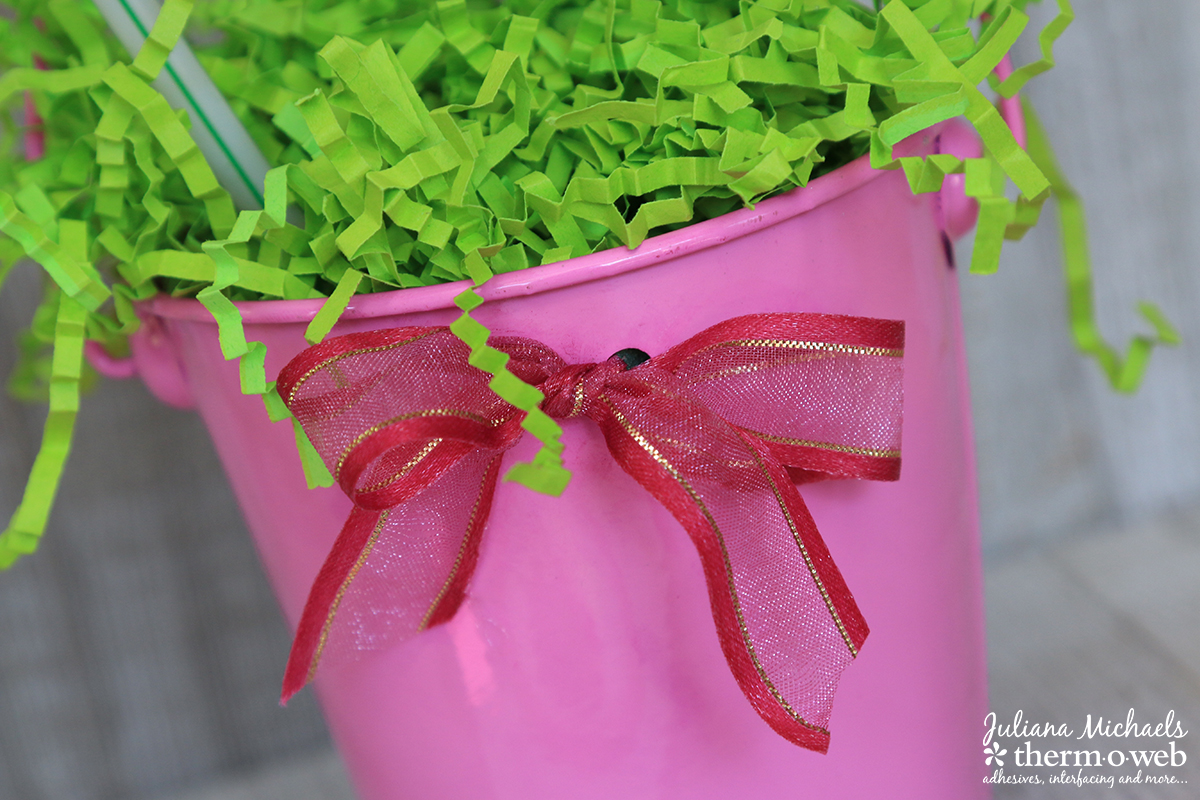
 The final touch for my Summer Party Pinwheels was to add a little ribbon to the pink bucket. Using Gina K Designs Premium Dye Ink, I was able to color the Gina K Designs Sheet Satin Ribbon in White and Gold to perfectly coordinate with my pinwheels.
 So now that you've got some pinwheels to make for your decorations, when are you having that Summer Party? We can't wait to see how it turns out!