No Products in the Cart
 Little Angel Gift Bag by Designer Audrey Pettit
Supplies:
Therm O Web iCraft® Deco Foil™ Transfer Sheets- Lilac and Spring Green (Coming Soon!)
Therm O Web iCraft® Deco Foil™ Pen (Coming Soon!)
Therm O Web iCraft® Deco Foil™ Liquid Adhesive
Therm O Web iCraft® Easy Tear Adhesive- 1/4"
Therm O Web Zots™ Clear Adhesive Dots- Medium
Therm O Web 12" Laminator
Dies: Sizzix, Papertrey Ink
Cardstock: Neenah
Patterned Paper: BasicGrey
Gift Bag: Stampin'Up
Die Cut Heart: Hero Arts
Metal Clip, Journaling Page: Making Memories
Ribbon: Bazzill
Glittered Berry: Petaloo
Ink: Ranger, Tsukineko
Rub On: Crate Paper
Little Angel Gift Bag by Designer Audrey Pettit
Supplies:
Therm O Web iCraft® Deco Foil™ Transfer Sheets- Lilac and Spring Green (Coming Soon!)
Therm O Web iCraft® Deco Foil™ Pen (Coming Soon!)
Therm O Web iCraft® Deco Foil™ Liquid Adhesive
Therm O Web iCraft® Easy Tear Adhesive- 1/4"
Therm O Web Zots™ Clear Adhesive Dots- Medium
Therm O Web 12" Laminator
Dies: Sizzix, Papertrey Ink
Cardstock: Neenah
Patterned Paper: BasicGrey
Gift Bag: Stampin'Up
Die Cut Heart: Hero Arts
Metal Clip, Journaling Page: Making Memories
Ribbon: Bazzill
Glittered Berry: Petaloo
Ink: Ranger, Tsukineko
Rub On: Crate Paper
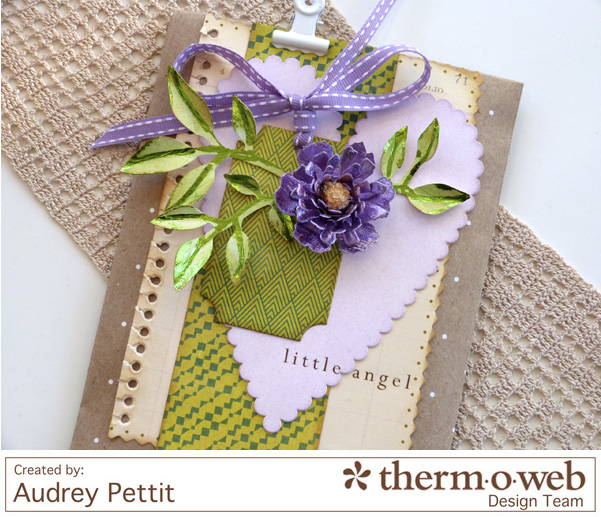
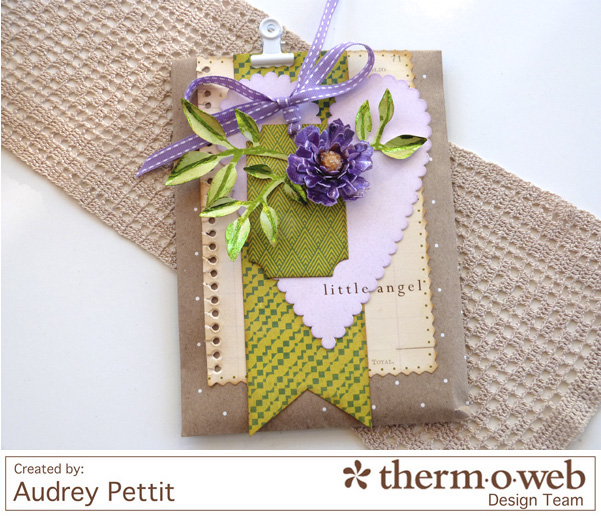
 Create a beautiful, handmade gift bag for your Valentine this year using the gorgeous new iCraft® Deco Foil™ colors and the new iCraft® Deco Foil™ Pen, available just in time for the holiday.
To get started, ink a piece of white cardstock with green Distress Ink using an ink blending tool. Make sure the paper is large enough to die cut several sprigs of greenery from. Lightly spritz the inked paper with water to create water droplets, and then let the paper dry completely. Die cut the branch. I used the Garden Greens Bigz die from Tim Holtz and Sizzix.
Create a beautiful, handmade gift bag for your Valentine this year using the gorgeous new iCraft® Deco Foil™ colors and the new iCraft® Deco Foil™ Pen, available just in time for the holiday.
To get started, ink a piece of white cardstock with green Distress Ink using an ink blending tool. Make sure the paper is large enough to die cut several sprigs of greenery from. Lightly spritz the inked paper with water to create water droplets, and then let the paper dry completely. Die cut the branch. I used the Garden Greens Bigz die from Tim Holtz and Sizzix.
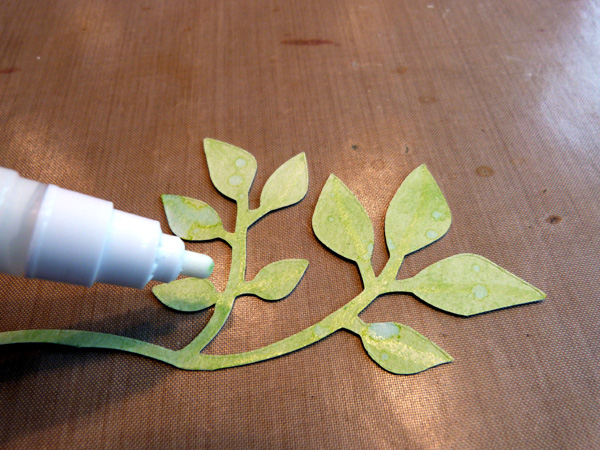 Draw vein details onto each leaf using the new iCraft® Deco Foil™ Adhesive Pen.(Coming Soon!) Allow the adhesive to dry while you turn your laminator on and let it heat up.
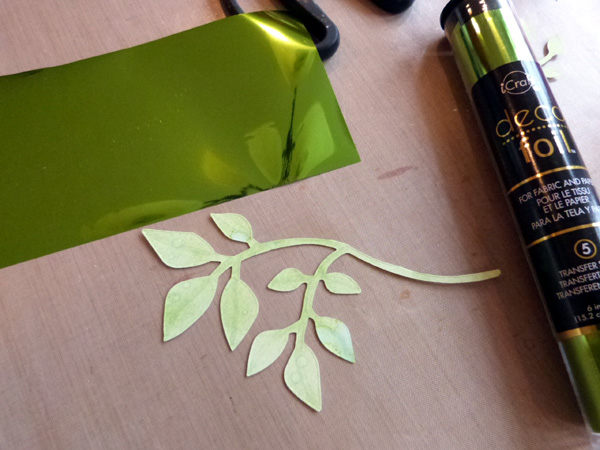 Cut a piece of iCraft® Deco Foil™ Transfer Sheet that is large enough to cover your entire die cut. Place the foil down onto the adhesive die cut, with the colored side up and the shiny silver side down.
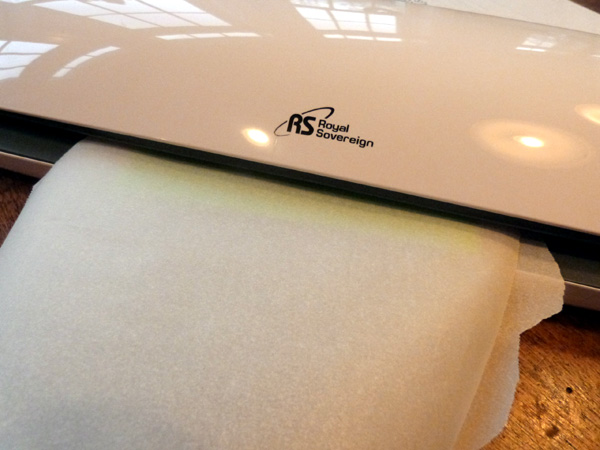 Sandwich the foil and die cut between the laminator sheets, and run the paper through the laminator.
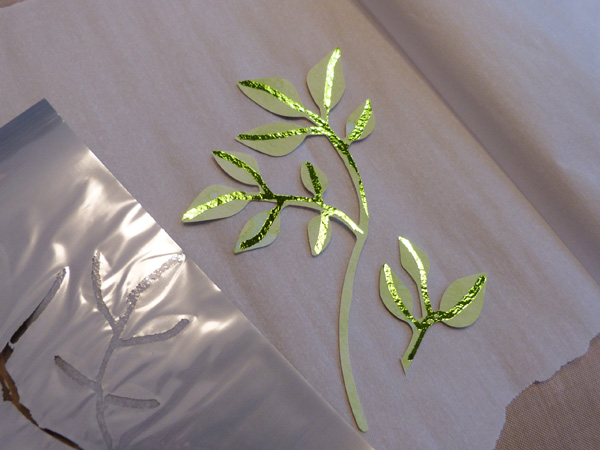 Peel off the transfer sheet and check out your gorgeous foiled leaves!
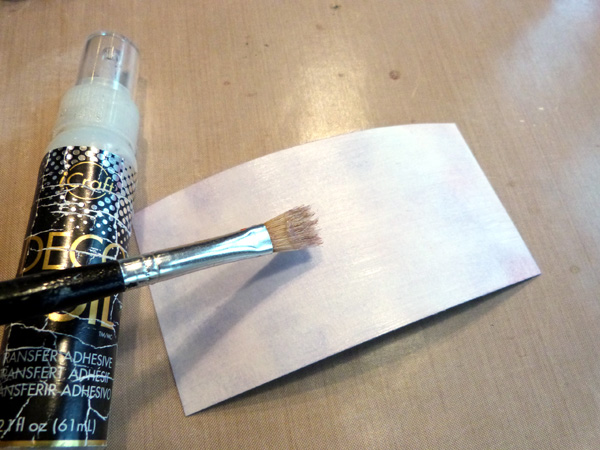 To create the flower, cut a piece of white cardstock that is large enough to die cut a spiral flower die. Place some iCraft® Deco Foil™ Liquid Adhesive onto the paper, and wipe it in a back and forth motion across the entire paper using an old paintbrush. Be sure to use a brush that you don't care about for this step, and make sure to wash it out well immediately. Set the paper aside to dry until the liquid adhesive is tacky, yet dry, to the touch.(it will go from cloudy to clear)
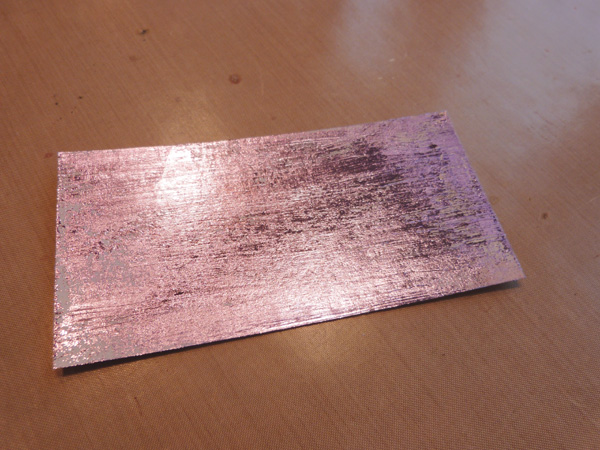
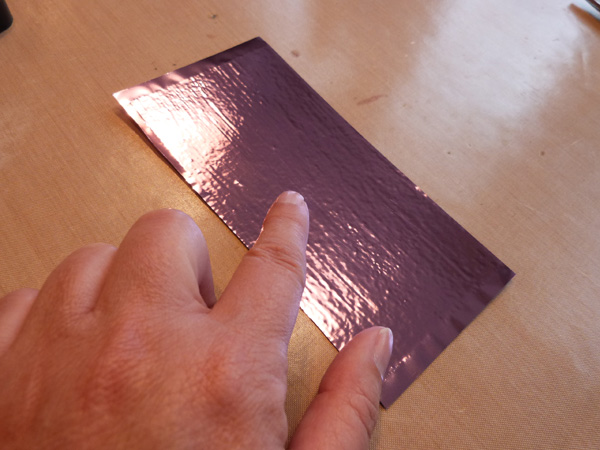 Cover the adhesive paper with Lilac Deco Foil™ Transfer Sheet.(coming soon!) Once again make sure to apply the foil with the colored side up and the shiny silver side down. Rub over the foil with the tip of your finger. If you look closely, you can see the cool stria effect you get from using the liquid adhesive with the paintbrush.
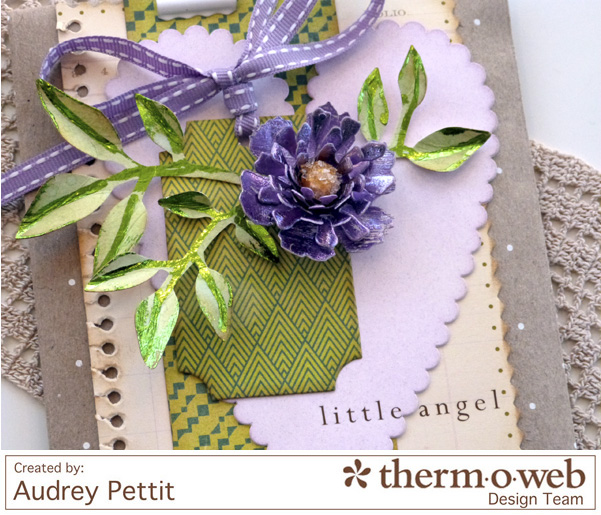
 Remove the foil. Now die cut a spiral flower from the foiled paper, and assemble the flower using a Zots™ adhesive dot to secure.
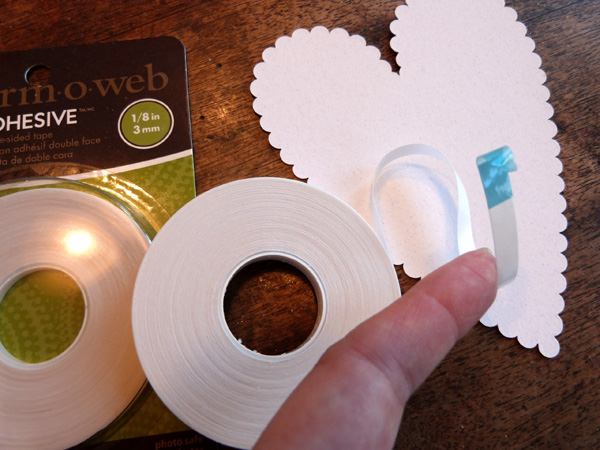 Layer papers, die cuts, and embellishments onto the front of a kraft gift bag using iCraft® Easy Tear adhesive. This fabulous adhesive comes in a variety of widths, for all your crafting needs, and is a great easy-to-use option for when you need a stronger adhesive. Perfect for projects like gift boxes and bags like this.
 Enjoy!