No Products in the Cart
 You’re Awesome Scrapbook Layout with Deco Foil and Transfer Gel Duo!
Hello everyone!
Jessica here with my layout for Gingham Week using Aqua Deco Foil and the Duo Transfer Gel! This one was a bit of a challenge for me but I think it came together quite nicely!
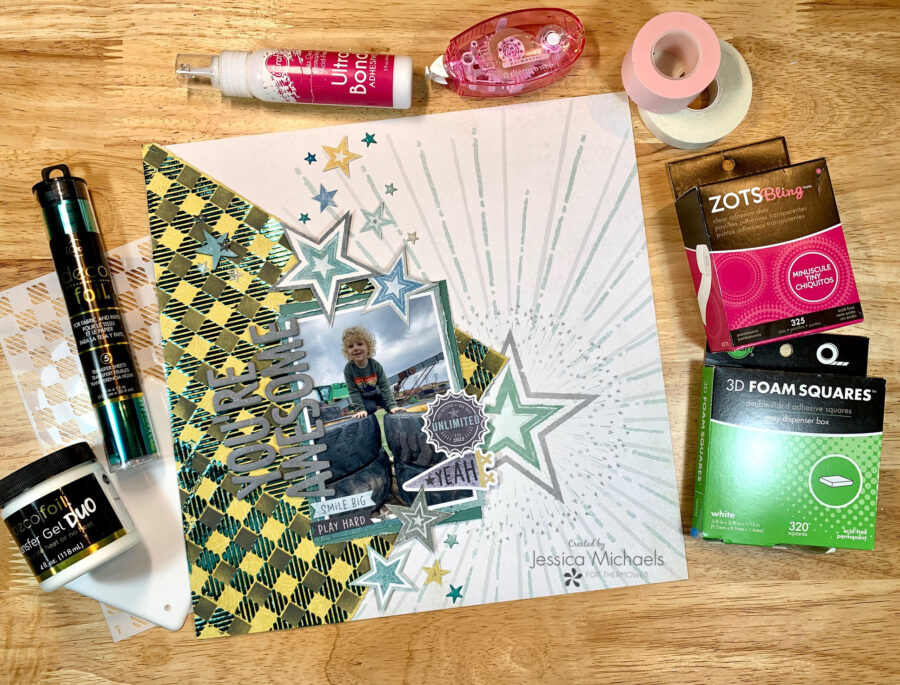 Therm O Web Supplies Used
Memory Runner XL
Memory Runner XL Refill
Deco Foil Transfer Sheets, Aqua
Transfer Gel DUO
Deco Foil Stencil Pal, 2PK
iCraft Pixie Tape
Zots Bling Roll
iCraft 3D Foam Squares Box-White
iCraft Easy Tear Tape 1/2 inch
iCraft UltraBond Permanent Dries Clear Adhesive, 2 fl oz
Other Supplies Used
Cocoa Vanilla Studio No Limits collection
Black Soot Distress Oxide
Photoplay Paper Great Outdoors stencil
Therm O Web Supplies Used
Memory Runner XL
Memory Runner XL Refill
Deco Foil Transfer Sheets, Aqua
Transfer Gel DUO
Deco Foil Stencil Pal, 2PK
iCraft Pixie Tape
Zots Bling Roll
iCraft 3D Foam Squares Box-White
iCraft Easy Tear Tape 1/2 inch
iCraft UltraBond Permanent Dries Clear Adhesive, 2 fl oz
Other Supplies Used
Cocoa Vanilla Studio No Limits collection
Black Soot Distress Oxide
Photoplay Paper Great Outdoors stencil
 I started this layout by using the Great Outdoors stencil by Photoplay Paper with some distress oxide in Black Soot on layer 1. Layer 2 was applied using the Transfer Gel Duo with my Stencil Pal and I let the first part dry overnight as it was late and I didn’t want to mess up the gel by trying to do the whole area in one shot. I did use the Pixie Tape to tape down and all around my stencil so I didn’t get any of the gel outside the stencil area.
The Pixie Tape is perfect for this as it is removable and doesn’t rip your paper but yet has enough hold to keep the stencil in place! The next day I finished up applying the duo gel and laid some sheets of the Aqua Deco Foil on it when it was completely dry and ran it through my laminator. Out came the magical foiled gingham! I did struggle a bit with it and it’s not absolutely perfect but if you know me, you know I like a bit of grunge and chaos to my layouts so this fits right in with my style!
I started this layout by using the Great Outdoors stencil by Photoplay Paper with some distress oxide in Black Soot on layer 1. Layer 2 was applied using the Transfer Gel Duo with my Stencil Pal and I let the first part dry overnight as it was late and I didn’t want to mess up the gel by trying to do the whole area in one shot. I did use the Pixie Tape to tape down and all around my stencil so I didn’t get any of the gel outside the stencil area.
The Pixie Tape is perfect for this as it is removable and doesn’t rip your paper but yet has enough hold to keep the stencil in place! The next day I finished up applying the duo gel and laid some sheets of the Aqua Deco Foil on it when it was completely dry and ran it through my laminator. Out came the magical foiled gingham! I did struggle a bit with it and it’s not absolutely perfect but if you know me, you know I like a bit of grunge and chaos to my layouts so this fits right in with my style!
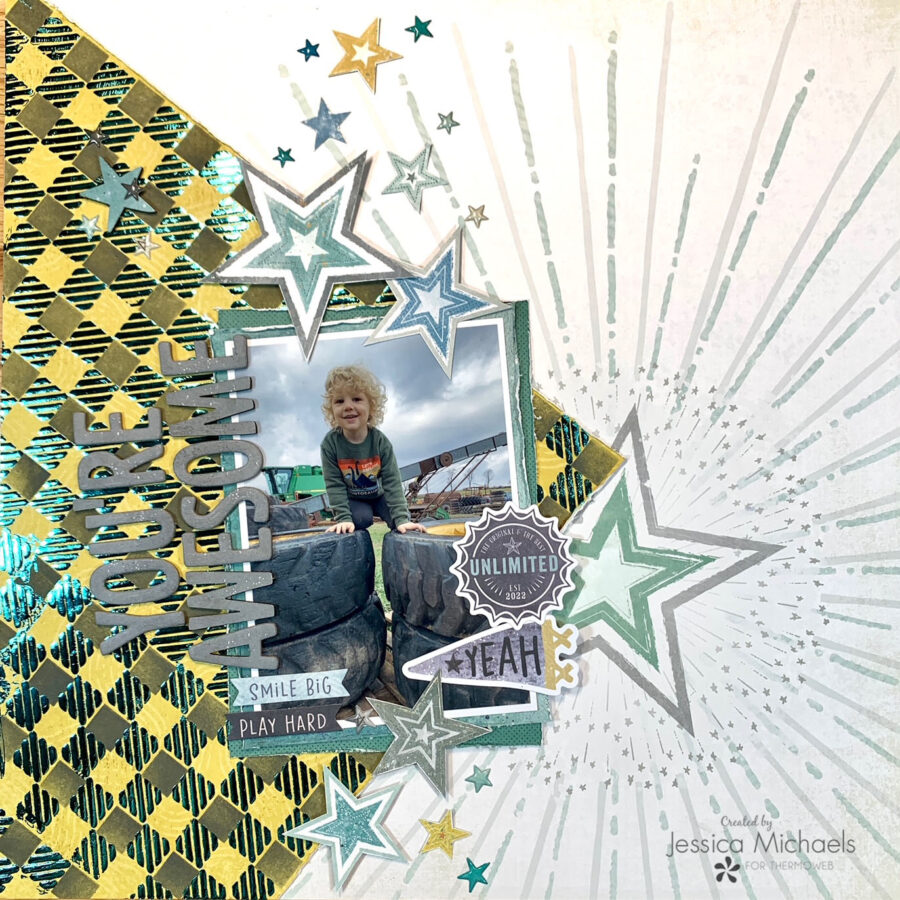
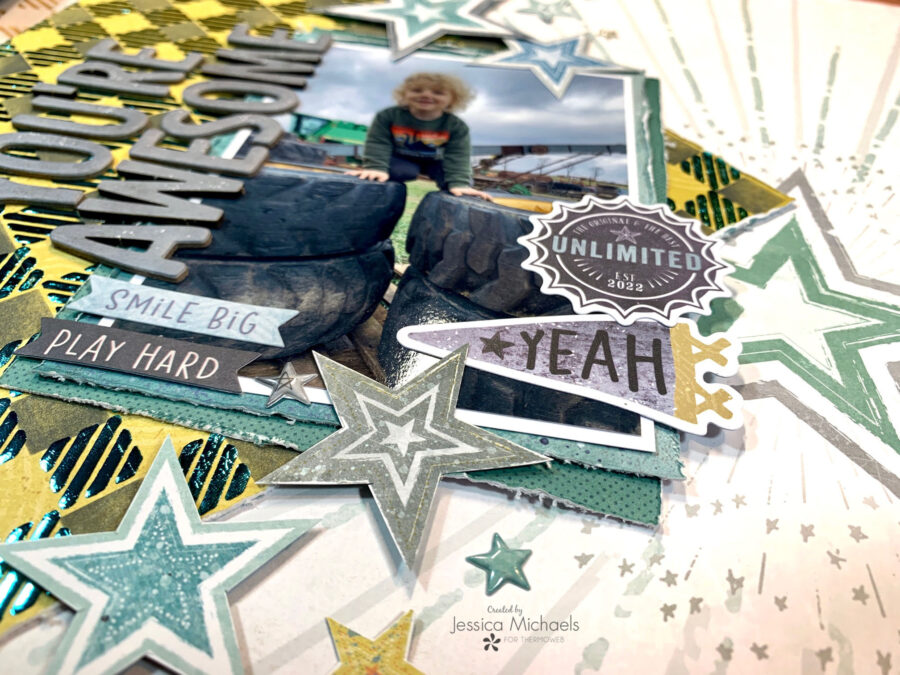
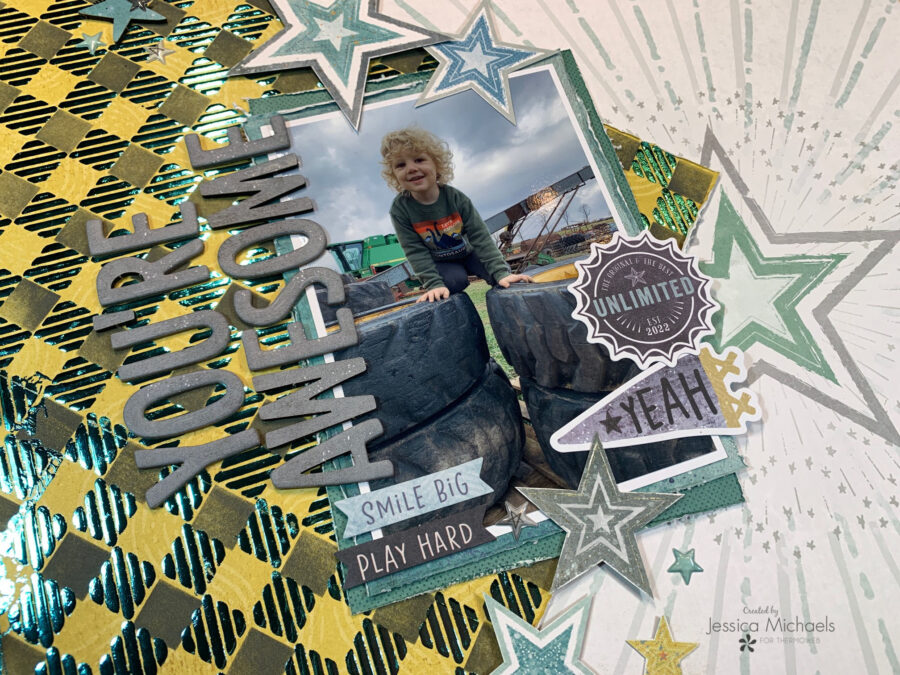 Next, I decided to cut out the gingham part and place it on top of one of the other patterned papers from the Cocoa Vanilla Studio No Limits collection. I just loved how the star pattern showed around the gingham and my photo!
I added some layers behind my photo using my Memory Tape Runner XL and Easy-Tear Tape and then finished it off with embellishments and my title! I did have to use the Liquid Ultrabond Adhesive on my title letters as some of them peeled the adhesive right off with the backing!
Next, I decided to cut out the gingham part and place it on top of one of the other patterned papers from the Cocoa Vanilla Studio No Limits collection. I just loved how the star pattern showed around the gingham and my photo!
I added some layers behind my photo using my Memory Tape Runner XL and Easy-Tear Tape and then finished it off with embellishments and my title! I did have to use the Liquid Ultrabond Adhesive on my title letters as some of them peeled the adhesive right off with the backing!
 Check out the process video on the Thermoweb YouTube channel to see how this came together:
[embed]https://youtu.be/aI8ZN3PJErw[/embed]
Thank you for being here today and I hope I was able to inspire you to create!
Jessica
This post contains affiliate links. For more information, see our disclosure HERE
Check out the process video on the Thermoweb YouTube channel to see how this came together:
[embed]https://youtu.be/aI8ZN3PJErw[/embed]
Thank you for being here today and I hope I was able to inspire you to create!
Jessica
This post contains affiliate links. For more information, see our disclosure HERE