No Products in the Cart
 Therm O Web Supplies:
Deco Foil™ Aqua, Teal, Ocean Blue, Deep Blue Transfer Sheets
Deco Foil™ Adhesive Pen
iCraft™ Easy-Cut Adhesive Sheet
3D Foam Squares
Aqua Ornate Glitter Dust™ Frames
Other Supplies:
Home Decor Canvas
Assorted stamps
Assorted paints
Vellum
Wave die cuts - Papertrey Ink
Shells, sequins or other mementos
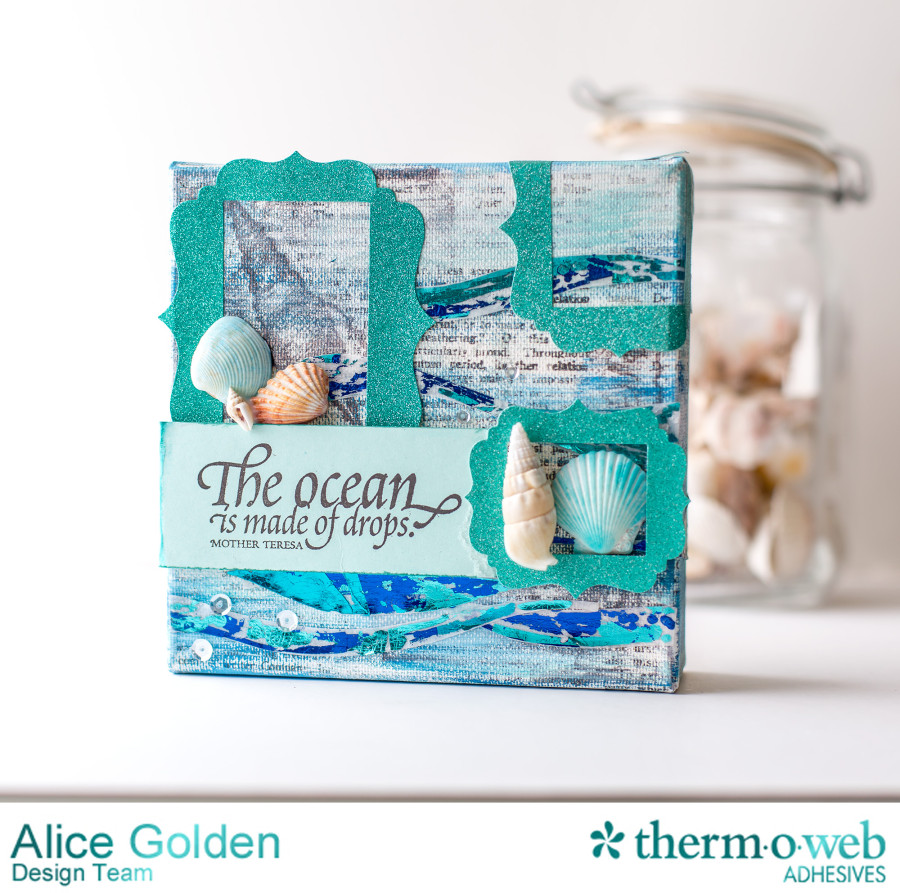
A variety of paint and stamps were used to create the base layer of the canvas. The canvas came pre-printed with text (and found at 60% off at my local big box craft store!). I went old school on this one and used some of my wood mounted stamps... so glad I hung on to a few of my favorites.
Therm O Web Supplies:
Deco Foil™ Aqua, Teal, Ocean Blue, Deep Blue Transfer Sheets
Deco Foil™ Adhesive Pen
iCraft™ Easy-Cut Adhesive Sheet
3D Foam Squares
Aqua Ornate Glitter Dust™ Frames
Other Supplies:
Home Decor Canvas
Assorted stamps
Assorted paints
Vellum
Wave die cuts - Papertrey Ink
Shells, sequins or other mementos
A variety of paint and stamps were used to create the base layer of the canvas. The canvas came pre-printed with text (and found at 60% off at my local big box craft store!). I went old school on this one and used some of my wood mounted stamps... so glad I hung on to a few of my favorites.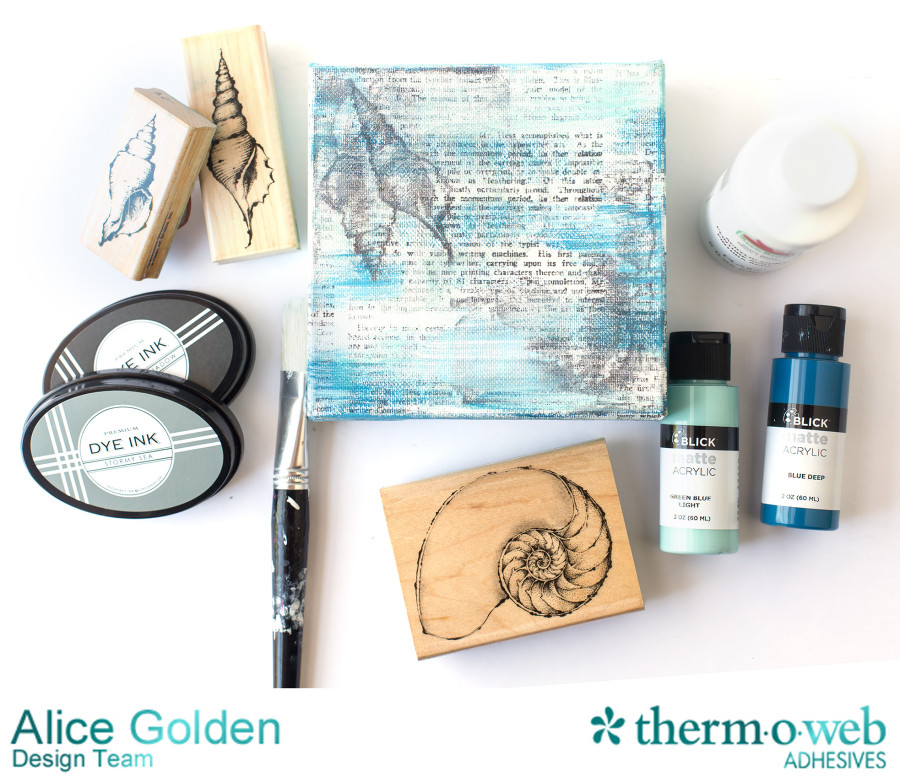 Project Instructions:
To create the DecoFoil accents, first apply a piece of Easy-Cut Adhesive to the back of a piece of vellum and then die cut the vellum into wave shapes. Use the new Deco Foil Adhesive Pen to randomly draw lines across the vellum and then use foil scraps to cover the adhesive. Run through a manual die-cutting machine to press the foil into the vellum. Remove the foil transfer sheets to reveal the foiled vellum.
Project Instructions:
To create the DecoFoil accents, first apply a piece of Easy-Cut Adhesive to the back of a piece of vellum and then die cut the vellum into wave shapes. Use the new Deco Foil Adhesive Pen to randomly draw lines across the vellum and then use foil scraps to cover the adhesive. Run through a manual die-cutting machine to press the foil into the vellum. Remove the foil transfer sheets to reveal the foiled vellum.
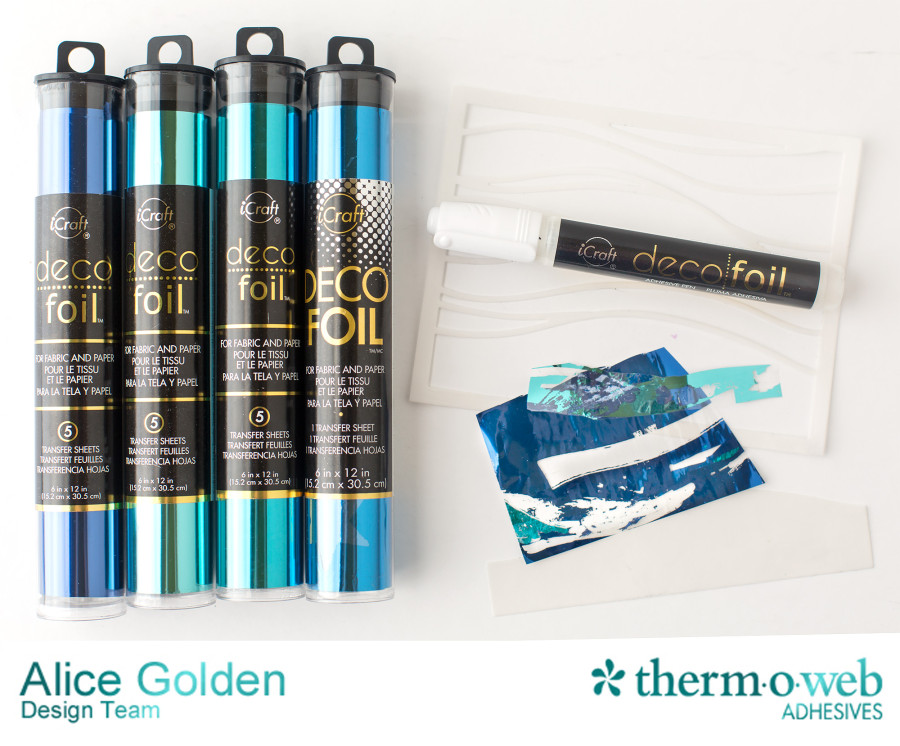 Continue layering foil colors as desired. Alternately, cover the entire "wave" with one color of foil to give more uniform coverage. Once you achieve the desired effect, peel the protective liner from the back of the vellum and adhere to the canvas. Using vellum as the base layer allows some of the text and stamping show through and adds more interest.
 Complete the canvas by adding Glitter Dust™ frames, shells, sequins, and a stamped quote. I just love this quote by Mother Theresa.
 Thanks so much for stopping by!