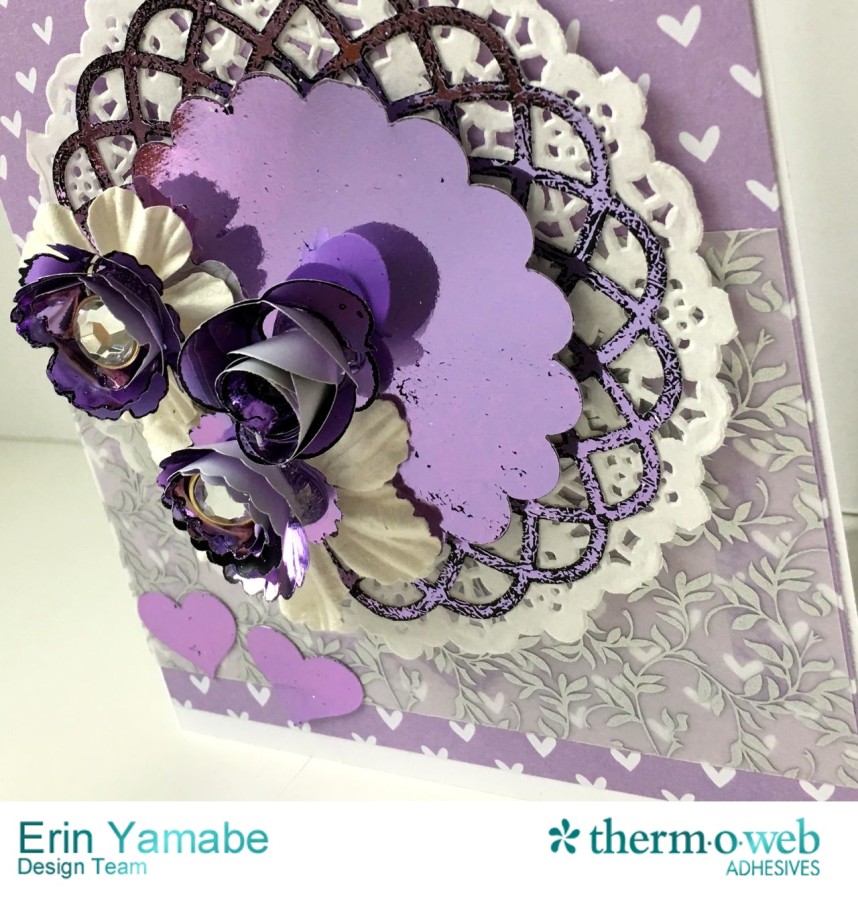
These new Deco Foil colors are just stunning, aren't they? Two shares for you today, one featuring the beautiful NEW and soon to be released Lilac and the other featuring the new Champagne & Pewter Deco Foil Transfer Sheets! Three of the seven new colors of Deco Foils released last weekend at the Winter CHA show in Anaheim! Stay tuned for more information on when these colors will be available to order.
 Therm O Web supplies:
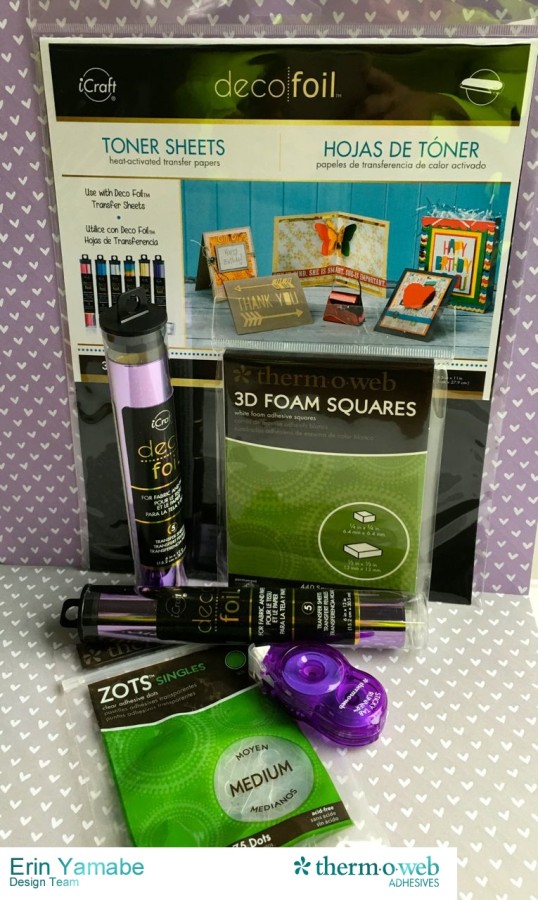
iCraft® Deco Foil™ Lilac Transfer Sheets (Coming Soon!)
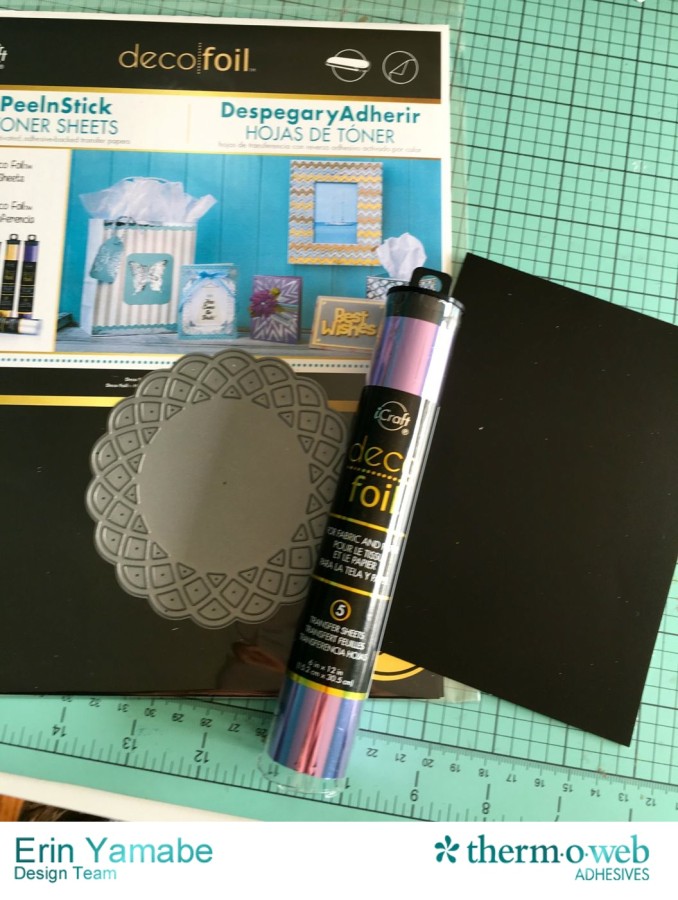
iCraft® Deco Foil™ PeelnStick Toner sheets (available now!)
Foam Squares
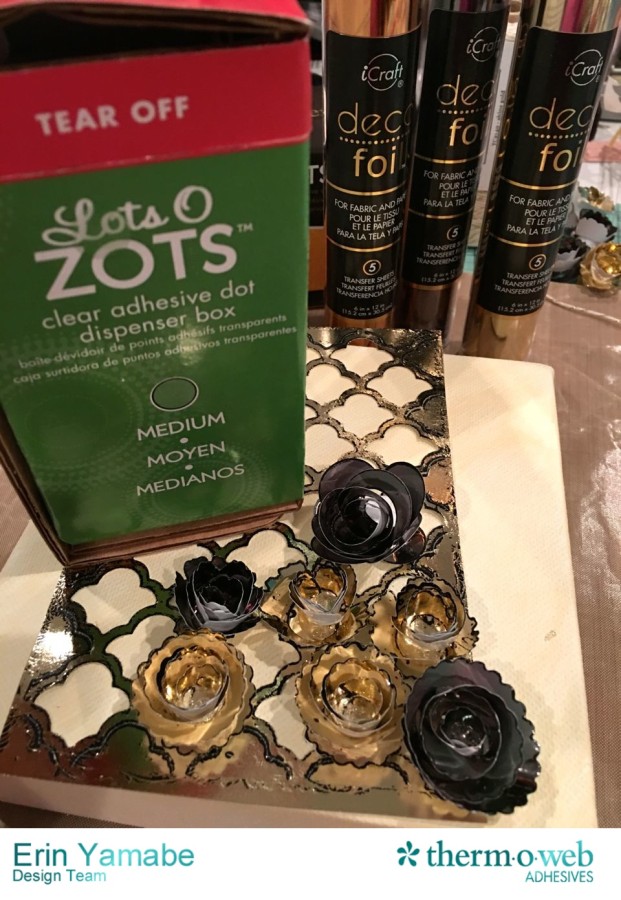
Zots™ Adhesive Dots Medium
Mini Tape Runner
Other supplies:
White card base
Ruby Rock-It vellum
Ruby Rock-It patterned paper
Doodlebug doily
My Favorite Things diecuts
Fiskars mini heart punch
Therm O Web supplies:
iCraft® Deco Foil™ Lilac Transfer Sheets (Coming Soon!)
iCraft® Deco Foil™ PeelnStick Toner sheets (available now!)
Foam Squares
Zots™ Adhesive Dots Medium
Mini Tape Runner
Other supplies:
White card base
Ruby Rock-It vellum
Ruby Rock-It patterned paper
Doodlebug doily
My Favorite Things diecuts
Fiskars mini heart punch
 Directions:
Turn on laminator, allow to warm up.
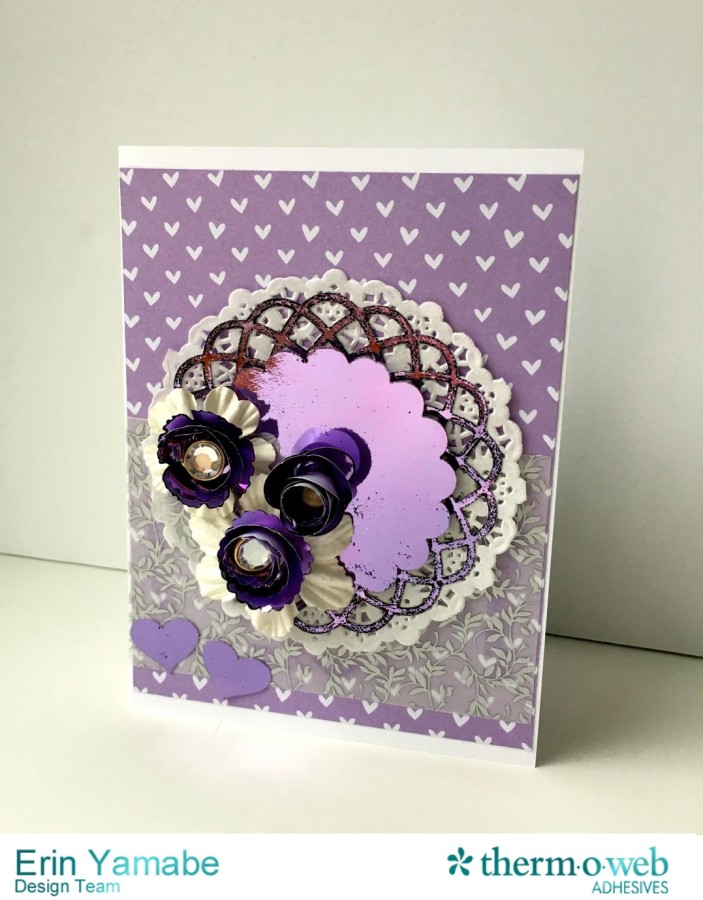
Cut cardstock to 5x7 inches. Adhere with mini tape runner to base of card.
Cut vellum to 5x3 inches. Adhere to patterned paper with mini tape runner.
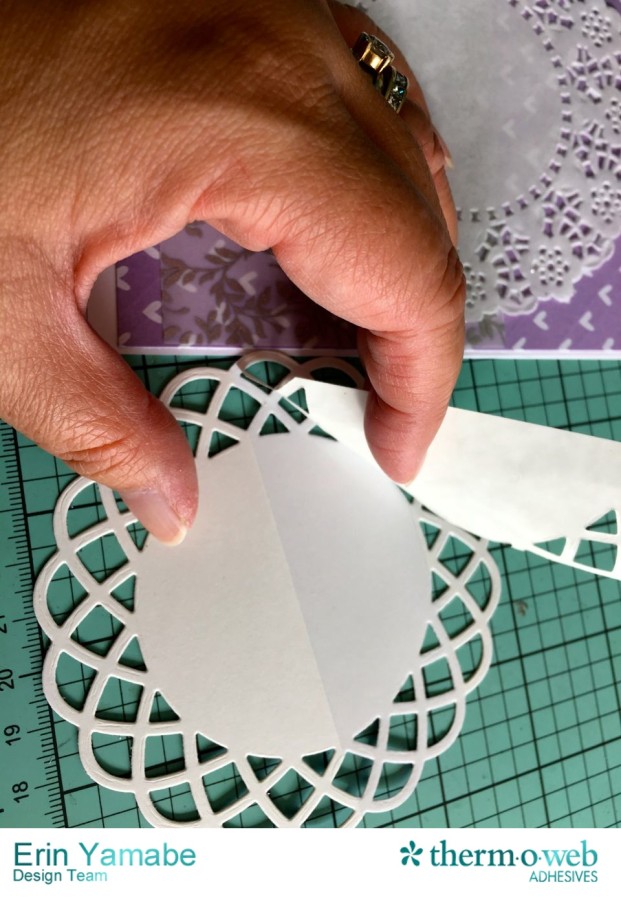
Adhere doily to the middle of the card with mini tape runner.
Choose diecut, and create the doily with iCraft® Deco Foil™ Peelnstick toner sheets.
Directions:
Turn on laminator, allow to warm up.
Cut cardstock to 5x7 inches. Adhere with mini tape runner to base of card.
Cut vellum to 5x3 inches. Adhere to patterned paper with mini tape runner.
Adhere doily to the middle of the card with mini tape runner.
Choose diecut, and create the doily with iCraft® Deco Foil™ Peelnstick toner sheets.
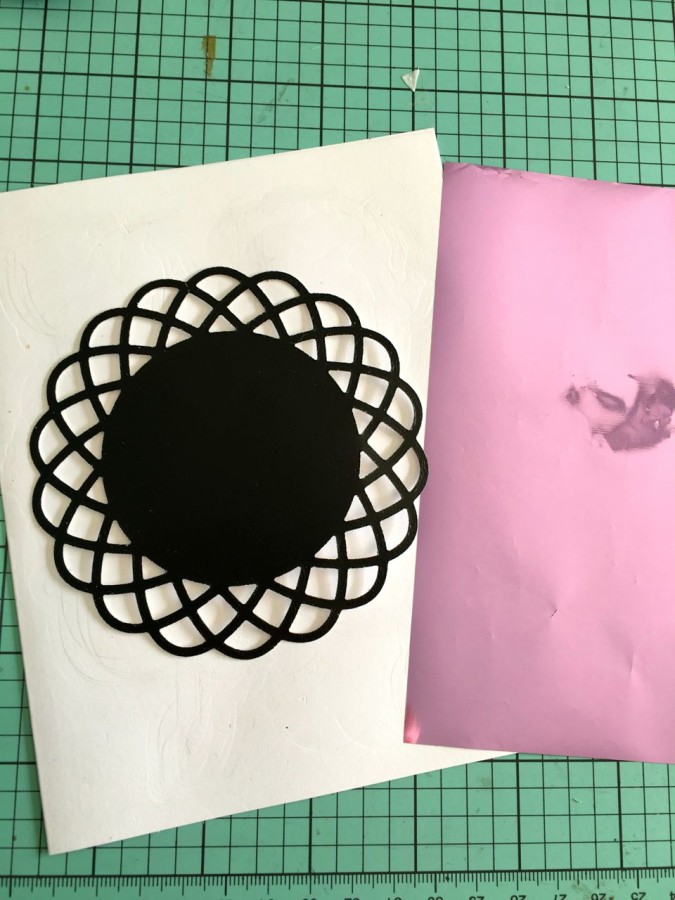 Place foil on top of diecut, and run through the laminator inside the parchment paper.
Remove adhesive from the back of doily, add on top of doily on the card.
Place foil on top of diecut, and run through the laminator inside the parchment paper.
Remove adhesive from the back of doily, add on top of doily on the card.
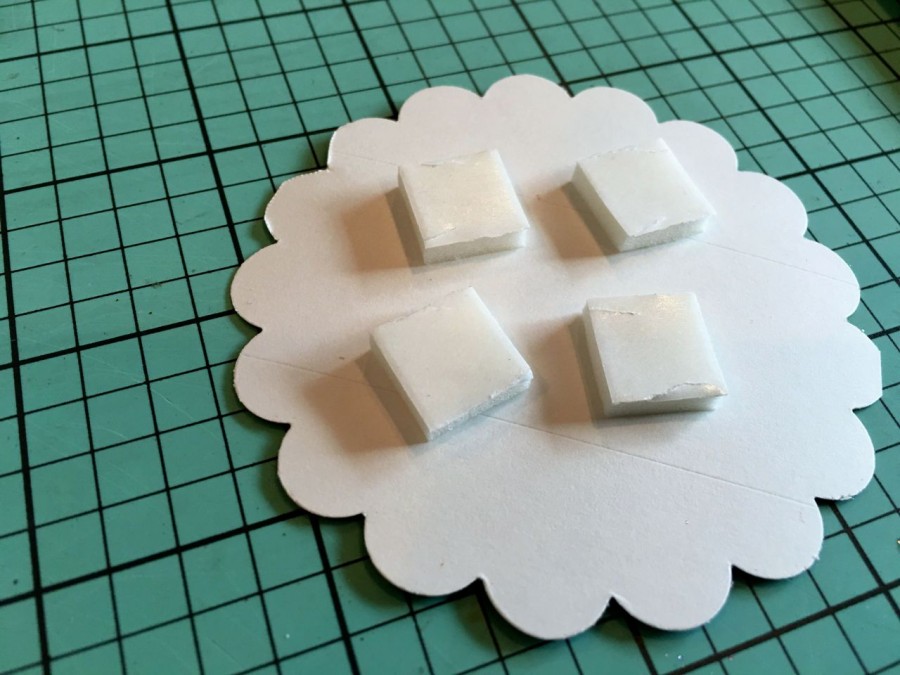
 Repeat the process with a diecut circle scallop. Adhere the circle scallop with foam squares on top of foiled doily.
 Repeat the process with some diecut rolled flowers.
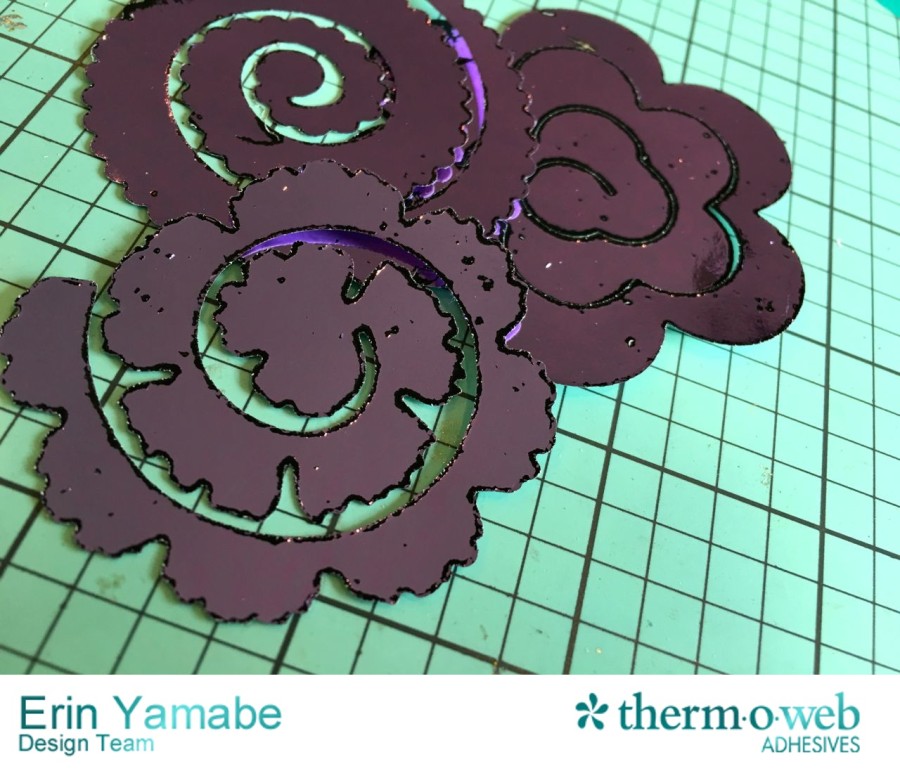 Using a quilling tool, roll the flowers with the lilac side going inward. Secure with a zot dot. Adhere to scallop circle.
Punch two mini hearts from remainder of lilac toner sheet. Adhere to lower left of card.
Using a quilling tool, roll the flowers with the lilac side going inward. Secure with a zot dot. Adhere to scallop circle.
Punch two mini hearts from remainder of lilac toner sheet. Adhere to lower left of card.
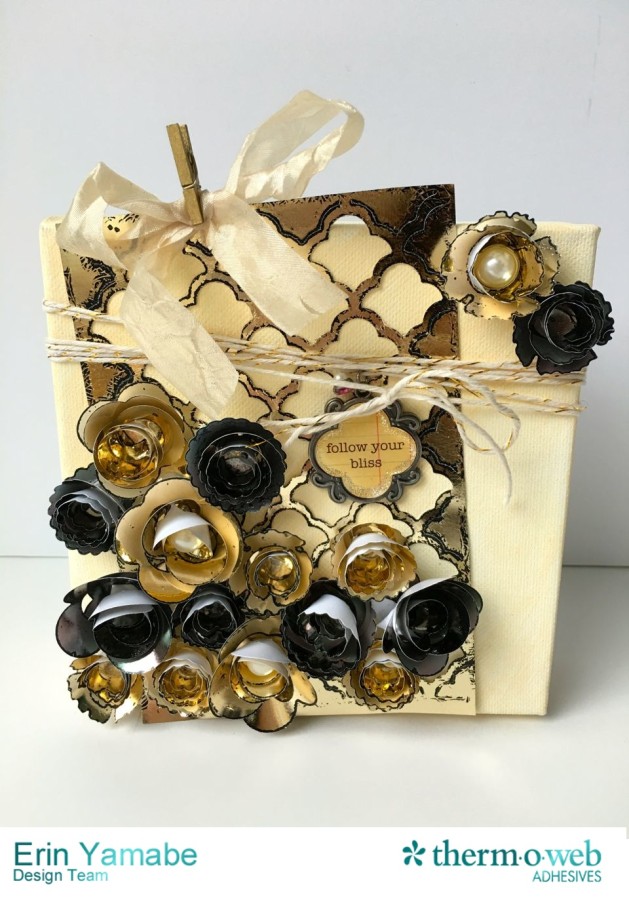
 Next, let's look at how beautiful the NEW Champagne and Pewter (Both Coming Soon!) Deco Foils™ pair together!
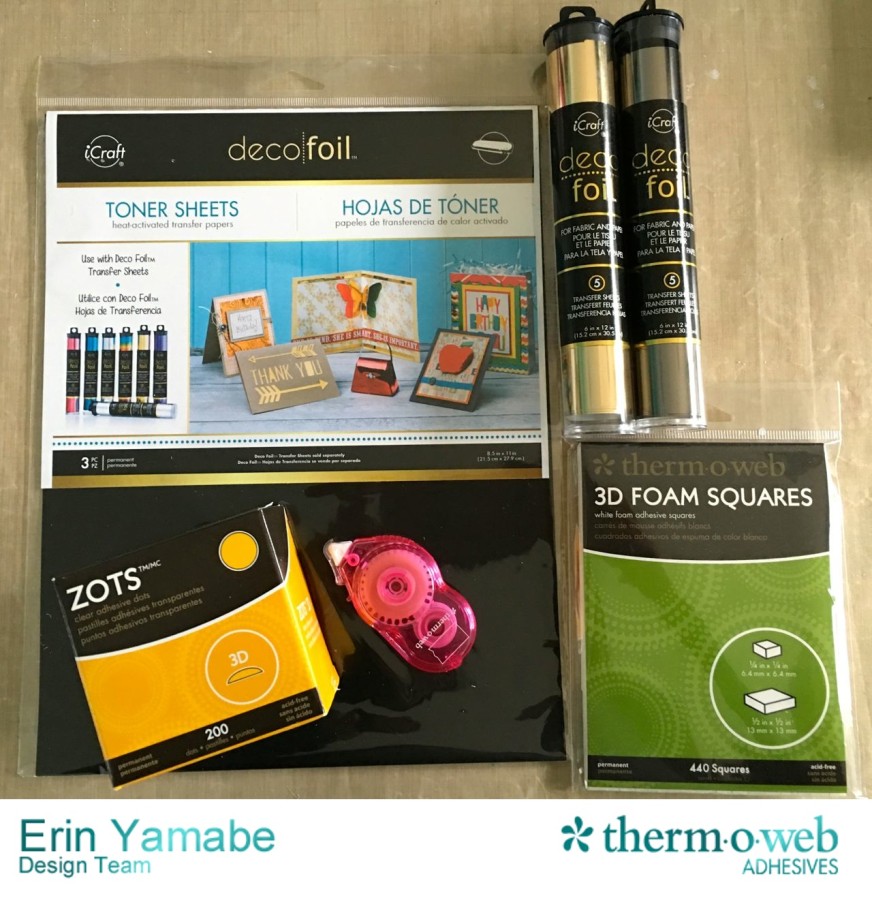
 Therm O Web supplies:
iCraft® Deco Foil™ Champagne
iCraft® Deco Foil™ Pewter
iCraft® Deco Foil™ Toner sheets
Zots™ Adhesive dots
Foam squares
Mini Tape Runner
Other supplies:
Canvas LSS
Ranger paint
My Favorite Things diecuts
Ribbon LSS
Maya Road mini clothespin
The Twinery twine
The Girls Paperie charm
Therm O Web supplies:
iCraft® Deco Foil™ Champagne
iCraft® Deco Foil™ Pewter
iCraft® Deco Foil™ Toner sheets
Zots™ Adhesive dots
Foam squares
Mini Tape Runner
Other supplies:
Canvas LSS
Ranger paint
My Favorite Things diecuts
Ribbon LSS
Maya Road mini clothespin
The Twinery twine
The Girls Paperie charm
 Directions:
Turn on laminator, allow to warm up.
Paint canvas, set aside to dry.
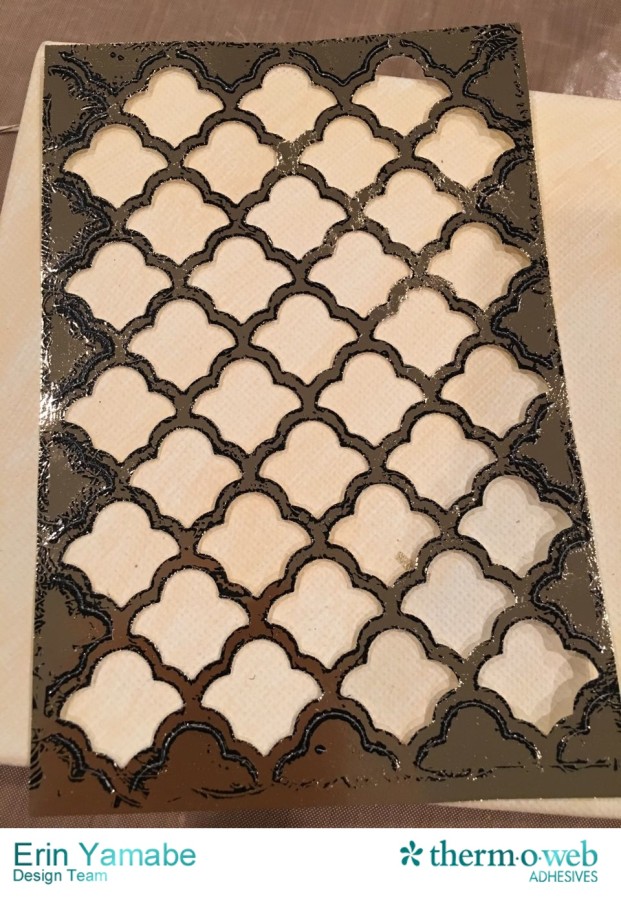
Diecut background image with an iCraft Deco Foil™ Toner sheet. Place champagne foil over diecut toner sheet, and run through the lamintor.
Directions:
Turn on laminator, allow to warm up.
Paint canvas, set aside to dry.
Diecut background image with an iCraft Deco Foil™ Toner sheet. Place champagne foil over diecut toner sheet, and run through the lamintor.
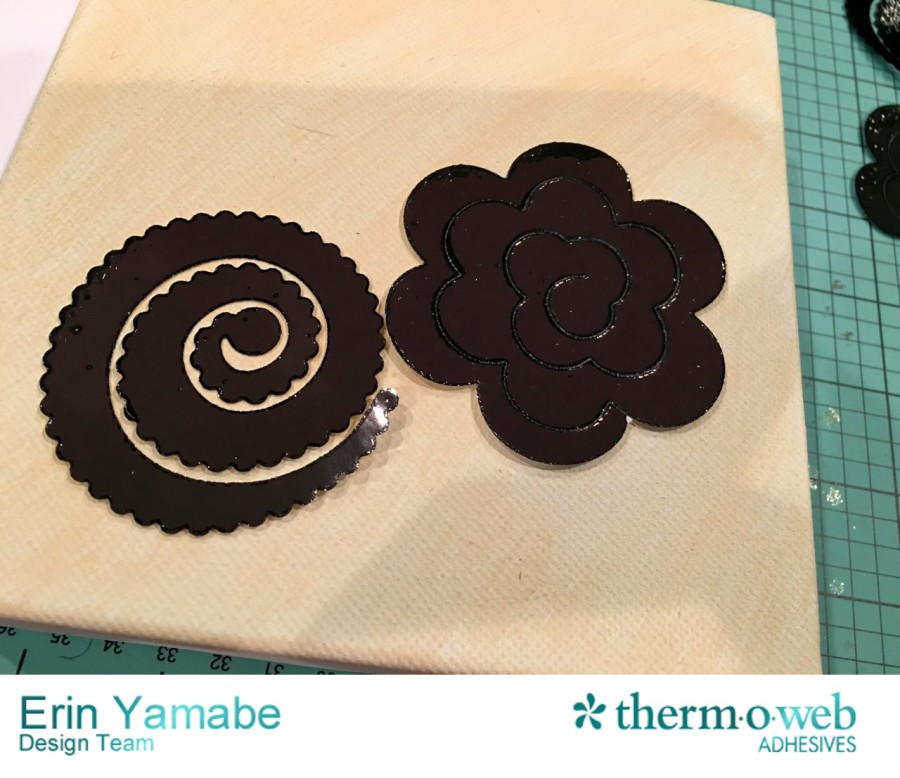
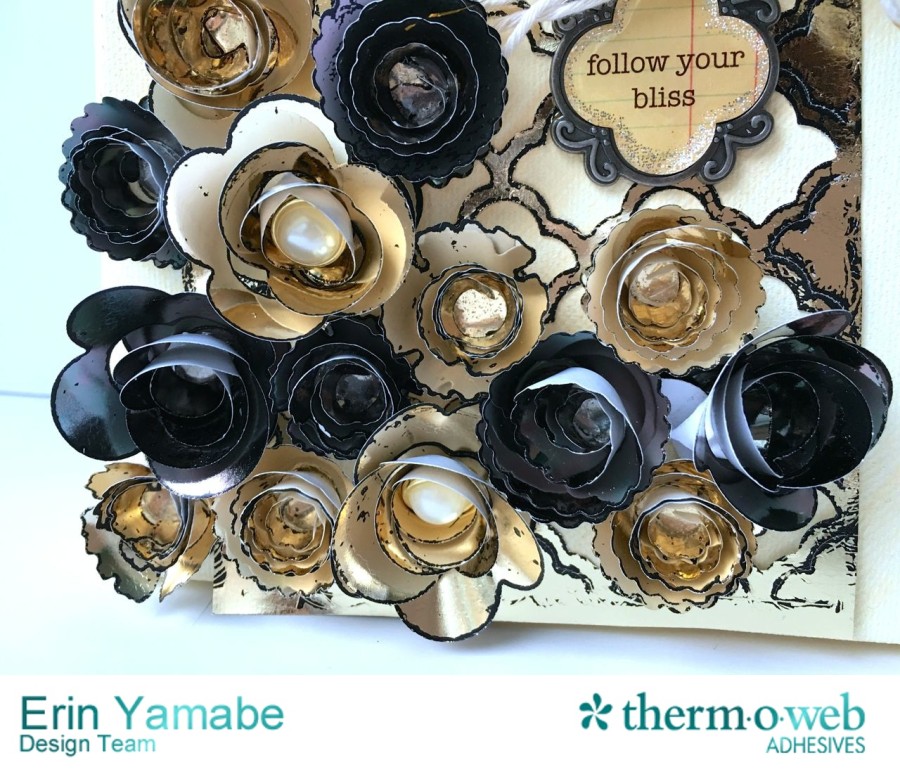
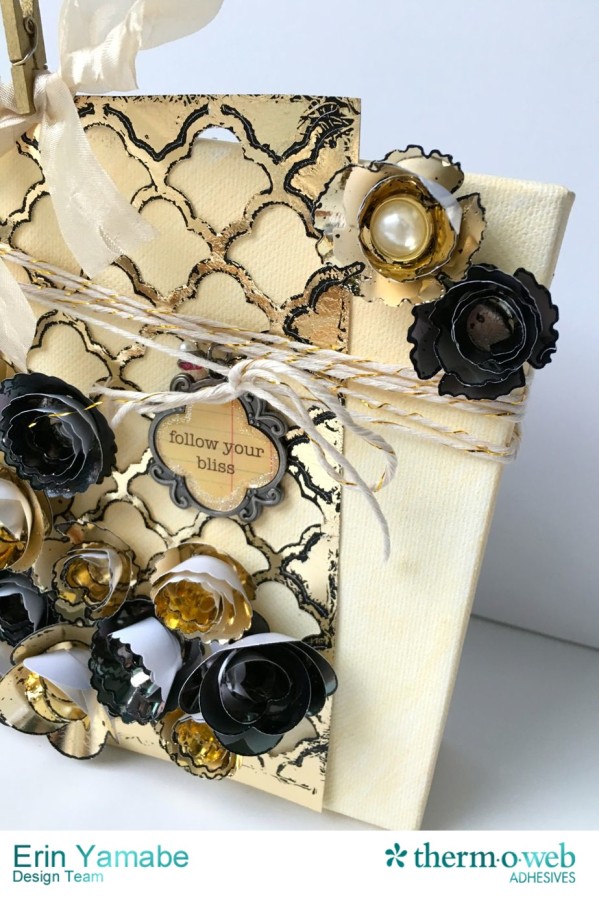
 Diecut rolled flower diecuts with a toner sheet. Repeat several times. Repeat the process with both champagne and pewter foil over the rolled flowers diecuts.
 Using a quilling tool, roll inward with the color on the inside. Secure the rolled flower with a Zot Adhesive dot.
Adhere the background diecut to the canvas. Adhere the rolled flowers to the background diecut with zot dots.
Using a quilling tool, roll inward with the color on the inside. Secure the rolled flower with a Zot Adhesive dot.
Adhere the background diecut to the canvas. Adhere the rolled flowers to the background diecut with zot dots.
 Wrap the charm around the twine, and tie to the top of canvas. Clip ribbon onto top of canvas with mini clothespin.
 Thank you for stopping by and making Therm O Web a part of your creative day!
~ Erin Yamabe
Thank you for stopping by and making Therm O Web a part of your creative day!
~ Erin Yamabe