No Products in the Cart



 THERM O WEB SUPPLIES:
iCraft® Deco Foil™ Adhesive Pen
iCraft® Deco Foil™ Liquid Adhesive
Therm O Web Glitter Dust Deco Frames – Teal Circle Scallop
Therm O Web 3D White Foam Squares – 1/4 inch
Therm O Web Deco Foil™ Transfer Sheet - Iridescent
12 inch Foil Laminator
Other Supplies:
Jillibean Soup Shape Shaker Card Base and Shape Shaker
Sentiment Stamp
Sequins
Wood Veneer
Stencil
THERM O WEB SUPPLIES:
iCraft® Deco Foil™ Adhesive Pen
iCraft® Deco Foil™ Liquid Adhesive
Therm O Web Glitter Dust Deco Frames – Teal Circle Scallop
Therm O Web 3D White Foam Squares – 1/4 inch
Therm O Web Deco Foil™ Transfer Sheet - Iridescent
12 inch Foil Laminator
Other Supplies:
Jillibean Soup Shape Shaker Card Base and Shape Shaker
Sentiment Stamp
Sequins
Wood Veneer
Stencil
Shaker Card Tutorial featuring Deco Foil, Adhesive Pen and Glitter Dust Frame
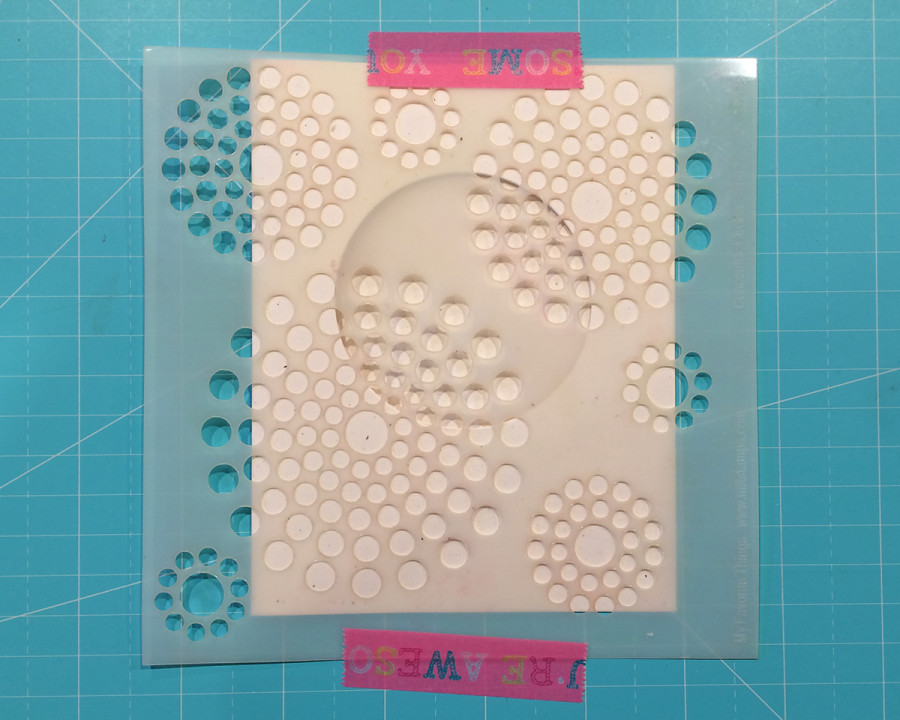 Begin by taping your stencil down to hold it in place.
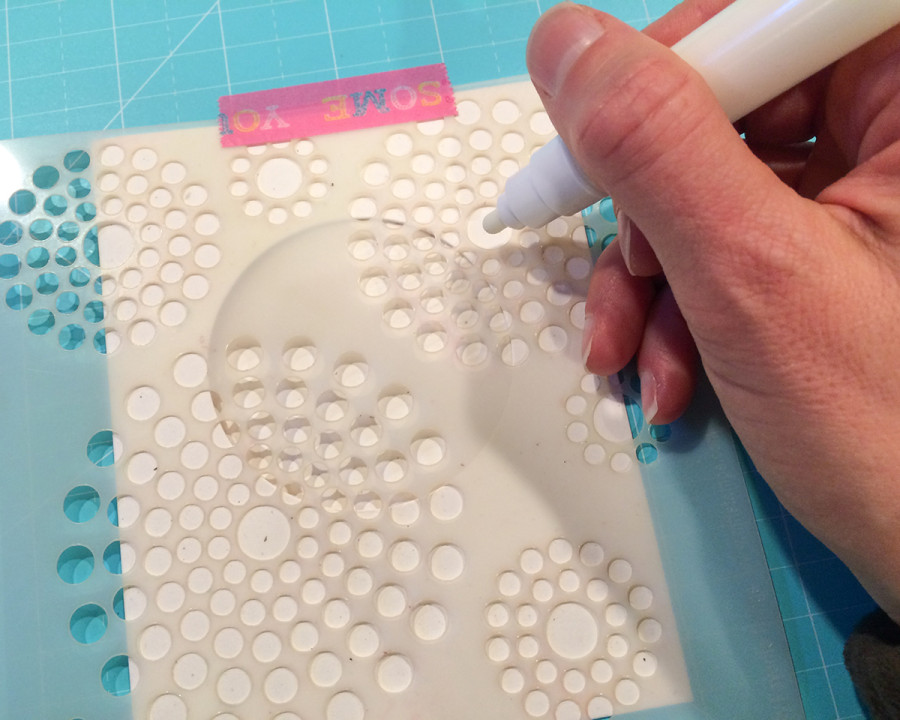 Use the Deco Foil™ Adhesive Pen to apply adhesive to the openings in the stencil. Allow the adhesive to dry at least 30 seconds. Make sure to thoroughly clean your stencil right away. I recommend using an adhesive remover, such as Un-Du, and a toothbrush.
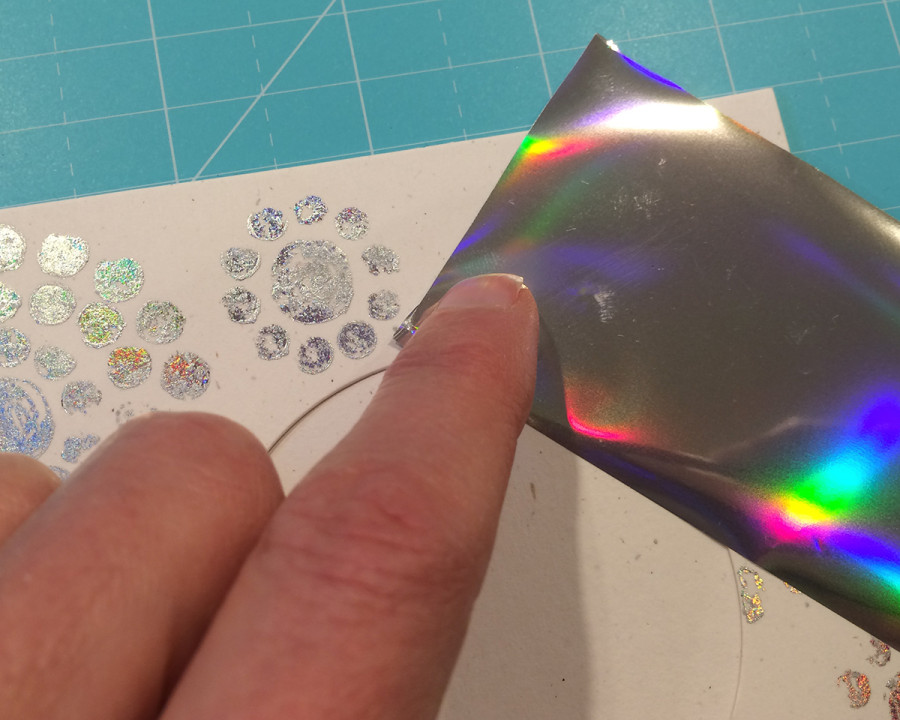 Place the desired Deco Foil™ with the colored side facing upward and use your finger to rub over the Deco Foil™. This will help the foil adhere to the adhesive.
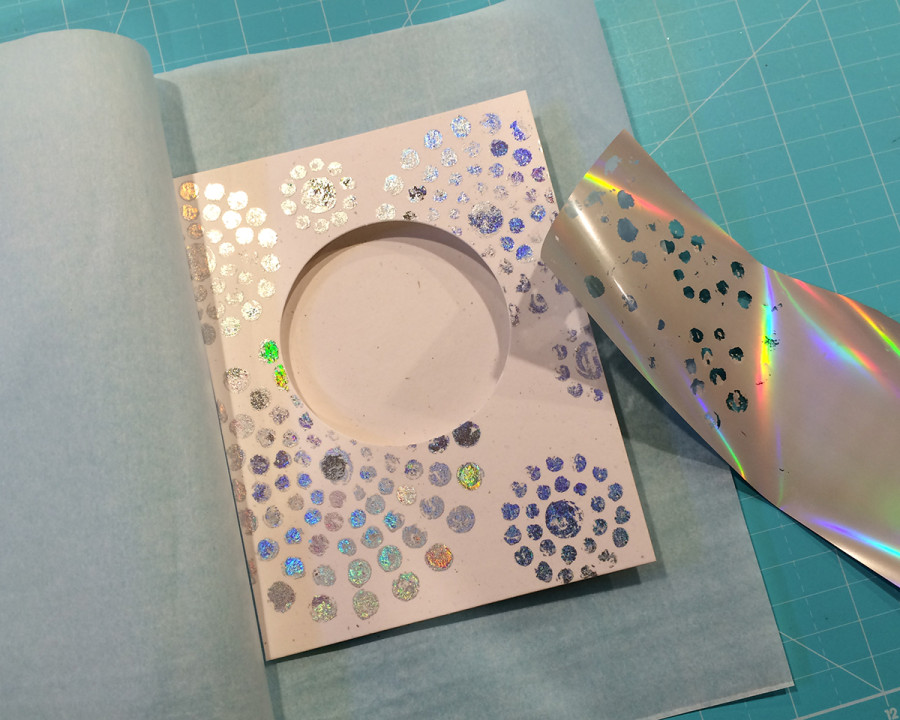 Turn on the laminator, select the 5mil setting and allow it to warm up for 10 minutes. Remove the Deco Foil™ Transfer Sheet and place the card into a piece of folded parchment paper. Insert the entire piece into a laminator using the crease of the folded parchment paper as a lead edge. Remove the project from the parchment paper. You can also choose to leave the Deco Foil™ Transfer Sheet in place as you run the entire piece through the laminator and then remove it once it is finishing going through the laminator.
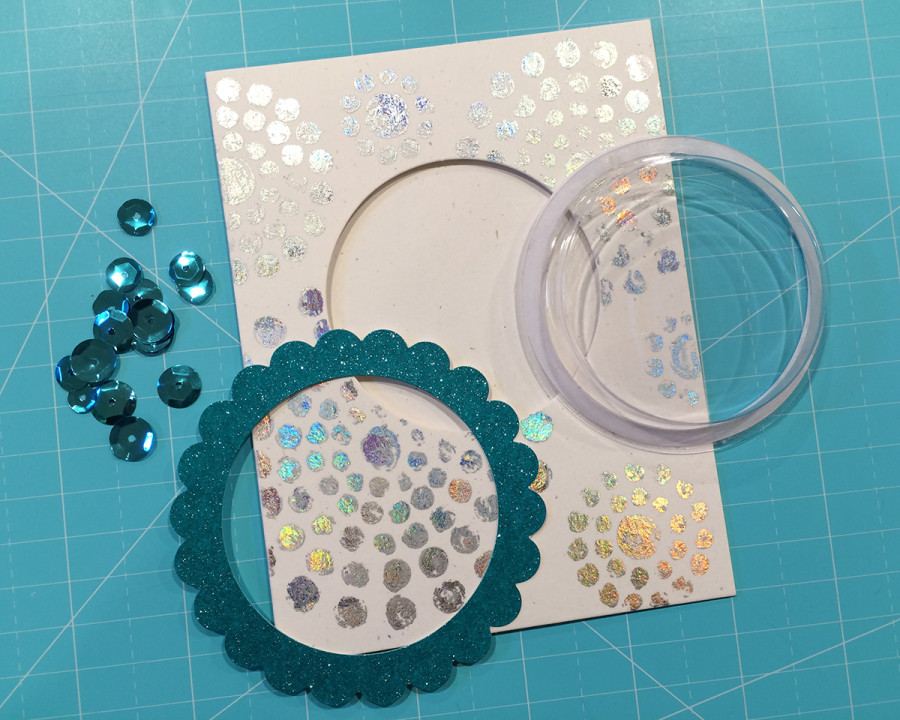 Fill the shaker piece with sequins.
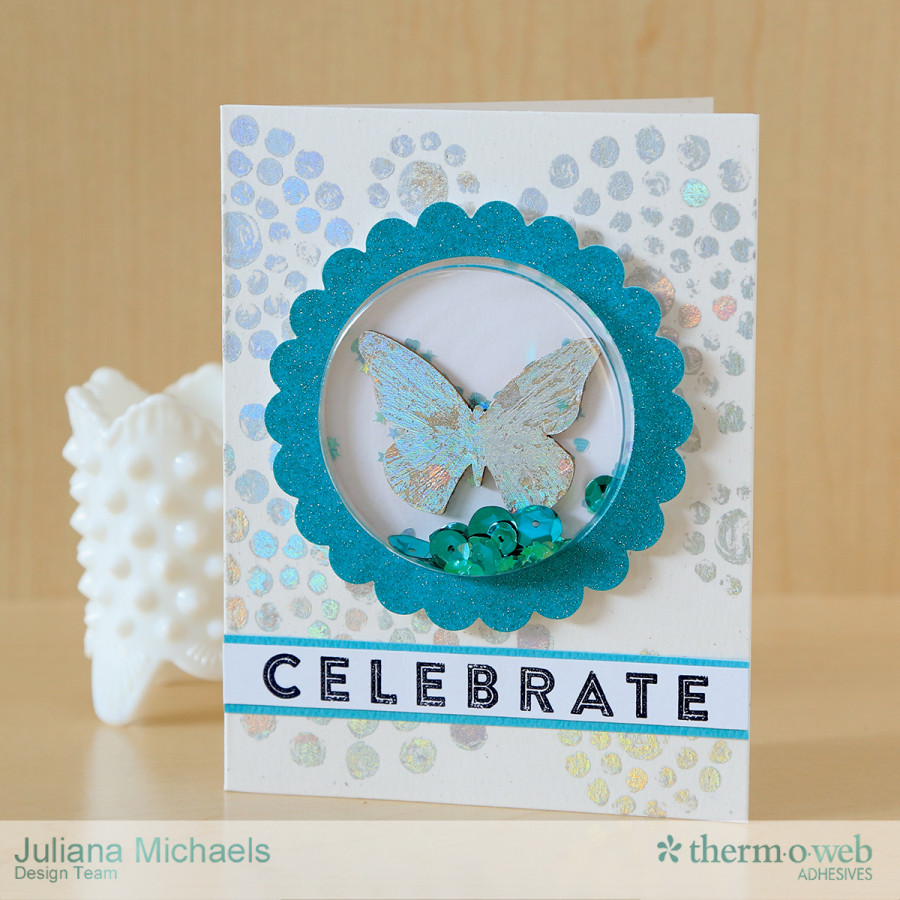
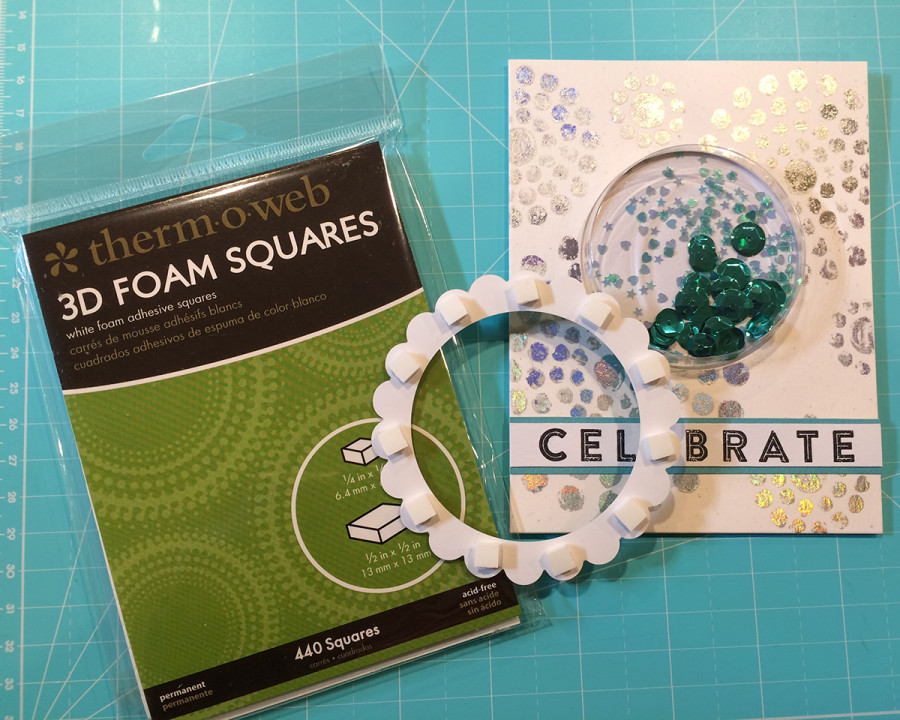 Select the large circle scallop from the Glitter Dust™ Deco Frames and adhere it to the card front using 3D Foam Squares. The frame worked perfectly with the larger Shape Shaker circle.
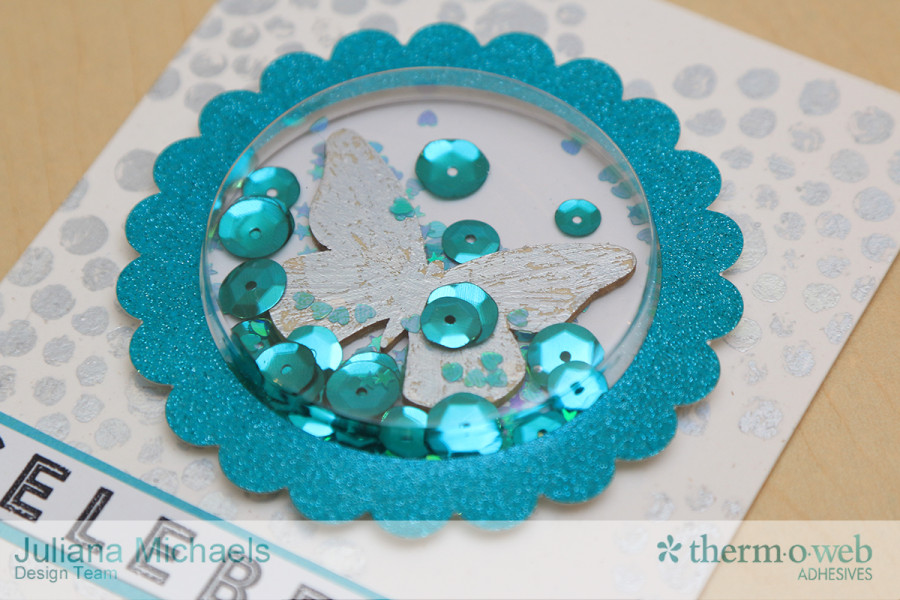 To further embellish the shaker, I applied Deco Foil™ Liquid Adhesive to a piece of wood veneer and then applied the Iridescent Deco Foil™ to it.
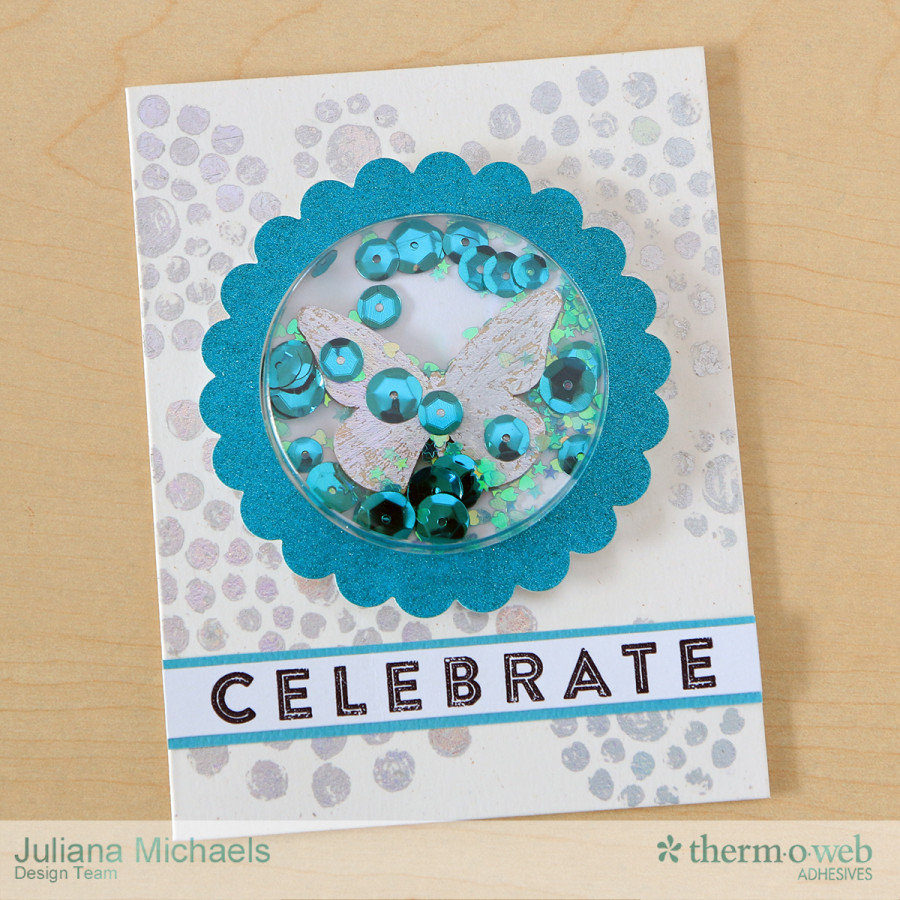 All the foil and glitter really created the perfect festive birthday card! I hope you enjoyed learning more about ways to use Therm O Web Deco Foil™ and the new Deco Foil™ Liquid Adhesive Pen.
HUGS!
Juliana
All the foil and glitter really created the perfect festive birthday card! I hope you enjoyed learning more about ways to use Therm O Web Deco Foil™ and the new Deco Foil™ Liquid Adhesive Pen.
HUGS!
Juliana
