No Products in the Cart
 This sew along is a little different than the last few because instead of only sewing four blocks, you’ll need to sew two to five applique blocks for each of the patterns. Each block, appliqued and pieced, will measure unfinished at 8½” x 8½”. “Christmas Joy” will be a 50” x 58” quilt when finished with the final instructions released on December 11th.
 What you'll need to get started:
Heat n Bond Lite, Iron-on Adhesive or Heat n Bond EZ Print Lite Sheets
Aurifil Thread
Oliso Iron
As for fabrics, you can use scraps, solids, or a specific line of fabric. Grabbing Christmas fabrics from your stash works great for this! Fat quarters are also perfect for assembling the blocks, along with some yardage for backgrounds and borders. The blocks and borders for this quilt used fabrics from my stash.
Applique background fabric: 1 yard
Applique fabrics: 10-12 fat quarters or large scraps in coordinating colors
Pieced blocks fabrics: 5/8 yard each of two different fabrics
Sashing fabrics: 1/4 yard each of two different fabrics
Border A fabric: 3/8 yard (pieced strips) or 1 1/4 yard (non-pieced strips cut lengthwise)
Border B fabric: 7/8 yard (pieced strips) or 1 3/8 yard (non-pieced strips cut lengthwise)
Quilt backing: 3 1/4 yard (allow extra if needed for quilting)
Binding: 1/2 yard
Batting to fit 50” x 58” quilt
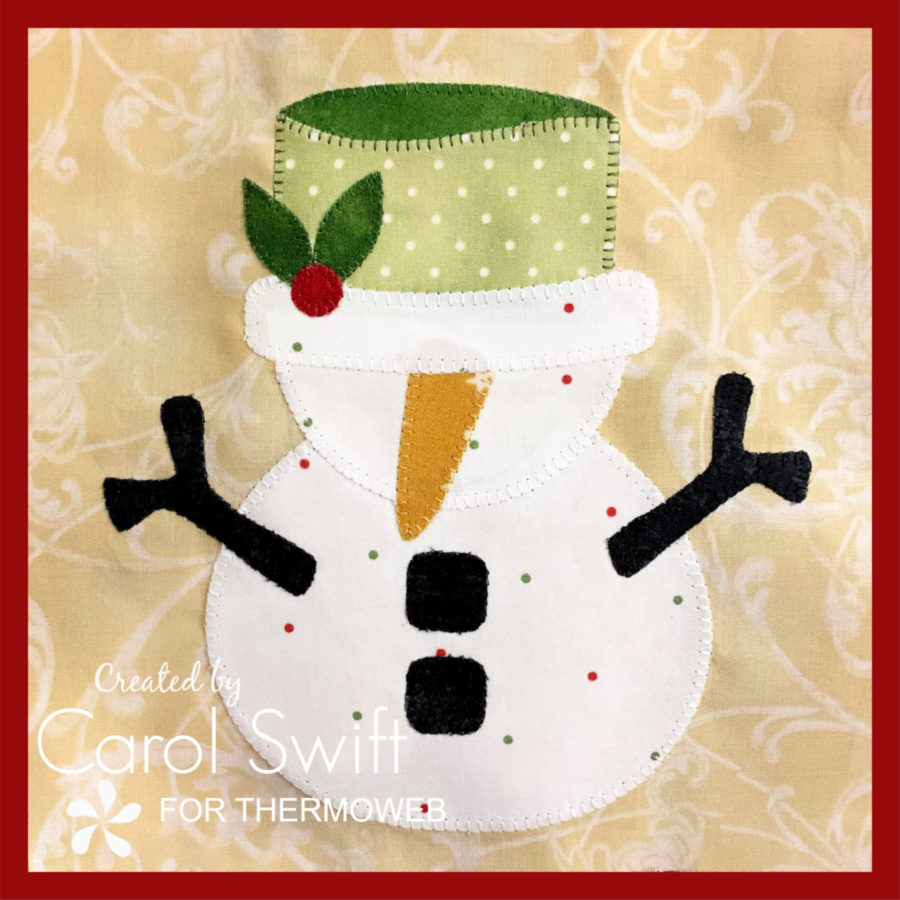
Fabrics needed for Snowman - Fat quarters or scraps for body, nose, buttons, sticks, hat, holly.
Cut 2 – 8 1/2” x 8 1/2” squares from applique background fabric.
What you'll need to get started:
Heat n Bond Lite, Iron-on Adhesive or Heat n Bond EZ Print Lite Sheets
Aurifil Thread
Oliso Iron
As for fabrics, you can use scraps, solids, or a specific line of fabric. Grabbing Christmas fabrics from your stash works great for this! Fat quarters are also perfect for assembling the blocks, along with some yardage for backgrounds and borders. The blocks and borders for this quilt used fabrics from my stash.
Applique background fabric: 1 yard
Applique fabrics: 10-12 fat quarters or large scraps in coordinating colors
Pieced blocks fabrics: 5/8 yard each of two different fabrics
Sashing fabrics: 1/4 yard each of two different fabrics
Border A fabric: 3/8 yard (pieced strips) or 1 1/4 yard (non-pieced strips cut lengthwise)
Border B fabric: 7/8 yard (pieced strips) or 1 3/8 yard (non-pieced strips cut lengthwise)
Quilt backing: 3 1/4 yard (allow extra if needed for quilting)
Binding: 1/2 yard
Batting to fit 50” x 58” quilt
Fabrics needed for Snowman - Fat quarters or scraps for body, nose, buttons, sticks, hat, holly.
Cut 2 – 8 1/2” x 8 1/2” squares from applique background fabric.
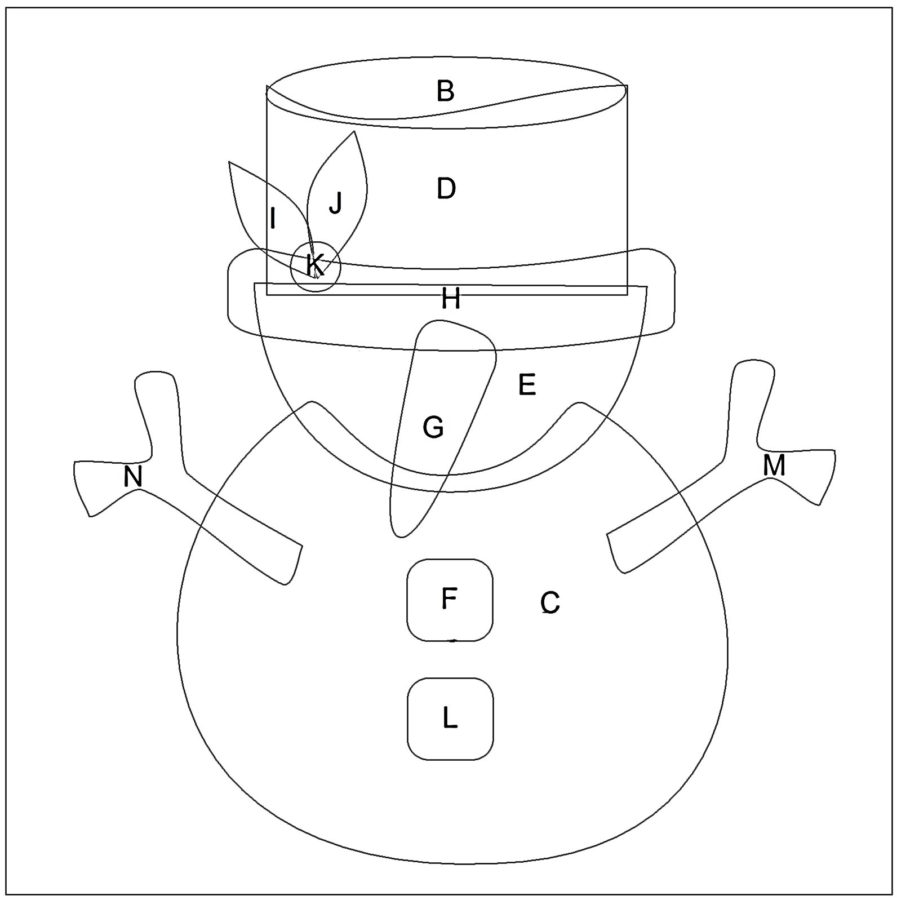
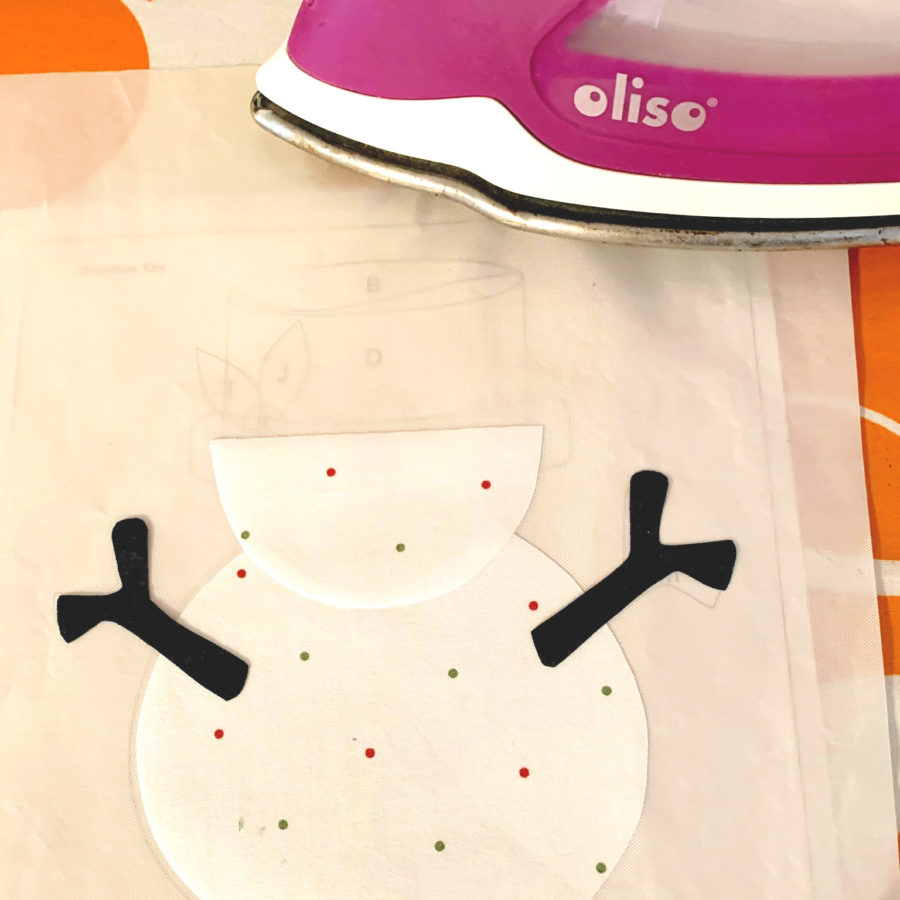
 *Tip: Use a heat resistant applique sheet to arrange your applique before applying it to your fabric. This helps avoid mistakes in placement. Place the applique sheet on top of the pattern key. Place the cut-out applique pieces right sides up on the applique sheet as shown on the key. Lightly press the pieces in place on the applique sheet and let cool before removing. Iron on the right side of the fabric with adhesive side down following manufacturer’s directions.
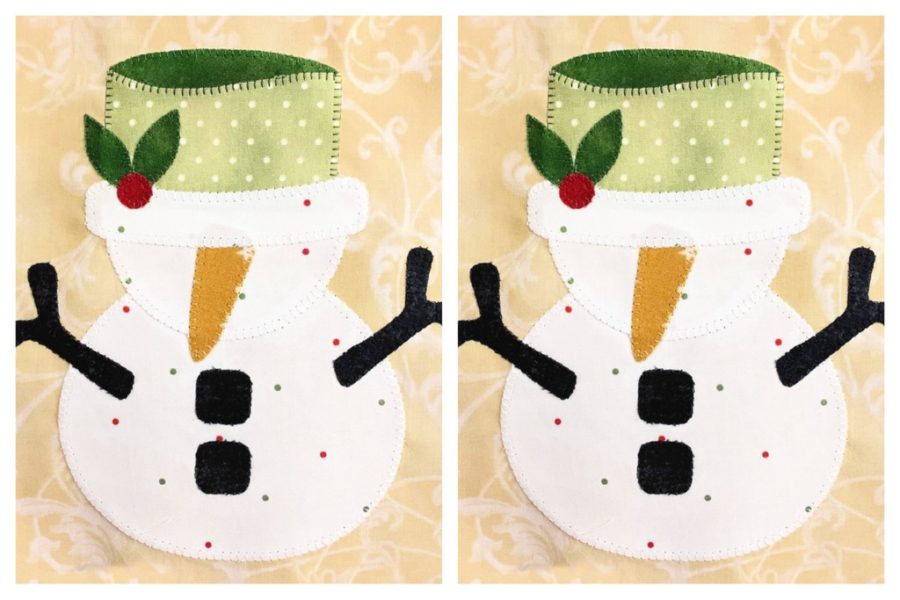
 Make two snowmen and set them aside. Tomorrow we'll release another block!
 We're sharing the pieced blocks with you on the first day so you can get started sewing them. The hourglass blocks are really easy to make following the instructions below.
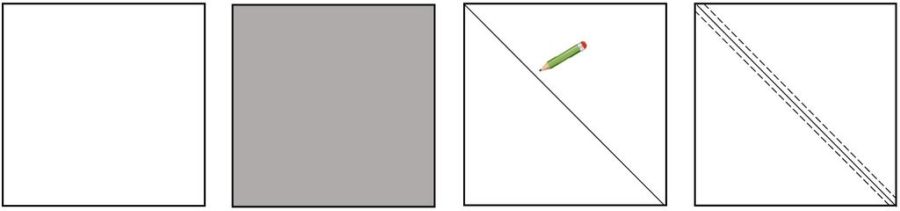
Cut 6 – 9½” x 9½” red squares (hourglass block)
Cut 6 – 9½” x 9½” white squares (hourglass block)
You’ll need one light square and one dark square to make two blocks. Draw a line diagonally on the wrong side of the light square. Place the right sides of squares together. Sew a 1/4" seam along both sides of the drawn line.
We're sharing the pieced blocks with you on the first day so you can get started sewing them. The hourglass blocks are really easy to make following the instructions below.
Cut 6 – 9½” x 9½” red squares (hourglass block)
Cut 6 – 9½” x 9½” white squares (hourglass block)
You’ll need one light square and one dark square to make two blocks. Draw a line diagonally on the wrong side of the light square. Place the right sides of squares together. Sew a 1/4" seam along both sides of the drawn line.
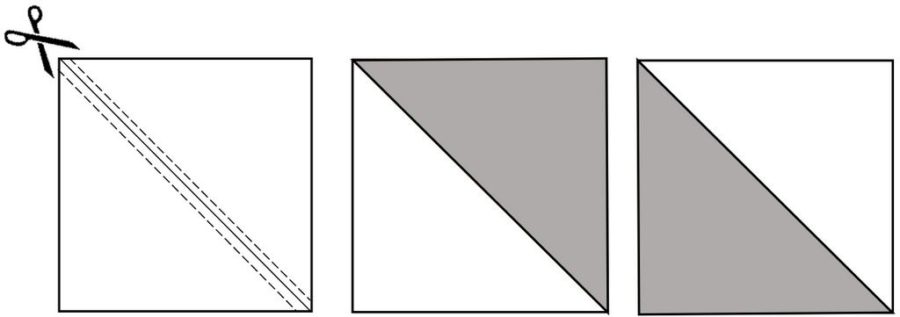
 Cut the block along the drawn line to create two blocks. Open and press fabrics to the dark side.
 On one of the blocks, draw a diagonal line opposite from the seam on the wrong side of the fabric. With right sides together and nesting the seam, sew 1/4" along both sides of the drawn line. Cut the blocks along the drawn line. Open and press seams toward the side. Trim blocks to 8½” x 8½”.
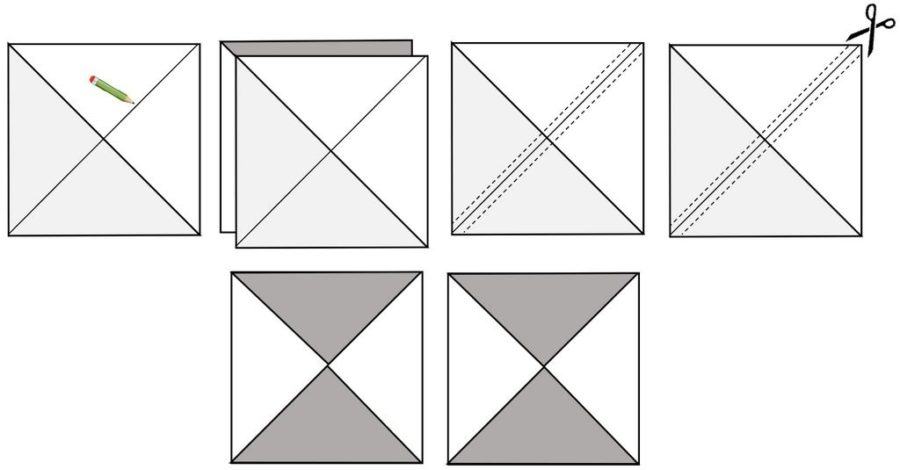 You will need to make a total of twelve blocks. The block instructions above creates two blocks each time, so repeat the process a total of six times to get twelve blocks.
We’d love to see the progress of your blocks on Instagram or Facebook. Tag your posts with #thermoweb so we can see them!
You will need to make a total of twelve blocks. The block instructions above creates two blocks each time, so repeat the process a total of six times to get twelve blocks.
We’d love to see the progress of your blocks on Instagram or Facebook. Tag your posts with #thermoweb so we can see them!Written by Carol Swift