No Products in the Cart
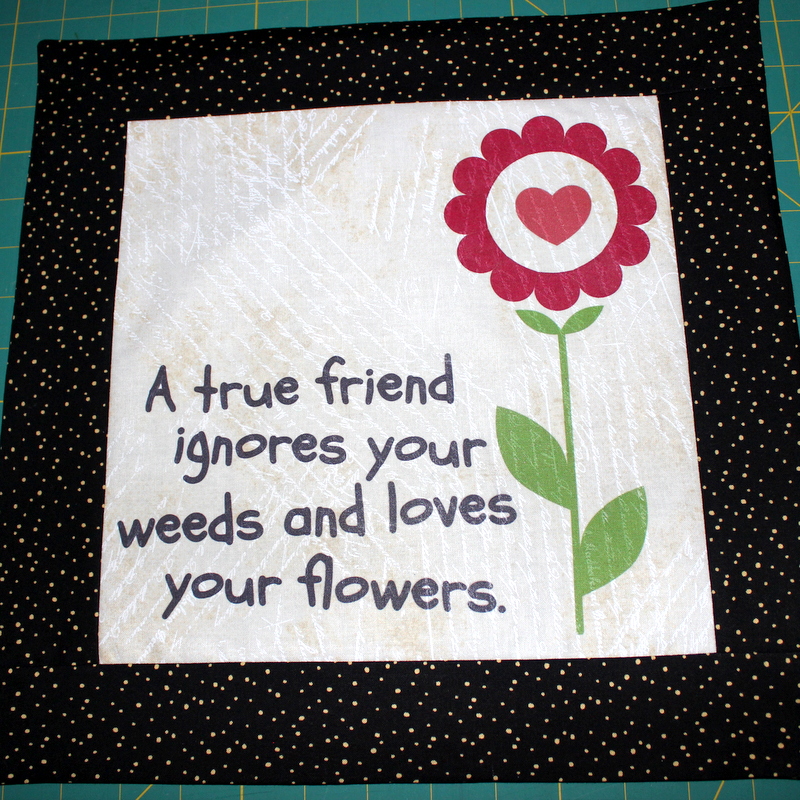
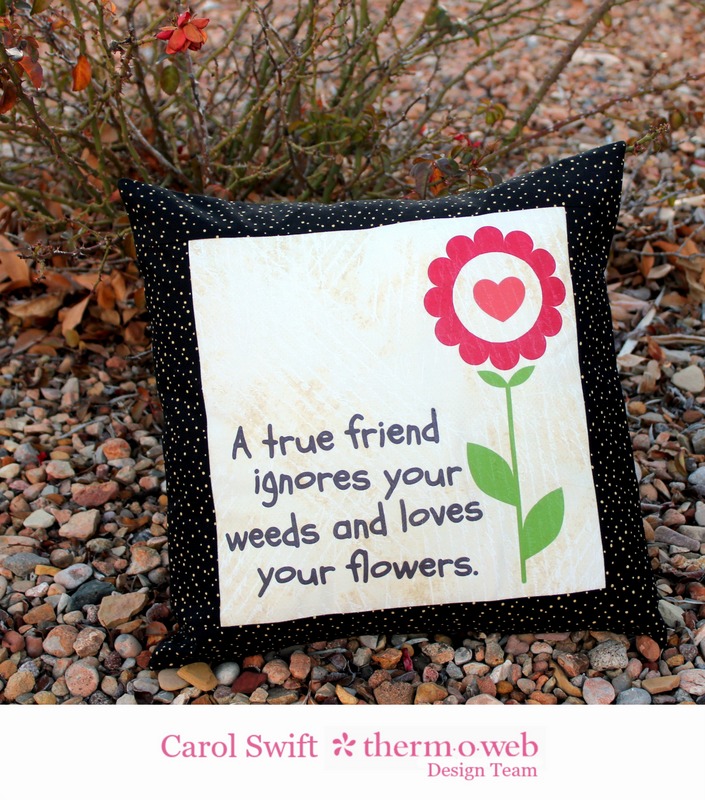 This "Celebrate Friendship" pillow is so quick and easy...I love how easy it was to make! I created a graphic and added a quote that describes just what a true friend should be. Using Therm-O-Web's HeatnBond EZ Print Transfer Sheets was a breeze. The directions were clear and ironing the graphic to my fabric was a snap! Let's get you started making your own "Celebrate Friendship" pillow:
Therm-O-Web Supplies:
HeatNBond® EZ Print Transfer Sheets (for light or dark fabrics)
Other supplies:
Ink Jet Printer
14” x 14” pillow form
Iron
PDF printout of quote and design (link at bottom of page)
Instructions:
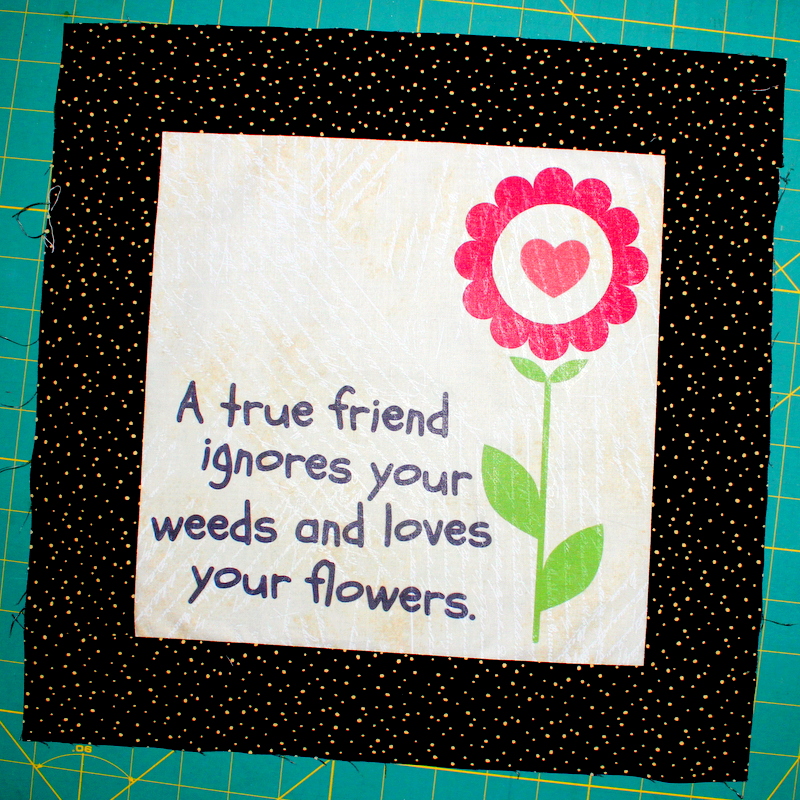
Following the directions on the HeatNBond® EZ Print Transfer Sheets, print designs using an ink jet printer. Important: Lettering must be printed backwards in order to appear the correct direction when ironed on fabric. Let transfer sheets cool. Cut around edges of transfers, rounding the edges to avoid lifting of design. Iron the design to the right side of the fabric front as directed in package instructions. Allow to cool completely.
Cut fabrics in designated sizes:
This "Celebrate Friendship" pillow is so quick and easy...I love how easy it was to make! I created a graphic and added a quote that describes just what a true friend should be. Using Therm-O-Web's HeatnBond EZ Print Transfer Sheets was a breeze. The directions were clear and ironing the graphic to my fabric was a snap! Let's get you started making your own "Celebrate Friendship" pillow:
Therm-O-Web Supplies:
HeatNBond® EZ Print Transfer Sheets (for light or dark fabrics)
Other supplies:
Ink Jet Printer
14” x 14” pillow form
Iron
PDF printout of quote and design (link at bottom of page)
Instructions:
Following the directions on the HeatNBond® EZ Print Transfer Sheets, print designs using an ink jet printer. Important: Lettering must be printed backwards in order to appear the correct direction when ironed on fabric. Let transfer sheets cool. Cut around edges of transfers, rounding the edges to avoid lifting of design. Iron the design to the right side of the fabric front as directed in package instructions. Allow to cool completely.
Cut fabrics in designated sizes:
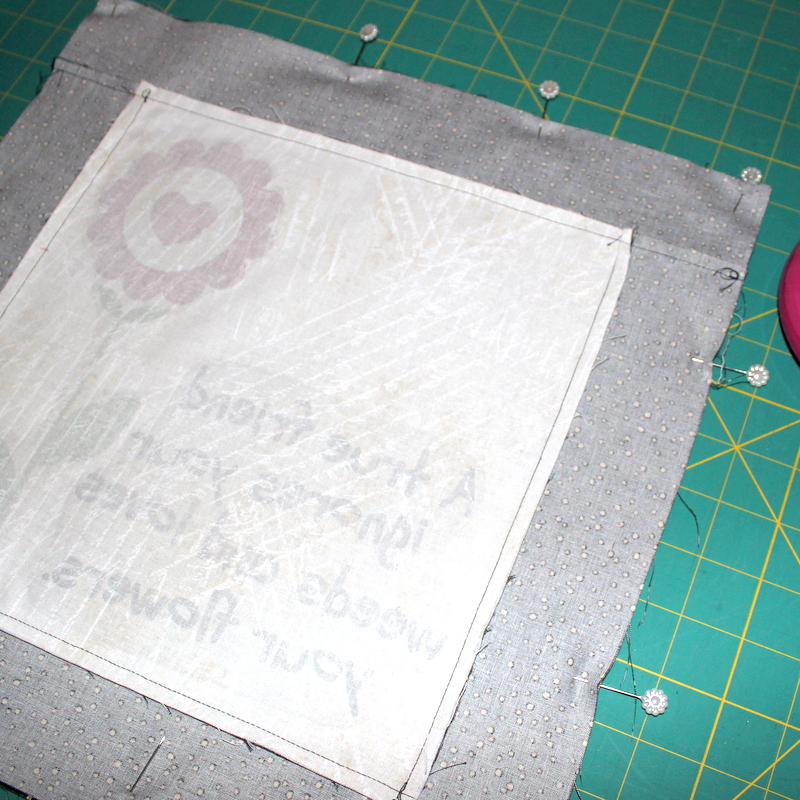
Piece A (front): cut 1 – 10.5” x 10.5”
Piece B (border): cut 2 – 2.5” x 10.5”
Piece C (border): cut 2 – 2.5” x 14.5”
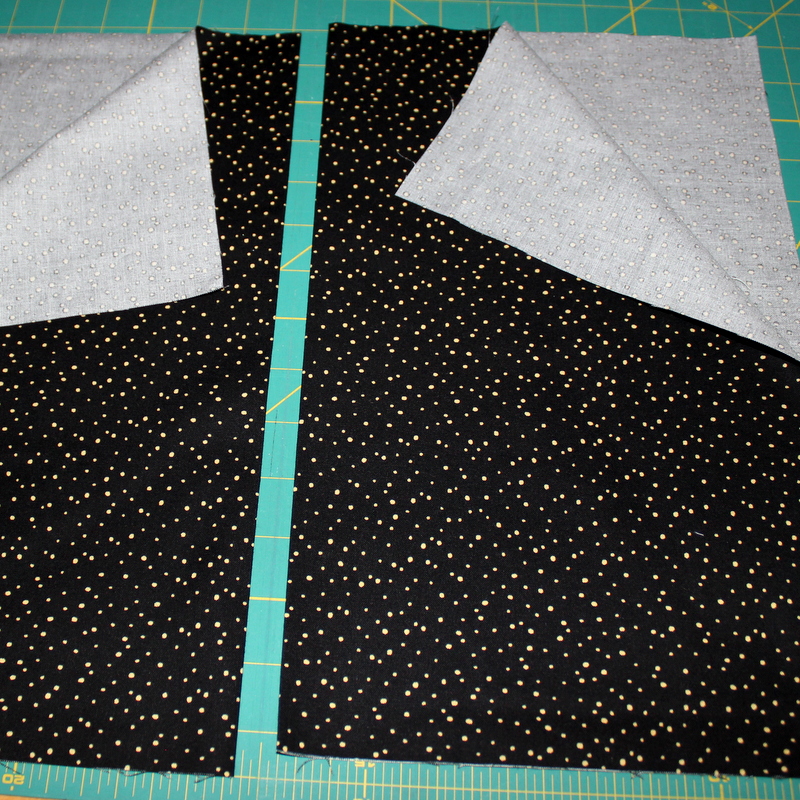
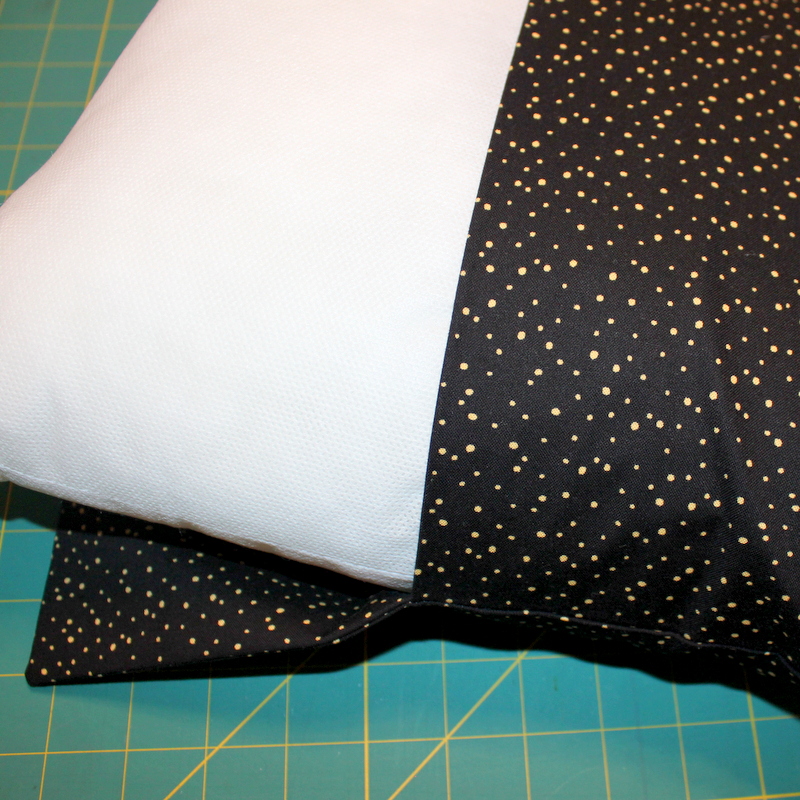
Piece D (back): cut 2 – 14.5 x 17.5
Sew fabrics together to create pillow: Sew pieces “B” to center piece “A” (1/4" seams) right sides together; press seams towards "B." Sew pieces “C” right sides together; press seams toward "C."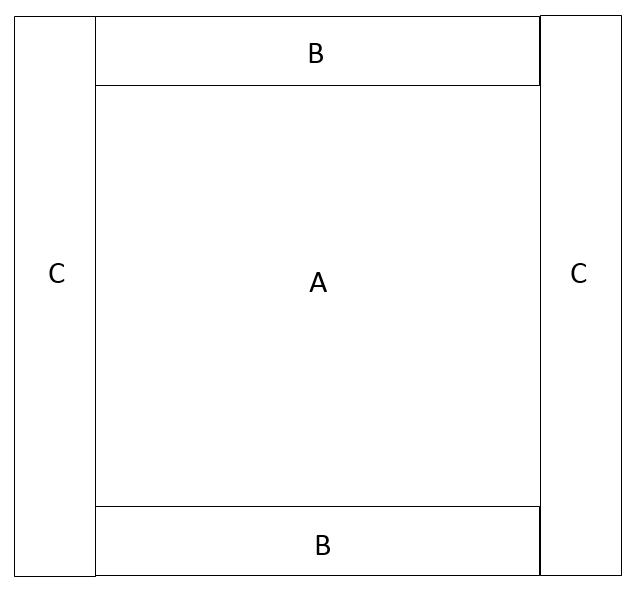
Fold both pieces of “D”, wrong sides together matching raw edges; press on fold.
Line up raw edges (overlapping the center folds) with the right side of the pillow top.
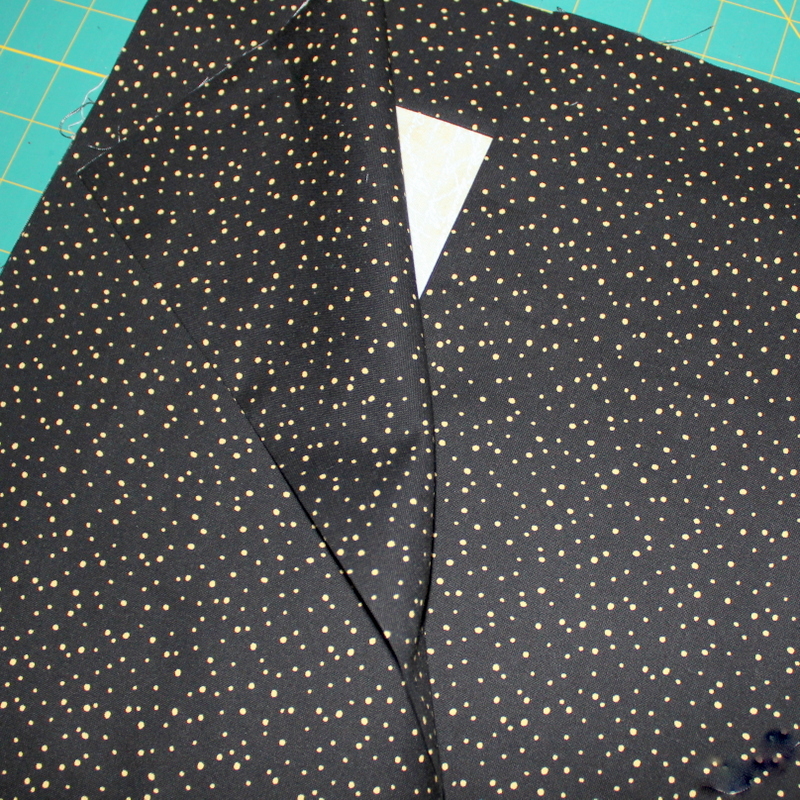
Pin raw edges around all sides catching all layers of fabrics.
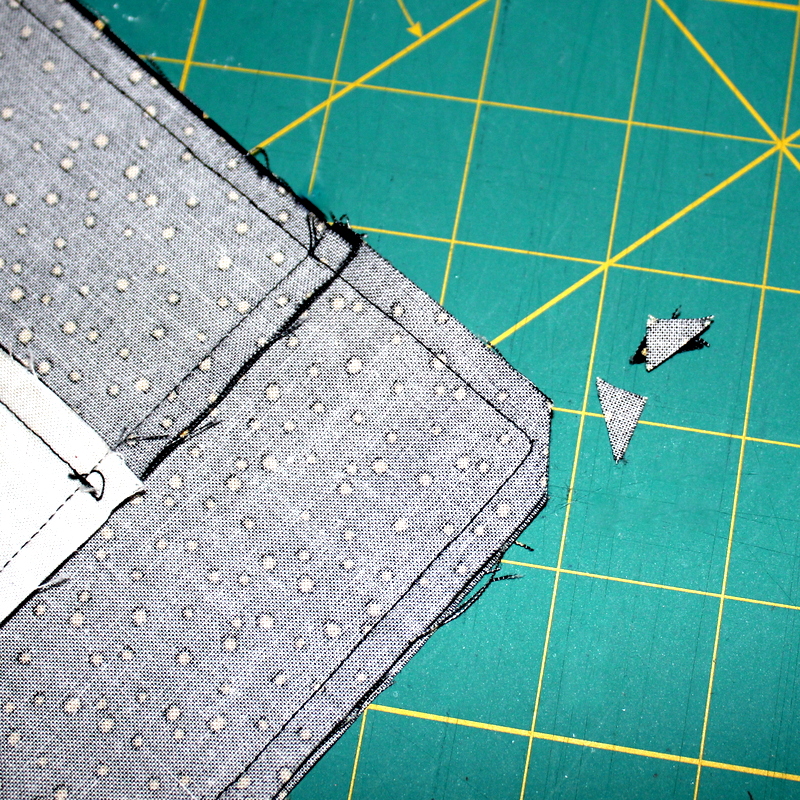
Stitch 1/4” around all edges, making sure to catch all layers. Trim corners.
Using the created flap in back, turn pillow to have rights sides showing.
Insert pillow form between folds in back.
You’re done!
Share with your best friend and maybe even include a big box of chocolate candy to show how much you love them. I think chocolate makes everything better!

You can get the Free PDF printout for this pattern and graphics at Carol's Craftsy Store.
Written by Carol Swift