No Products in the Cart
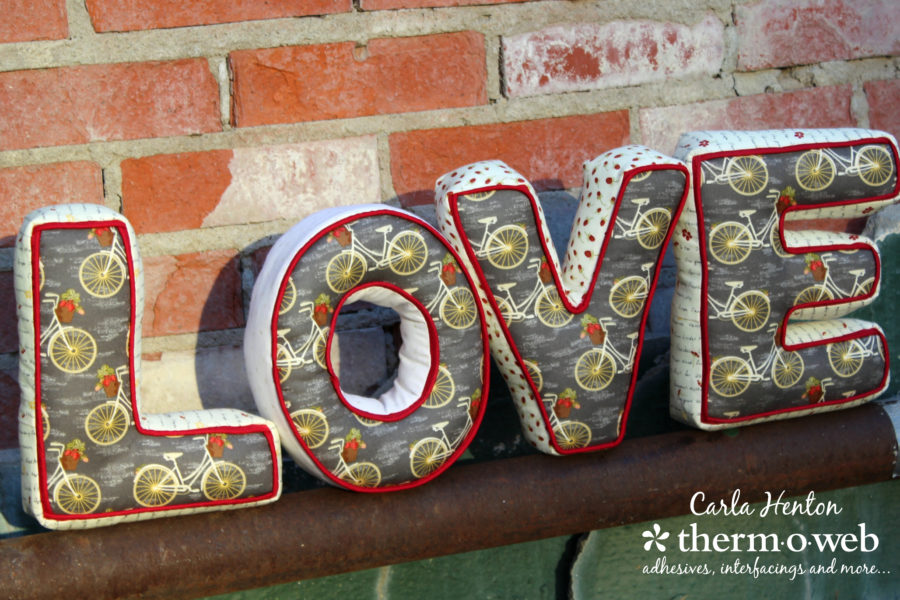
 Happy Valentine's Day! I'm Carla and I have to tell you, these LOVE Letter Pillows are so fun to make you will be making them for everyone you LOVE. With
 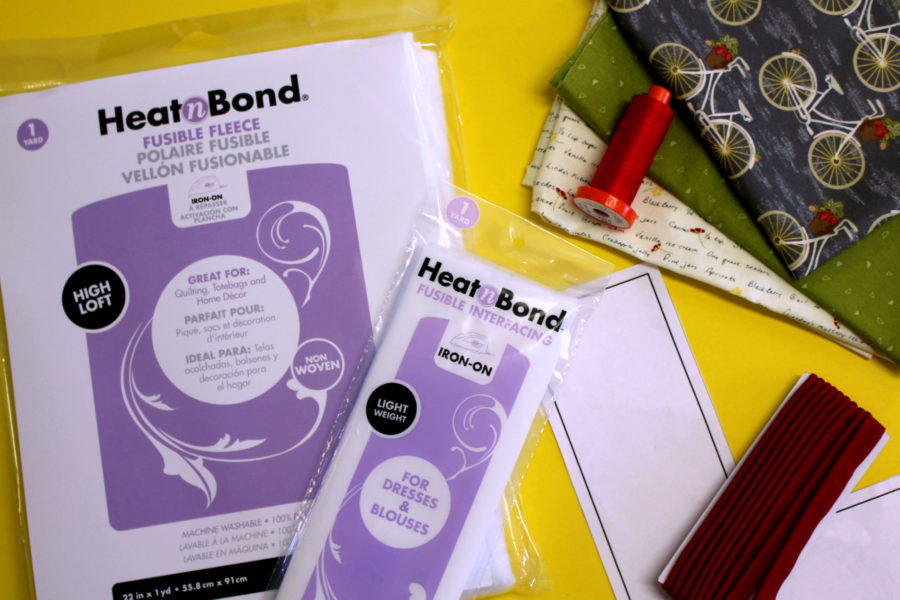 Letter patterns –
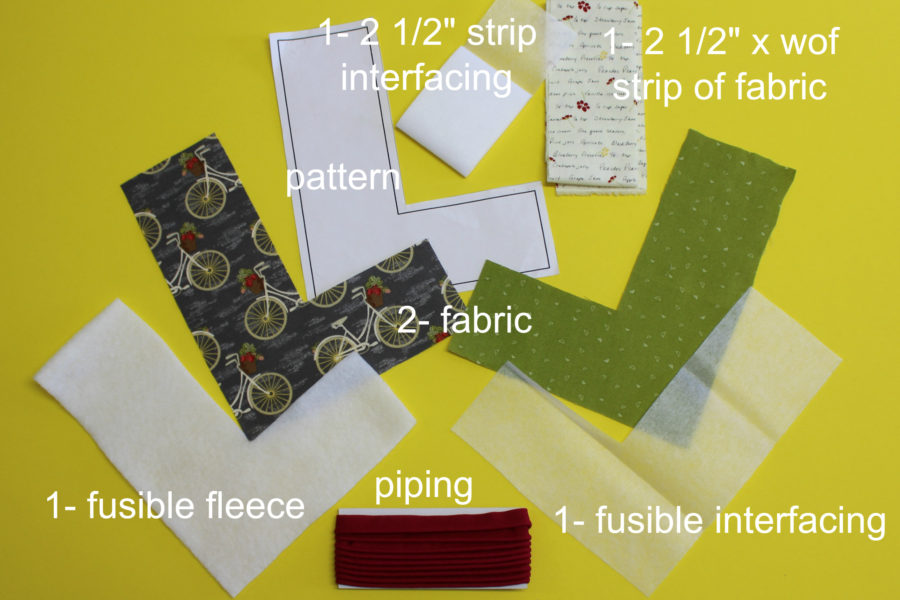
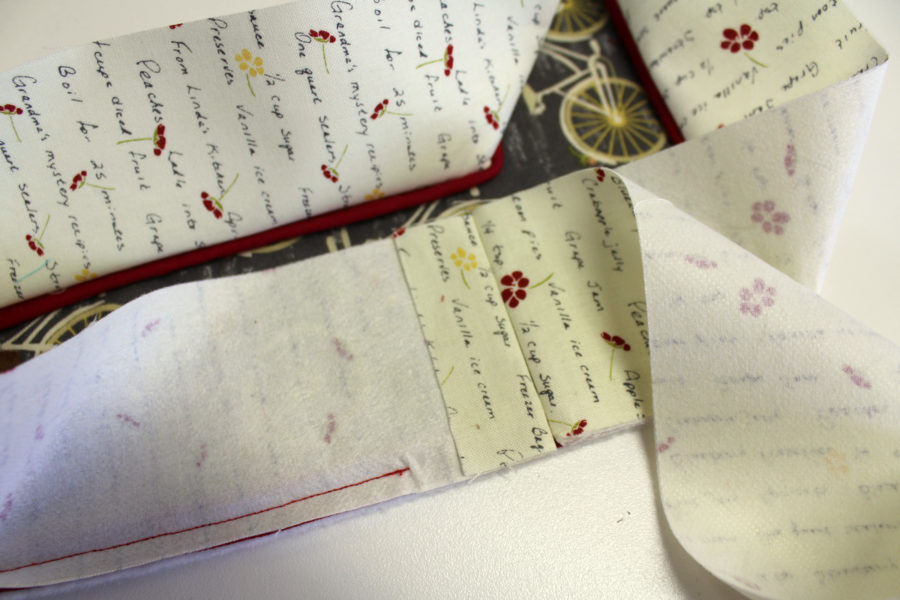
Love Letter Pillow Instructions for each letter: Step 1 – Begin by fusing the 2 ½” strip of interfacing to the wrong side of the 2 ½” strip of fabric following the package instructions. The interfacing strip is shorter than the fabric, but you won't need the whole strip for "L" or "V". The "O" will require one strip for the outside and one half for the inside. The "E" will require a whole strip. Just use the extra half strip of interfacing from the "O" to cover the whole "E" strip. The fleece will be on the back of the pillow front letter. Fuse the fleece to the wrong side of the fabric letter (front). Fuse the interfacing to the wrong side of the fabric letter (back). Step 2 – If piping is desired, pin and stitch the piping to the front of the fleece backed letter with a ¼” seam with matching thread. For the inside corners, pinch the piping and pin without cutting the seam allowance of the piping. Part of the seam allowance will be exposed on the finished pillow.
 Start stitching, but go slow and the corners will stitch out by pivoting the sewing machine needle at each corner. Clip the seam allowances after all the stitching is complete. For the “O” inside curves, the piping will need to be slightly folded and eased around.
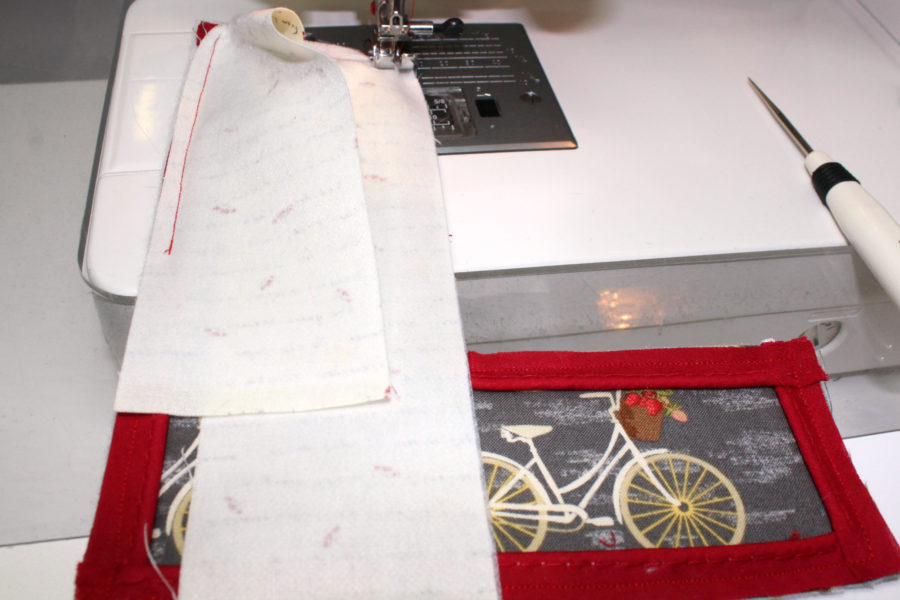
 Step 3 – Stitch the interface backed strip of fabric around the letter. Trim the excess fabric away (the part that has no interfacing). It is important to trim all selvages also.
Begin stitching 2” from the end of the strip and on a straight side of the letter. (start anywhere on the “O”) Back stitch at the beginning and begin stitching the strip around the letter with right sides together and ¼” from the edge. It is important to remember to pivot the sewing machine needle at corners and slightly stretch the strip to ease around the corners.
Step 3 – Stitch the interface backed strip of fabric around the letter. Trim the excess fabric away (the part that has no interfacing). It is important to trim all selvages also.
Begin stitching 2” from the end of the strip and on a straight side of the letter. (start anywhere on the “O”) Back stitch at the beginning and begin stitching the strip around the letter with right sides together and ¼” from the edge. It is important to remember to pivot the sewing machine needle at corners and slightly stretch the strip to ease around the corners.
 Take the stitching slow and make the strip smooth by slightly stretching where needed. Continue stitching around the letter until about 3” from the start and backstitch. Remove the letter from the sewing machine and take to the iron. Press both ends of the strip back, as shown, to mark where the strip meets.
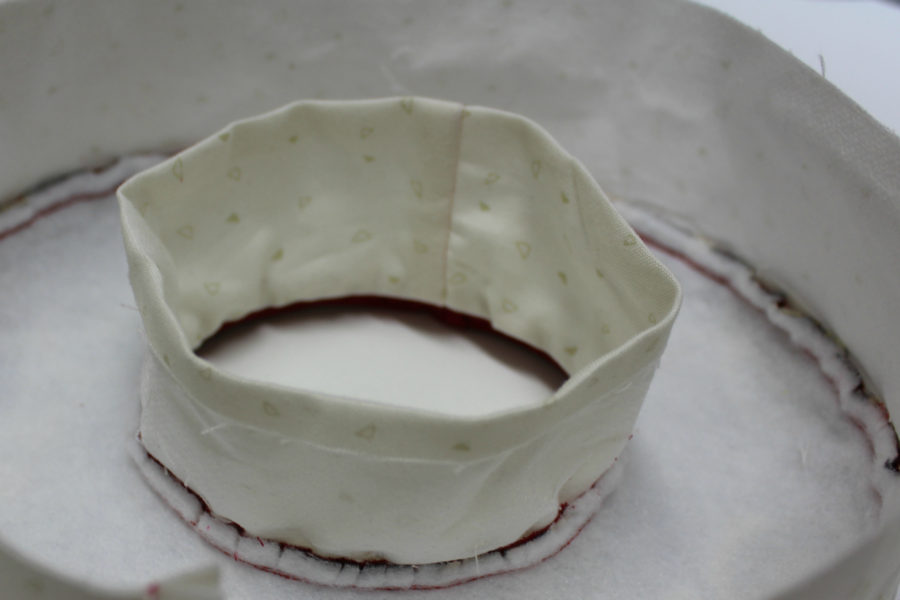
 For the “O”, the seam will have to be finger pressed while the strip is upright for both the inner and similarly for the outer strips then pinned.
 Pin the strip at the creases and then stitch on the line. Trim the extra strip tails to ¼” seam allowance, press, and pin the strip in place. Then stitch the strip to the letter.
With sharp scissors, trim off all corners and clip all curves in the seam allowances up to the stitching.
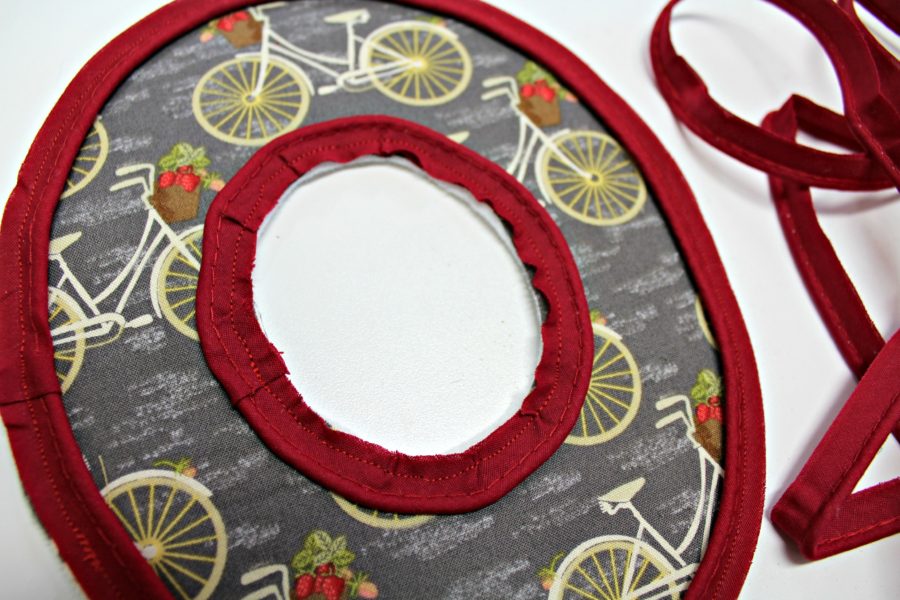
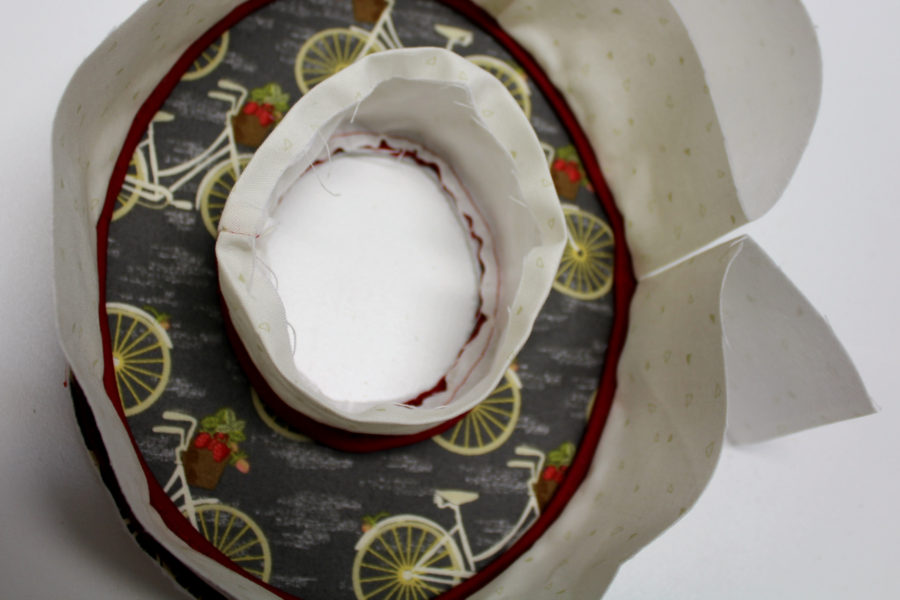
For the “O”, press ¼” seam allowance on the edge of the inner circle as shown below.
Pin the strip at the creases and then stitch on the line. Trim the extra strip tails to ¼” seam allowance, press, and pin the strip in place. Then stitch the strip to the letter.
With sharp scissors, trim off all corners and clip all curves in the seam allowances up to the stitching.
For the “O”, press ¼” seam allowance on the edge of the inner circle as shown below.
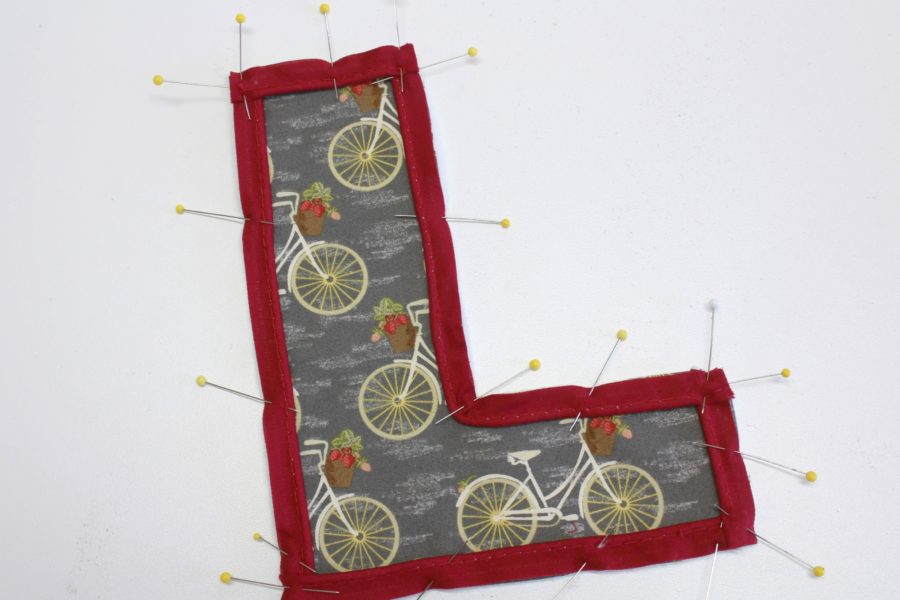
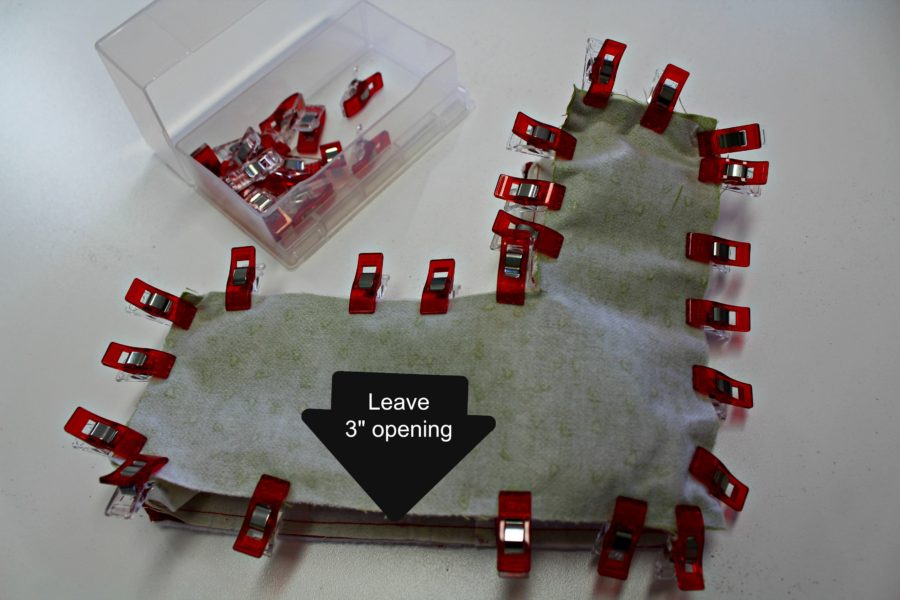
 Step 4 – Use clips for the purpose of attaching the interface backed letter to the strip, right sides together. Start at the top by finger pressing the strip at the corners of the “L” and the "V" to therefore mark the placement. Likewise the “E” can be started at any branch by finger pressing the corners to mark the placement of the back letter. To clip the backing on the “O” fold both “O”s in quarters and finger press with the intention of marking the placement of the outside strip. Do not clip the middle.
Stitch ¼” from edge, starting on a straight side of the “L” , "V", and “E”. Back stitch at beginning and end and leave a 3” opening for turning the letter inside out later. The "O" is turned inside out in the middle and consequently does require an opening.
Step 4 – Use clips for the purpose of attaching the interface backed letter to the strip, right sides together. Start at the top by finger pressing the strip at the corners of the “L” and the "V" to therefore mark the placement. Likewise the “E” can be started at any branch by finger pressing the corners to mark the placement of the back letter. To clip the backing on the “O” fold both “O”s in quarters and finger press with the intention of marking the placement of the outside strip. Do not clip the middle.
Stitch ¼” from edge, starting on a straight side of the “L” , "V", and “E”. Back stitch at beginning and end and leave a 3” opening for turning the letter inside out later. The "O" is turned inside out in the middle and consequently does require an opening.
 Meanwhile, continue by trimming off all corners and clip seam allowances on all curves and inside corners to stitching.
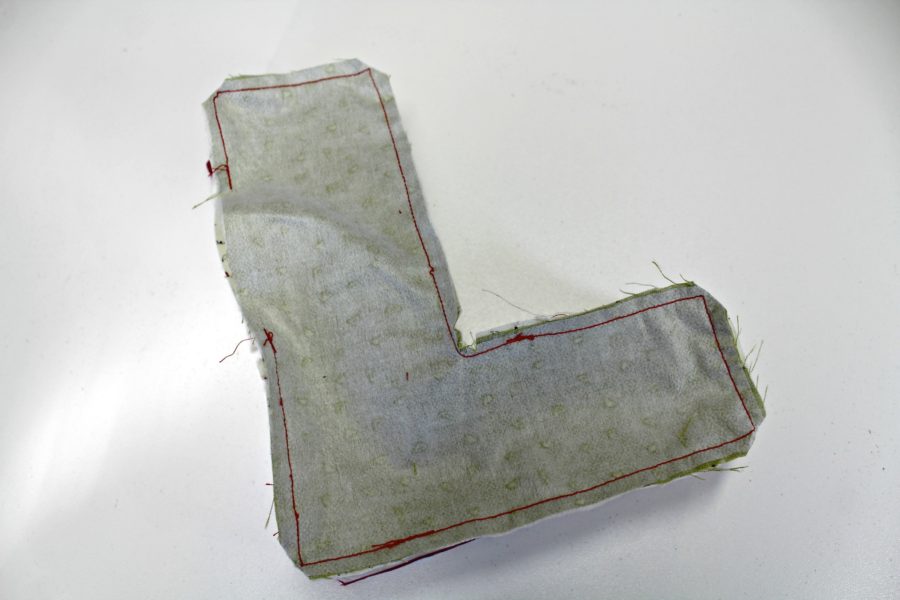 Turn the letter right side out and push out all the corners to continue.
Step 5 – Finish each LOVE Letter Pillow. Hand stitch the middle of the "O" before stuffing. Turn it right side out and pin the inner strip to the back of the letter, right sides together, and then slip stitch ¾ of the circle to leave an opening for stuffing.
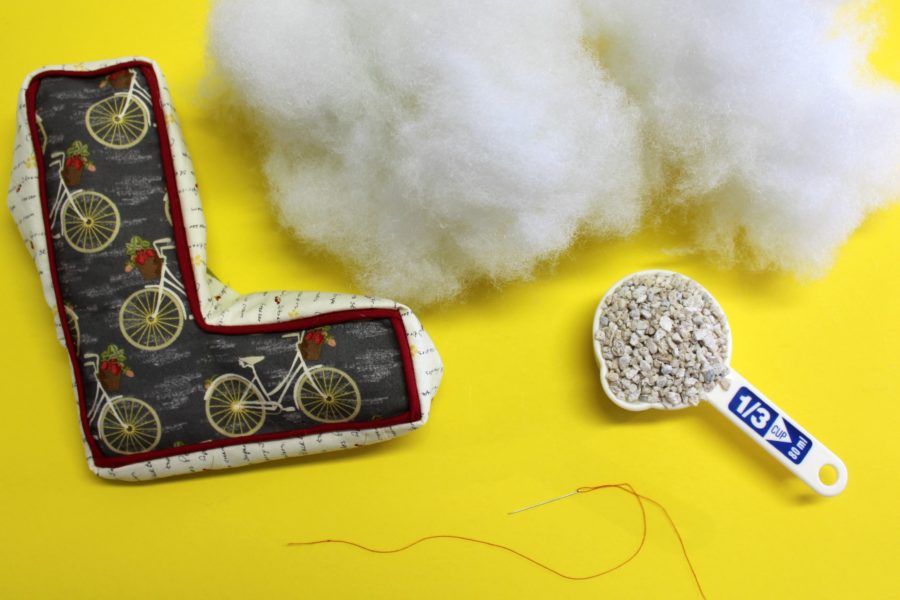
When the LOVE Letter Pillows are for display only, adding aquarium gravel to the bottom will add weight and make the letters stand up. Add 2/3 cup of the gravel before stuffing with fiberfill.
Turn the letter right side out and push out all the corners to continue.
Step 5 – Finish each LOVE Letter Pillow. Hand stitch the middle of the "O" before stuffing. Turn it right side out and pin the inner strip to the back of the letter, right sides together, and then slip stitch ¾ of the circle to leave an opening for stuffing.
When the LOVE Letter Pillows are for display only, adding aquarium gravel to the bottom will add weight and make the letters stand up. Add 2/3 cup of the gravel before stuffing with fiberfill.
 Now, stuff the letter with fiberfill making sure to push it into the corners.
Lastly, slip stitch the opening shut
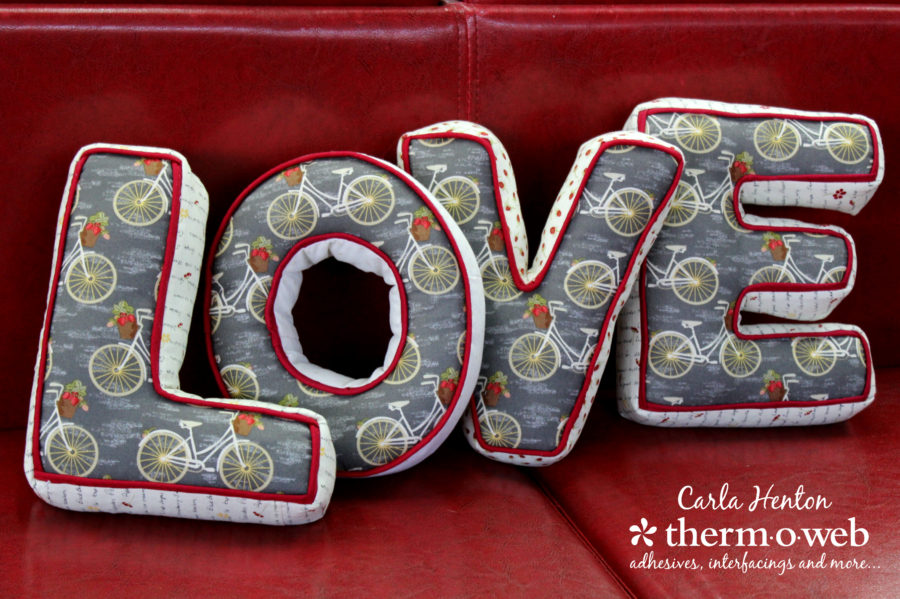
Make all four LOVE Letter Pillows to demonstrate your LOVE!
Now, stuff the letter with fiberfill making sure to push it into the corners.
Lastly, slip stitch the opening shut
Make all four LOVE Letter Pillows to demonstrate your LOVE!