No Products in the Cart
 Hello Crafty Friends
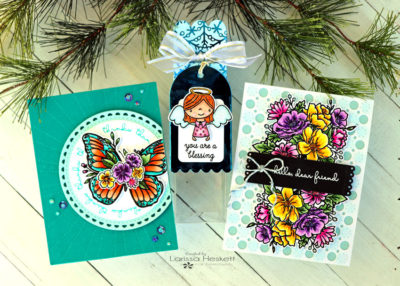 Larissa here today with a FUN Trio of Projects for the Reverse Confetti Collaboration Week!! I wanted to share a few quick ideas on ways to use the NEW Deco Foil Flock Sheets to add some AMAZING Texture to your FAVORITE Reverse Confetti Cover Panel Dies!!
 Dear Friend Card with Reverse Confetti
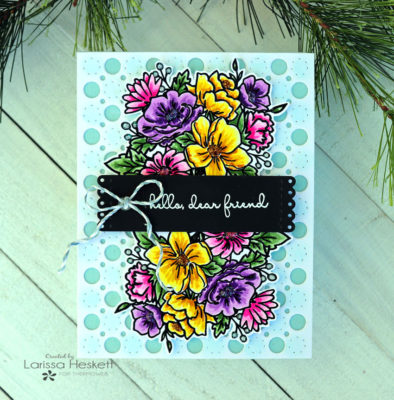
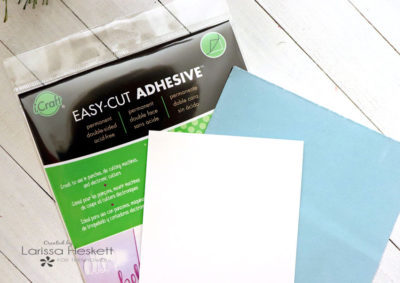 I started by using a piece of Easy-Cut Adhesive Sheets and applied it to the front of my A2 Card Panel!! I then removed the backing sheet and then applied the Deco Foil Blue Sky Flocking Sheet on top of the exposed Easy-Cut Adhesive Flock side down!! Then I ran it through my Die Cutting Machine to adhered the Flocking to the Adhesive!! I then removed the Panel and removed the Flocking Backing to expose the BEAUTIFUL Flocking that was transferred to the Card Panel!!
Then I took the Reverse Confetti Stitched Circle Cover Panel and Die Cut it from some Gina K Designs Premium Cardstock in Luxury White!! I wanted to accentuate the Stitched Circles in the design so I took an Ink Dauber and applied some Tumbled Glass Distress Ink to each of the Stitched Circle and then adhered to the Stitched Circle Panel on top of the Blue Sky Flocked A2 Card Panel using some iCraft Adhesive Tape in 1/8 in.
I started by using a piece of Easy-Cut Adhesive Sheets and applied it to the front of my A2 Card Panel!! I then removed the backing sheet and then applied the Deco Foil Blue Sky Flocking Sheet on top of the exposed Easy-Cut Adhesive Flock side down!! Then I ran it through my Die Cutting Machine to adhered the Flocking to the Adhesive!! I then removed the Panel and removed the Flocking Backing to expose the BEAUTIFUL Flocking that was transferred to the Card Panel!!
Then I took the Reverse Confetti Stitched Circle Cover Panel and Die Cut it from some Gina K Designs Premium Cardstock in Luxury White!! I wanted to accentuate the Stitched Circles in the design so I took an Ink Dauber and applied some Tumbled Glass Distress Ink to each of the Stitched Circle and then adhered to the Stitched Circle Panel on top of the Blue Sky Flocked A2 Card Panel using some iCraft Adhesive Tape in 1/8 in.
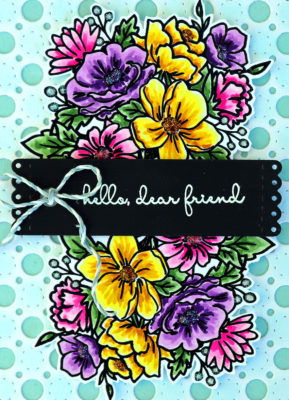 For the Focal Images on my Card, I Stamped and Embossed two of the Floral Clusters from the NEW Reverse Confetti "The Best Days" Stamp Set and colored them with Copic Markers!! (Yellow Flowers: Y11, Y15 & YR23 Purple Flowers: V0, V15 & V09 Pink Flowers: RV00, RV09 & RV19 Greenery: YG61, YG63 & YG67 Berries: B02) After Coloring both Images I Die Cut it out using the coordinating "The Best Days" Confetti Cuts Die and placed then together tucking the Stems underneath the Images to create one seamless Floral Image!!
I added some White Sticky Strips for some dimension and adhered them to the front center of my Card Panel!!! Then I Stamped and Embossed the Sentiment onto a Reverse Confetti Tall Tag Trio Die Cut from some Gina K Designs Black Onyx Cardstock using some WoW White Embossing Powder!! I Adhered the Tag over the center of the Floral Clusters using some Black Sticky Strips that I cut down and adhered just to the ends of the Tag hanging over the edge of the Floral Clusters!! I added a Twine Bow to the Tag and applied some Nuvo Glitter Drops to the Center of the Flowers to add some Sparkle!!
Products Used:
Therm O Web Products:
Easy-Cut Adhesive Sheets
Deco Foil Flock Transfer Sheets in Blue Sky
iCraft Easy-Tear Adhesive Tape 1/8 in.
Gina K Designs Premium Cardstock in Luxury White
Gina K Designs Premium Cardstock in Onyx Black
Sticky Strips in Black and White
Other Products:
Reverse Confetti Stitched Circle Cover Panel
Reverse Confetti The Days Stamp Set
Reverse Confetti The Best Day Confetti Cuts
Reverse Confetti Tall Tag Trio Confetti Cuts
Twine
Distress Oxide Ink in Tumbled Glass
Ink Dauber
Copic Markers
WoW Clear & White Embossing Powders
Nuvo Glitter Drops
For the Focal Images on my Card, I Stamped and Embossed two of the Floral Clusters from the NEW Reverse Confetti "The Best Days" Stamp Set and colored them with Copic Markers!! (Yellow Flowers: Y11, Y15 & YR23 Purple Flowers: V0, V15 & V09 Pink Flowers: RV00, RV09 & RV19 Greenery: YG61, YG63 & YG67 Berries: B02) After Coloring both Images I Die Cut it out using the coordinating "The Best Days" Confetti Cuts Die and placed then together tucking the Stems underneath the Images to create one seamless Floral Image!!
I added some White Sticky Strips for some dimension and adhered them to the front center of my Card Panel!!! Then I Stamped and Embossed the Sentiment onto a Reverse Confetti Tall Tag Trio Die Cut from some Gina K Designs Black Onyx Cardstock using some WoW White Embossing Powder!! I Adhered the Tag over the center of the Floral Clusters using some Black Sticky Strips that I cut down and adhered just to the ends of the Tag hanging over the edge of the Floral Clusters!! I added a Twine Bow to the Tag and applied some Nuvo Glitter Drops to the Center of the Flowers to add some Sparkle!!
Products Used:
Therm O Web Products:
Easy-Cut Adhesive Sheets
Deco Foil Flock Transfer Sheets in Blue Sky
iCraft Easy-Tear Adhesive Tape 1/8 in.
Gina K Designs Premium Cardstock in Luxury White
Gina K Designs Premium Cardstock in Onyx Black
Sticky Strips in Black and White
Other Products:
Reverse Confetti Stitched Circle Cover Panel
Reverse Confetti The Days Stamp Set
Reverse Confetti The Best Day Confetti Cuts
Reverse Confetti Tall Tag Trio Confetti Cuts
Twine
Distress Oxide Ink in Tumbled Glass
Ink Dauber
Copic Markers
WoW Clear & White Embossing Powders
Nuvo Glitter Drops
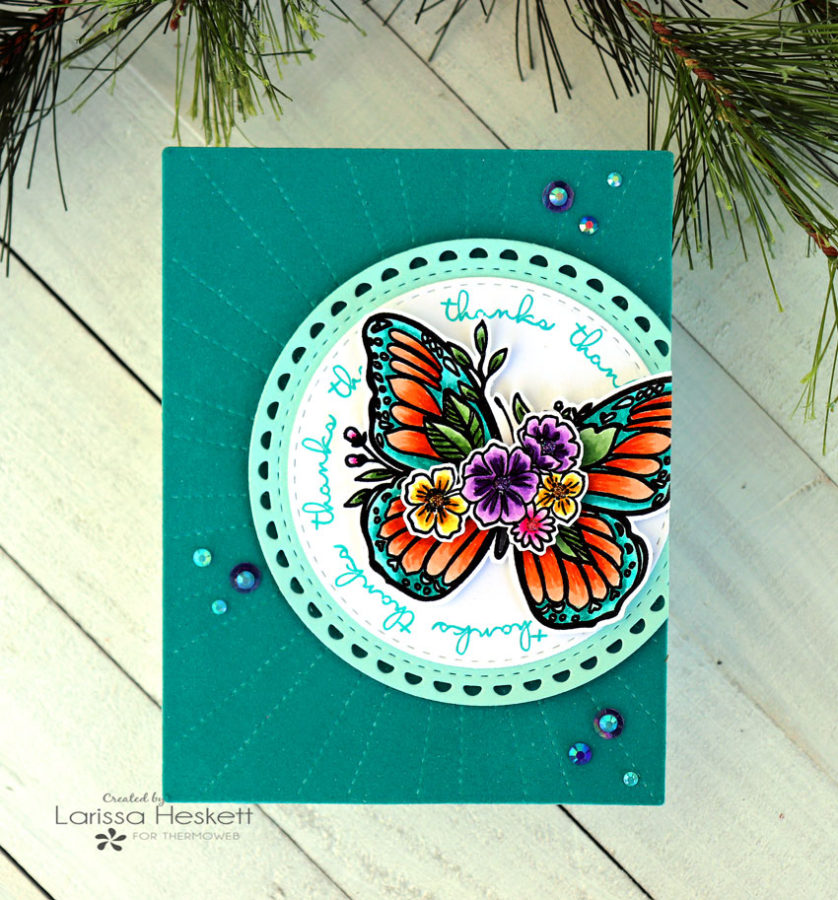
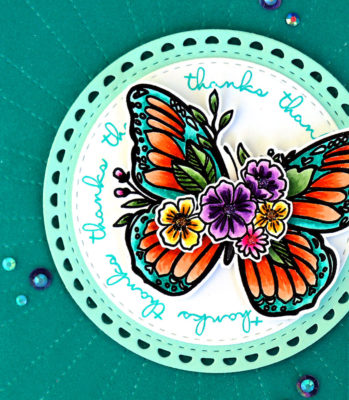 For the Focal Image, I Stamped and Embossed the Butterfly and coordinating Floral Cluster Images from the Reverse Confetti "Butterfly Blossom" Stamp Set and colored them with Copic Markers!! I used (Butterfly: YR00, YR02 & YR68 BG10, BG45 & BG49 Yellow Flowers: Y11, Y15 & YR23 Purple Flowers: V0, V15 & V09 Pink Flowers: RV00, RV09 & RV19 Greenery: YG61, YG63 & YG67) After Coloring the Images I Die Cut them out using the coordinating "Butterfly Blossom" Confetti Cuts!!
I added some 3D Foam Squares to the back of the Floral Cluster and adhered it to the Butterfly!! I Die Cut the Reverse Confetti Lacy Scallop Circle from some Reverse Confetti Iced Aqua Cardstock and then Die Cut a Stitched Circle that I Stamped with the "Thanks" Sentiment around the edge using some Reverse Confetti Aqua Ink!! I then adhered the Butterfly Image onto the Lacy Scallop Die Cut using some 3-D Foam Squares!! A Scattering of Sequins and Jewels from Pretty Pink Posh finishes off the Design!!
Products Used:
Therm O Web Products:
Easy-Cut Adhesive Sheets
Deco Foil Flock Transfer Sheets in Teal Waters
Gina K Designs Premium Cardstock in Luxury White
3D White Foam Squares
Other Products:
Reverse Confetti Stitched Rays Cover Panel
Reverse Confetti Butterfly Blossom Stamp Set
Reverse Confetti Butterfly Blossom Confetti Cuts
Reverse Confetti Lacy Scallop Circles Confetti Cuts
Reverse Confetti Iced Aqua Cardstock
Reverse Confetti Aqua Ink
Copic Markers
WoW Clear Embossing Powders
Nuvo Glitter Drops
Pretty Pink Posh Sequins and Jewels
For the Focal Image, I Stamped and Embossed the Butterfly and coordinating Floral Cluster Images from the Reverse Confetti "Butterfly Blossom" Stamp Set and colored them with Copic Markers!! I used (Butterfly: YR00, YR02 & YR68 BG10, BG45 & BG49 Yellow Flowers: Y11, Y15 & YR23 Purple Flowers: V0, V15 & V09 Pink Flowers: RV00, RV09 & RV19 Greenery: YG61, YG63 & YG67) After Coloring the Images I Die Cut them out using the coordinating "Butterfly Blossom" Confetti Cuts!!
I added some 3D Foam Squares to the back of the Floral Cluster and adhered it to the Butterfly!! I Die Cut the Reverse Confetti Lacy Scallop Circle from some Reverse Confetti Iced Aqua Cardstock and then Die Cut a Stitched Circle that I Stamped with the "Thanks" Sentiment around the edge using some Reverse Confetti Aqua Ink!! I then adhered the Butterfly Image onto the Lacy Scallop Die Cut using some 3-D Foam Squares!! A Scattering of Sequins and Jewels from Pretty Pink Posh finishes off the Design!!
Products Used:
Therm O Web Products:
Easy-Cut Adhesive Sheets
Deco Foil Flock Transfer Sheets in Teal Waters
Gina K Designs Premium Cardstock in Luxury White
3D White Foam Squares
Other Products:
Reverse Confetti Stitched Rays Cover Panel
Reverse Confetti Butterfly Blossom Stamp Set
Reverse Confetti Butterfly Blossom Confetti Cuts
Reverse Confetti Lacy Scallop Circles Confetti Cuts
Reverse Confetti Iced Aqua Cardstock
Reverse Confetti Aqua Ink
Copic Markers
WoW Clear Embossing Powders
Nuvo Glitter Drops
Pretty Pink Posh Sequins and Jewels
 Blessing Tag with Reverse Confetti
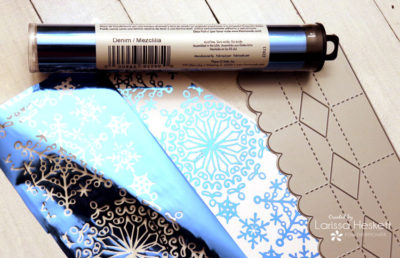 I Started by Foiling a Piece of the NEW Brutus Monroe Winter Wonder Designer Toner Paper with some Denim Deco Foil!! SWOON!! Isn't it STUNNING!!??
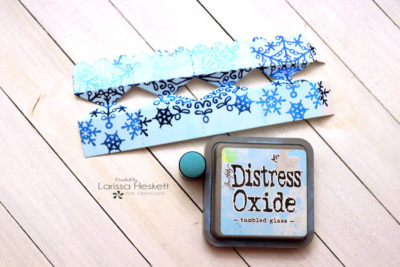 Then I Die Cut it using the Reverse Confetti Treat Tube Topper Die!! I decided I wanted to Ink the Cardstock so I used some Tumbled Glass Distress Oxide Ink and applied it with an Ink Dauber!! I burnished over the entire thing with a paper towel once I was done inking to remove any excess ink left on the Foiled Snowflakes!! Then I adhered the Treat Tube Topper together using some Gina K Designs Terrific Tape and added the Treat Tube Topper to the Reverse Confetti Treat Tube!!
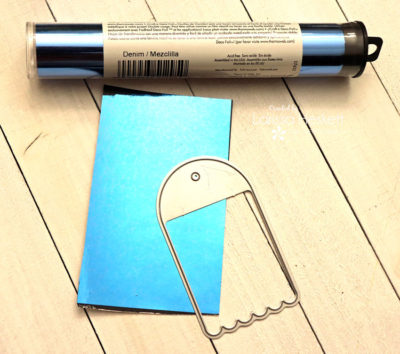 For the Gift Tag Base, I Die Cut some Deco Foil Toner Sheets and Foiled it with some of the Deco Foil Transfer Sheets in Denim!! Then I took the Reverse Confetti Rounded Top Tag Die and Die Cut the Tag!!
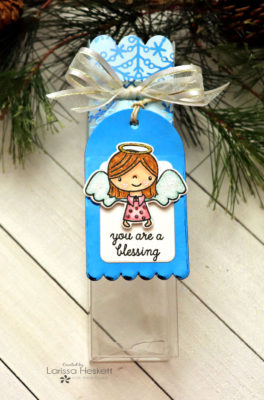
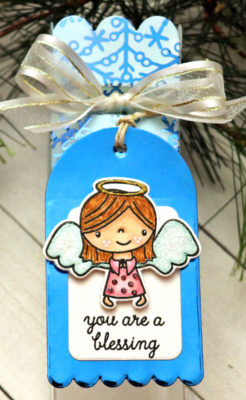 I Die Cut the layering Panel from some Gina K Designs Premium Cardstock in Luxury White and Stamped and Embossed the "you are a blessing" Sentiment from the Revere Confetti "Joyous Holiday" Stamp Set!! Then I Stamped and Embossed an Angel also from that Set and Colored it in with Copic Markers!! I used (Flesh: E00, E11 & E13 Cheeks: RV00 Hair: E31, E33 E37 Robe: RV00. RV11 & RV34 Wings: BG000 & BG10)
I added some White Gel Pen Details and some Nuvo Glitter Drops in Blizzard for the Wings, Pink for the Robe details and Gold for the Halo!! I LOVE the added touch of Sparkle!! Placed some 3D Foam Square to the back of the Angel and adhered her to the Tag!! I tied a bow onto the Top of the Treat Tube and added the Tag!! All that's left is to fill it with some YUMMY Treats for the Holidays!!
Products Used:
Therm O Web Products:
Deco Foil Toner Sheets
Deco Foil Transfer Sheets in Denim
Brutus Monroe Designer Toner Sheets in Winter Wonder
Gina K Designs Sheer Satin Ribbon in White & Gold
Gina K Designs Premium Cardstock in Luxury White
3D White Foam Squares
Other Products:
Reverse Confetti Treat Tube Topper Confetti Cuts
Reverse Confetti Joyous Holiday Stamp Set
Reverse Confetti Joyous Holiday Confetti Cuts
Reverse Confetti Rounded Tag Confetti Cuts
Reverse Confetti Treat Tube
Distress Oxide Ink in Tumbled Glass
Copic Markers
WoW Clear Embossing Powders
Nuvo Glitter Drops in Blizzard, Pink, and Gold
THANKS SO MUCH for stopping by today!! I hope I've INSPIRED you to give Deco Foil Flock Sheets a try with your Cover Panel Dies if you haven't already!! Also, it's never to early to get a start on those Holiday Treat Tags and Boxes!! The MANY different Designer Toner Sheets that we carry make the process a breeze while maximizing the WOW factor to make your Gifts a FAVORITE of the recipients!!
If you create something I hope you’ll share with us on Social Media using the #Hashtag #decofoil, #thermoweb, #ginakdesigns as we LOVE to see what you create!!
I Die Cut the layering Panel from some Gina K Designs Premium Cardstock in Luxury White and Stamped and Embossed the "you are a blessing" Sentiment from the Revere Confetti "Joyous Holiday" Stamp Set!! Then I Stamped and Embossed an Angel also from that Set and Colored it in with Copic Markers!! I used (Flesh: E00, E11 & E13 Cheeks: RV00 Hair: E31, E33 E37 Robe: RV00. RV11 & RV34 Wings: BG000 & BG10)
I added some White Gel Pen Details and some Nuvo Glitter Drops in Blizzard for the Wings, Pink for the Robe details and Gold for the Halo!! I LOVE the added touch of Sparkle!! Placed some 3D Foam Square to the back of the Angel and adhered her to the Tag!! I tied a bow onto the Top of the Treat Tube and added the Tag!! All that's left is to fill it with some YUMMY Treats for the Holidays!!
Products Used:
Therm O Web Products:
Deco Foil Toner Sheets
Deco Foil Transfer Sheets in Denim
Brutus Monroe Designer Toner Sheets in Winter Wonder
Gina K Designs Sheer Satin Ribbon in White & Gold
Gina K Designs Premium Cardstock in Luxury White
3D White Foam Squares
Other Products:
Reverse Confetti Treat Tube Topper Confetti Cuts
Reverse Confetti Joyous Holiday Stamp Set
Reverse Confetti Joyous Holiday Confetti Cuts
Reverse Confetti Rounded Tag Confetti Cuts
Reverse Confetti Treat Tube
Distress Oxide Ink in Tumbled Glass
Copic Markers
WoW Clear Embossing Powders
Nuvo Glitter Drops in Blizzard, Pink, and Gold
THANKS SO MUCH for stopping by today!! I hope I've INSPIRED you to give Deco Foil Flock Sheets a try with your Cover Panel Dies if you haven't already!! Also, it's never to early to get a start on those Holiday Treat Tags and Boxes!! The MANY different Designer Toner Sheets that we carry make the process a breeze while maximizing the WOW factor to make your Gifts a FAVORITE of the recipients!!
If you create something I hope you’ll share with us on Social Media using the #Hashtag #decofoil, #thermoweb, #ginakdesigns as we LOVE to see what you create!!
 Deanne's Supply List: