No Products in the Cart
 Welcome crafty friends! This is Amanda from Twiddler's Nook with a Christmas card and tag duo to share with you today. I mixed the newly release Brutus Monroe toner card fronts and Deco Foil transfer sheets with some great Deco Foil Flock and Brutus Monroe dies! These were a blast to create! Let's take a look.

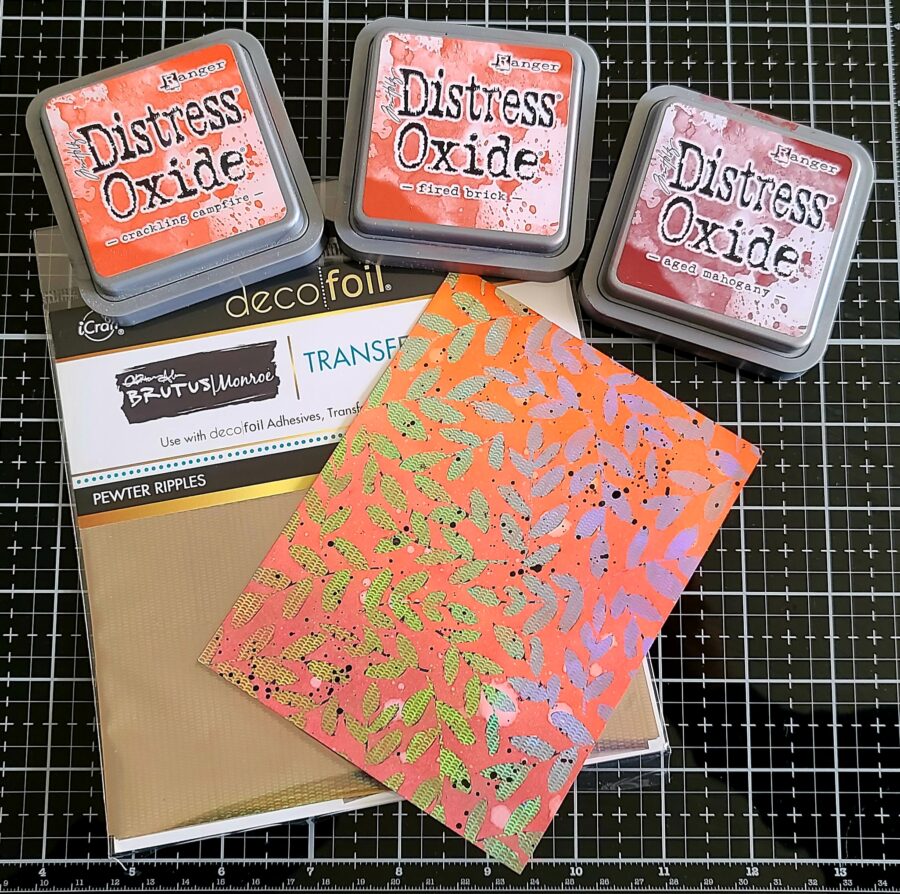
Products used on today's projects: Brutus Monroe Toner Card Fronts - Floral Fantasy and Really Radiant Brutus Monroe Deco Foil Transfer Sheets - Pewter Ripples iCraft Ultra Bond Liquid Adhesive Pen Foam squares and strips Deco Foil Flock Transfer Sheets - Tuscan Gold and Emerald Green Brutus Monroe Evergreen Builder dies Brutus Monroe Reindeer dies Brutus Monroe Seasonal Wreath stamps Avery Elle Easy Layer Tag dies Lawn Fawn Tiny Tag Sayings stamps Trinity Stamps Blending Buddy Brush Pink & Main Large Sentiment Strip dies Lawn Fawn artichoke ink Lawn Fawn Tiny Tags Sayings stamps Distress Oxide Ink - crackling campfire, fired brick, aged mahogany, barn door
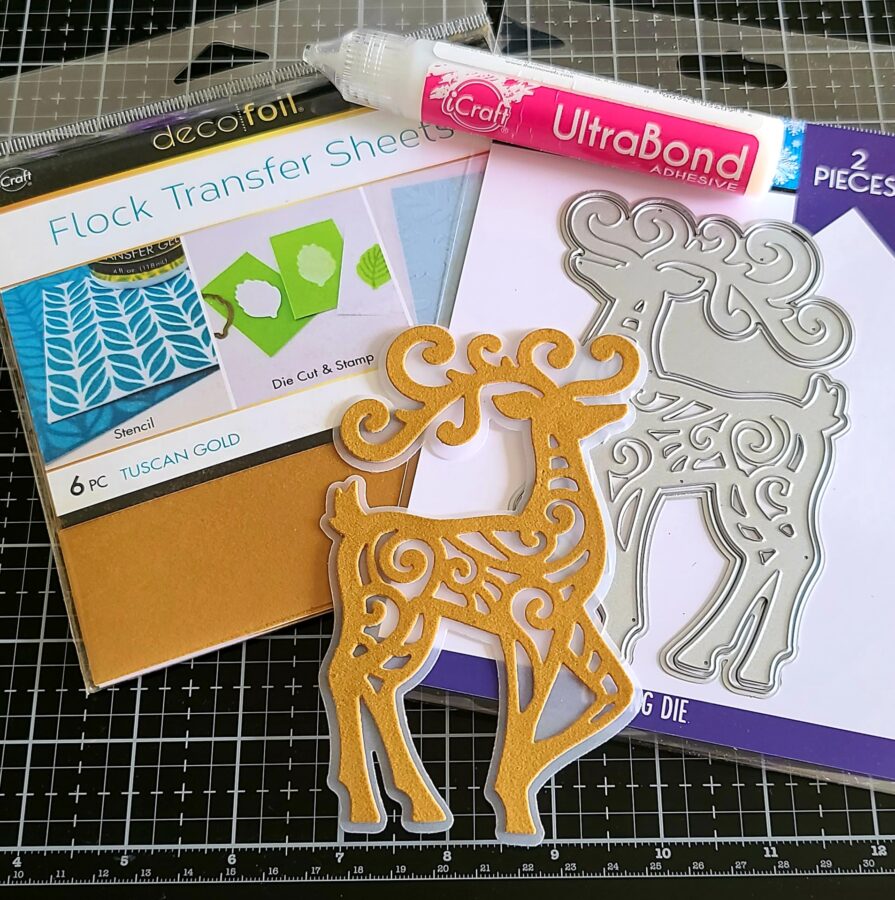 Next, I die-cut the Brutus Monroe reindeer from a Tuscan Gold Deco Foil Flock Transfer Sheet and the shadow from vellum. I used the Ultra Bond Liquid Adhesive Pen to adhere the layers together.
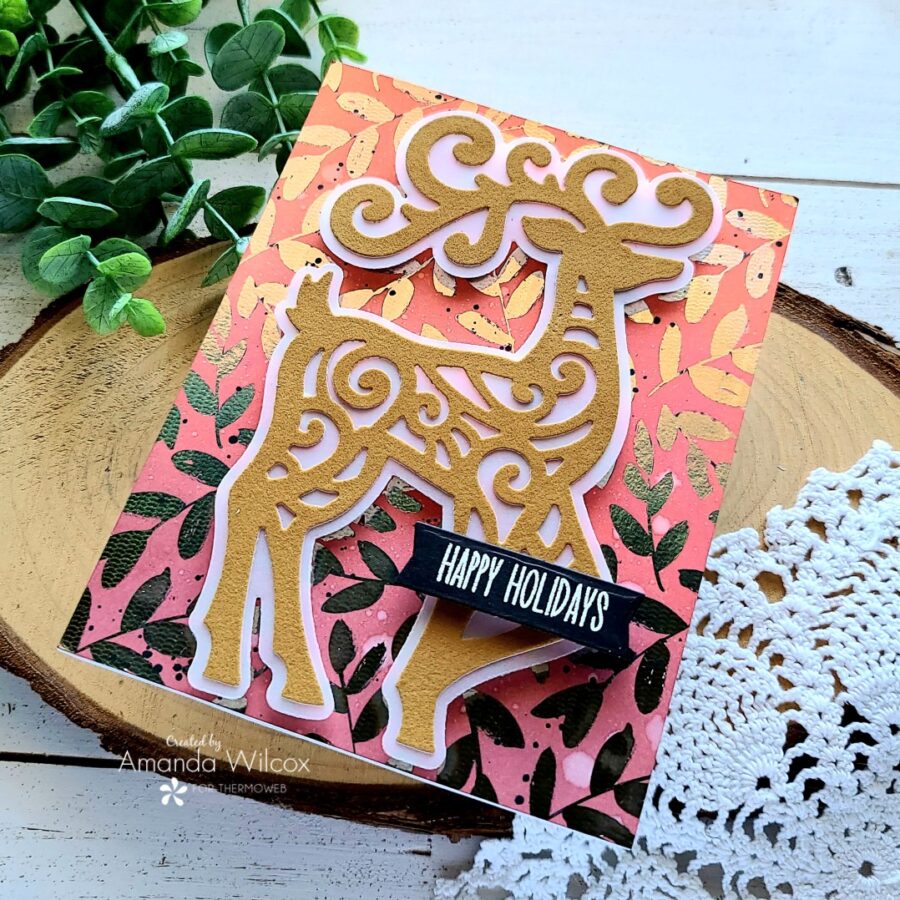
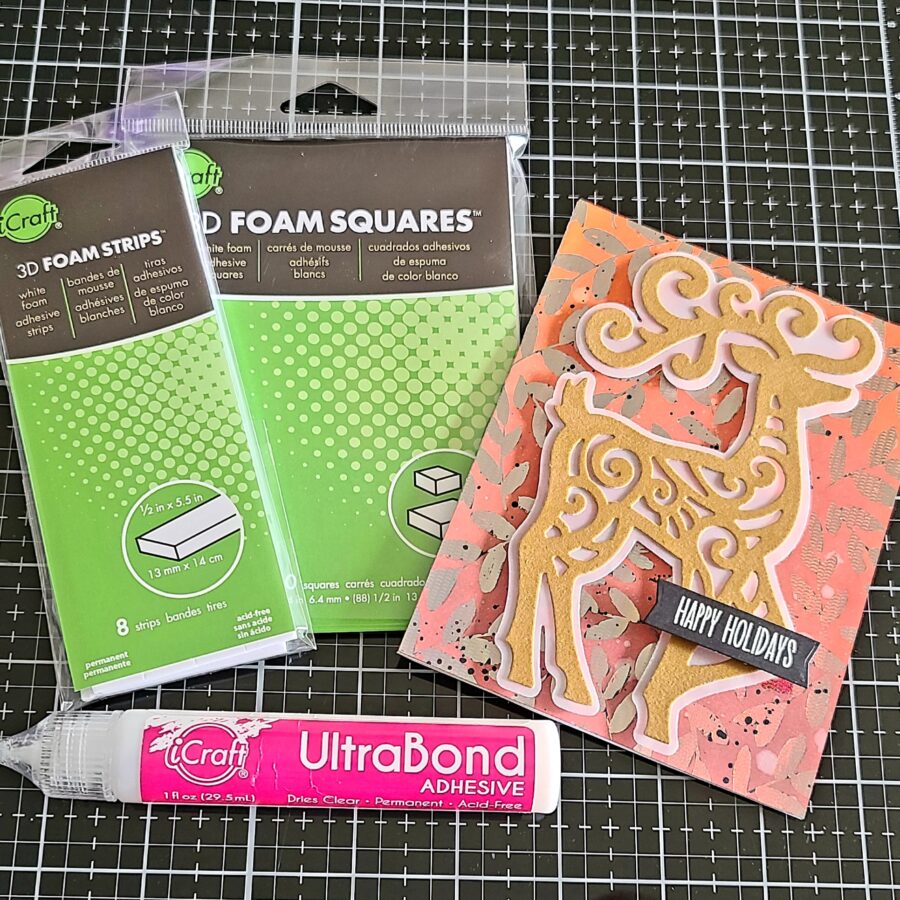 Next, I used a combination of foam strips and squares to adhere the reindeer to my toner card front. Then I stamped and heat embossed a sentiment from the Brutus Monroe Seasonal Wreaths stamp set and cut it out with a Pink & Main Large Sentiment Strip die. This is popped on with foam squares as well. Then I used more liquid adhesive to add the whole panel to a white card base.
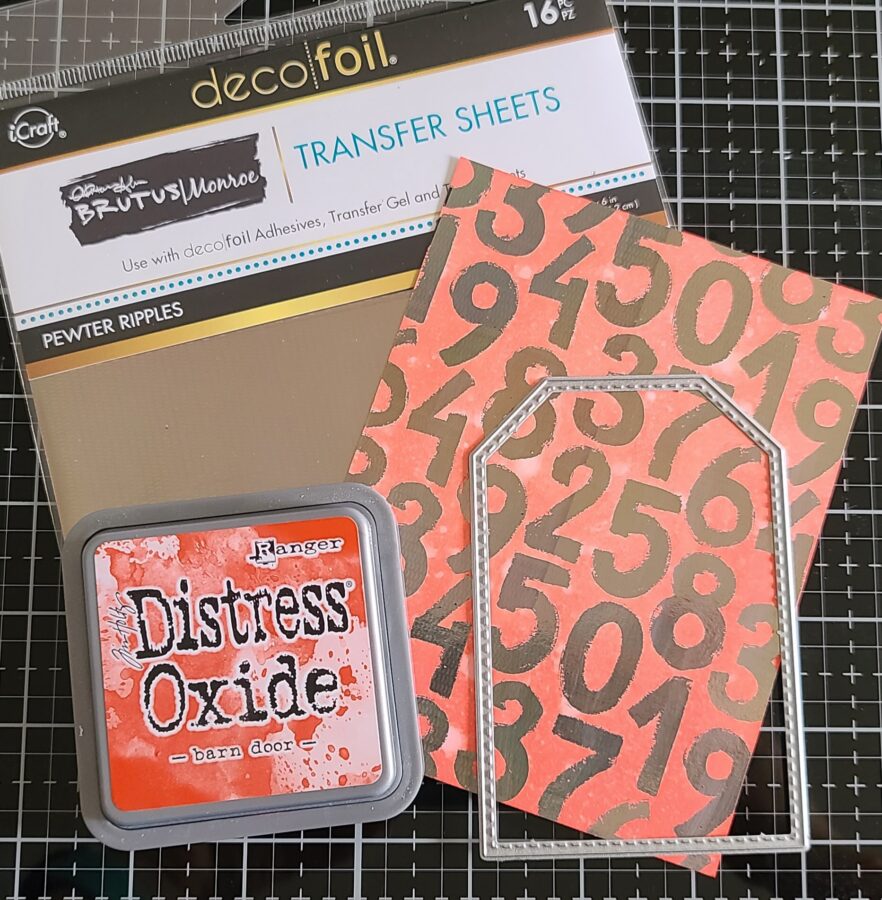
 Now, moving on to the super fun tag that I made alongside this card. I started with my foiling again. We used the same pewter ripples Deco Foil transfer sheets but this time on the Really Radiant toner card front. I inked it up with bard door distress oxide ink and spritzed it with water. Then I die cut it with the stitched tag shape in the Avery Elle Easy Layer Tag die set.
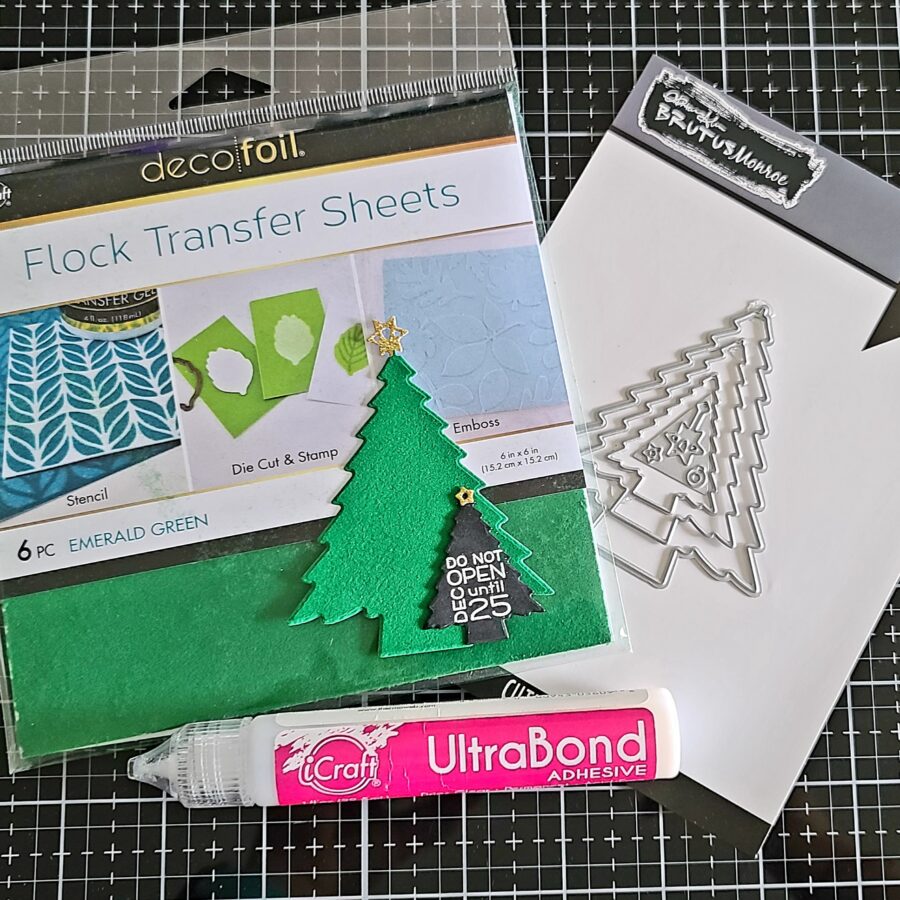
 Then I cut 2 trees from the Evergreen Builder die set - one from emerald green Deco Foil flock transfer sheet and another from black cardstock. I also cut the stars from gold glitter cardstock scrap in my stash. Then I heat embossed a "do not open until Dec 25" sentiment from Lawn Fawn Tiny Tag Sayings stamps. I used the liquid adhesive pen to adhere the stars to the trees next.
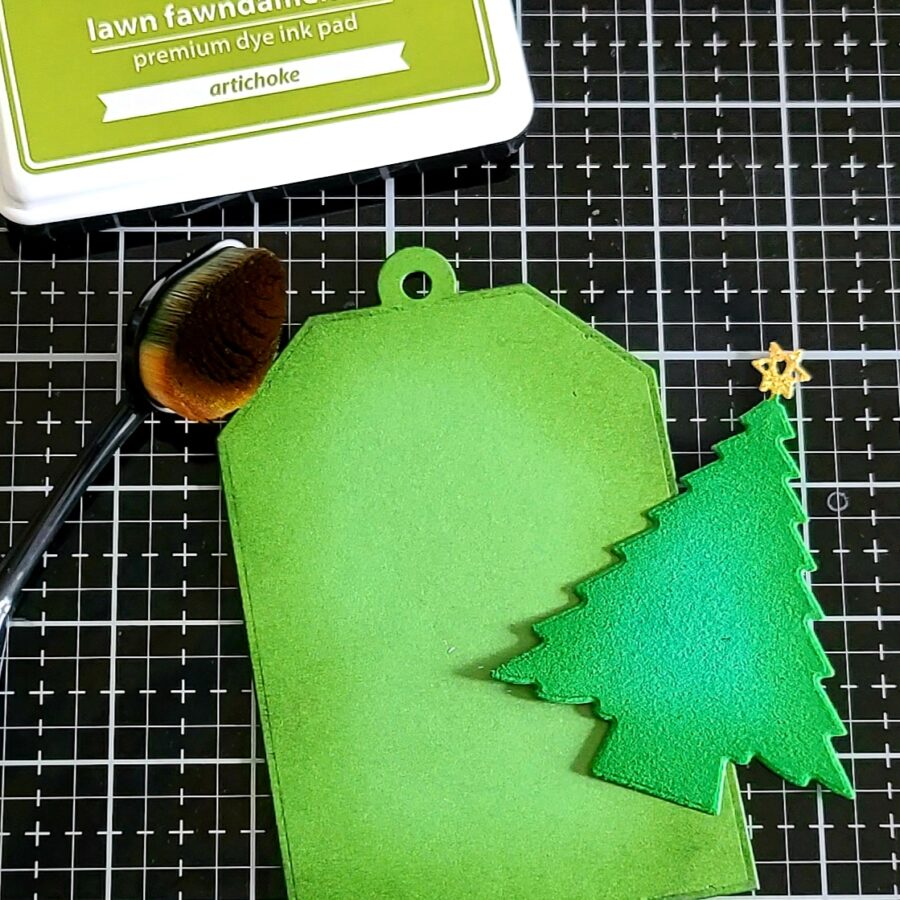
 I die-cut the base layer for the tag from green cardstock and when I laid things out, I didn't love how flat it all looked. So I took a blending brush and some green ink and inked up the edges of the green flocked tree and my tag.
 Finally, I used more liquid adhesive, foam squares, and strips and adhered all my layers together. The foiled layer and the tag base are adhered using liquid adhesive and the frees are popped up with foam squares and strips.
 To finish this fun tag off, I die cut a second base and adhered the two back-to-back so it's nice and smooth, and really sturdy too. Then I strung some black baker's twine through the hole and cut another piece to tie a bow with too.
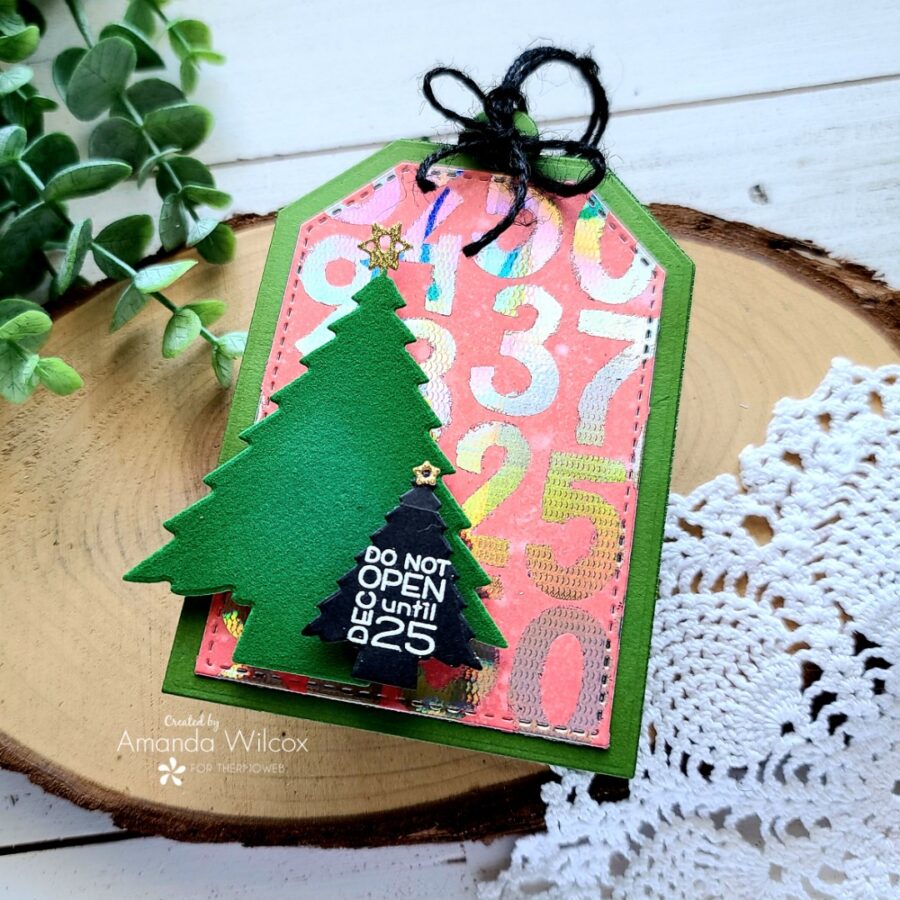 Voila! Super fun and ready to go on a package for Christmas time! I love doing these projects ahead of time and being ready for the holidays.
I hope you enjoyed today's creations and found some inspiration to create something wonderful!
I appreciate you sharing your time with me. Have a fabulous day!
This post contains affiliate links. For more information, see our disclosure HERE.
Voila! Super fun and ready to go on a package for Christmas time! I love doing these projects ahead of time and being ready for the holidays.
I hope you enjoyed today's creations and found some inspiration to create something wonderful!
I appreciate you sharing your time with me. Have a fabulous day!
This post contains affiliate links. For more information, see our disclosure HERE.