No Products in the Cart
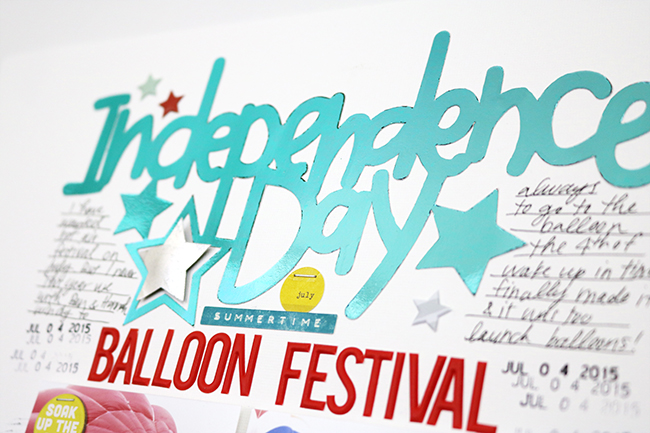
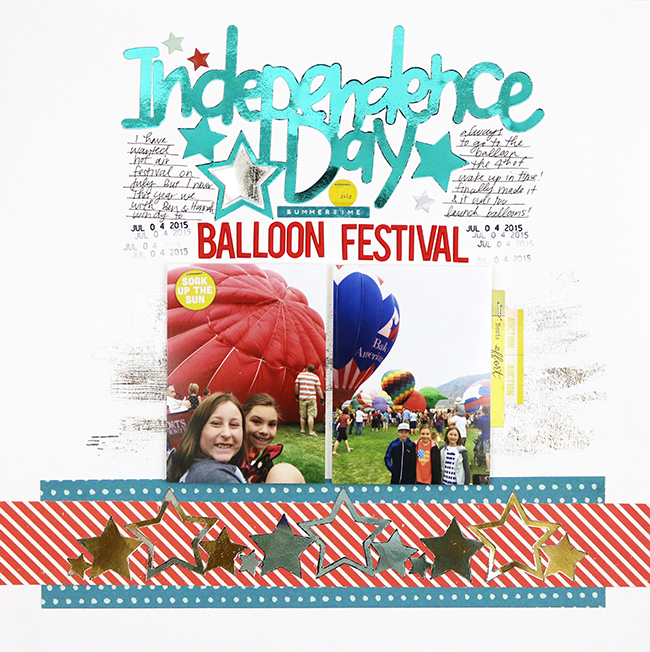 Foil is the perfect way to add a festive touch to a 4th of July layout, and I used it in a few different ways. Here are some of the products I used:
 ThermOWeb Products:
Deco Foil™ PeelnStick Toner Sheets
Silver Deco Foil™ Transfer Sheets
Aqua Deco Foil™ Transfer Sheets
Deco Foil™ Liquid Adhesive
Royal Sovereign Laminator
Other Products:
Paintbrush
Silhouette Cameo
Free "Let Freedom Ring" Cut File
ThermOWeb Products:
Deco Foil™ PeelnStick Toner Sheets
Silver Deco Foil™ Transfer Sheets
Aqua Deco Foil™ Transfer Sheets
Deco Foil™ Liquid Adhesive
Royal Sovereign Laminator
Other Products:
Paintbrush
Silhouette Cameo
Free "Let Freedom Ring" Cut File
 Here's a close look at the title I created with the cut file and some Deco Foil™ PeelnStick Toner sheets. Love those things!
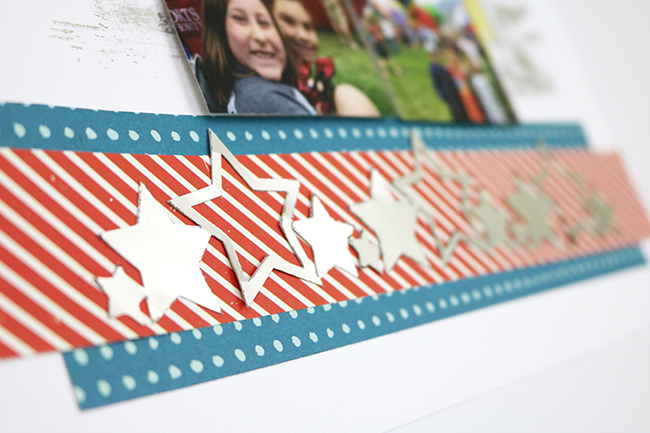
 I tried a new (to me) technique on this layout and thought I would share how easy it is. I wanted to bring a little extra shine to my photos, so I used a paintbrush and some Deco Foil™ Liquid Adhesive to add a little foil behind them.
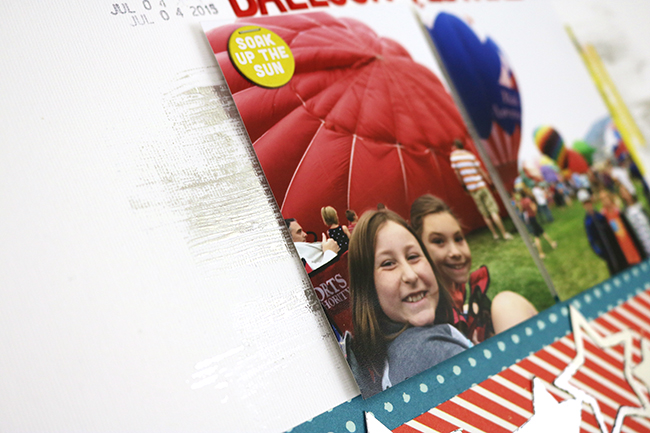 I think it turned out really cool and I'll definitely be trying that technique again. I created a little video tutorial on my process and you can watch it below.
Have you already tried getting a brushed foil look on your projects? If not, I hope this has inspired you to give it a try!
I think it turned out really cool and I'll definitely be trying that technique again. I created a little video tutorial on my process and you can watch it below.
Have you already tried getting a brushed foil look on your projects? If not, I hope this has inspired you to give it a try!