No Products in the Cart
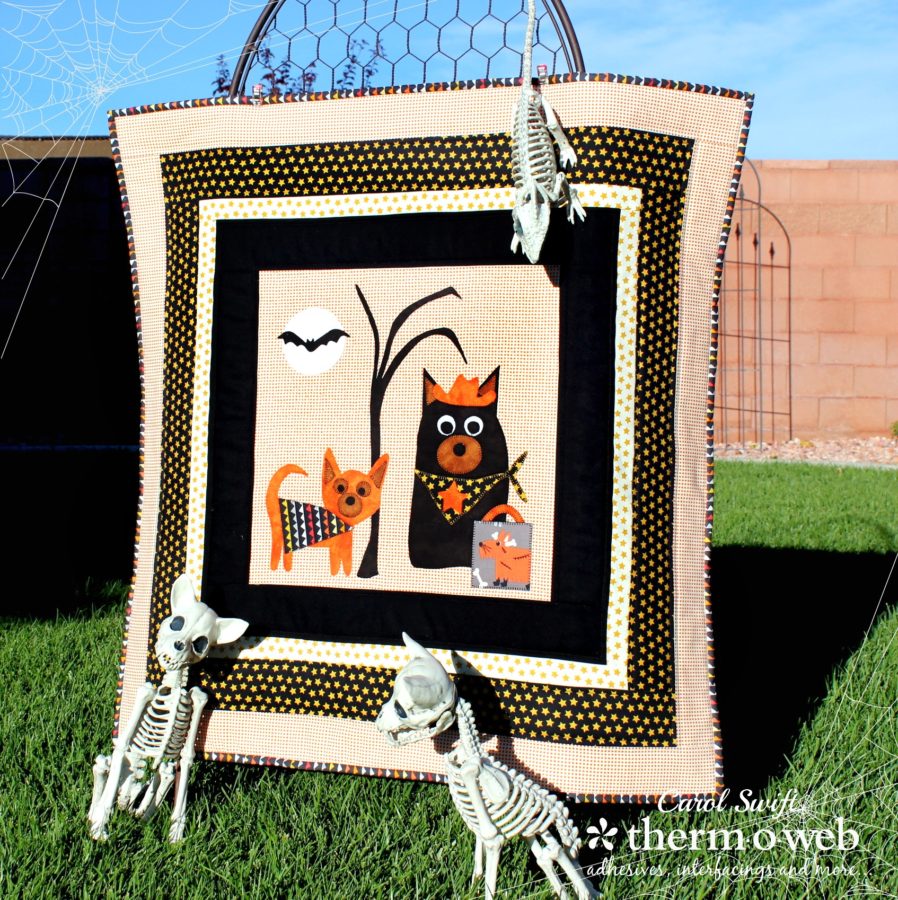
 Adding HeatnBond Fleece Fusible High Loft as batting makes a great lightweight wall hanging or table topper. It's so easy to apply it to fabric! I used HeatnBond EZ Print Lite sheets to create the applique and sewed around the edges, but if you wanted a no-sew applique then use the HeatnBond Ultrahold.
 Halloween Boo Crew Quilt Supplies:
HeatnBond Lite, Iron-on Adhesive
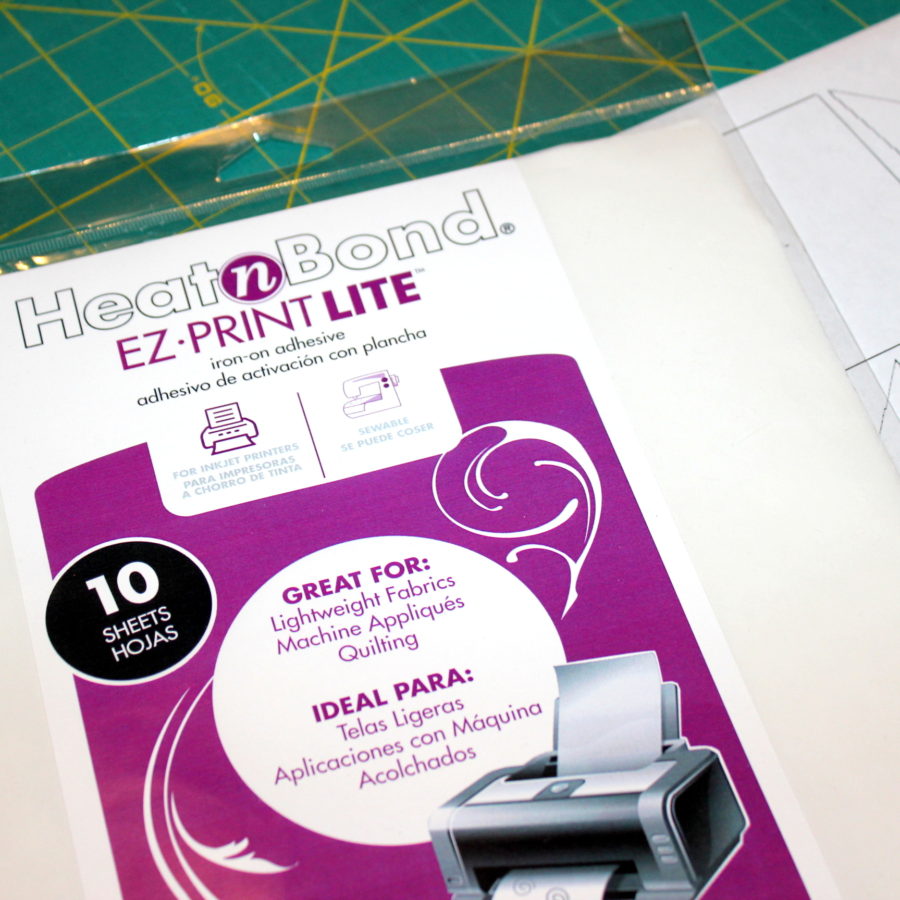
Or HeatnBond EZ Print Lite sheets
HeatnBond Fleece Fusible High Loft
Therm O Web SpraynBond Basting Adhesive
Iron, Fabric
Super Dooper Boo Crew Applique Pattern and Instructions
Cutting instructions:
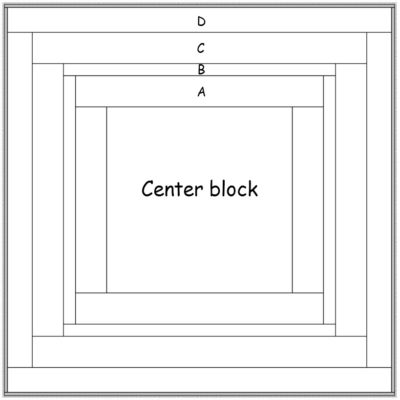
Cut 1 – 15½” x 15½” square for center block
Cut 2 – 3” x 15 ½” strips for left and right Border A
Cut 2 - 3” x 20 ½” strips for top and bottom Border A
Cut 2 – 1½” x 20½” strips for left and right Border B
Cut 2 – 1½” x 22½” strips for top and bottom Border B
Cut 2 – 3” x 22½” strips for left and right Border C
Cut 2 – 3” x 27½” strips for top and bottom Border C
Cut 2 – 2½” x 27½” strips for left and right Border D
Cut 2 – 2½” x 31½” strips for top and bottom Border D
Cut 1 – Fabric for quilt backing
Halloween Boo Crew Quilt Supplies:
HeatnBond Lite, Iron-on Adhesive
Or HeatnBond EZ Print Lite sheets
HeatnBond Fleece Fusible High Loft
Therm O Web SpraynBond Basting Adhesive
Iron, Fabric
Super Dooper Boo Crew Applique Pattern and Instructions
Cutting instructions:
Cut 1 – 15½” x 15½” square for center block
Cut 2 – 3” x 15 ½” strips for left and right Border A
Cut 2 - 3” x 20 ½” strips for top and bottom Border A
Cut 2 – 1½” x 20½” strips for left and right Border B
Cut 2 – 1½” x 22½” strips for top and bottom Border B
Cut 2 – 3” x 22½” strips for left and right Border C
Cut 2 – 3” x 27½” strips for top and bottom Border C
Cut 2 – 2½” x 27½” strips for left and right Border D
Cut 2 – 2½” x 31½” strips for top and bottom Border D
Cut 1 – Fabric for quilt backing
 Step 2: Iron adhesive pieces to wrong sides of fabrics with a medium heat iron, no steam. Press for 2 seconds. Repeat until all surfaces have been bonded to fabric. Let cool. Cut out applique pieces. Peel off paper liner.
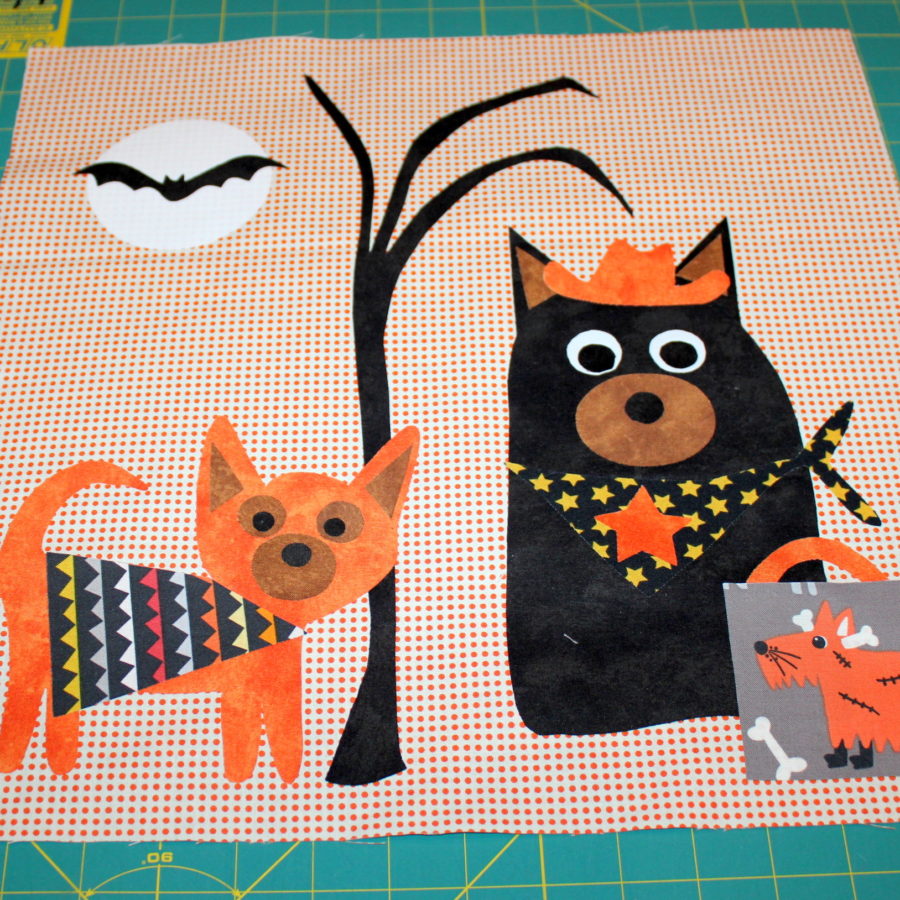
Step 3: Place applique shapes, adhesive side down, on top of 15½” x 15½” center fabric. Press and hold iron for 6 seconds on each section until entire piece is bonded. Let cool.
Step 2: Iron adhesive pieces to wrong sides of fabrics with a medium heat iron, no steam. Press for 2 seconds. Repeat until all surfaces have been bonded to fabric. Let cool. Cut out applique pieces. Peel off paper liner.
Step 3: Place applique shapes, adhesive side down, on top of 15½” x 15½” center fabric. Press and hold iron for 6 seconds on each section until entire piece is bonded. Let cool.
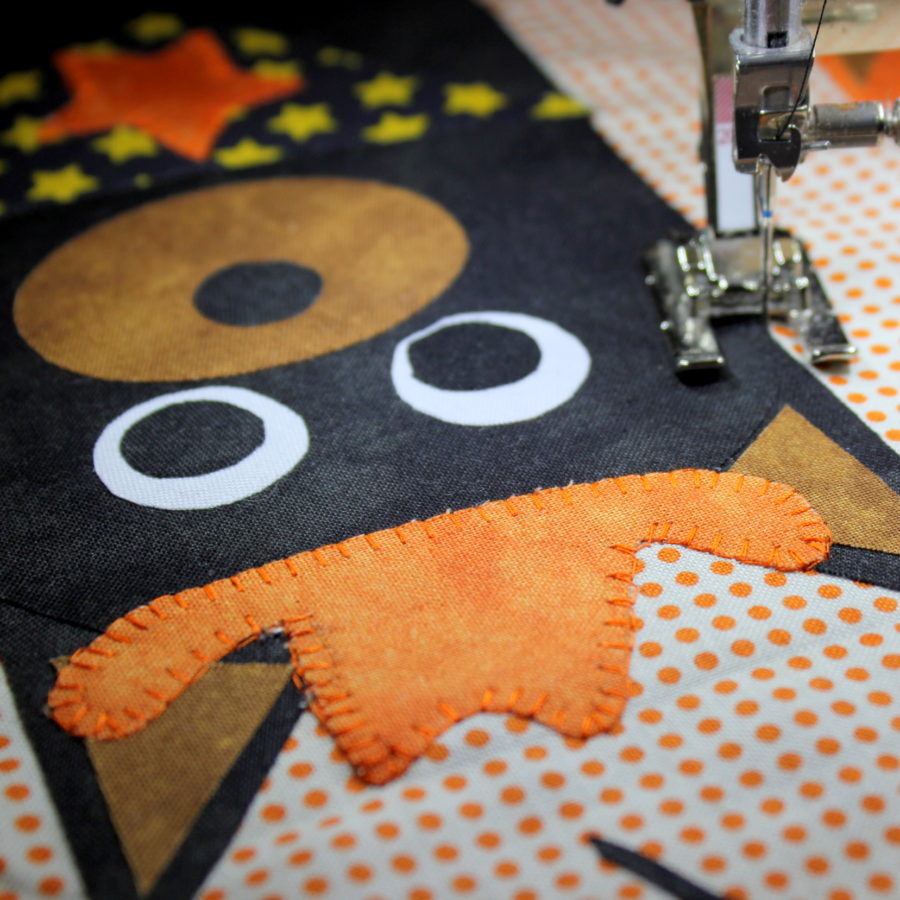
 Step 4: Sew around edges using a straight, zig-zag, or blanket stitch.
 Step 5: Sew borders to center block in the order below:
Border A - Sew 3” x 15½” strips to left and right
Border A - Sew 3” x 20½” strips to top and bottom
Border B - Sew 1½” x 20½” strips to left and right
Border B - Sew 1½” x 22½” strips to top and bottom
Border C - Sew 3” x 22½” strips to left and right
Border C - Sew 3” x 27½” strips to top and bottom
Border D - Sew 2½” x 27½” strips to left and right
Border D - Sew 2½” x 31½” strips to top and bottom
Step 5: Sew borders to center block in the order below:
Border A - Sew 3” x 15½” strips to left and right
Border A - Sew 3” x 20½” strips to top and bottom
Border B - Sew 1½” x 20½” strips to left and right
Border B - Sew 1½” x 22½” strips to top and bottom
Border C - Sew 3” x 22½” strips to left and right
Border C - Sew 3” x 27½” strips to top and bottom
Border D - Sew 2½” x 27½” strips to left and right
Border D - Sew 2½” x 31½” strips to top and bottom
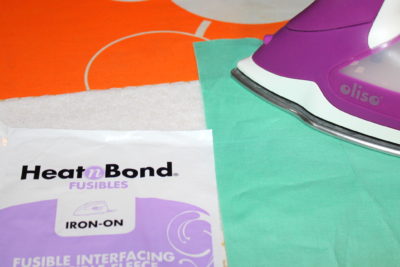
 Step 6: Cut fusible interfacing to fit quilt backing. Pre-heat iron to wool (medium heat) setting with steam. Place the rough side of the interfacing onto the back (wrong side) of the quilt back. Cover with a dry pressing cloth. Press and hold iron with medium pressure for 10-15 seconds. Repeat by lifting iron to the new area and pressing, slightly overlapping previous area until entire surface is bonded. Let cool. If more ironing is needed iron an additional 5 seconds from the front of the project.
 Step 7: Protect the area where you will be working by placing an old sheet or paper under and around the area you’ll be spraying. Place the quilt back with interfacing face down on the working surface. Using the SpraynBond Adhesive, spray about 6-8 inches across the interfacing from one edge to the other. Place the wrong side of the quilt back front over the sprayed surface. Smooth fabric to ensure it adheres to the sprayed fabric. Continue this method of spraying and smoothing just 6-8 inches at a time until you reach the bottom of the quilt. Check for creases or folds. Trim edges and square-up quilt.
Step 8: Quilt and add binding as desired.
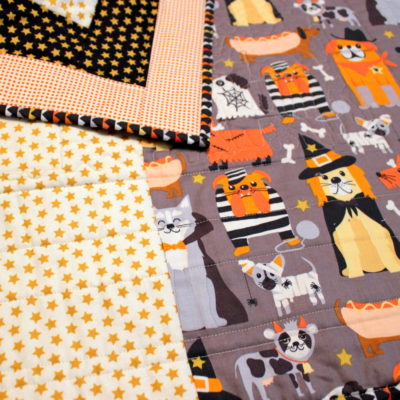
Those dogs in costumes made the cutest back on this table topper!
Step 7: Protect the area where you will be working by placing an old sheet or paper under and around the area you’ll be spraying. Place the quilt back with interfacing face down on the working surface. Using the SpraynBond Adhesive, spray about 6-8 inches across the interfacing from one edge to the other. Place the wrong side of the quilt back front over the sprayed surface. Smooth fabric to ensure it adheres to the sprayed fabric. Continue this method of spraying and smoothing just 6-8 inches at a time until you reach the bottom of the quilt. Check for creases or folds. Trim edges and square-up quilt.
Step 8: Quilt and add binding as desired.
Those dogs in costumes made the cutest back on this table topper!
Written by Carol Swift