No Products in the Cart
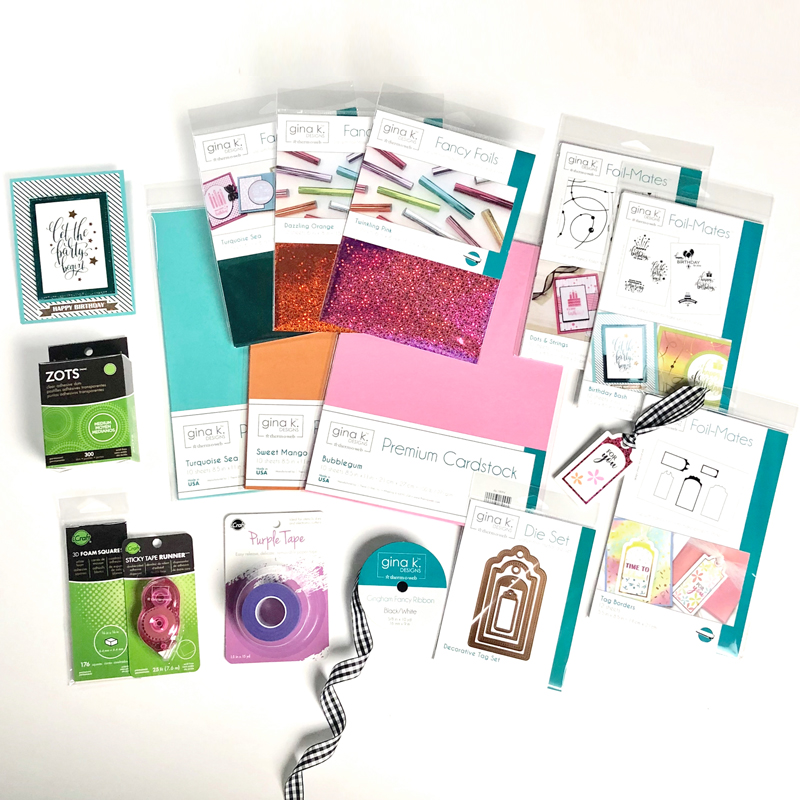
 Therm O Web supplies:
Gina K. Designs Foil-Mates™ Backgrounds • Where's The party?
Gina K. Designs Foil-Mates™ Sentiments • Birthday Bash
Gina K. Designs StampnFoil™ Foil-Mates Detail Sheet • Label Borders
Gina K. Designs StampnFoil™ Foil-Mates Detail Sheet • Time To Celebrate
Gina K. Designs Fancy Foils™ 6" x 8" • Turquoise Sea
Gina K. Designs Fancy Foils™ 6" x 8" • Gold Sequins
Gina K. Designs StampnFoil™ Die Set • Time To Celebrate
Gina K. Designs StampnFoil™ Stamp Set • Time To Celebrate
Gina K. Designs (3) Nested Oval Dies • Single Stitch Design • Large Set
Gina K. Designs (3) Nested Oval Dies • Double Stitch Design • Small Set
Gina K. Designs (3) Nested Label Dies
Deco Foil™ Parchment Paper
Foil Laminator • 12 inch
Gina K. Designs Premium Dye Inkpad Sets 1" Cube • Prime Time
Zots™ Roll • 3D
Memory Tape Runner XL™
Deco Foil™ White Foam Adhesive
iCraft Easy Cut Adhesive™ Sheets • Sm
Purple Tape
iCraft Mixed Media Adhesive 2.1 fl oz
Other Supplies:
Simple Stories Hello Summer 12"x 12" papers
Paper Trimmer
Electronic Cutting Machine
Die-Cutting Machine
Acrylic Stamping Block
Sponge Dauber
Therm O Web supplies:
Gina K. Designs Foil-Mates™ Backgrounds • Where's The party?
Gina K. Designs Foil-Mates™ Sentiments • Birthday Bash
Gina K. Designs StampnFoil™ Foil-Mates Detail Sheet • Label Borders
Gina K. Designs StampnFoil™ Foil-Mates Detail Sheet • Time To Celebrate
Gina K. Designs Fancy Foils™ 6" x 8" • Turquoise Sea
Gina K. Designs Fancy Foils™ 6" x 8" • Gold Sequins
Gina K. Designs StampnFoil™ Die Set • Time To Celebrate
Gina K. Designs StampnFoil™ Stamp Set • Time To Celebrate
Gina K. Designs (3) Nested Oval Dies • Single Stitch Design • Large Set
Gina K. Designs (3) Nested Oval Dies • Double Stitch Design • Small Set
Gina K. Designs (3) Nested Label Dies
Deco Foil™ Parchment Paper
Foil Laminator • 12 inch
Gina K. Designs Premium Dye Inkpad Sets 1" Cube • Prime Time
Zots™ Roll • 3D
Memory Tape Runner XL™
Deco Foil™ White Foam Adhesive
iCraft Easy Cut Adhesive™ Sheets • Sm
Purple Tape
iCraft Mixed Media Adhesive 2.1 fl oz
Other Supplies:
Simple Stories Hello Summer 12"x 12" papers
Paper Trimmer
Electronic Cutting Machine
Die-Cutting Machine
Acrylic Stamping Block
Sponge Dauber
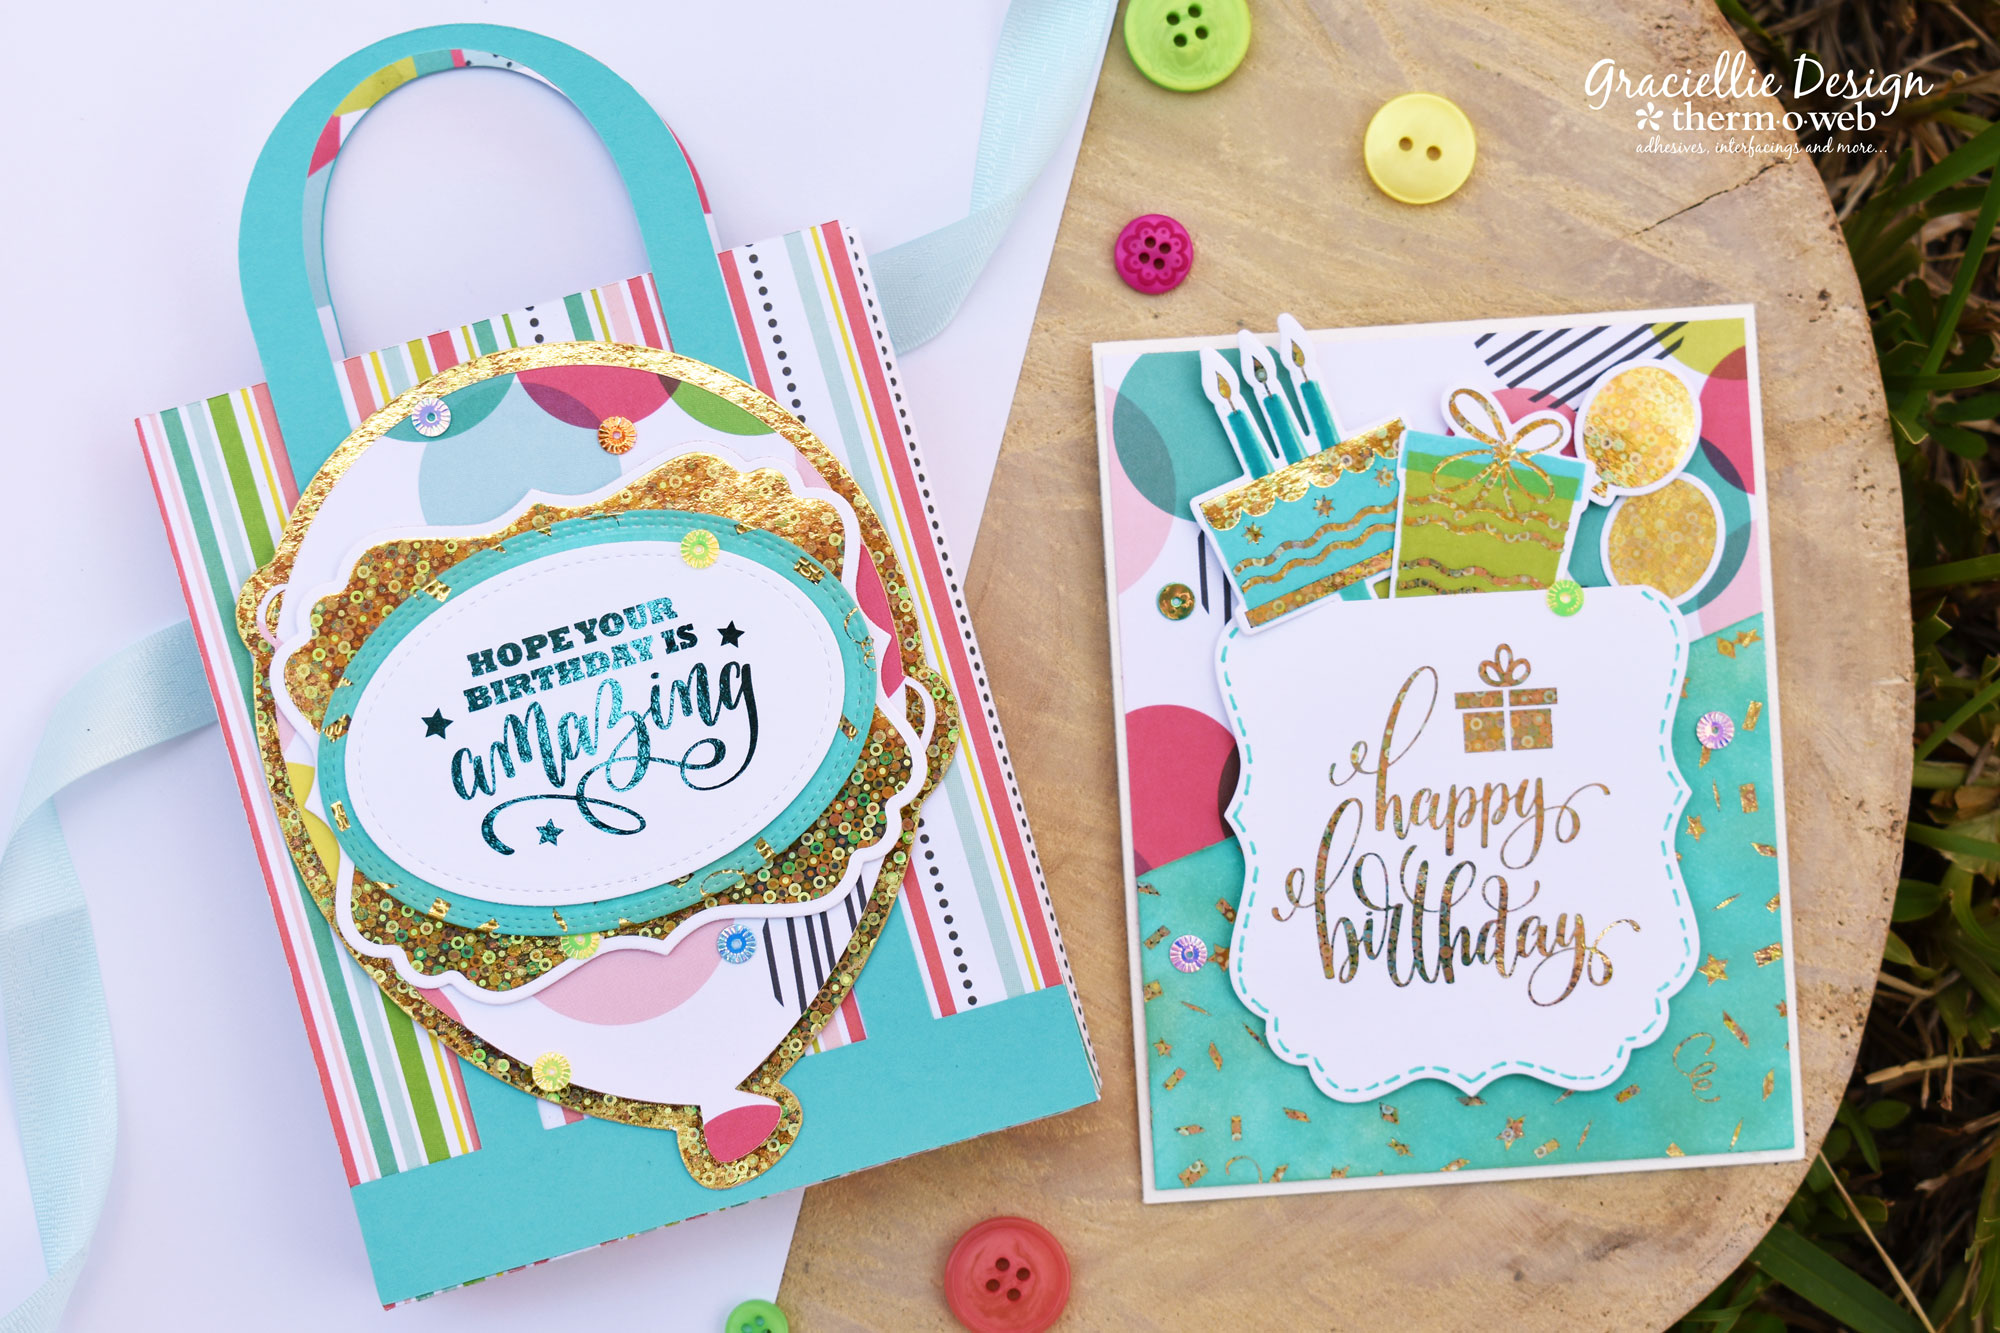
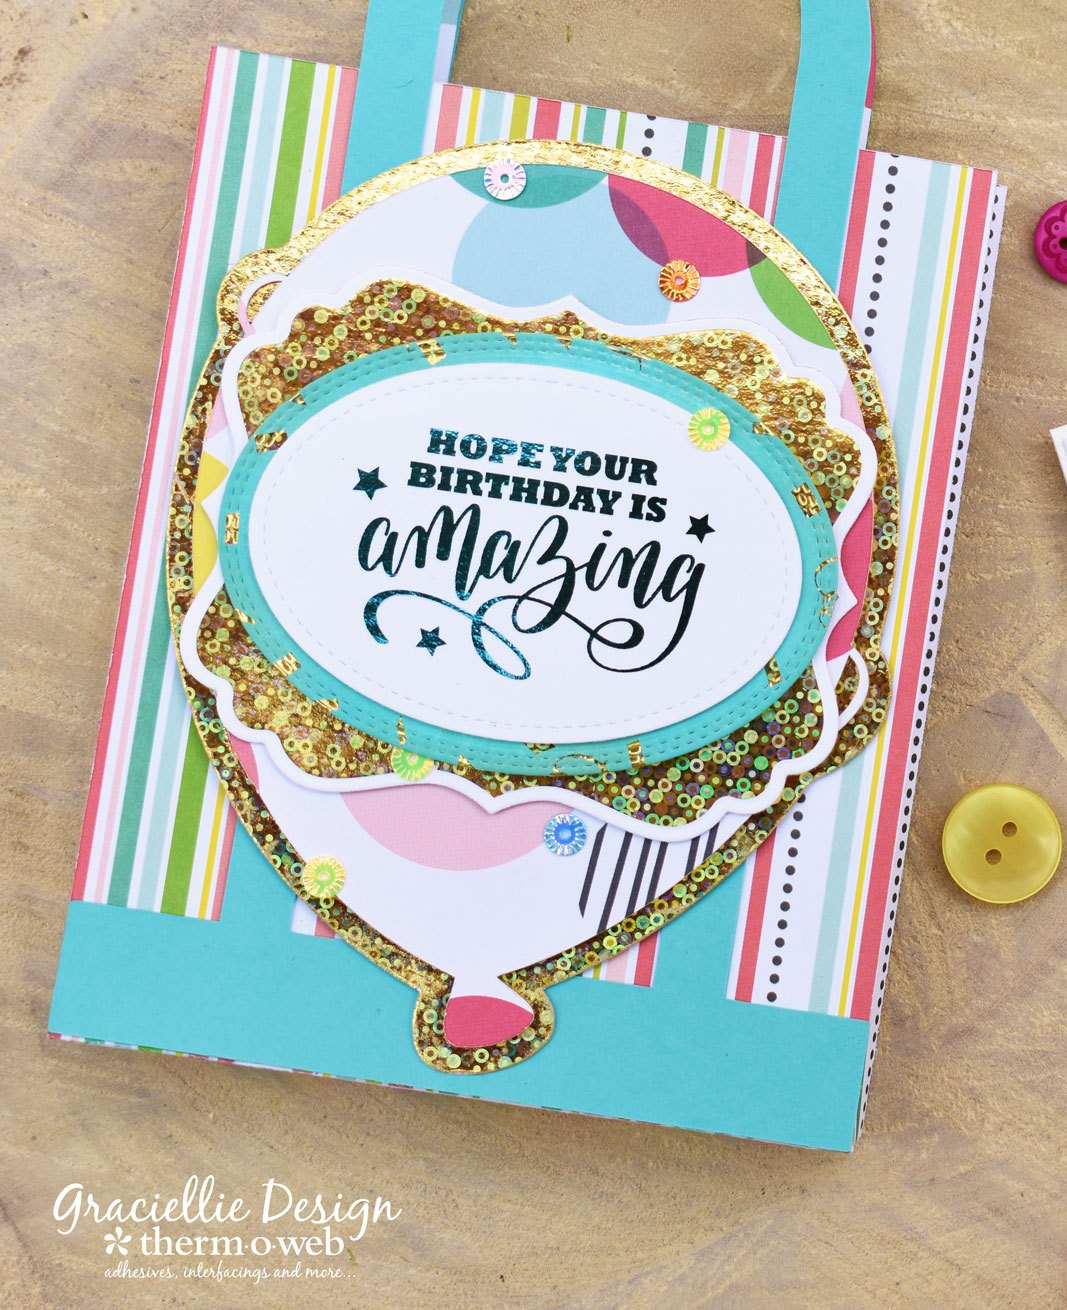
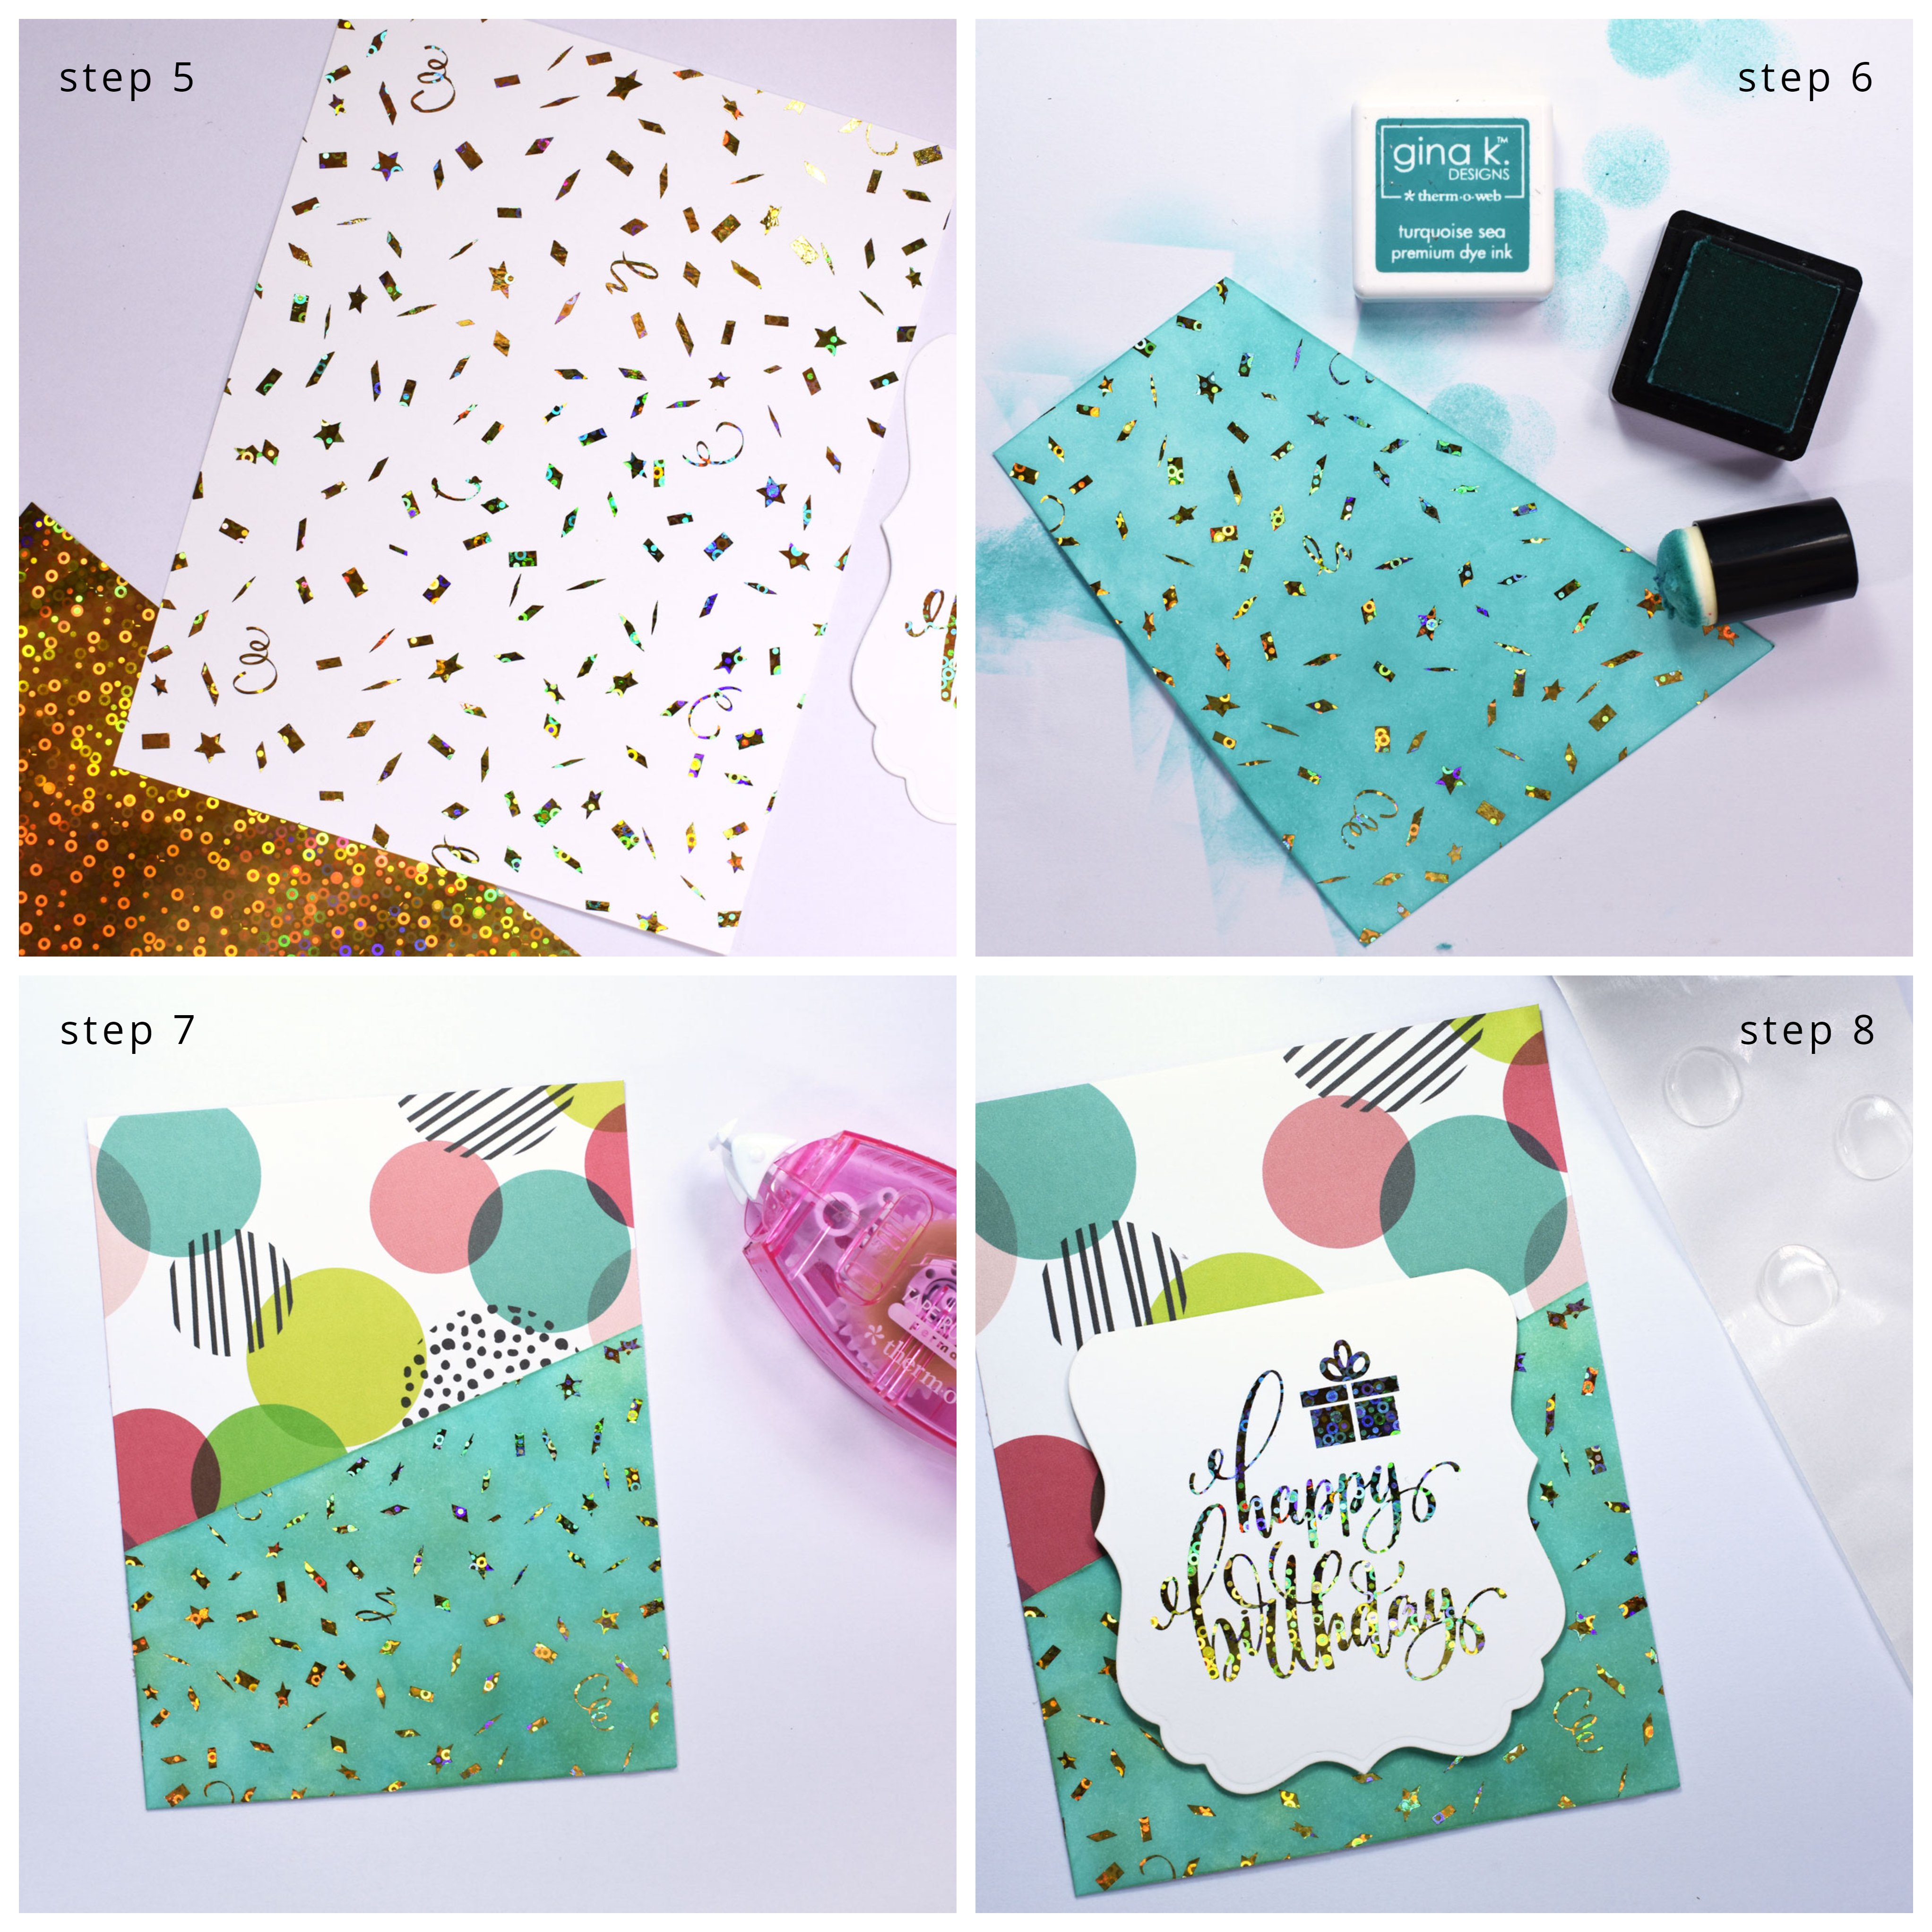
 Step 5. Next, cut a 4 1/4" by 5 1/2" panel from a Where's The Party Foil-Mates Background. Foil the panel with Gold Sequins Fancy Foil, just as you did for the Decorative Label on step 2.
Step 6. Cut the panel diagonally and sponge it with Turquoise Sea Premium Dye Ink.
Step 7. Attach the inked piece to a 4 1/4" by 5 1/2" patterned paper panel using XL Tape Runner.
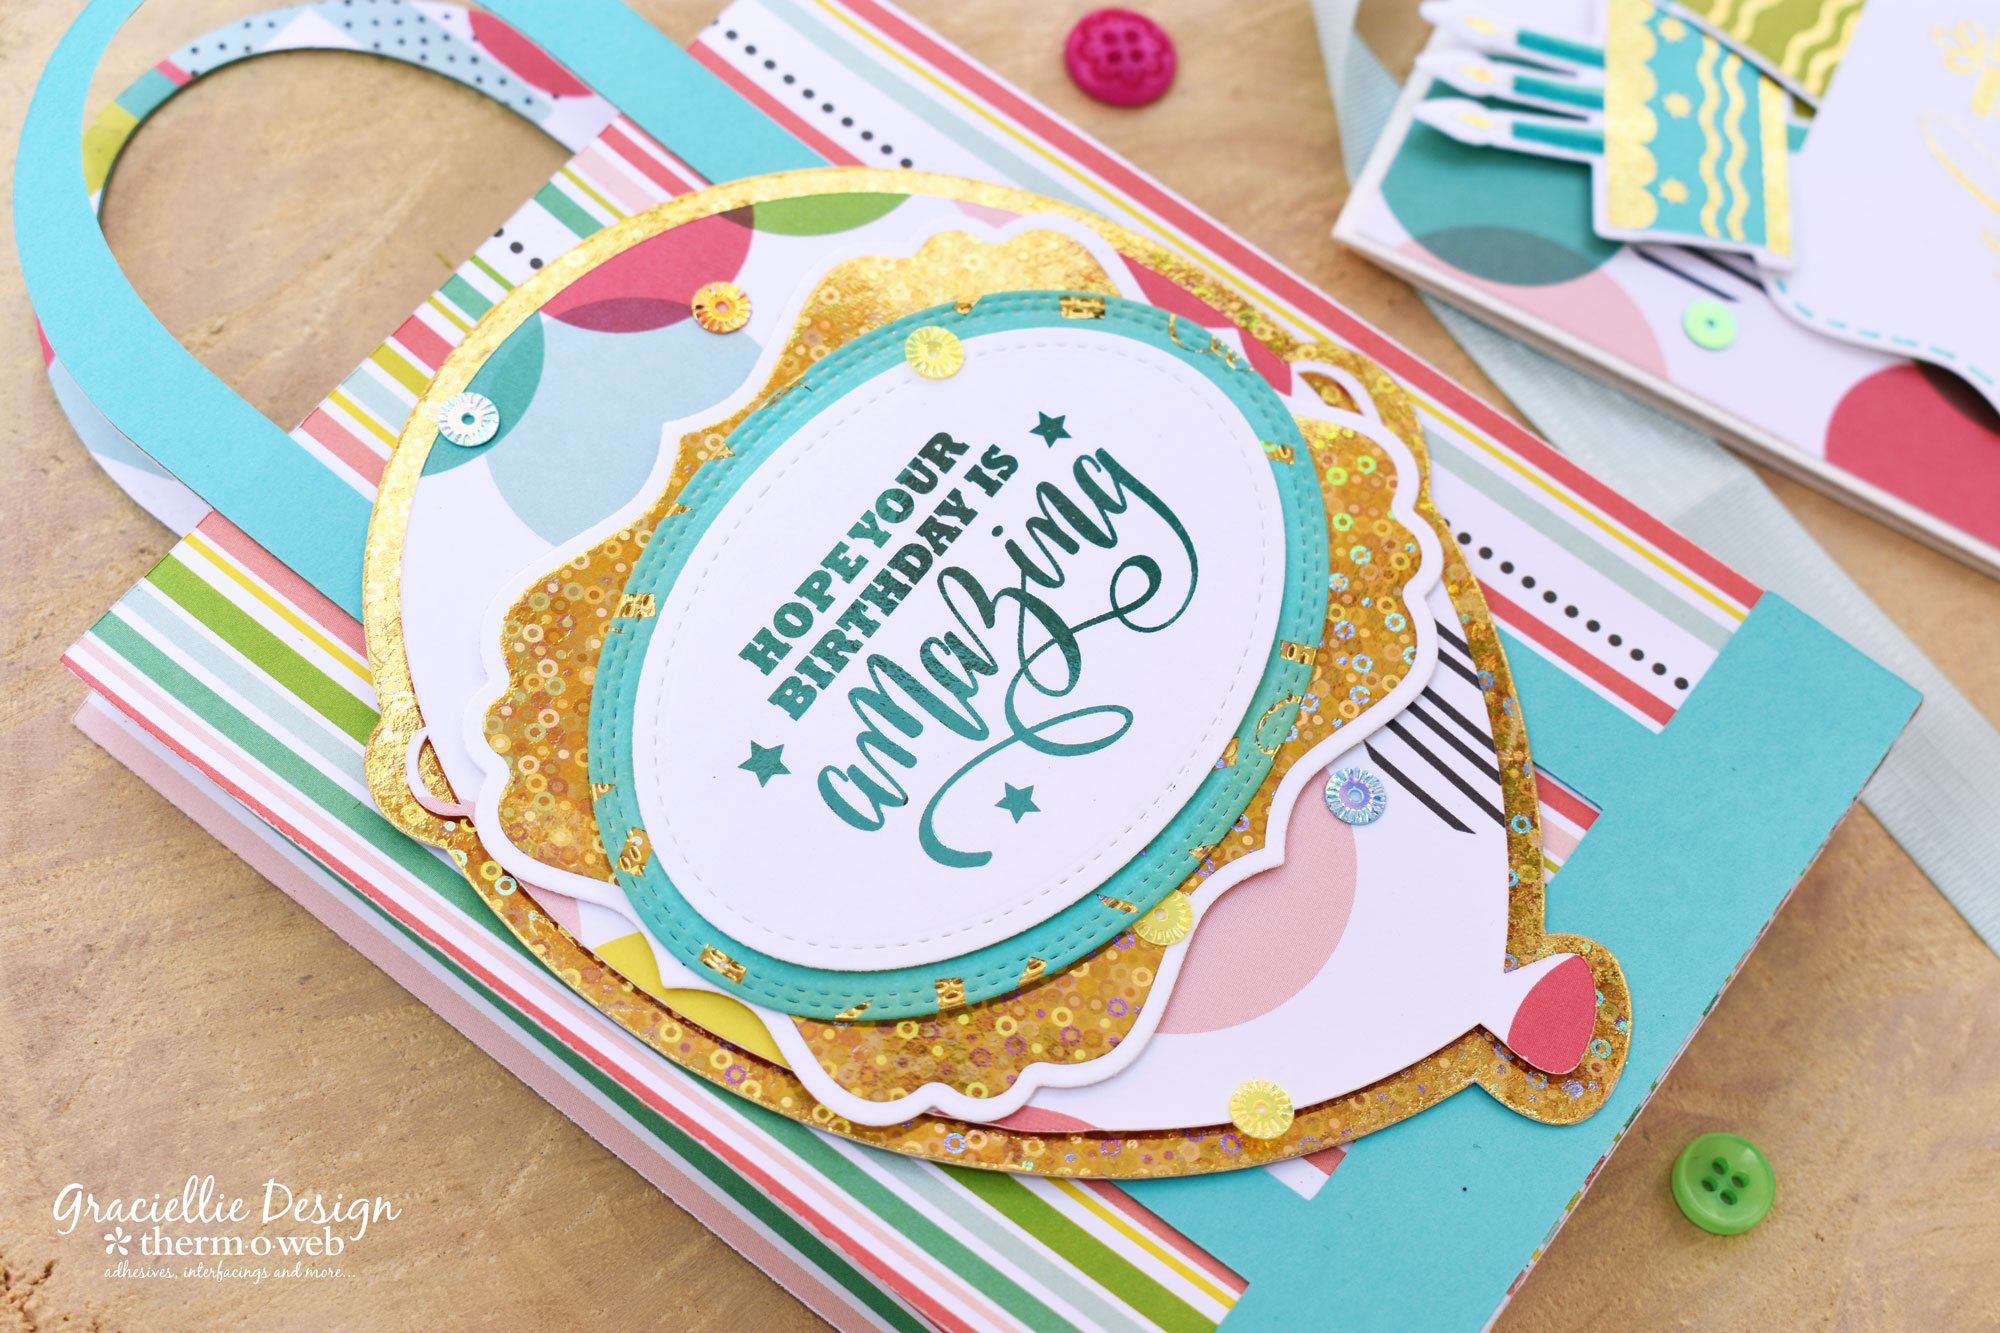
Step 8. Adhere the Decorative Label pocket to the card panel using 3D zots.
Step 5. Next, cut a 4 1/4" by 5 1/2" panel from a Where's The Party Foil-Mates Background. Foil the panel with Gold Sequins Fancy Foil, just as you did for the Decorative Label on step 2.
Step 6. Cut the panel diagonally and sponge it with Turquoise Sea Premium Dye Ink.
Step 7. Attach the inked piece to a 4 1/4" by 5 1/2" patterned paper panel using XL Tape Runner.
Step 8. Adhere the Decorative Label pocket to the card panel using 3D zots.
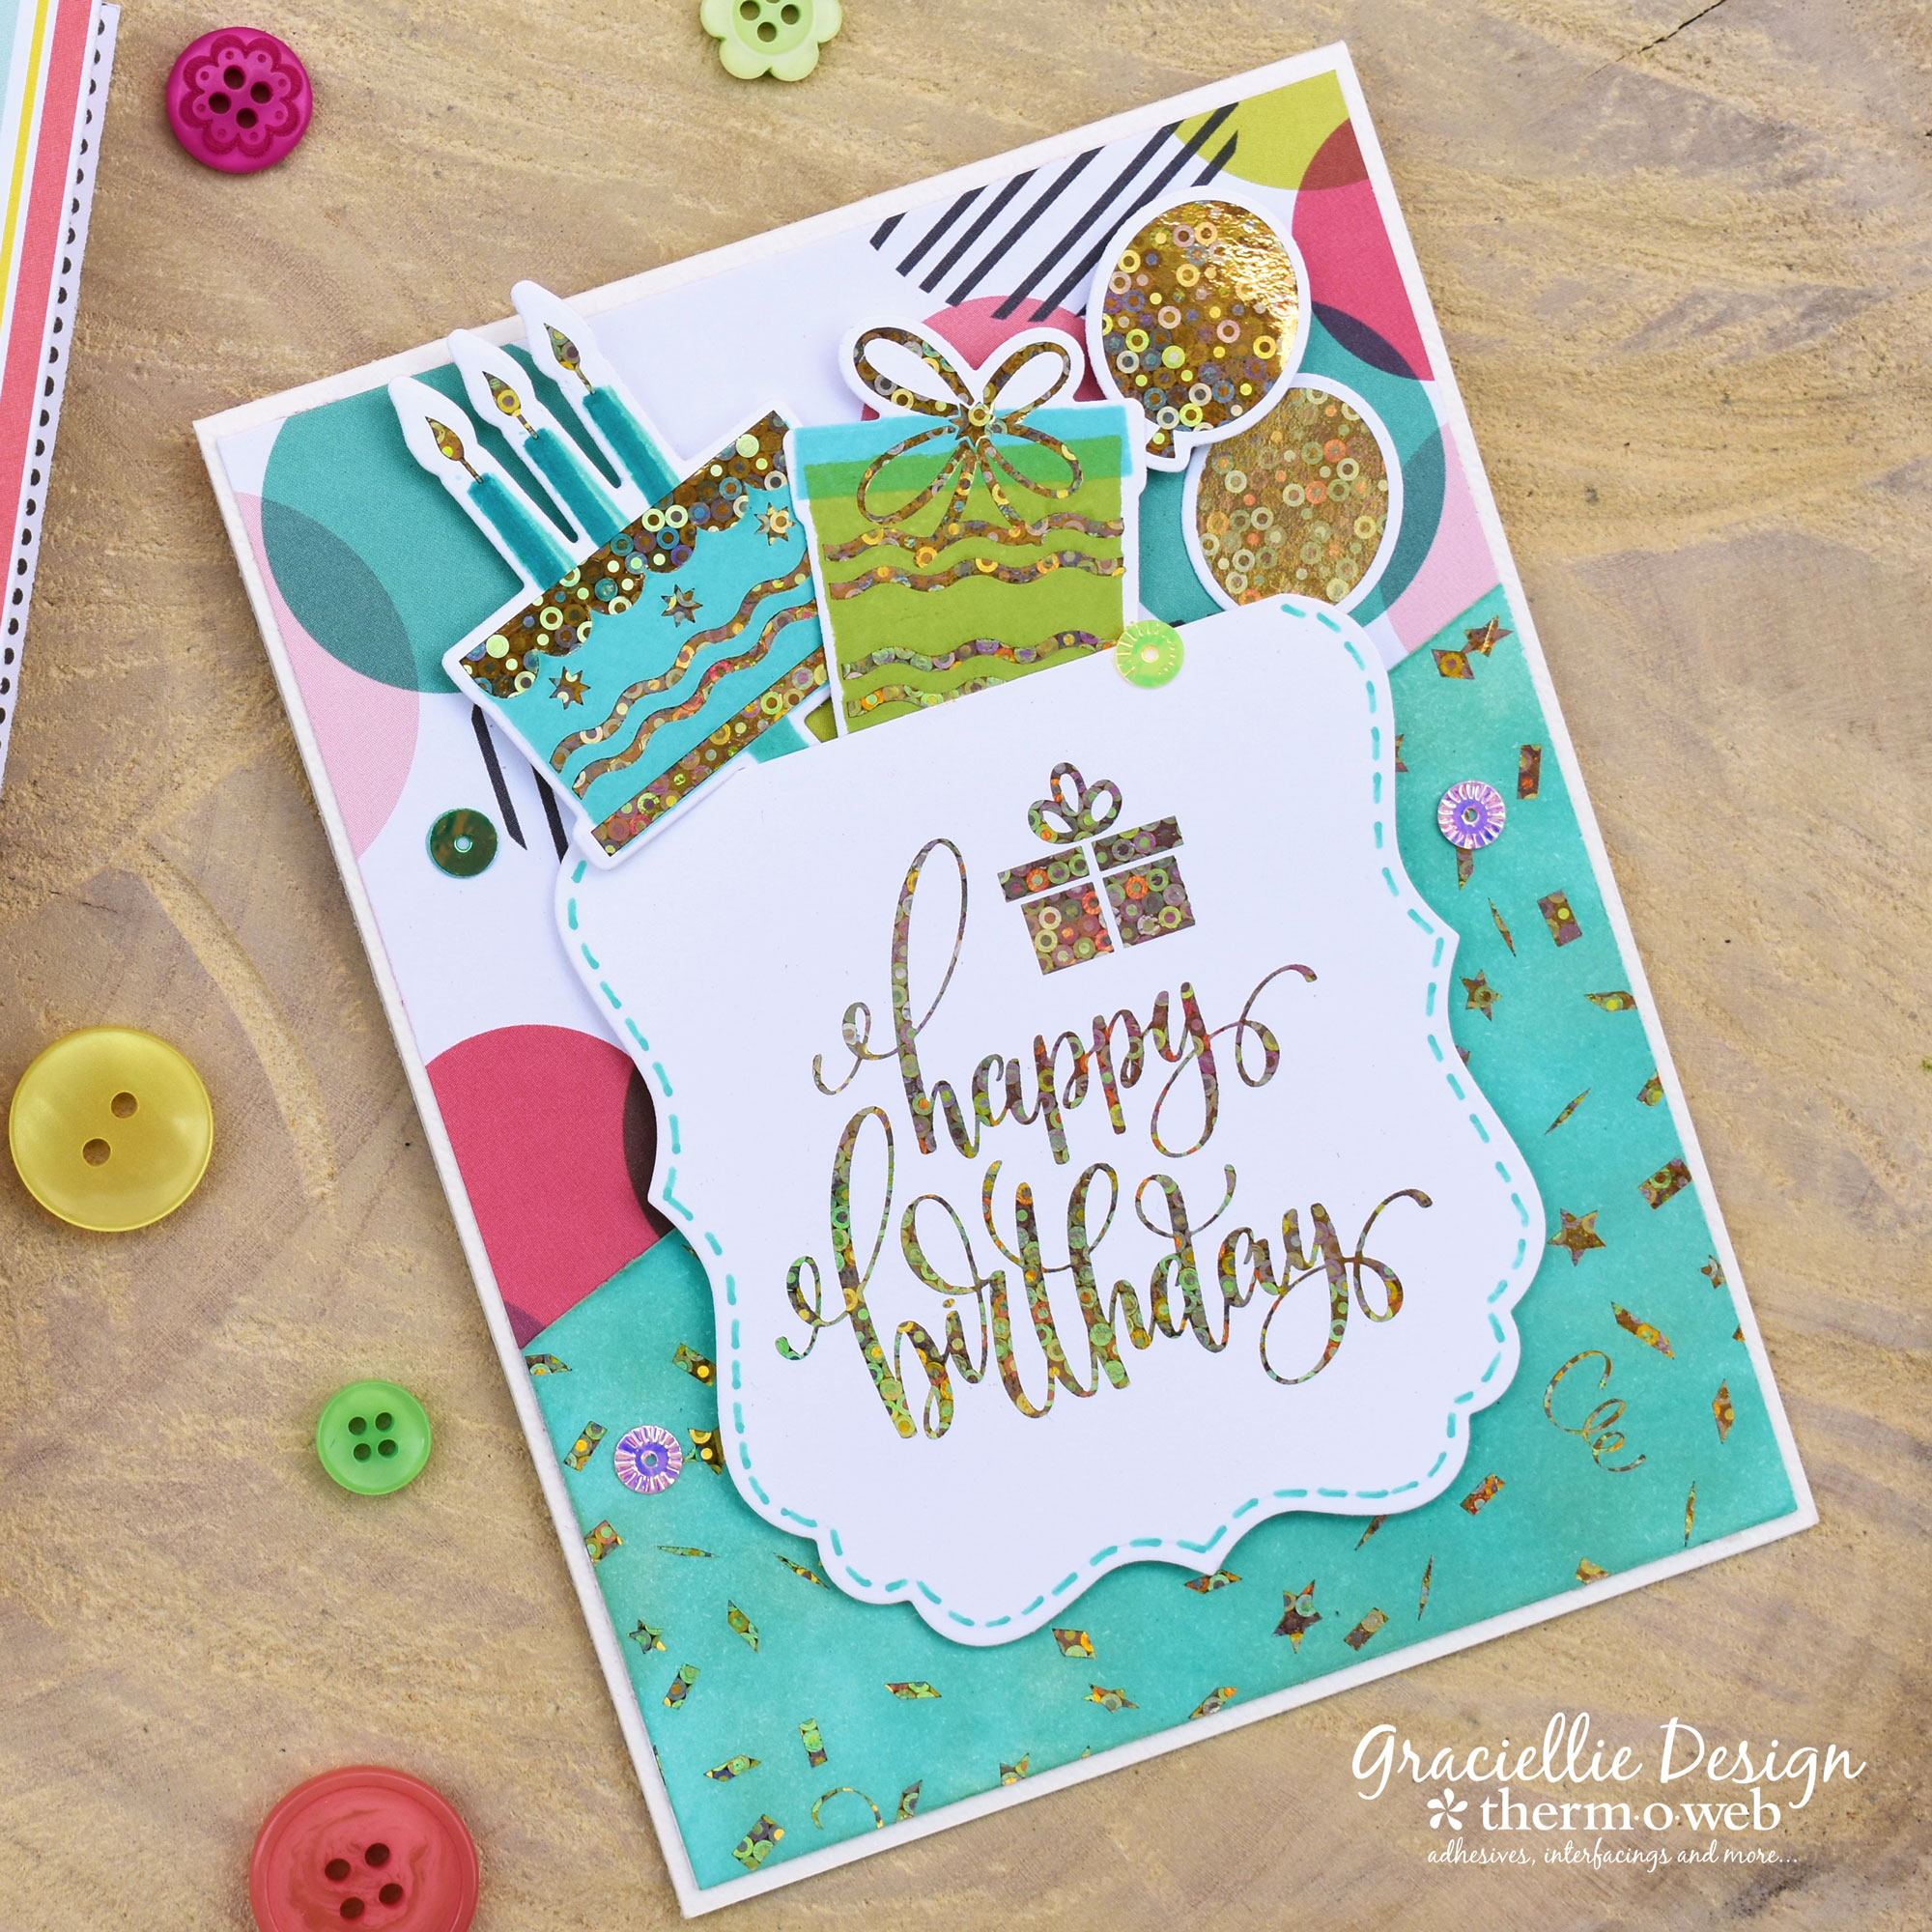
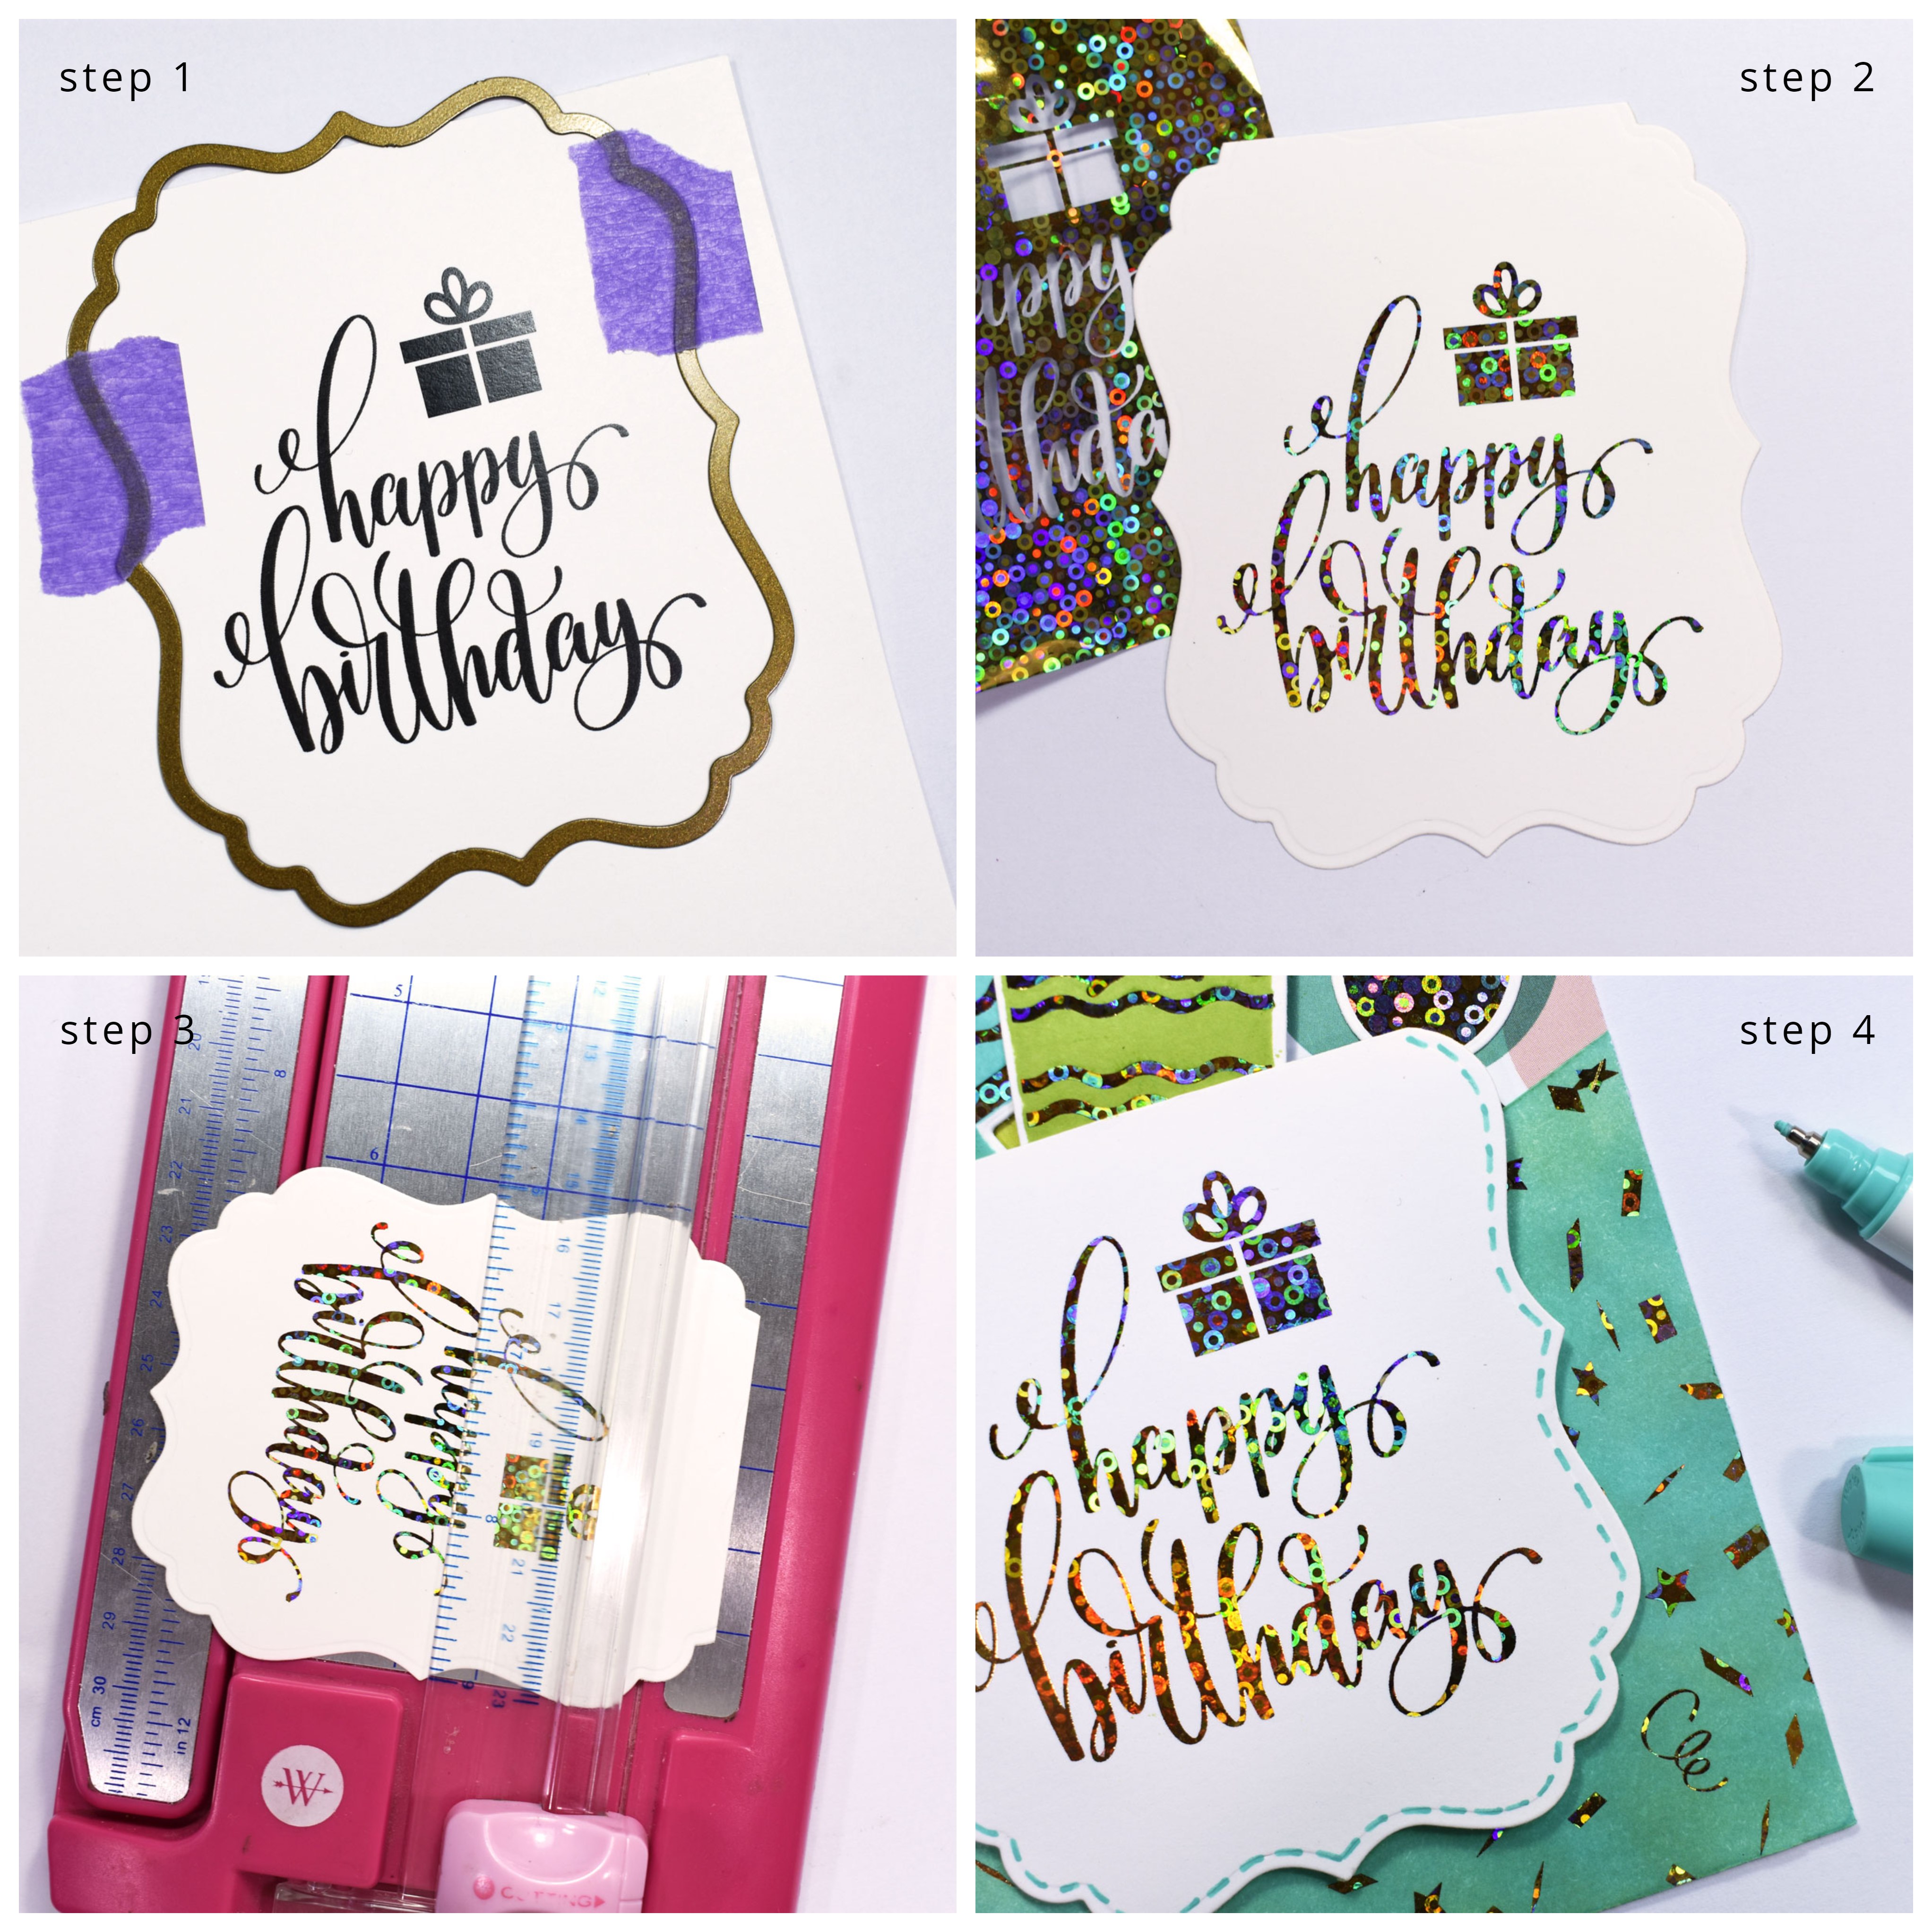
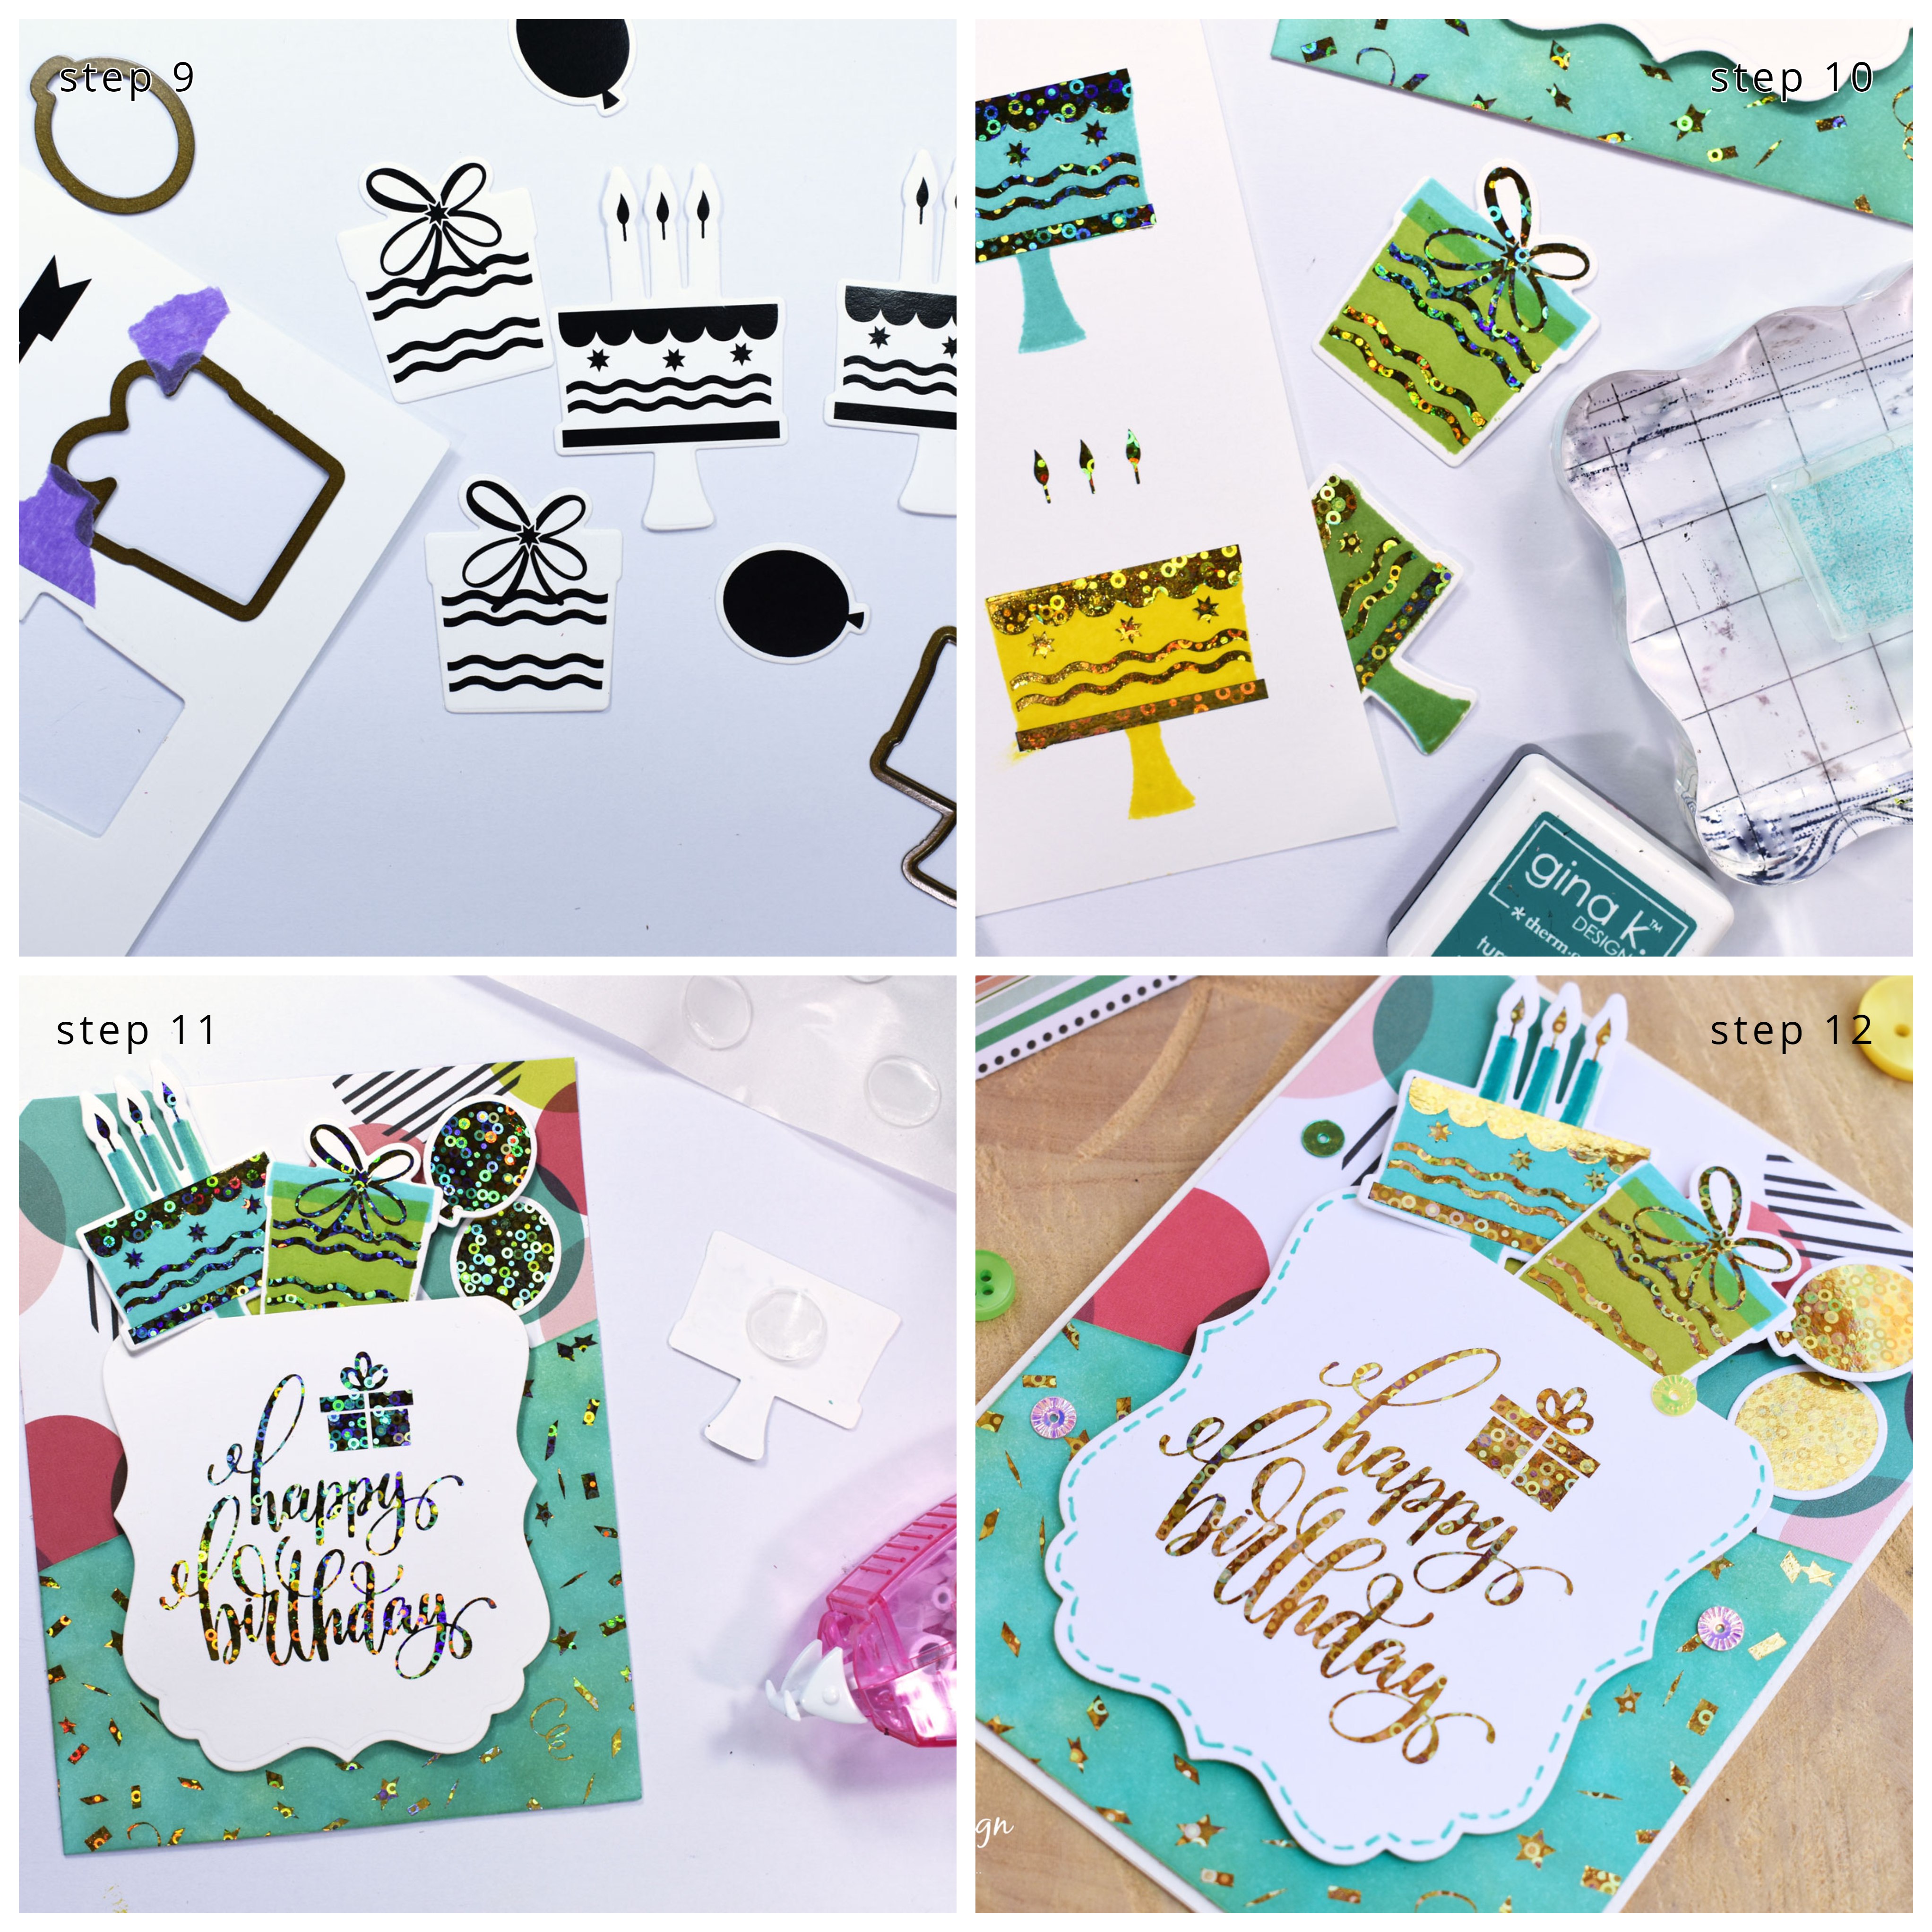
 Step 9. Use the Time to Celebrate Die Set to cut some embellishments from the coordinating Foil-Mates Detail Sheet. Just place each die on the coordinating image and secure with Purple Tape to then be able to run the sheet through your die cutting machine.
Step 10. Stamp all the die cut embellishments using the coordinating Time to Celebrate clear Stamp Set and Premium Dye Inks to add color to each piece. Next, repeat step 2, to foil all the die cut embellishments.
Step 11. Attach all the Stamp'nFoil die cuts to the card panel using 3D Zots and XL Tape Runner, sliding each piece inside the Decorative Label pocket.
Step 12. Adhere the background to a white card base using XL Tape Runner.
Step 9. Use the Time to Celebrate Die Set to cut some embellishments from the coordinating Foil-Mates Detail Sheet. Just place each die on the coordinating image and secure with Purple Tape to then be able to run the sheet through your die cutting machine.
Step 10. Stamp all the die cut embellishments using the coordinating Time to Celebrate clear Stamp Set and Premium Dye Inks to add color to each piece. Next, repeat step 2, to foil all the die cut embellishments.
Step 11. Attach all the Stamp'nFoil die cuts to the card panel using 3D Zots and XL Tape Runner, sliding each piece inside the Decorative Label pocket.
Step 12. Adhere the background to a white card base using XL Tape Runner.
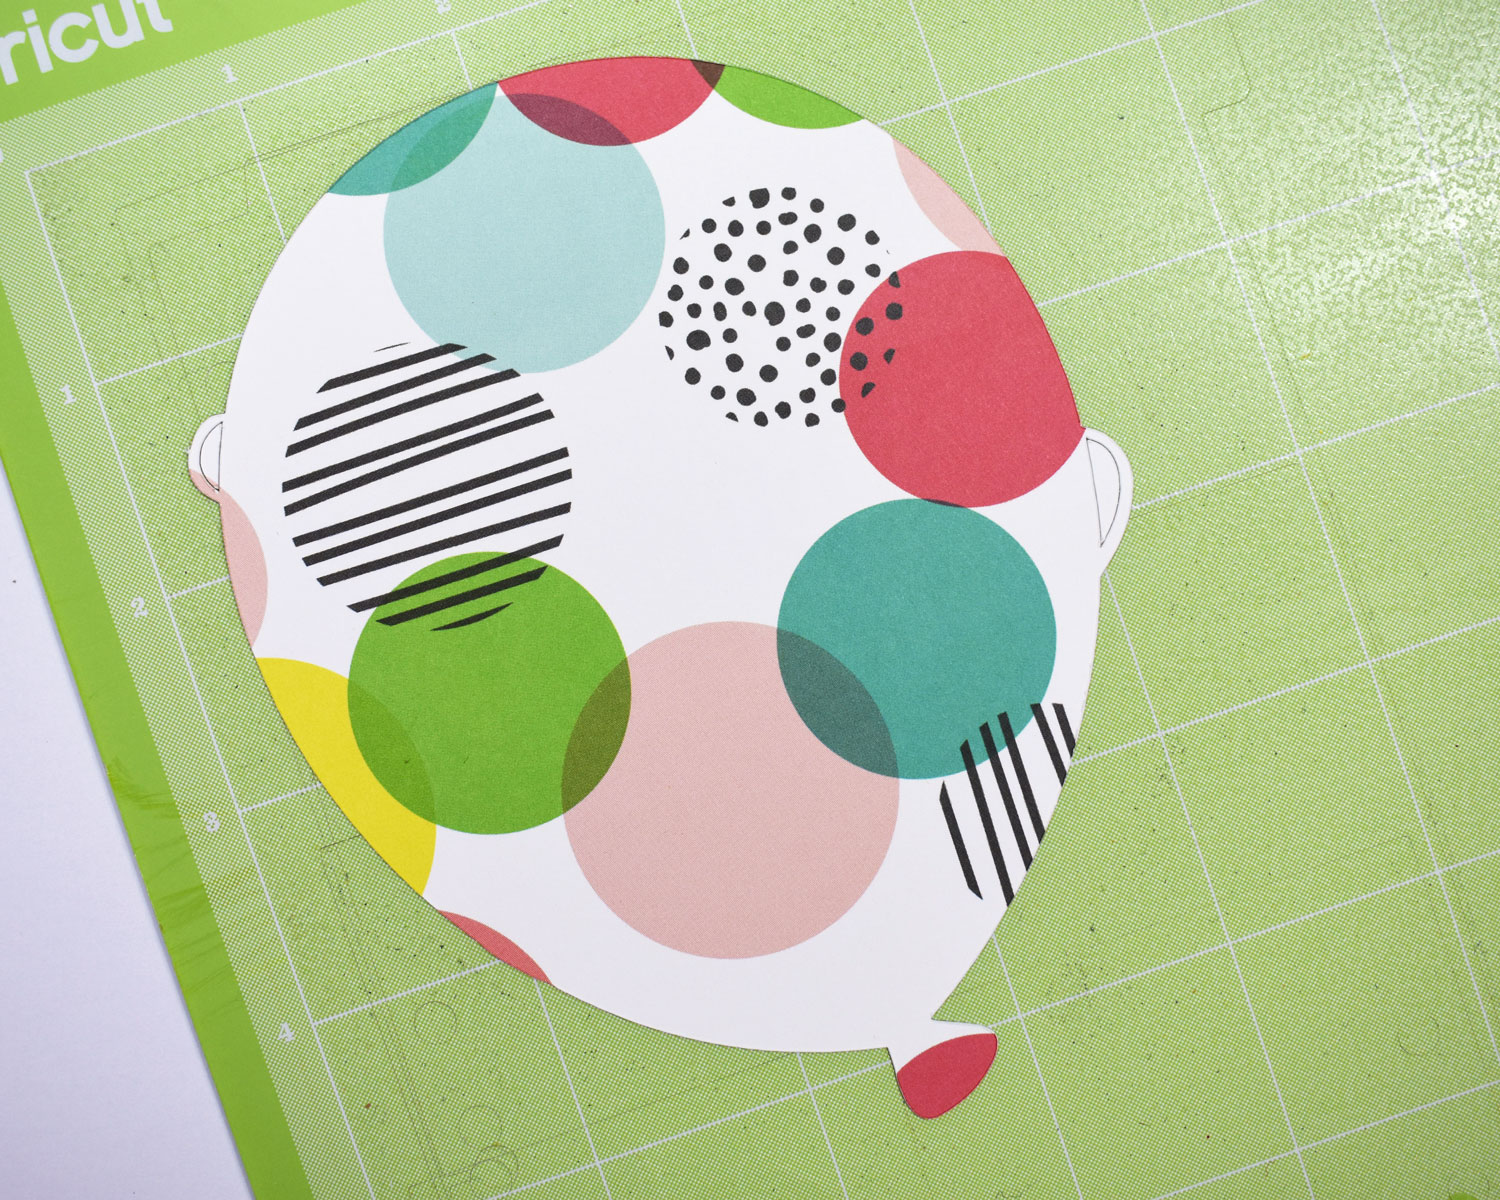
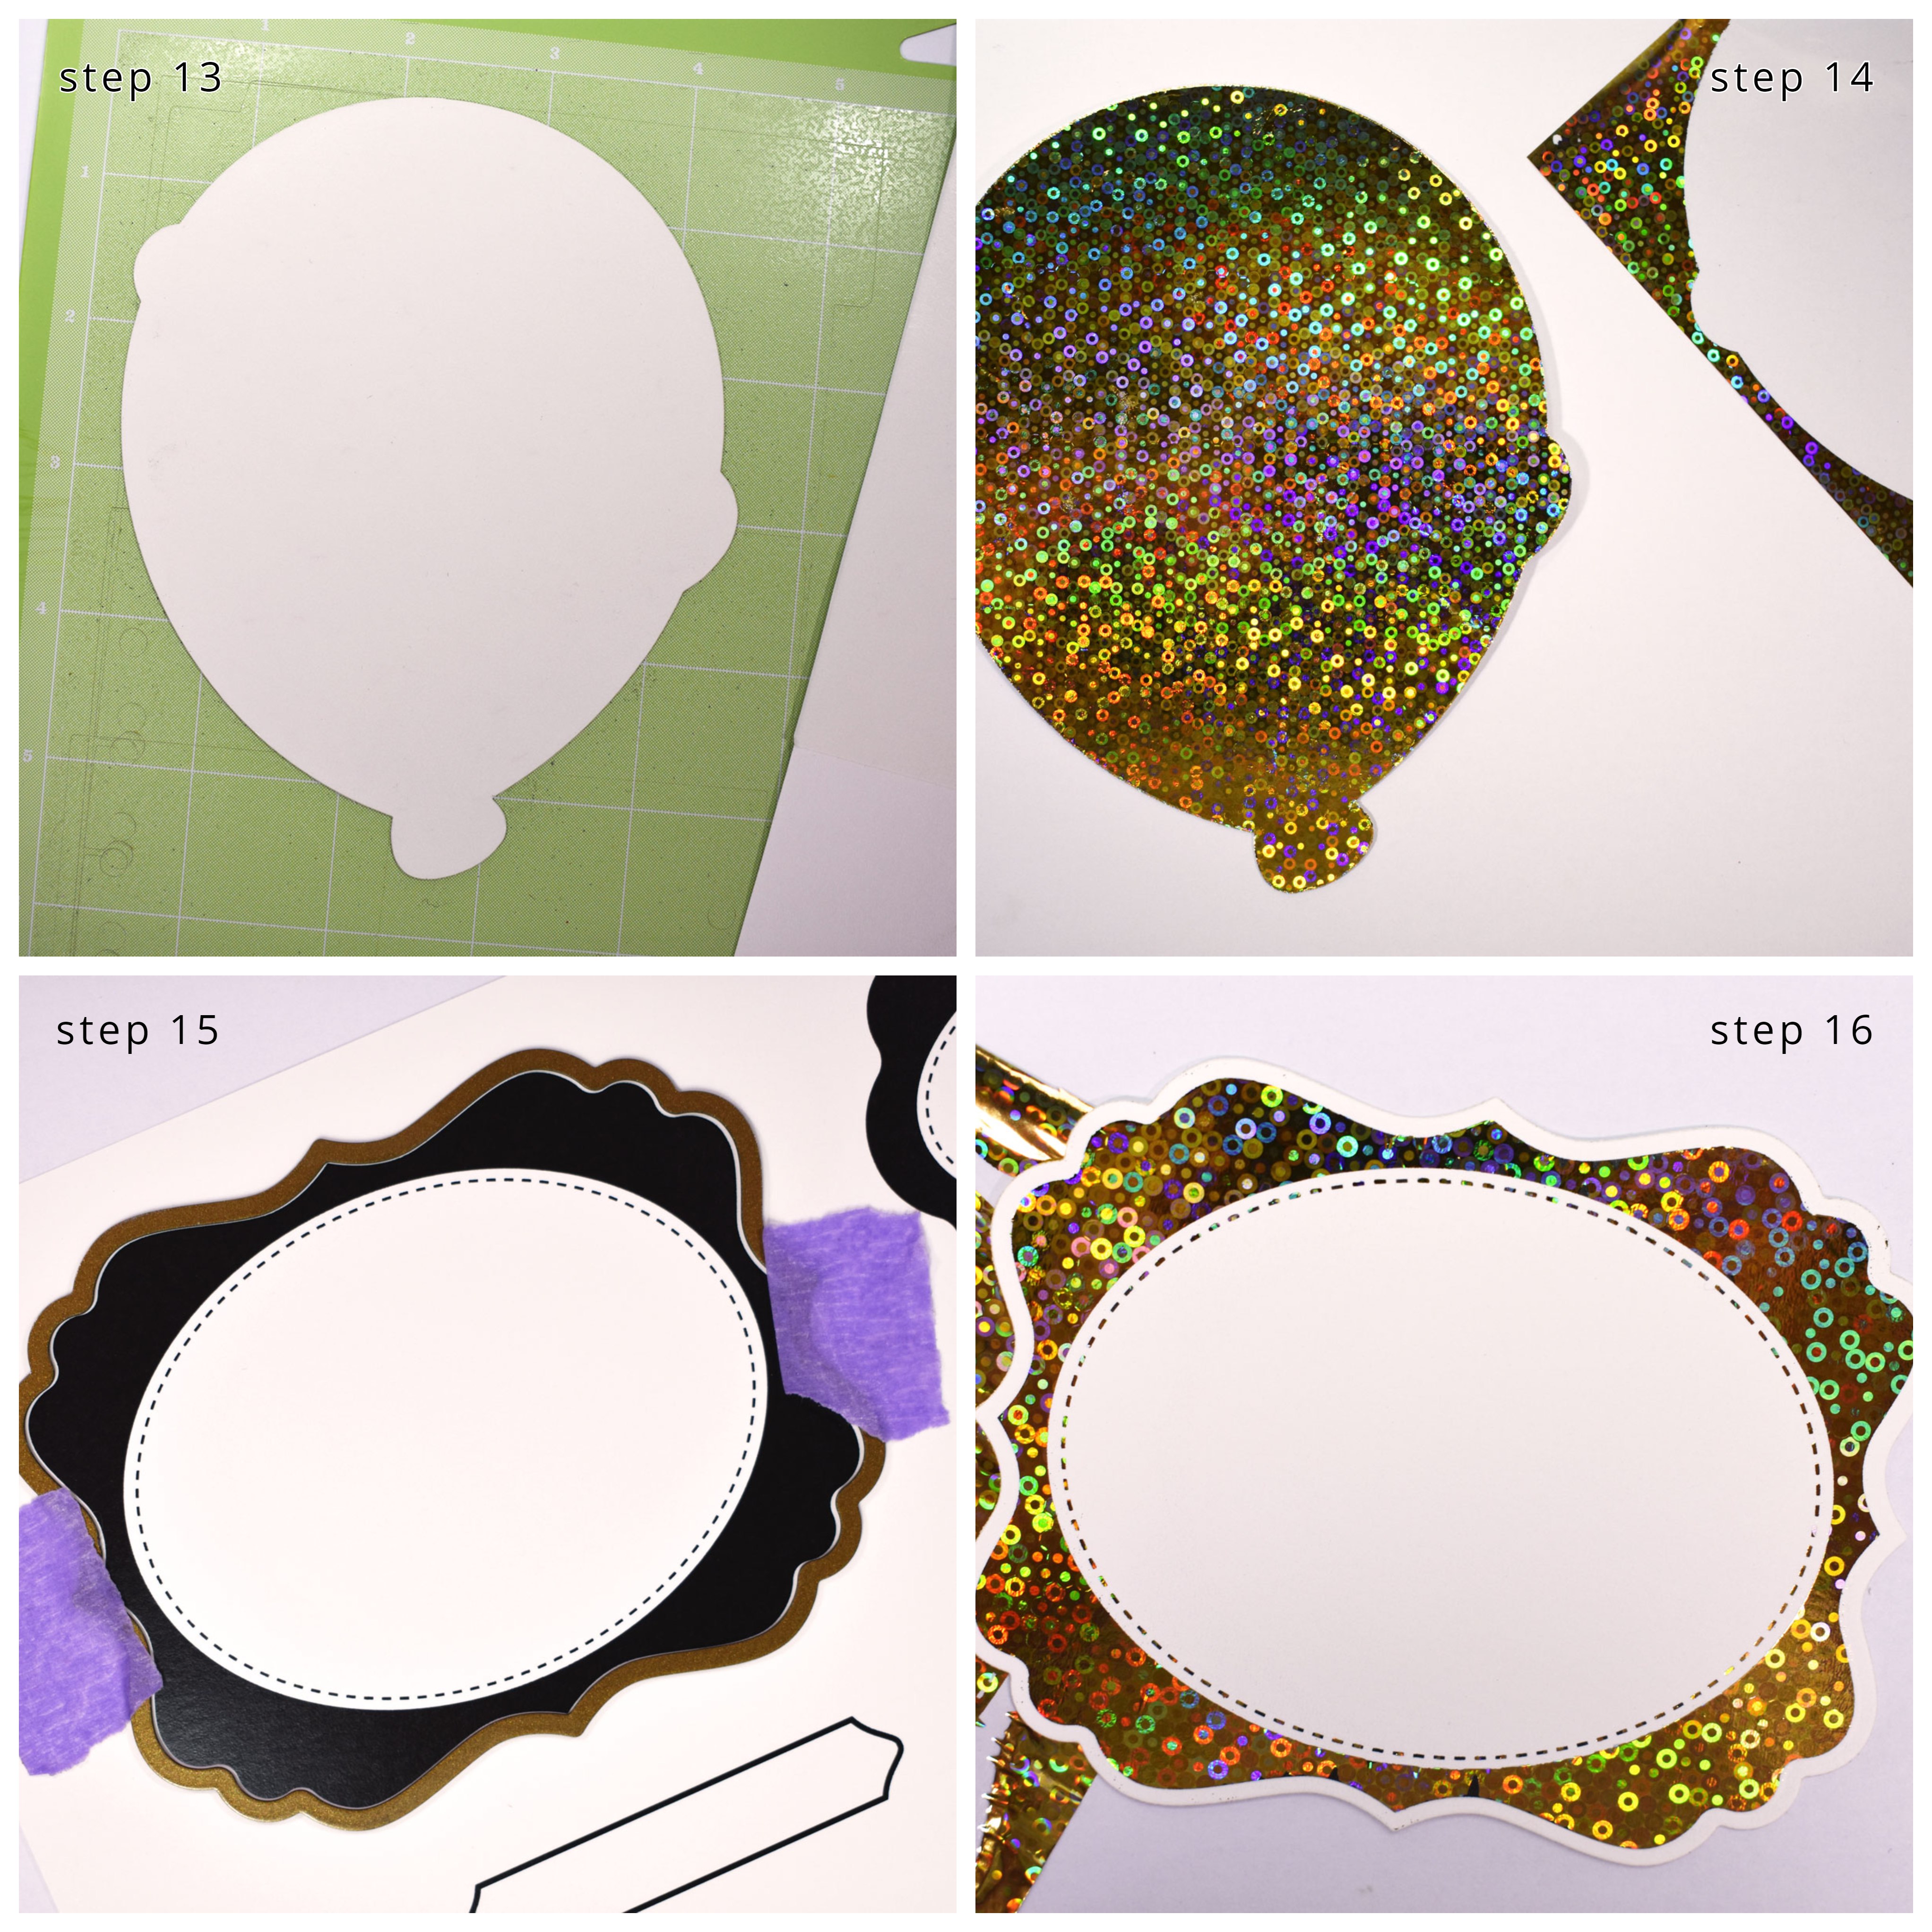 Optional: Cut a matting balloon shape in a slightly smaller size from patterned paper.
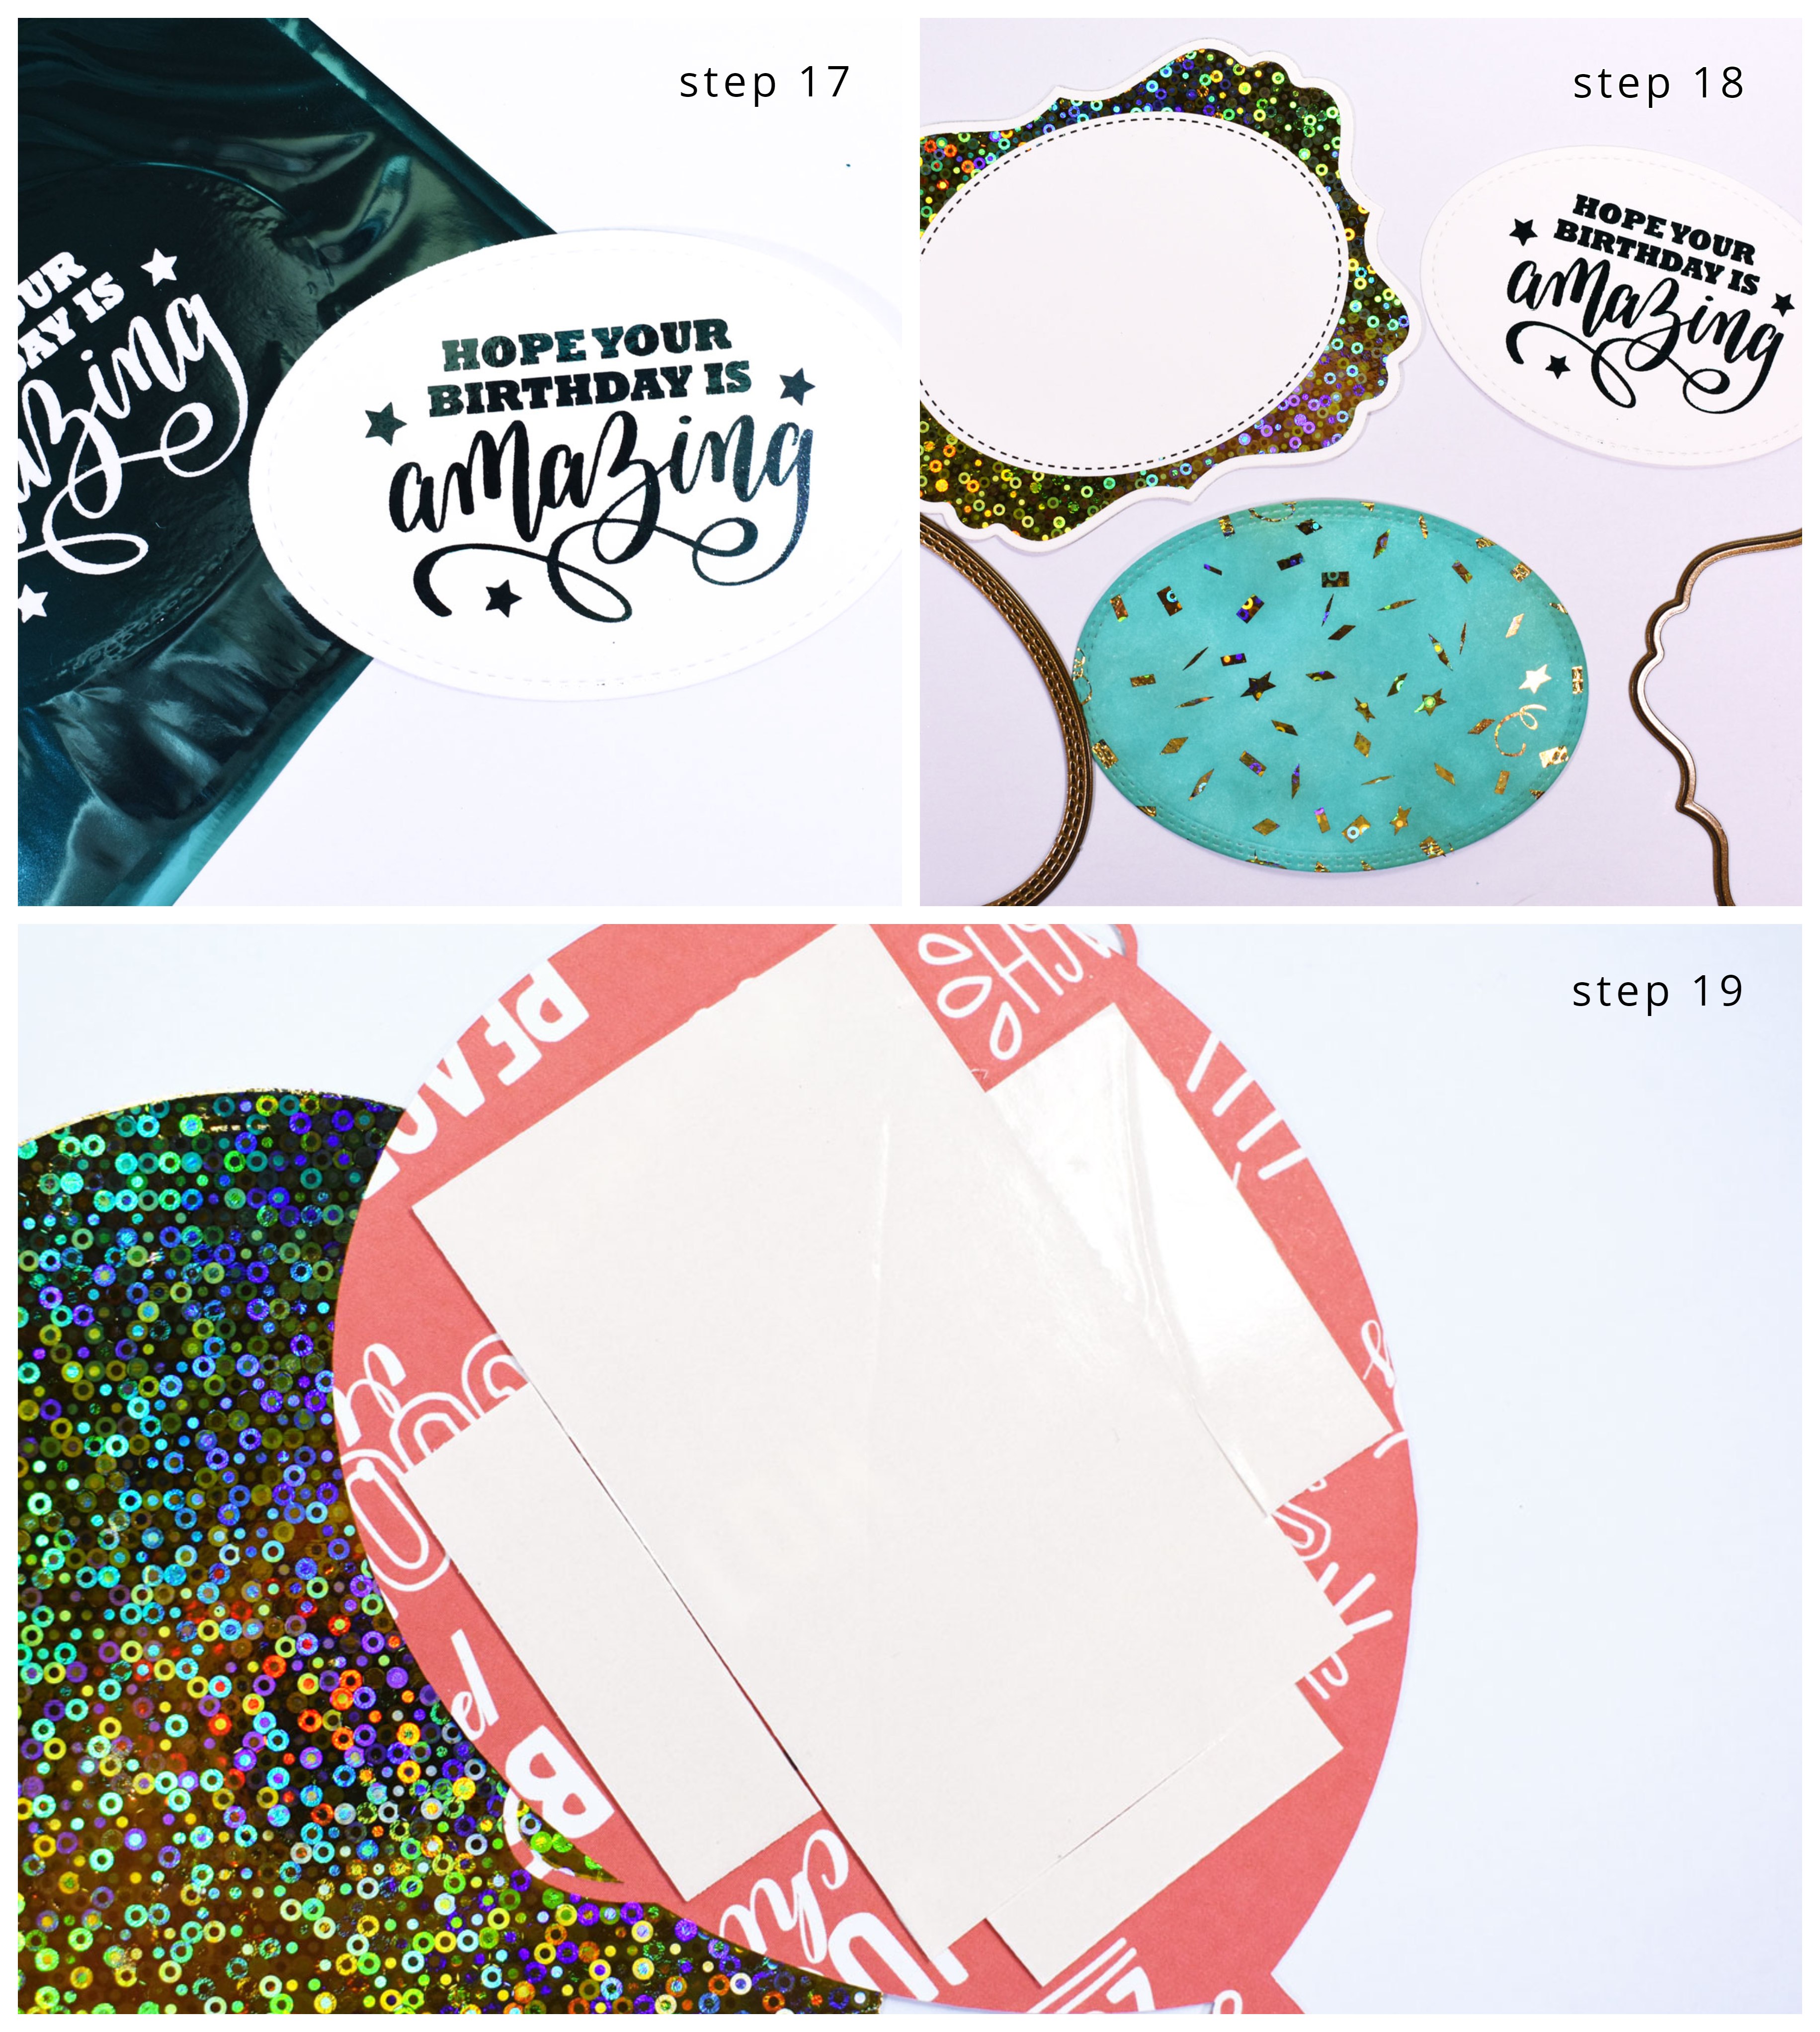
 Step 17. Foil another Foil-Mates sentiment from the Birthday Bash pack using a Turquoise Sea Fancy Foil Transfer Sheet and cut it with a Single Stitch Design Oval Die using your die cutting machine.
Step 18. Die cut a matting oval from the same inked Foil-Mates Background used on step 6, using the Double Stitch Design set.
Step 19. Attach all the balloon and label cuts to the front of a small gift bag using Deco Foil Foam Adhesive sheets cut into pieces.
Step 17. Foil another Foil-Mates sentiment from the Birthday Bash pack using a Turquoise Sea Fancy Foil Transfer Sheet and cut it with a Single Stitch Design Oval Die using your die cutting machine.
Step 18. Die cut a matting oval from the same inked Foil-Mates Background used on step 6, using the Double Stitch Design set.
Step 19. Attach all the balloon and label cuts to the front of a small gift bag using Deco Foil Foam Adhesive sheets cut into pieces.
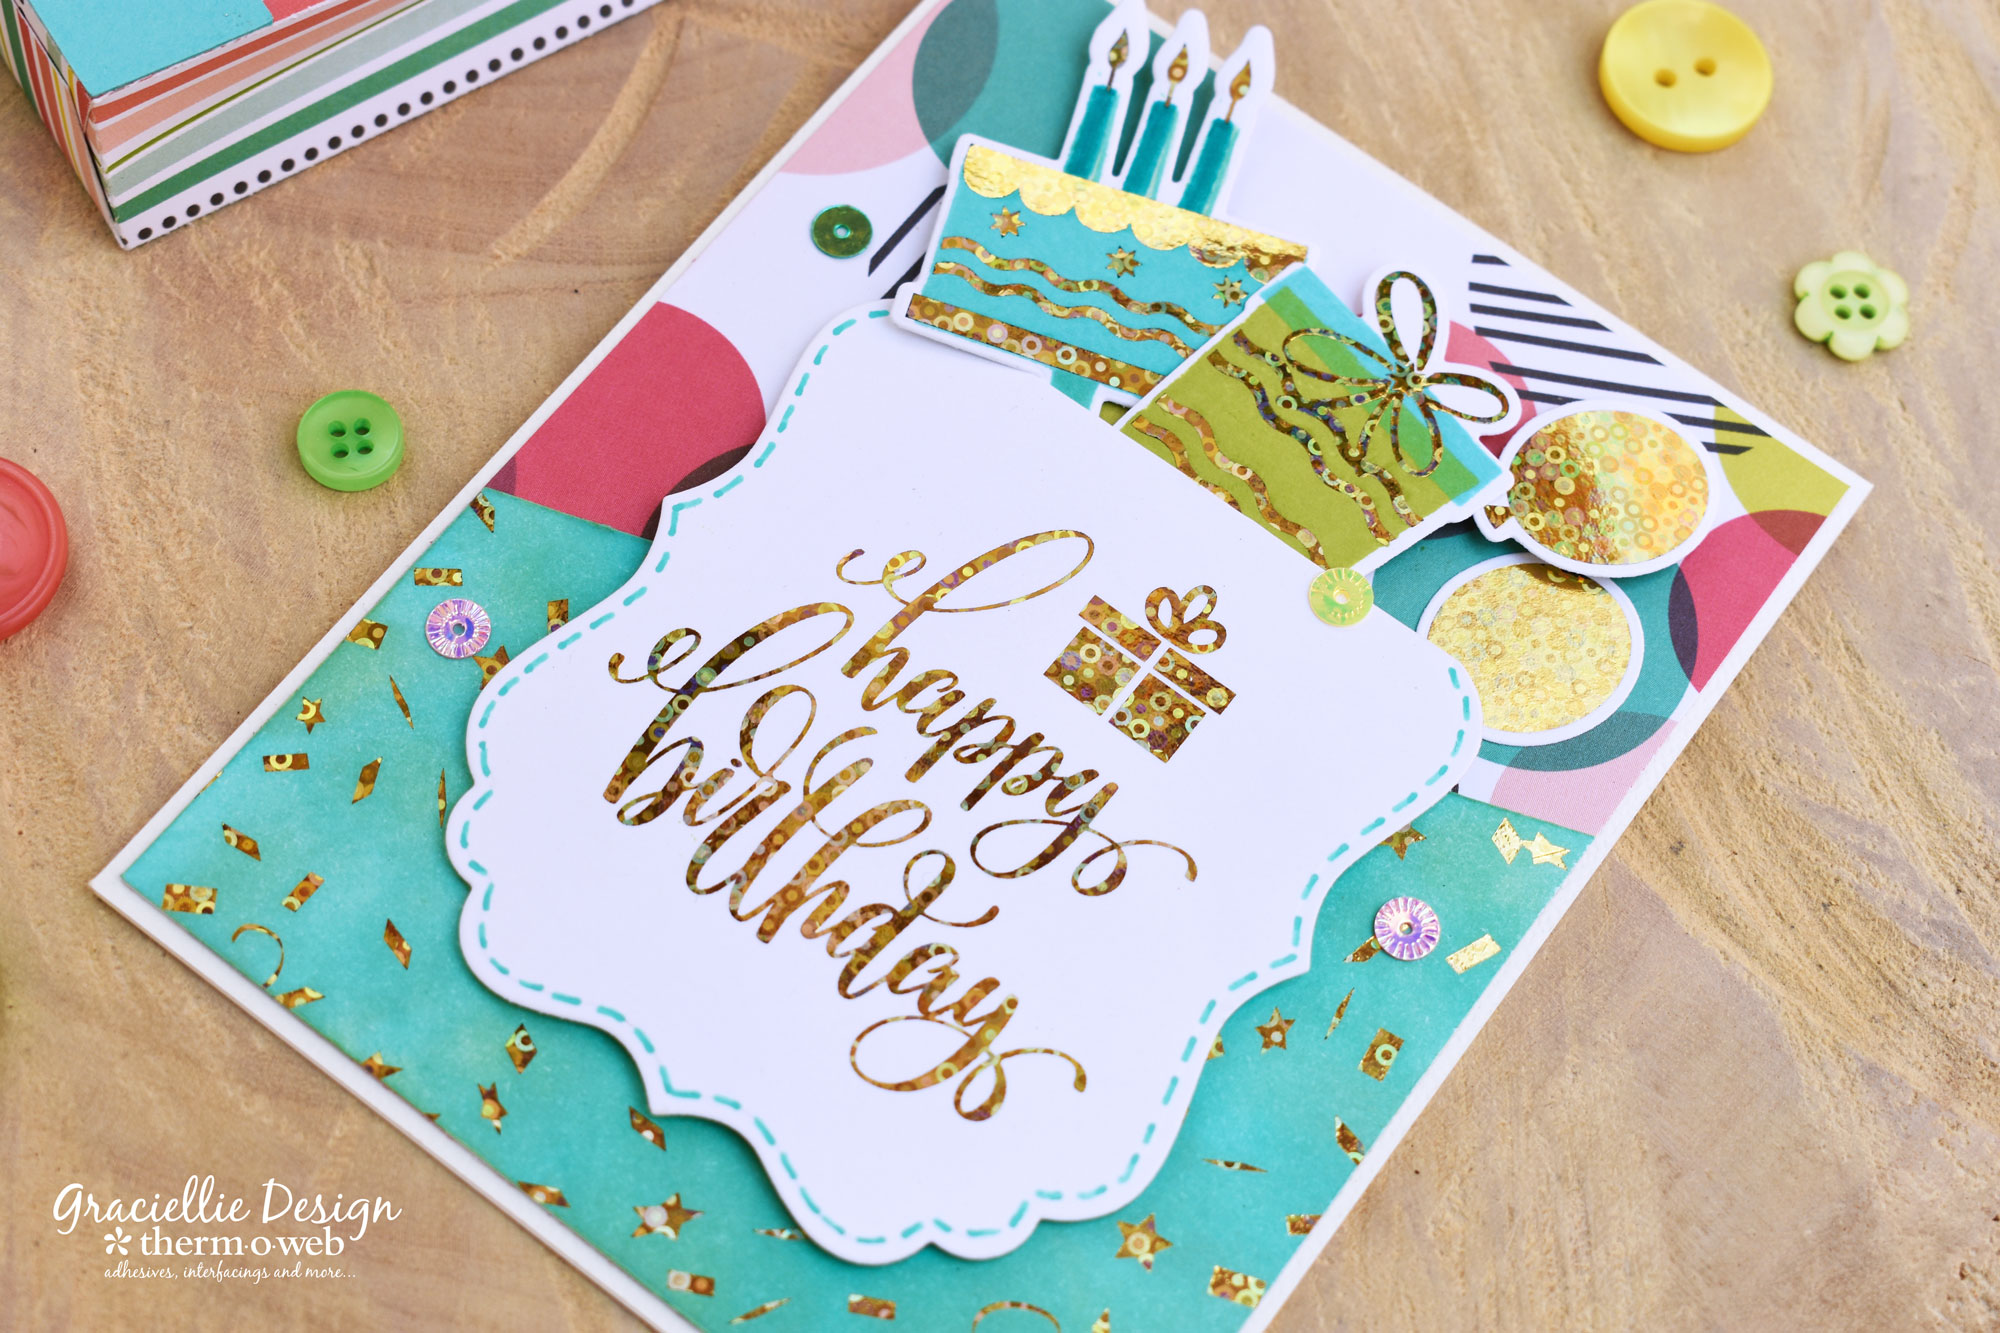
 As an optional step, you may add more embellishments to your card such as sequins or enamel dots. TIP: Mixed Media Adhesive works perfectly with sequins!
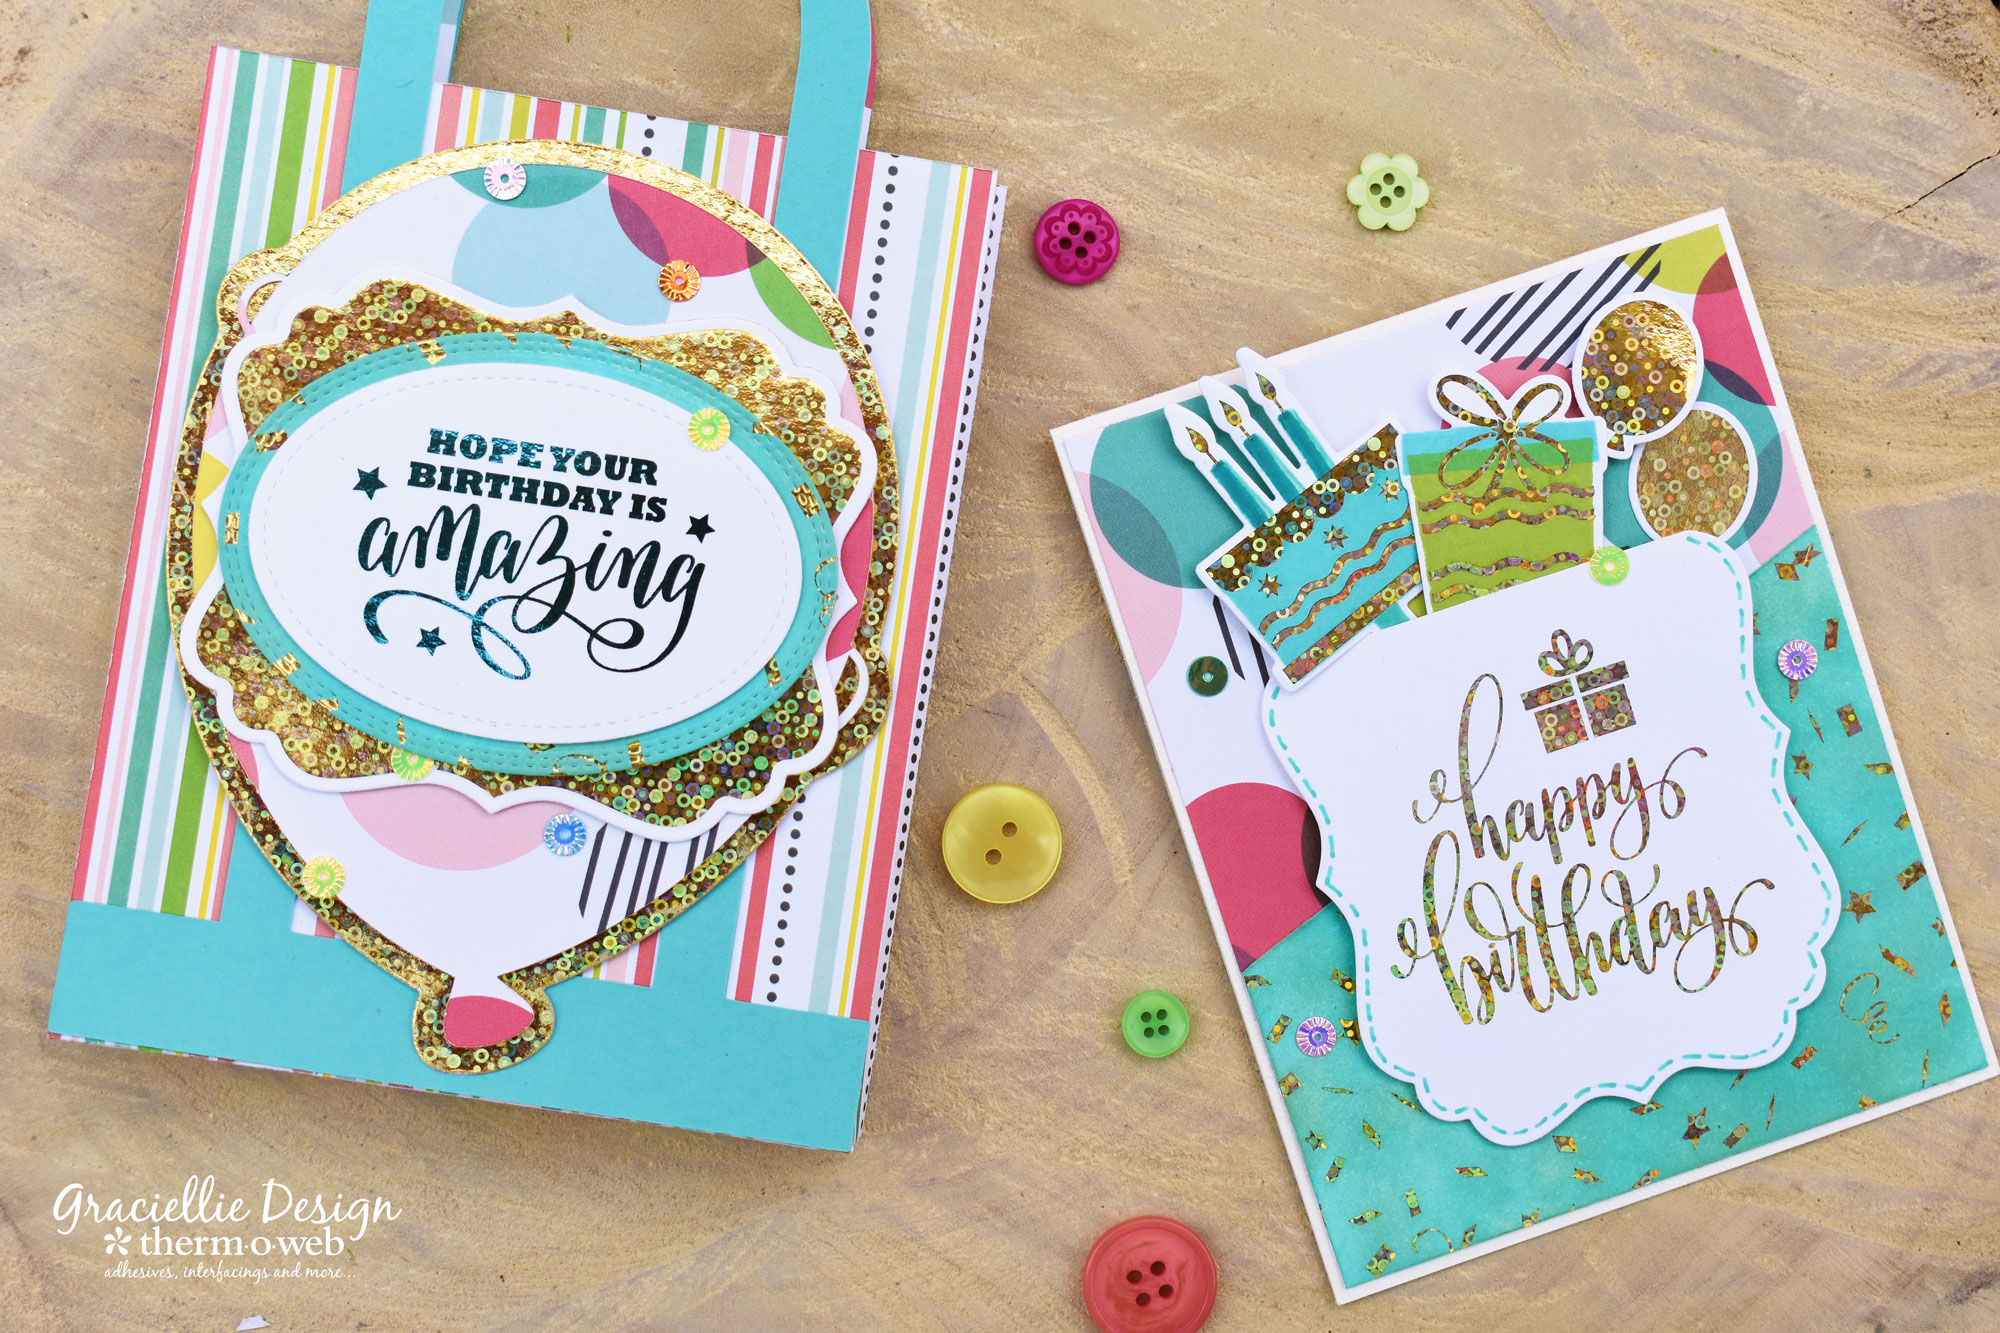 That's all for today! Hope you love today's project ideas using the new Gina K. Designs Birthday Bash and Label Border Foil-Mates. Make sure to subscribe to Therm O Web's blog and follow us on Instagram for many more creative ideas!
Thanks so much for stopping by today! Don't forget to use hashtags #ginakdesigns, #thermoweb and #decofoil so we can find you online!
To get yourself entered to win this fun prize...
That's all for today! Hope you love today's project ideas using the new Gina K. Designs Birthday Bash and Label Border Foil-Mates. Make sure to subscribe to Therm O Web's blog and follow us on Instagram for many more creative ideas!
Thanks so much for stopping by today! Don't forget to use hashtags #ginakdesigns, #thermoweb and #decofoil so we can find you online!
To get yourself entered to win this fun prize...
 Click here!