No Products in the Cart
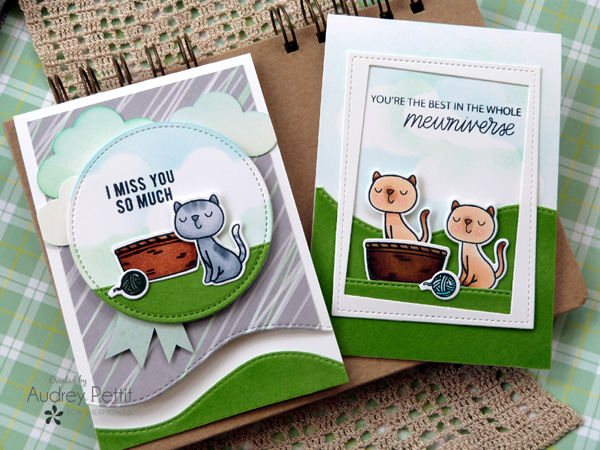 This week, our friends at Heffy Doodle Stamps are joining with us for a fun week of inspiration, project ideas, and some awesome giveaways, too. Join me today as I share a pair of quick and easy friendship cards featuring some adorable cats and puny sentiments mixed with soft, velvety background accents made with Therm O Web's Deco Foil Flock transfer sheets.
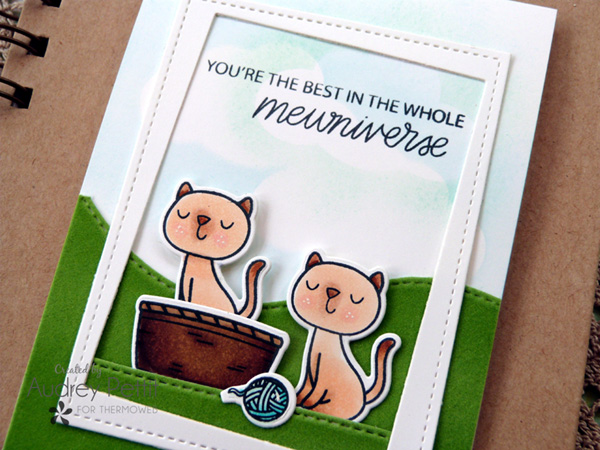
 Mewniverse Card
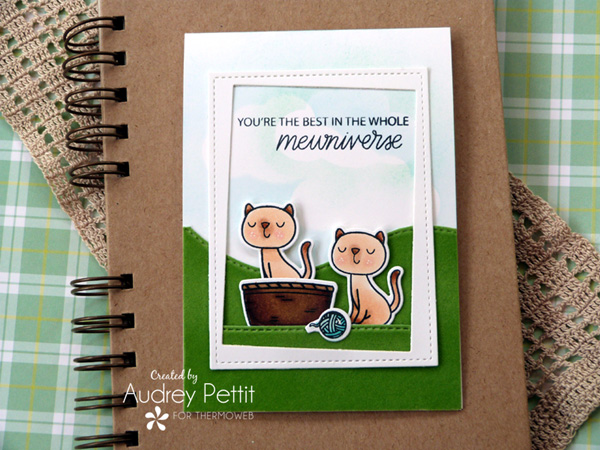
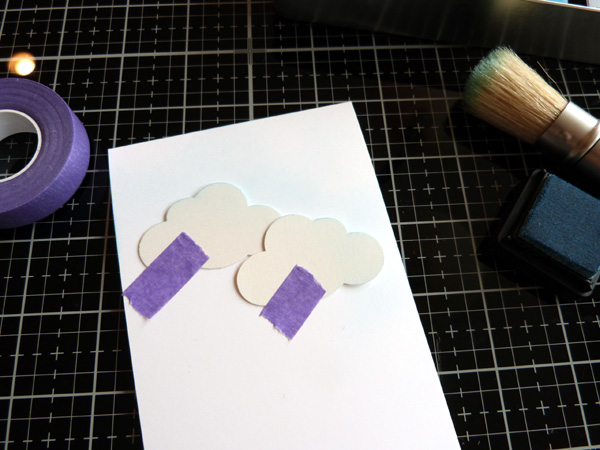 Create a 3.5" x 5" card base from Luxury White cardstock. Punch several clouds from scrap cardstock. Place the clouds onto the front of the card, overlapping them slightly, and holding them temporarily in place with Purple Tape. Apply light blue Distress ink over the cloud stencils using a stencil brush. Move the tape around as needed to get all the way around the images. Shift the clouds to a new area, tape them in place again, and apply light green ink using the stencil brush.
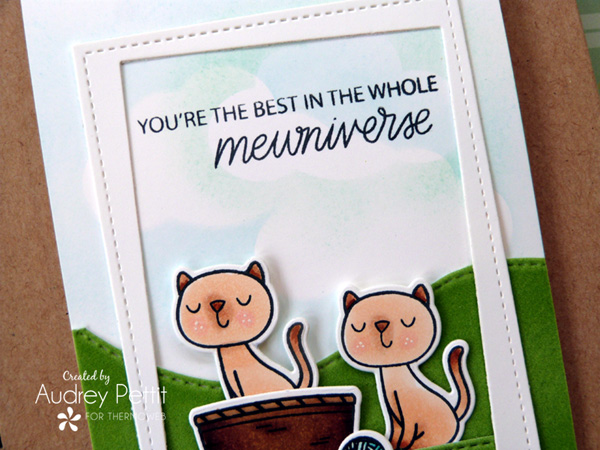
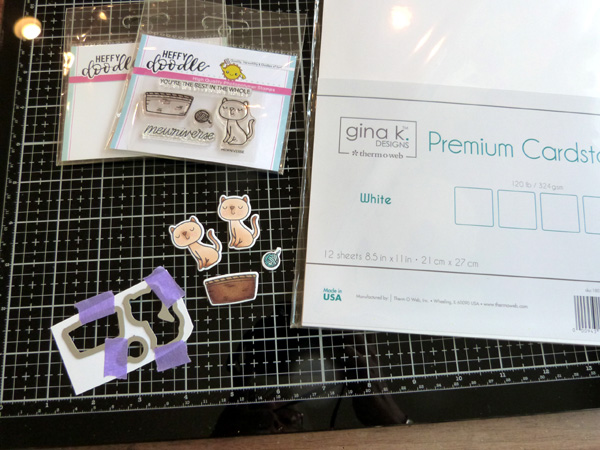
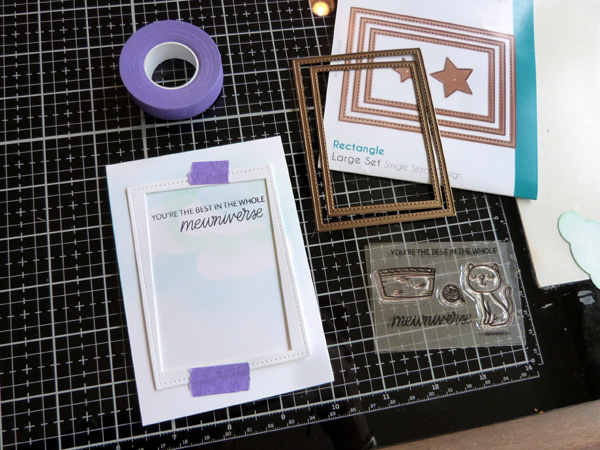 Nestle the two largest shapes from the Stitched Rectangle Large die set, placing the inner die at a slight angle. Hold the dies together with Purple Tape, and die cut the frame from Luxury White cardstock. Place the frame onto the center of the card, and hold it temporarily in place with the Purple Tape. Stamp the sentiment at the top of the frame in black ink.
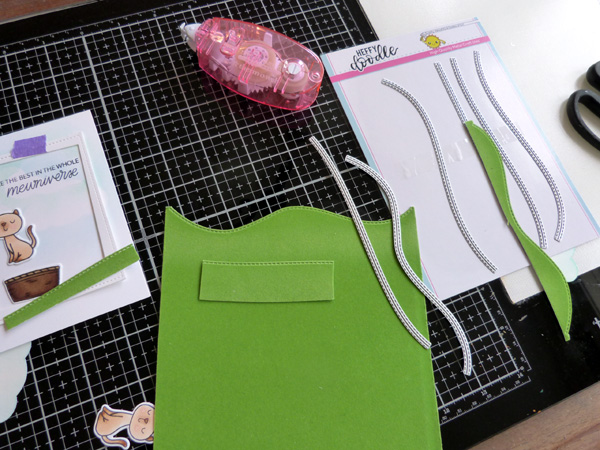 Die cut several sections of Green Envy Flock transfer sheet with the Heffy Doodle stitched border dies. You'll need a smaller section to fit the bottom of the frame, and a larger section to fit the background of the card. Save the leftover pieces to use on the next project.
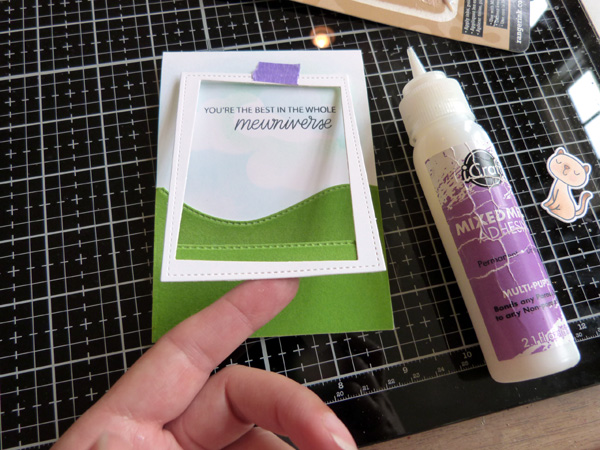 Adhere the larger hill section to the bottom of the card using XL Memory Tape Runner, and then trim the sides and bottom as needed. Apply a thin line of Mixed Media Adhesive to the back bottom edge of the frame, and adhere the smaller flock piece in place. Trim the edges as needed.
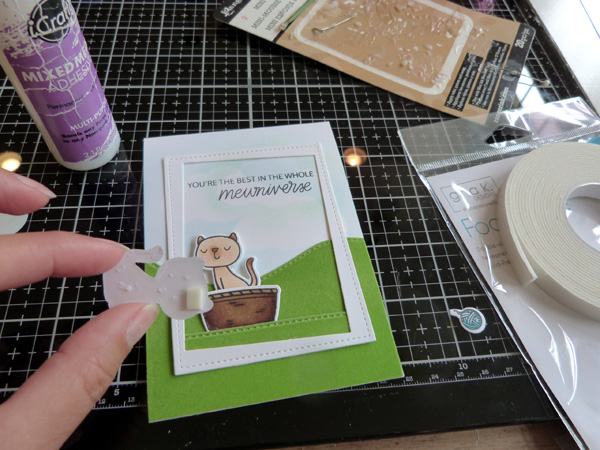 Apply more Mixed Media Adhesive to the back of the frame, and adhere the frame to the card base. Add the die cut images to the scene using a mixture of Mixed Media Adhesive and GinaK Designs Foam Tape.
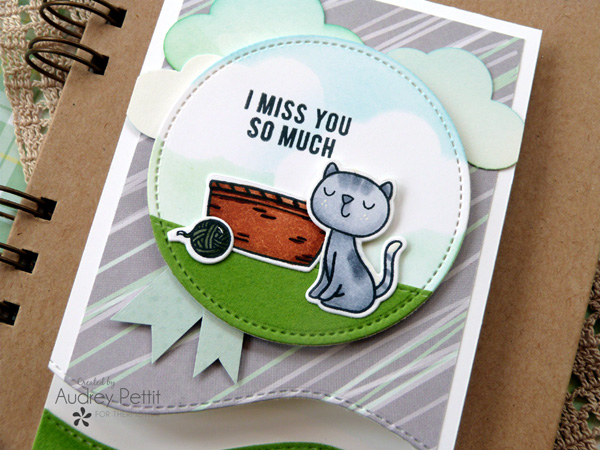
 The second card uses many of the same elements but steps the design up a bit with the addition of some patterned paper.

 Miss You Card
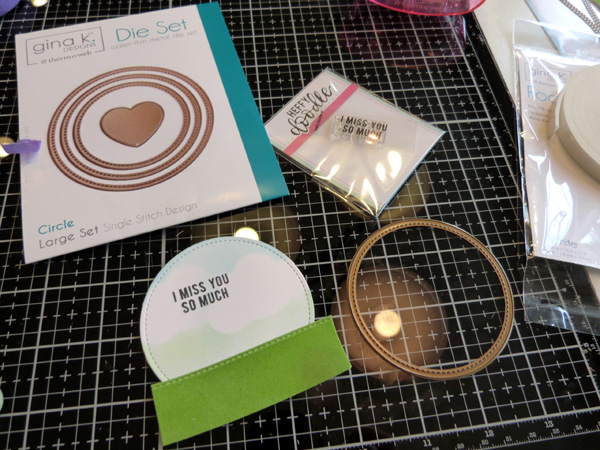
 Place the circle die back onto the die cut, shifting the shape around until it locks back into place. Hold the die with Purple Tape, and run the circle through your die cutting machine.
 Create another 3.5" x 5" card base from Luxury White cardstock, and layer it with a panel of patterned paper. Tape a curvy border die across the bottom of the card. Open up the card, and run it through your die cutting machine. Add a section of Green Envy Flock sheet along the bottom edge of the inside of the card, matching up the curves.
Adhere the cloud punch shapes to the top of the card, trimming off the edges as needed. Adhere the stamped images to the die cut circle using Mixed Media Adhesive and foam tape. Trim little banner strips from patterned paper, and adhere them to the bottom of the circle. Apply foam tape to the back of the circle, and adhere it to the card.
Create another 3.5" x 5" card base from Luxury White cardstock, and layer it with a panel of patterned paper. Tape a curvy border die across the bottom of the card. Open up the card, and run it through your die cutting machine. Add a section of Green Envy Flock sheet along the bottom edge of the inside of the card, matching up the curves.
Adhere the cloud punch shapes to the top of the card, trimming off the edges as needed. Adhere the stamped images to the die cut circle using Mixed Media Adhesive and foam tape. Trim little banner strips from patterned paper, and adhere them to the bottom of the circle. Apply foam tape to the back of the circle, and adhere it to the card.
 Enjoy!
Thanks so much for stopping by today! I can't wait to see what you create with Deco Foil Flock Transfer Sheets and Heffy Doodle Stamps!
Enjoy!
Thanks so much for stopping by today! I can't wait to see what you create with Deco Foil Flock Transfer Sheets and Heffy Doodle Stamps!
 If you create something we hope you’ll share with us on Social Media using the #Hashtag #decofoil, #thermoweb as we LOVE to see what you create!! Be sure to stop by the Heffy Doodle Blog as well as their social media during this week for more chances to win!
Speaking of chances to win...we have one right here for you to enter. The more steps you do...the more chances for you to win with us! You can pick your own prize too...so select from our Deco Foil products, Gina K. Designs and so much more!
a Rafflecopter giveaway
If you create something we hope you’ll share with us on Social Media using the #Hashtag #decofoil, #thermoweb as we LOVE to see what you create!! Be sure to stop by the Heffy Doodle Blog as well as their social media during this week for more chances to win!
Speaking of chances to win...we have one right here for you to enter. The more steps you do...the more chances for you to win with us! You can pick your own prize too...so select from our Deco Foil products, Gina K. Designs and so much more!
a Rafflecopter giveaway