No Products in the Cart
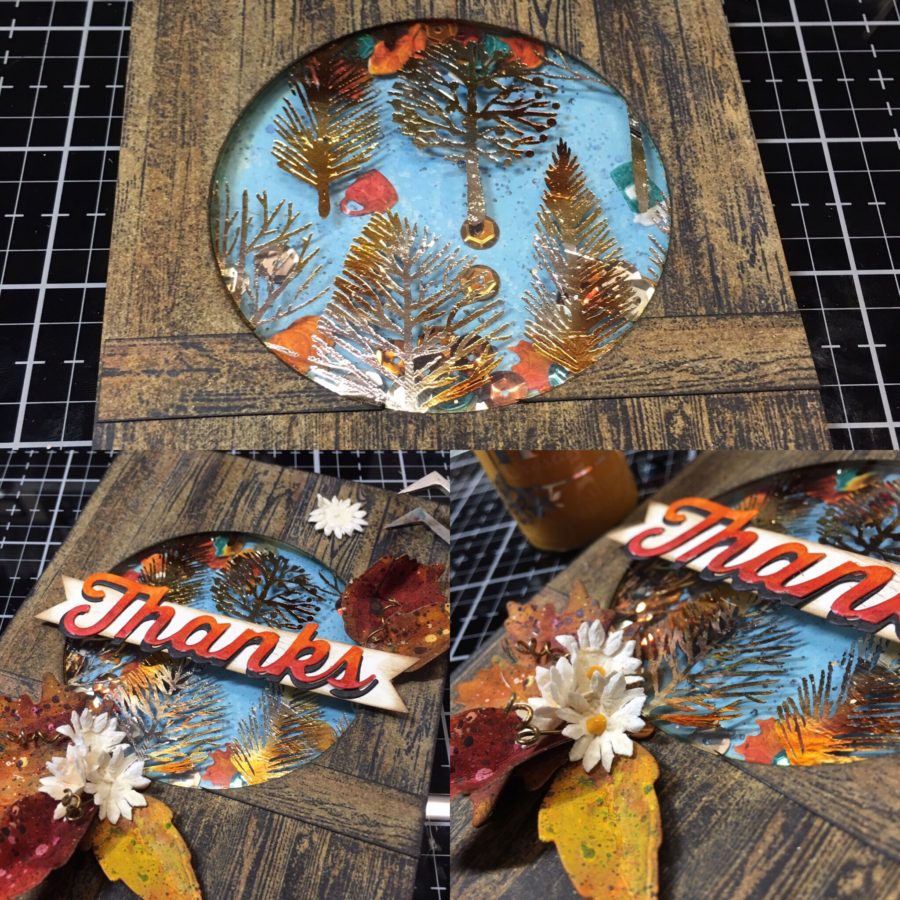
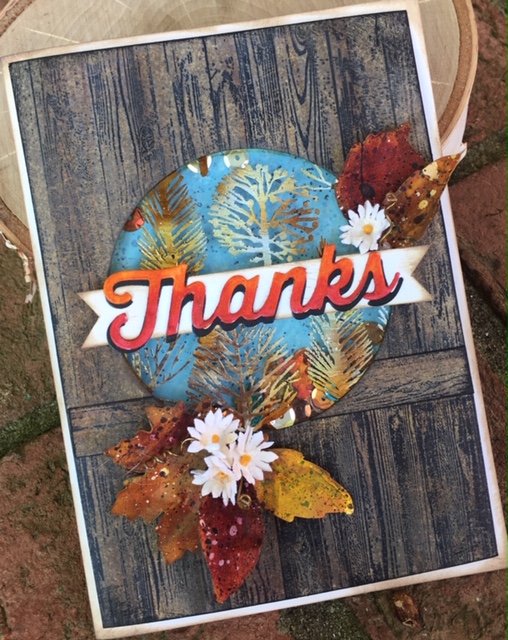
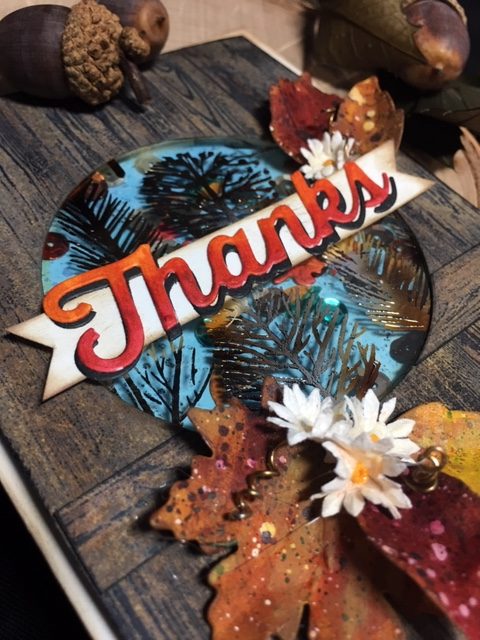
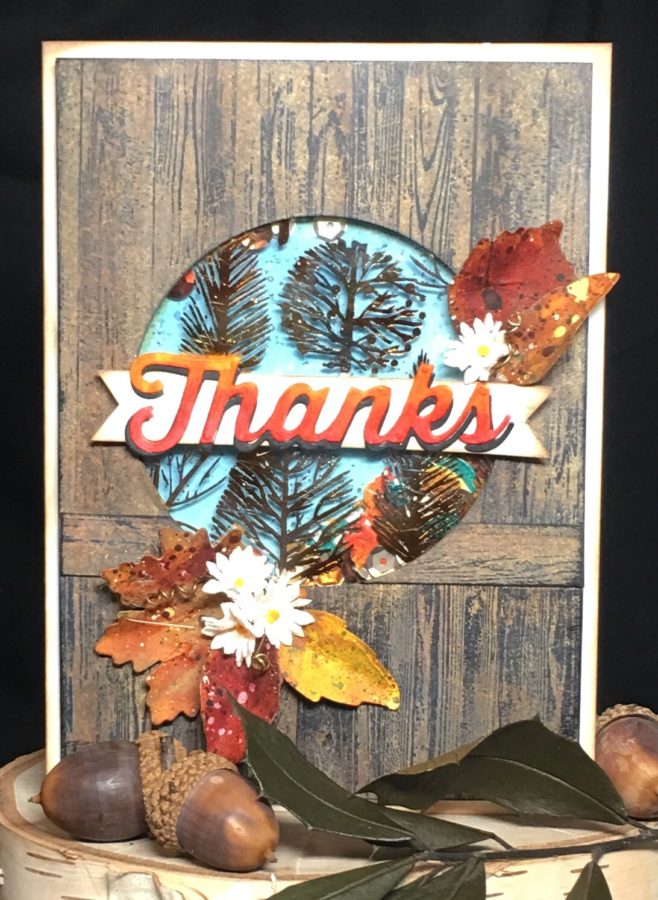 Barn Door Thank You Shaker Card with Joy Clair and Deco Foil
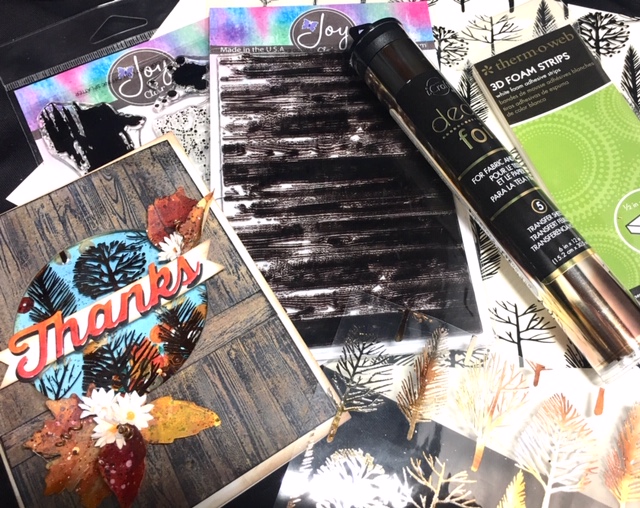 Other supplies: cardstock, foiling machine, black Ink, Distress Oxide Inks, Distress Inks, Distress Markers, paper flowers, die-cut Sentiment, sequins and other shaker bits, Nuvo Drops and wire.
 Step Two:
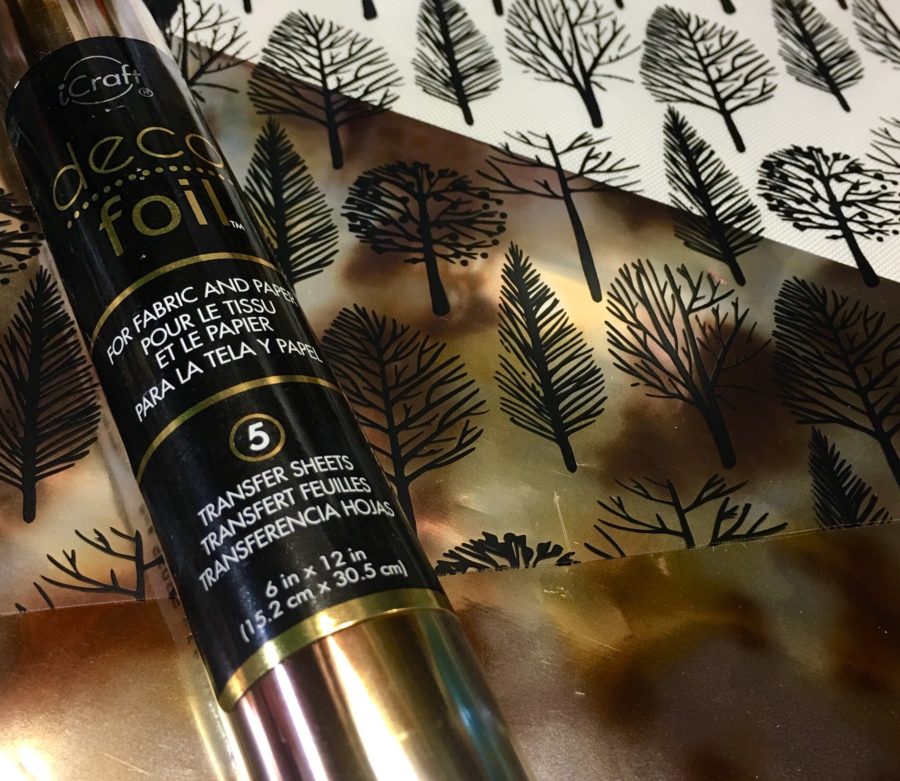
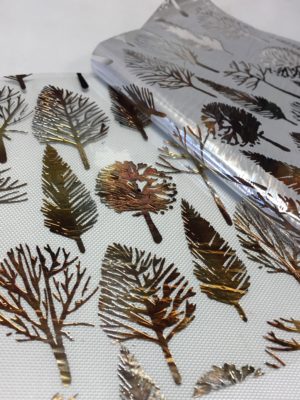
Using the Amber Watercolor Deco Foil Transfer Sheets, foil the Wilderness Clear Toner Sheet. Lay the Foil Transfer Sheet shiny side up onto the printed side of the Clear Toner Sheet (if you can't see the difference, rub your finger over the surface . . . you can feel the raised image on the printed side), insert in the carrier and run through foil machine.
Hint: Don't throw away the negative foil sheet (see my previous post here to see what you can do with it!).
Step Two:
Using the Amber Watercolor Deco Foil Transfer Sheets, foil the Wilderness Clear Toner Sheet. Lay the Foil Transfer Sheet shiny side up onto the printed side of the Clear Toner Sheet (if you can't see the difference, rub your finger over the surface . . . you can feel the raised image on the printed side), insert in the carrier and run through foil machine.
Hint: Don't throw away the negative foil sheet (see my previous post here to see what you can do with it!).
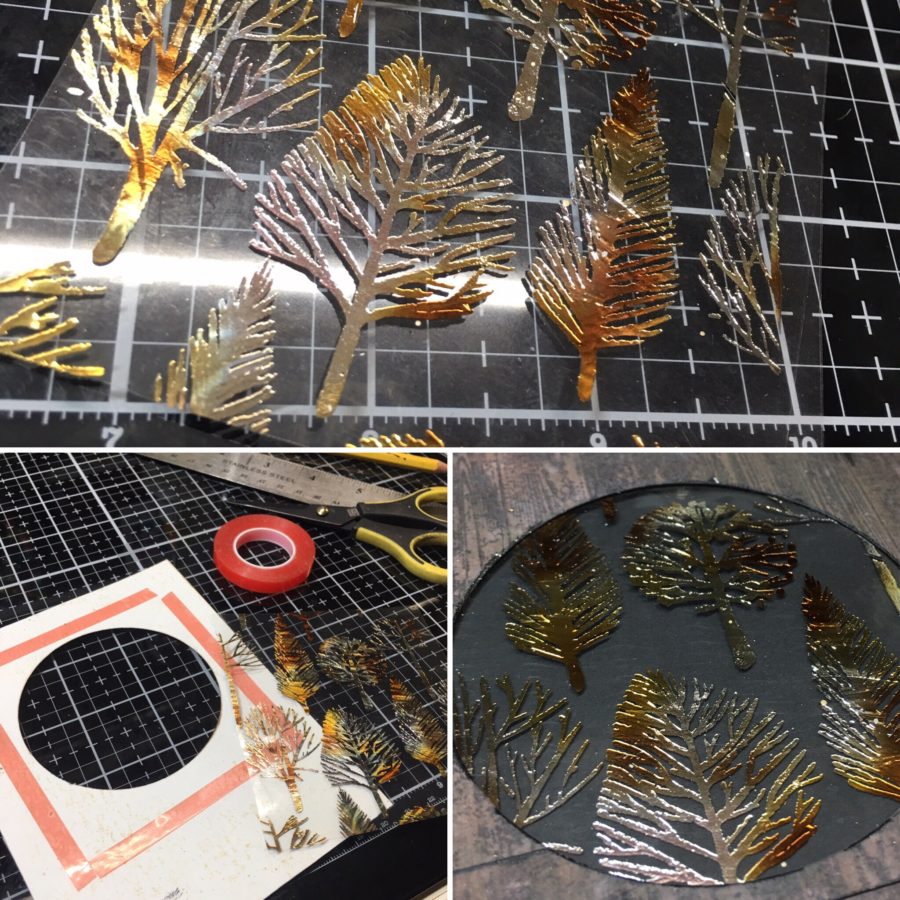
 Step Three:
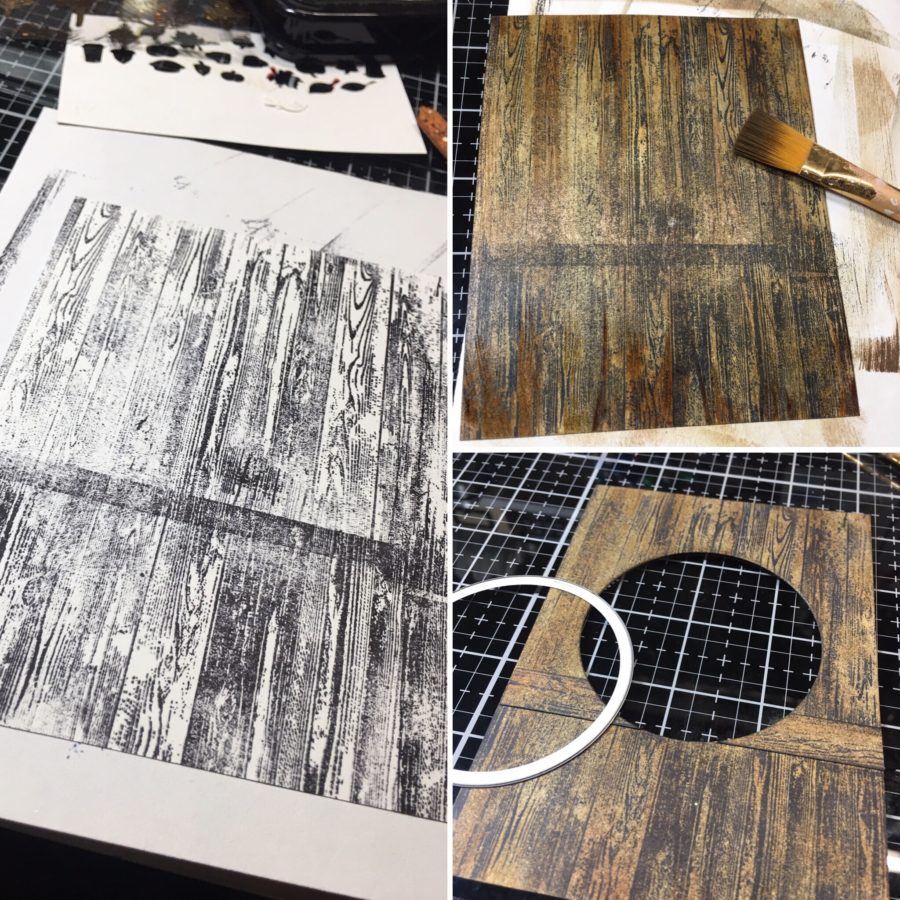
Cut your foiled Clear Toner Sheet down to about 1/4" (on all sides) larger than the die-cut window in your wood grain panel. Use Super Tape to adhere the foiled Clear Toner Sheet to the back side of the wood grain panel to create the front of your shaker card.
Hint: Move the Clear Toner Sheet around in front of the window to choose where you want to trim it down.
Step Three:
Cut your foiled Clear Toner Sheet down to about 1/4" (on all sides) larger than the die-cut window in your wood grain panel. Use Super Tape to adhere the foiled Clear Toner Sheet to the back side of the wood grain panel to create the front of your shaker card.
Hint: Move the Clear Toner Sheet around in front of the window to choose where you want to trim it down.
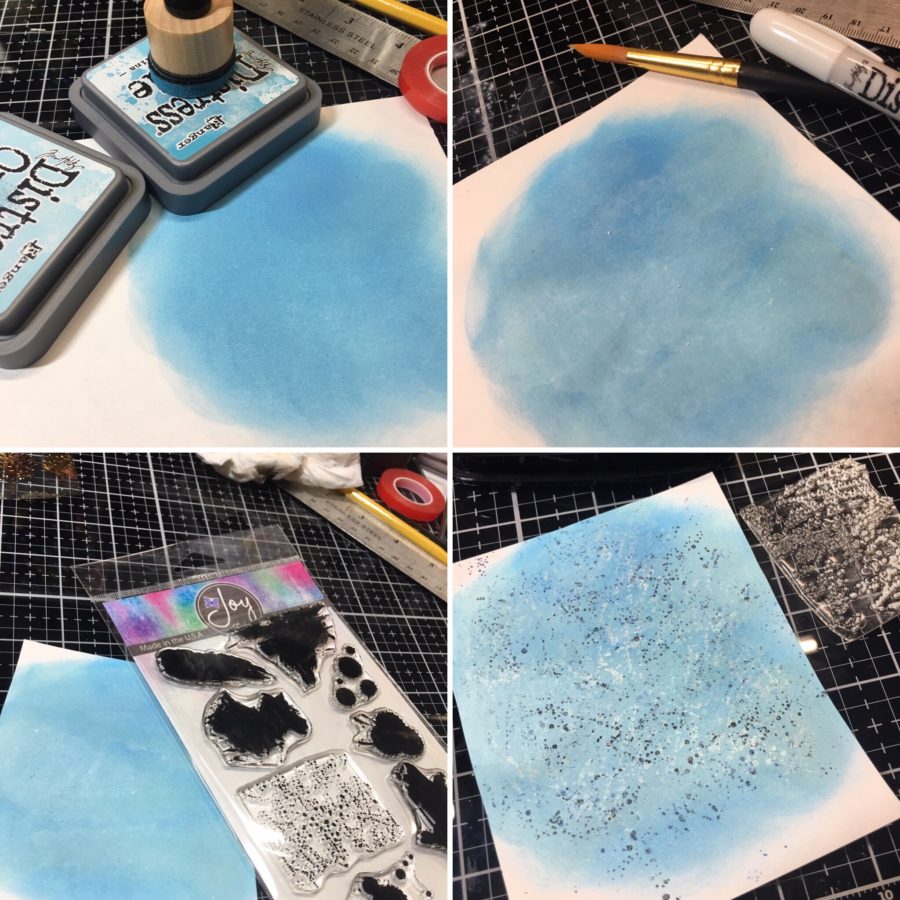
 Step Four:
Create a background for your shaker card (you will see this through the window) using Distress Oxide blue inks and white Distress Crayon or gelatos to create clouds. I used one of the Uh Oh Ink Splatter stamps to create a little more interest without splattering paint all over my work area!).
Hint: If you don't have Distress Crayons or gelatos you can use a bit of watered down white craft paint.
Step Four:
Create a background for your shaker card (you will see this through the window) using Distress Oxide blue inks and white Distress Crayon or gelatos to create clouds. I used one of the Uh Oh Ink Splatter stamps to create a little more interest without splattering paint all over my work area!).
Hint: If you don't have Distress Crayons or gelatos you can use a bit of watered down white craft paint.
 Step Five:
Die-cut and color fall themed shaker bits (I used the Multi-Frame Shaker Pocket die by Lindsey Serata) and place along with sequins onto your blue background where your window will sit.
Use 3D Foam Strips to create a well around your shaker window (on the back side), peel release paper and place the window over the pile of shaker contents.
Hint: I cut my 3D Foam Strips lengthwise down the center to make them thinner and easier to curve around the window.
Step Five:
Die-cut and color fall themed shaker bits (I used the Multi-Frame Shaker Pocket die by Lindsey Serata) and place along with sequins onto your blue background where your window will sit.
Use 3D Foam Strips to create a well around your shaker window (on the back side), peel release paper and place the window over the pile of shaker contents.
Hint: I cut my 3D Foam Strips lengthwise down the center to make them thinner and easier to curve around the window.
 Step Six:
Embellish the front of your card. On the sample, I chose a simple die-cut sentiment colored with Distress Markers and adhered to a hand-cut flag attached to the shaker window using 3D Foam Tape. The fall leaves which were left over from a previous project (you can see how I made them here) were twisted and bent to create dimension and adhered to the front of the card.Add some tiny paper flowers (mine were from my stash), accented with a bit of yellow Nuvo Drops to the centers. Finish off your card by adding some bits of twisted wire and adhere the card front panel to a folded card base.
Hint: If you don't have Nuvo Drops you can use stickles or puffy paint.
Step Six:
Embellish the front of your card. On the sample, I chose a simple die-cut sentiment colored with Distress Markers and adhered to a hand-cut flag attached to the shaker window using 3D Foam Tape. The fall leaves which were left over from a previous project (you can see how I made them here) were twisted and bent to create dimension and adhered to the front of the card.Add some tiny paper flowers (mine were from my stash), accented with a bit of yellow Nuvo Drops to the centers. Finish off your card by adding some bits of twisted wire and adhere the card front panel to a folded card base.
Hint: If you don't have Nuvo Drops you can use stickles or puffy paint.
 I hope you will try some of these products to create your own barn door shaker card!
Wendy
I hope you will try some of these products to create your own barn door shaker card!
Wendy
 Be sure to stop by their blog for added ideas and inspiration featuring our two companies products!
And so you can pick some new supplies to have fun creating...we're offering you a chance to win a $25 Gift Card to shop with us!
Be sure to stop by their blog for added ideas and inspiration featuring our two companies products!
And so you can pick some new supplies to have fun creating...we're offering you a chance to win a $25 Gift Card to shop with us!
 a Rafflecopter giveaway