No Products in the Cart
 For Scarf:
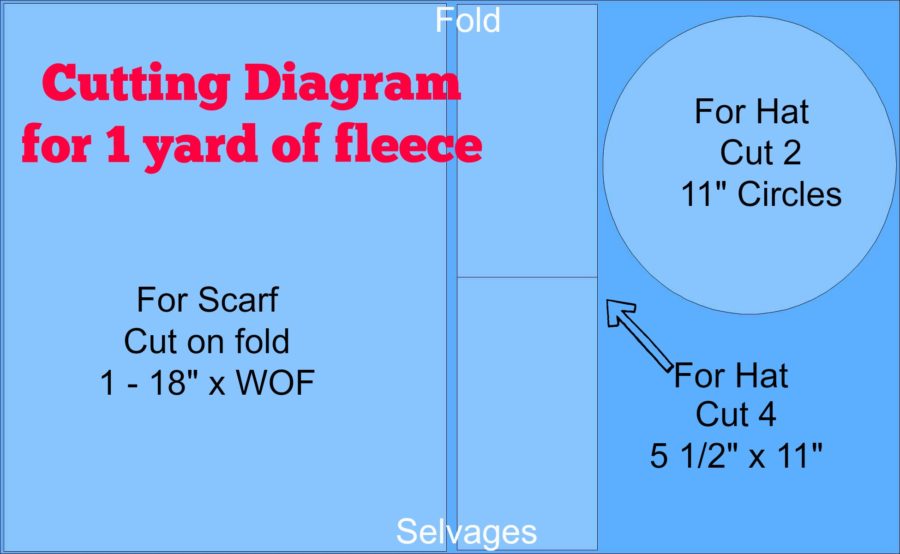
1 piece - 18" x WOF (width of fabric)
For Hat:
2 - 11" circles (just trace around a plate with a permanent marker and cut them out).
Fold circles in half and cut. This leaves 4 half circles.
4 - 5 1/2" x 11" strips
For appliques:
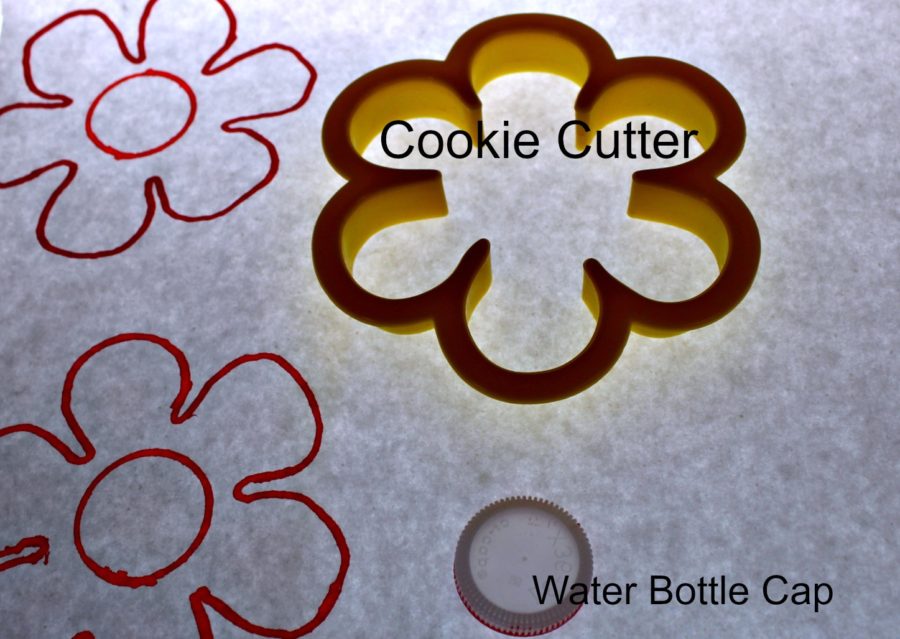
Trace cookie cutter on the paper side of HeatnBond Soft Stretch™ LITE. Trace 4, 2 for the scarf and 2 for the hat. If making flowers, trace a circle in the middle of the flowers. A bottle cap is perfect.
For Scarf:
1 piece - 18" x WOF (width of fabric)
For Hat:
2 - 11" circles (just trace around a plate with a permanent marker and cut them out).
Fold circles in half and cut. This leaves 4 half circles.
4 - 5 1/2" x 11" strips
For appliques:
Trace cookie cutter on the paper side of HeatnBond Soft Stretch™ LITE. Trace 4, 2 for the scarf and 2 for the hat. If making flowers, trace a circle in the middle of the flowers. A bottle cap is perfect.
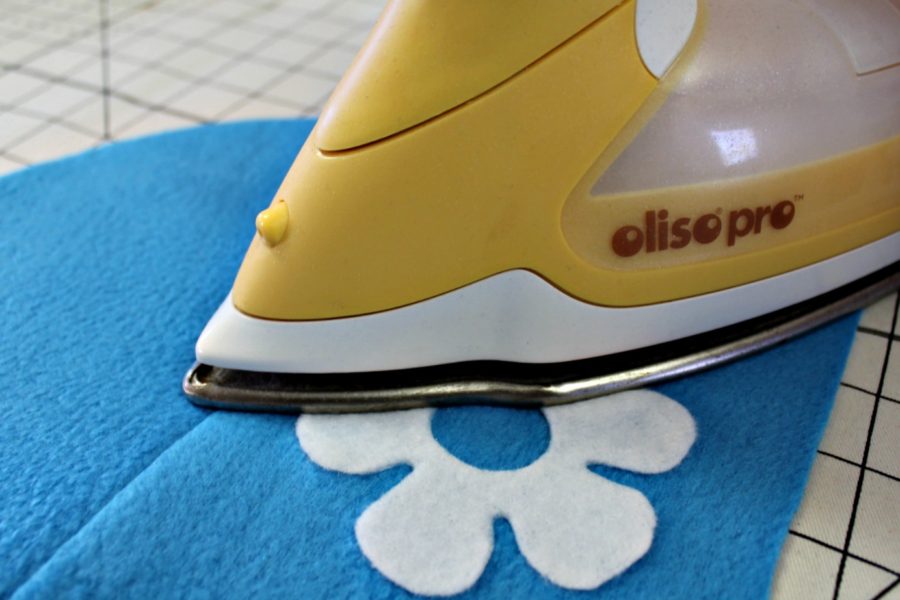
 Fuse the HeatnBond® Soft Stretch™ LITE to StitchNSew™ fleece and cut out 4 flowers.
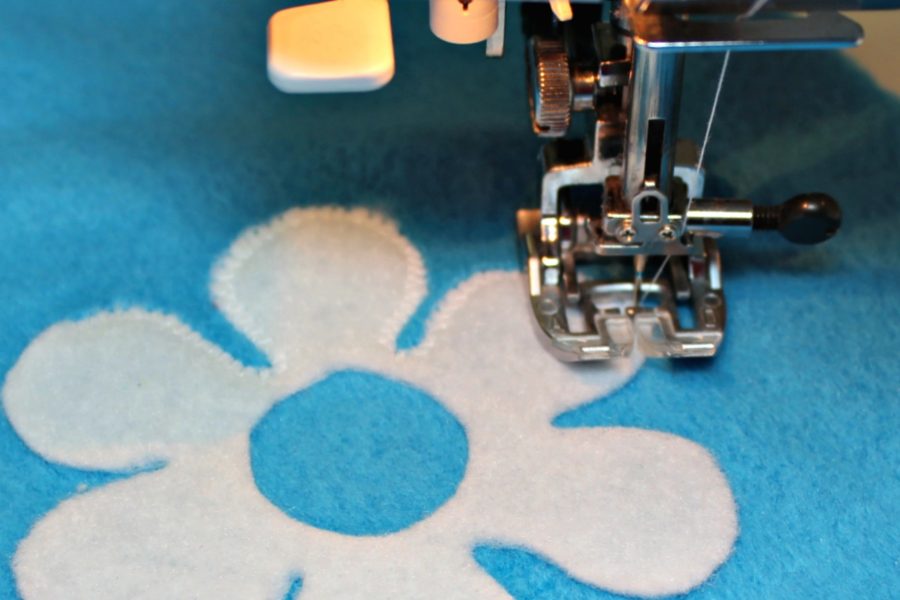
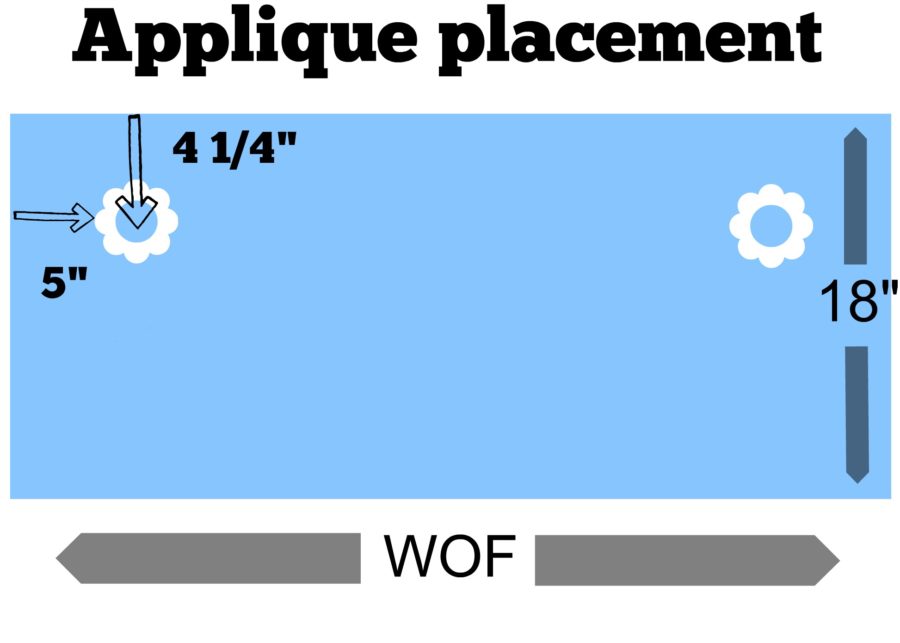 Peel the backing fabric off the flowers and bond to the scarf following the package instructions. Zigzag around the appliques.
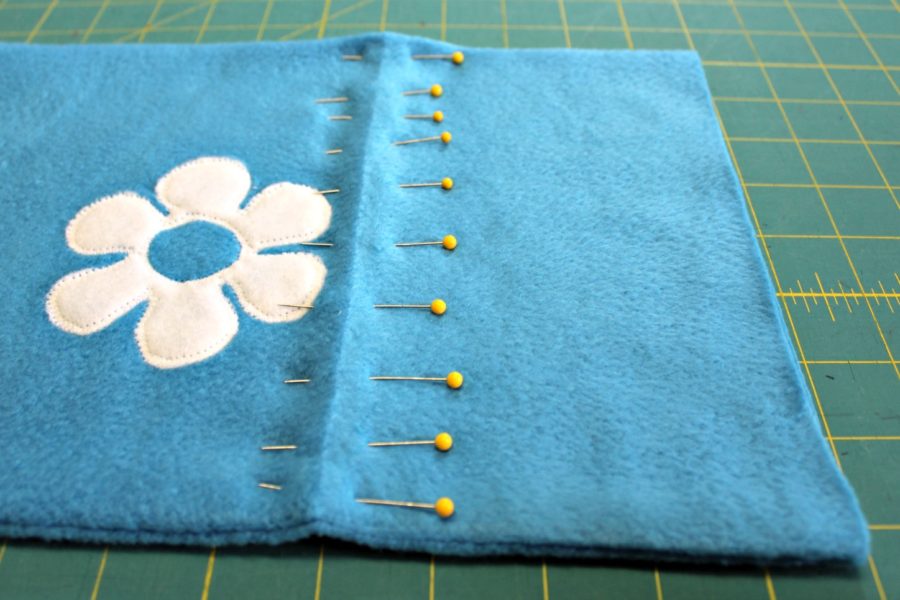
 Fold, right sides together lengthwise and pin. This fabric is stretchy, so pin every 1/2" and stitch 1/2" from edge of long side, leaving both short ends open. Turn right side out.
Flatten scarf on ironing surface and press. Measure 5" form each end and fold and press. This is a stitching line. Pin and stitch through both layers using a walking foot.
Fold, right sides together lengthwise and pin. This fabric is stretchy, so pin every 1/2" and stitch 1/2" from edge of long side, leaving both short ends open. Turn right side out.
Flatten scarf on ironing surface and press. Measure 5" form each end and fold and press. This is a stitching line. Pin and stitch through both layers using a walking foot.
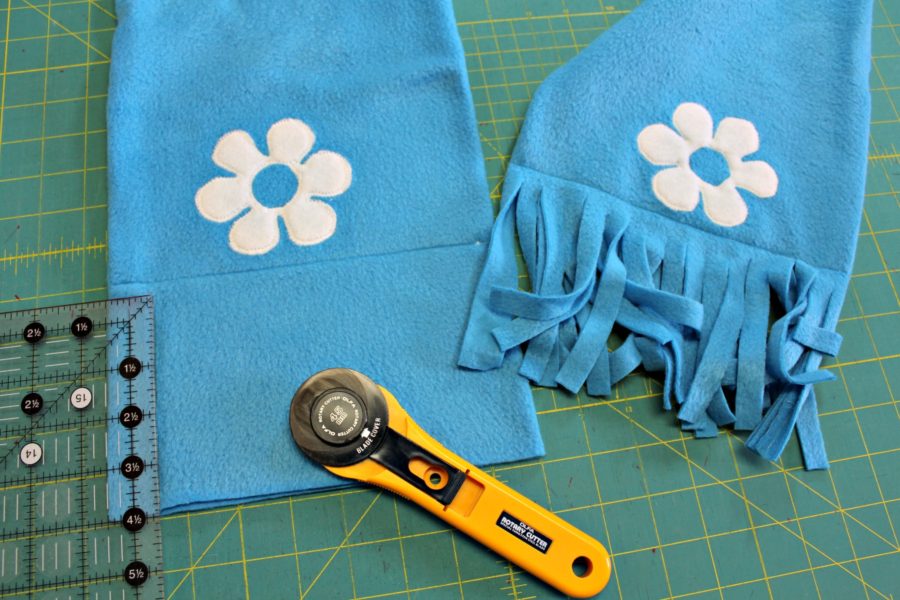
 Create the fringe of the scarf by laying each end on the cutting mat and with a rotary cutter, cut into scarf from the end every 1/2" up to 1/2" from stitching.
 Zigzag around the applique as done with the scarf.
Pair 2 half circle units right sides together and pin around the curved edges. Repeat with the other pair. One pair (with the applique) is the outside of the hat and one pair is the lining. Leave a 2" opening on the lining for turning right side out later. Stitch both pairs 1/2" from edge around the curved edges.
Zigzag around the applique as done with the scarf.
Pair 2 half circle units right sides together and pin around the curved edges. Repeat with the other pair. One pair (with the applique) is the outside of the hat and one pair is the lining. Leave a 2" opening on the lining for turning right side out later. Stitch both pairs 1/2" from edge around the curved edges.
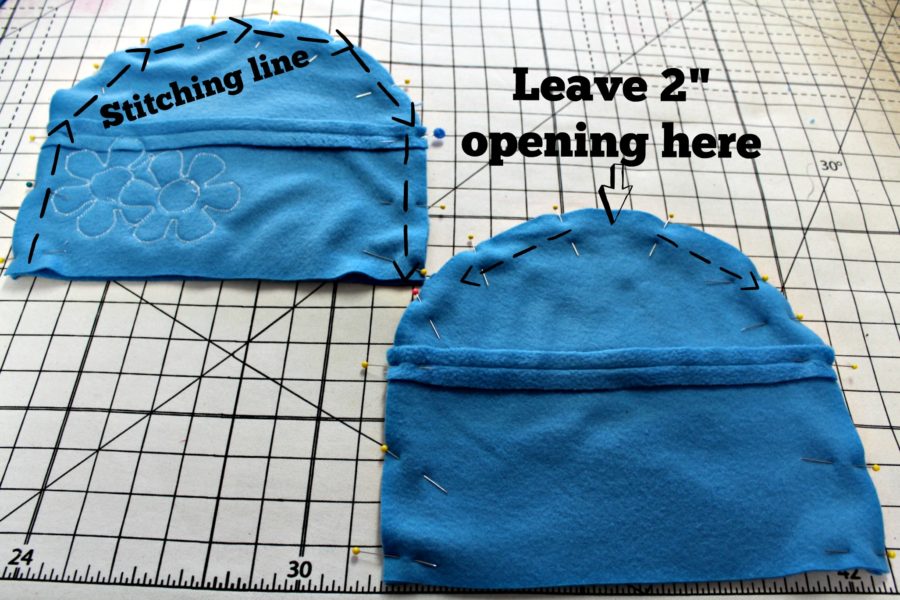 Turn lining right side out and slide into outside hat piece. Matching seams, pin around the bottom of the hat.
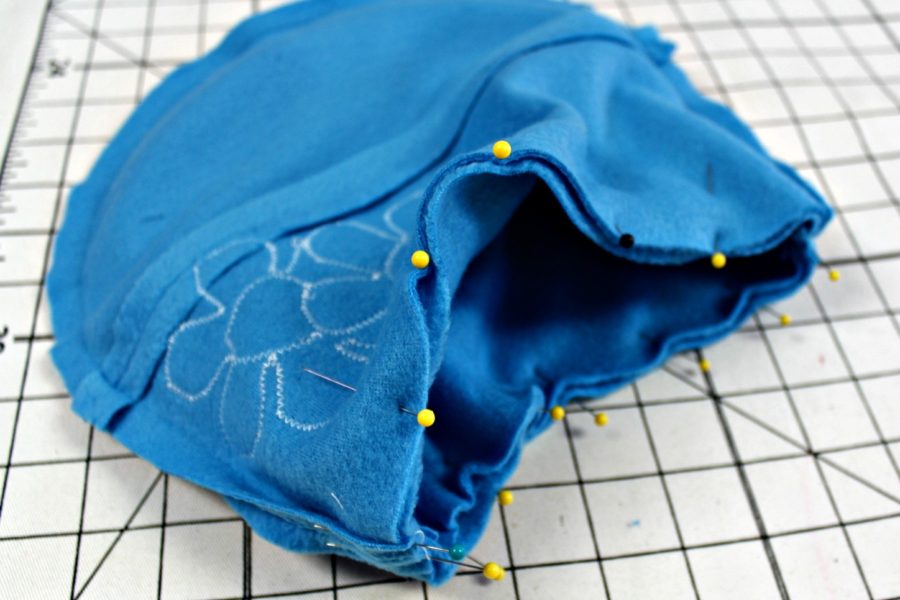 Stitch 1/2" from edge all around. Turn the hat right side out through the opening in the lining. Slip stitch the opening or sew a narrow seam with a sewing machine to close it. Tuck the lining into the hat and press. Top stitch around the bottom of the hat and it's ready to wear.
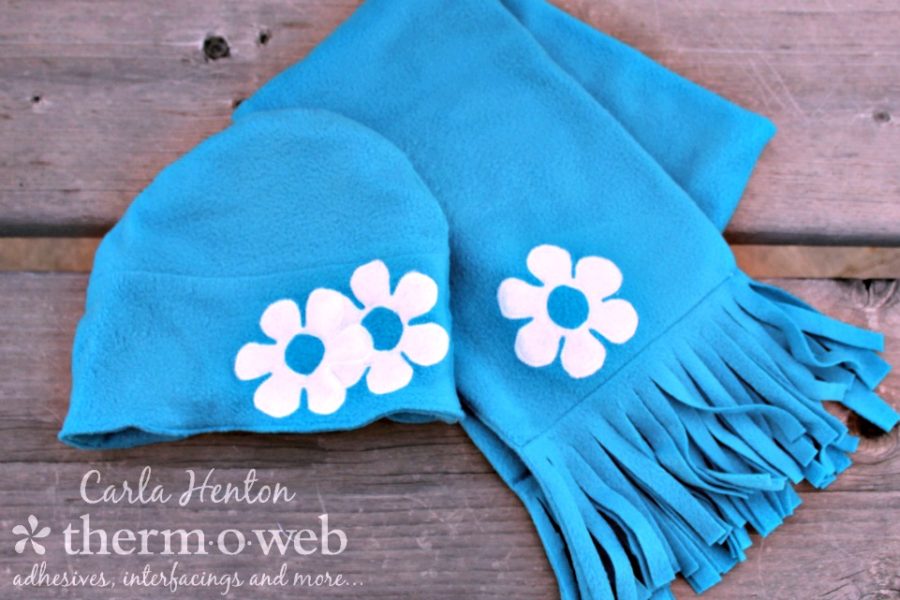 Appliqued Fleece Hat and Scarf with HeatnBond Soft Stretch