No Products in the Cart
 We are so excited to be joining up this week with our friends at Newton's Nook! Throughout the week we'll have lots of fun holiday inspired projects to share with you featuring Newton's adorable stamps and Therm O Web's awesome line up of Deco Foil, Adhesives, and more.
 Naughty or Mice? Tag Set by Designer Audrey Pettit
Therm O Web Supplies:
Gina K Designs Premium Cardstock: Luxury White, Red Velvet
Gina K Designs Wafer Thin Die Sets: Stitched Circles Large, Decorative Tag
XL Memory Tape Runner
iCraft Purple Tape
iCraft Ultra Hold Adhesive
Other Supplies:
Newton's Nook: Naughty or Mice? Stamp Set
Ink: Memento Tuxedo Black
Copic Markers
Twine: Maya Road, Stampin'Up
Naughty or Mice? Tag Set by Designer Audrey Pettit
Therm O Web Supplies:
Gina K Designs Premium Cardstock: Luxury White, Red Velvet
Gina K Designs Wafer Thin Die Sets: Stitched Circles Large, Decorative Tag
XL Memory Tape Runner
iCraft Purple Tape
iCraft Ultra Hold Adhesive
Other Supplies:
Newton's Nook: Naughty or Mice? Stamp Set
Ink: Memento Tuxedo Black
Copic Markers
Twine: Maya Road, Stampin'Up
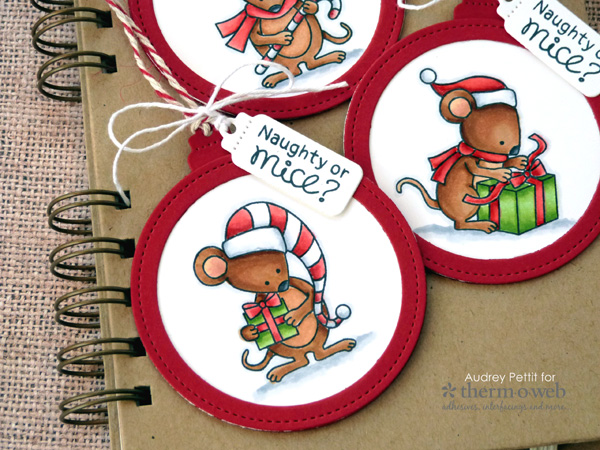
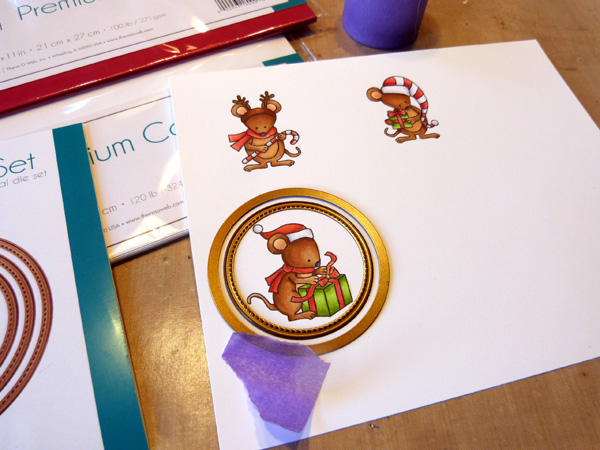 To begin, stamp images from the Naughty or Mice? stamp set onto GinaK Designs Luxury White cardstock using black ink that is Copic marker-friendly. Be sure to leave some space around each image for die cutting. Color the images with Copic markers. Select the two smallest dies from the Stitched Circles Large die set, and place them as a guide around the images to get the proper spacing. Secure the larger of the two dies in place with a bit of Purple Tape, and then die cut the images.
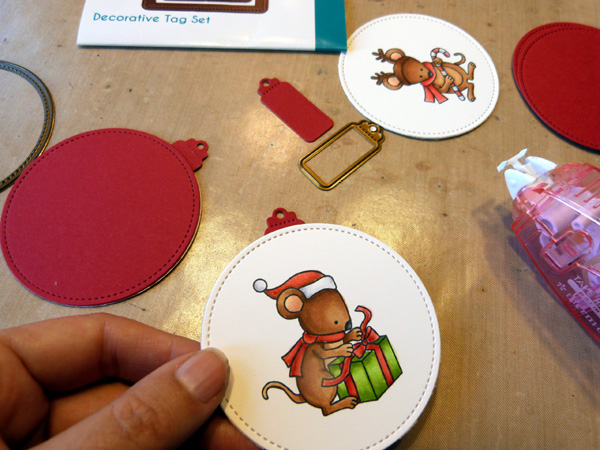
 Die cut the larger circles again from GinaK Designs Red Velvet cardstock. Die cut the smallest tag shape from the Decorative Tag die set from Red Velvet cardstock, too.
 Tape the tag onto the back side of the images so that just the top of the tag extends above the circle. Then adhere the red circles onto the back of the tags, lined up with the white circles in the front.
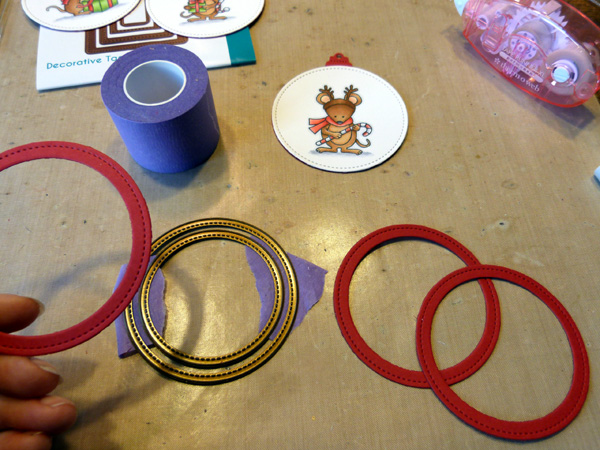 Nestle the two circle dies together, and hold them in place with Purple Tape. Die cut round frames from Red Velvet cardstock.
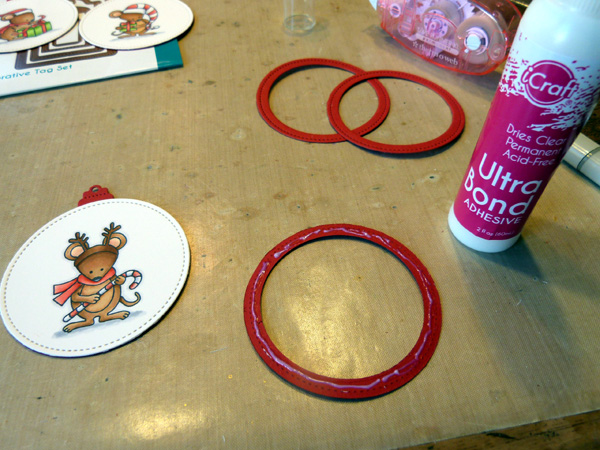 Put a thin line of iCraft Ultra Bond Adhesive onto the back of the frames, and then adhere them to the tags.
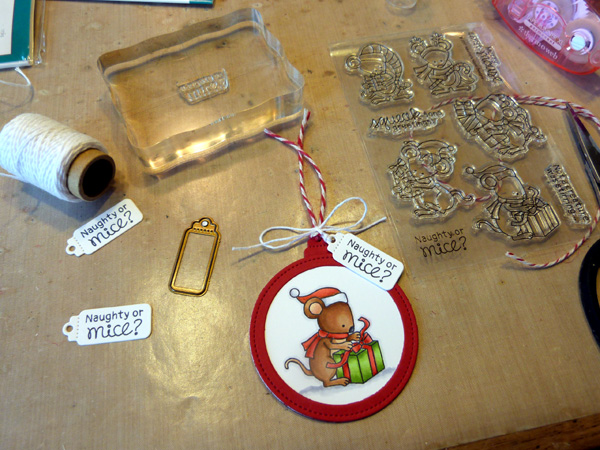 Die cut the smallest tag shape again from Luxury White cardstock, and stamp a sentiment onto them using black ink. Thread the sentiment tag and the round tag with twine, and tie the sentiment onto the tag topper.
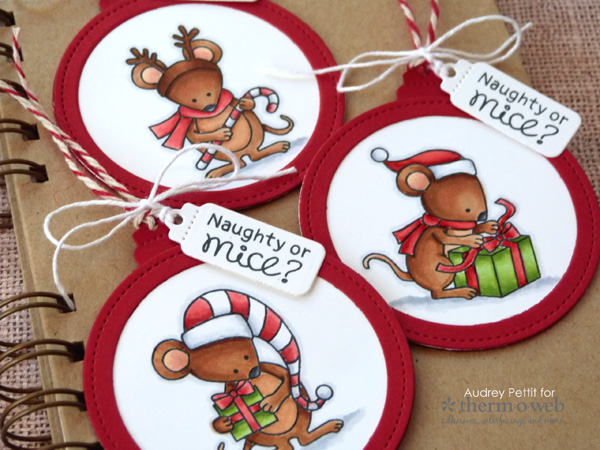 Such cute ornament shapes!
[line]
Such cute ornament shapes!
[line]
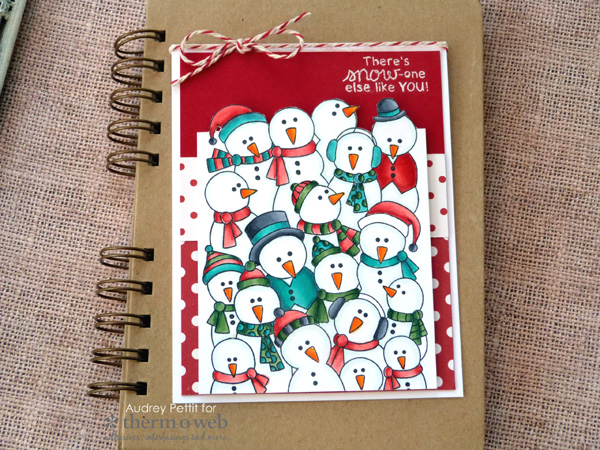 There's Snow-One Else Like You! Card by Designer Audrey Pettit
Therm O Web Supplies:
Gina K Designs Premium Cardstock: Luxury White, Red Velvet
XL Memory Tape Runner
3D Adhesive Squares
iCraft Ultra Hold Adhesive
Other Supplies:
Newton's Nook: Frozen Fellowship Stamp Set
Patterned Paper: Echo Park
Ink: Memento Tuxedo Black, Versamark
Copic Markers
Embossing Powder: Ranger Ink
Twine: Maya Road
There's Snow-One Else Like You! Card by Designer Audrey Pettit
Therm O Web Supplies:
Gina K Designs Premium Cardstock: Luxury White, Red Velvet
XL Memory Tape Runner
3D Adhesive Squares
iCraft Ultra Hold Adhesive
Other Supplies:
Newton's Nook: Frozen Fellowship Stamp Set
Patterned Paper: Echo Park
Ink: Memento Tuxedo Black, Versamark
Copic Markers
Embossing Powder: Ranger Ink
Twine: Maya Road
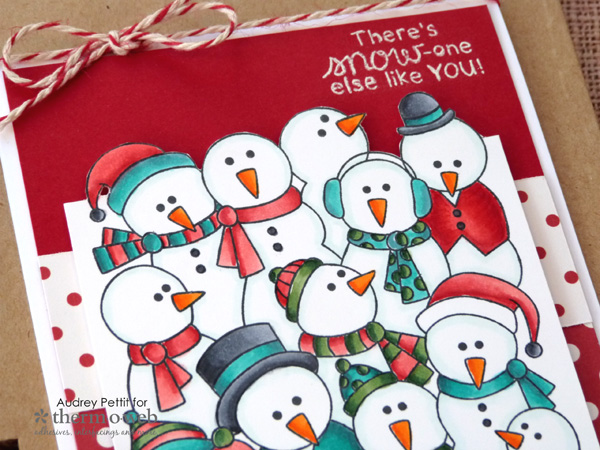
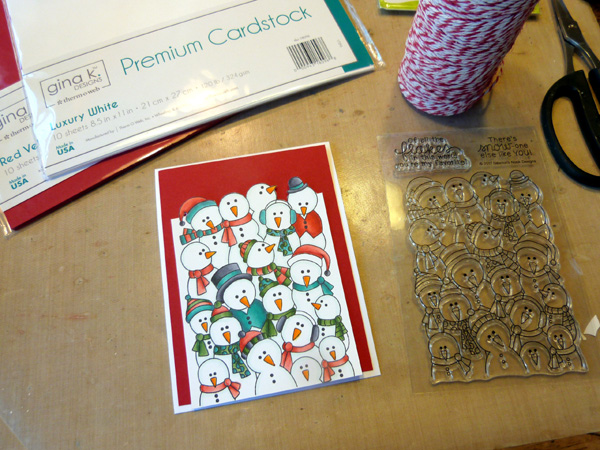 To begin, create a top folding A2 card base from Luxury White cardstock, and then cut a smaller panel of Red Velvet cardstock. Stamp the snowmen onto a panel of Luxury White cardstock, and color the image with Copic markers. Trim a small portion of the image off of the bottom, and trim close on the sides. You need to leave about an inch of room at the top for the sentiment. Use a ruler to draw a straight line across the top of the panel, and then use your scissors or craft blade to cut around the top line of snowmen.
 Adhere two strips of patterned paper to the bottom of the red velvet panel using XL Memory Tape runner. Stamp the sentiment onto the top right corner of the panel using Versamark ink, coat the ink in white embossing powder, and then heat set the powder using a heat tool. Adhere the red panel to the center of the card base. Twine baker's twine around the top of the card, tying it into a bow on the left side. Place a small dot of Ultra Hold adhesive behind the bow to secure it in place.
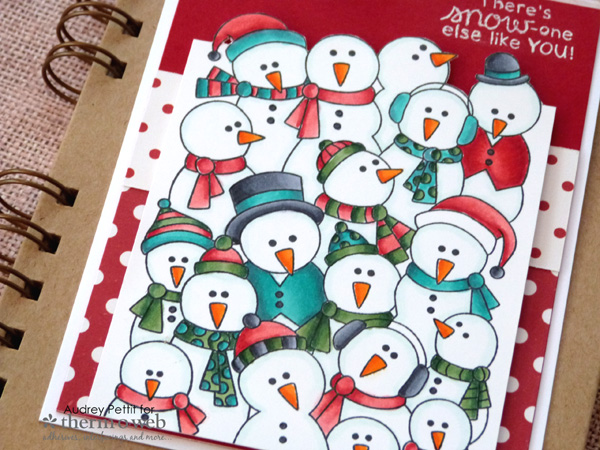 Place 3D Adhesive Squares onto the back side of the stamped panel, and then adhere it to the bottom of the card.
Enjoy!
Place 3D Adhesive Squares onto the back side of the stamped panel, and then adhere it to the bottom of the card.
Enjoy!
 Before you go...please take a moment to get yourself entered to win a $25 Gift Card to shop with us!
a Rafflecopter giveaway
Before you go...please take a moment to get yourself entered to win a $25 Gift Card to shop with us!
a Rafflecopter giveaway