No Products in the Cart
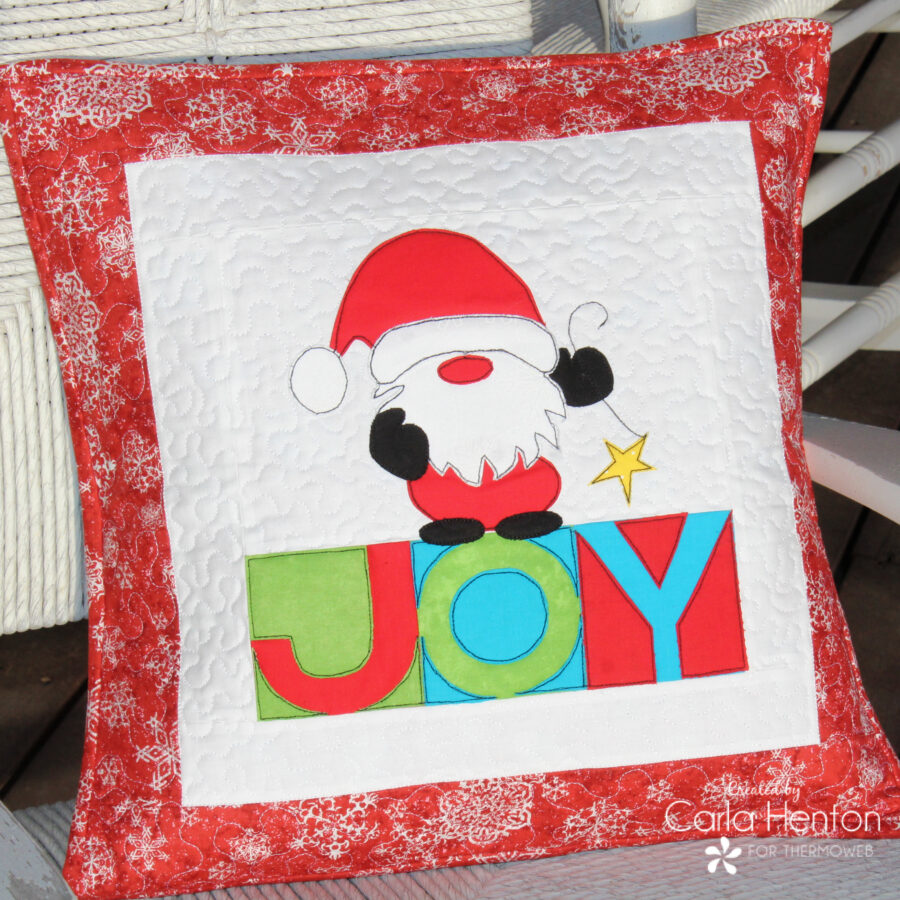
 Santa is coming! Are you ready to show him some love? Carla at Creatin’ in the Sticks is on the blog today to share a free pattern for this fun and trendy quilted Santa Gnome pillow. Stitch it up with HeatnBond to share the joy of the season. Who wouldn't love a Quilted Santa Gnome Pillow with HeatnBond?
 Pattern - free download: Santa Gnome Mini Quilt - Creatin in the Sticks
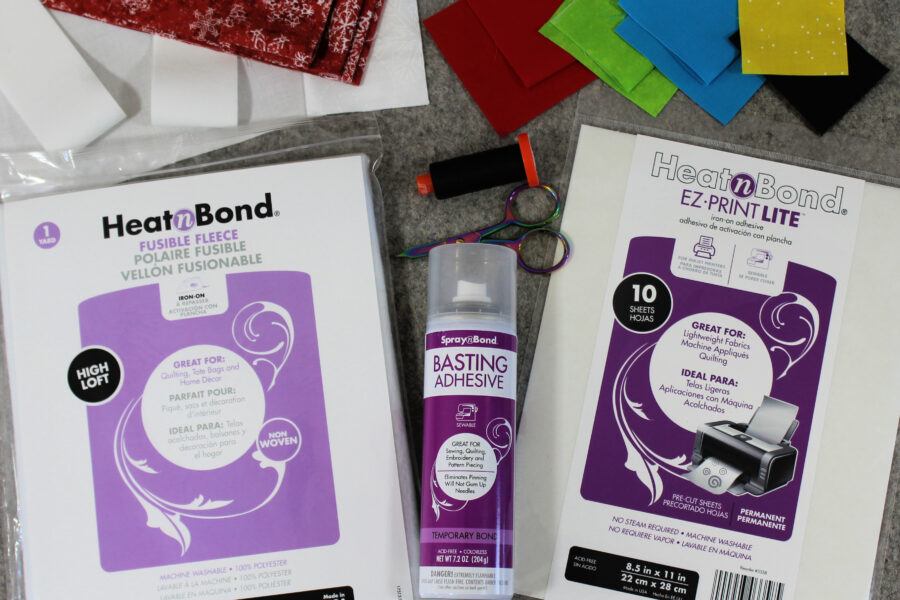
HeatnBond Fusible Fleece,
HeatnBond EZ Print Lite iron-on adhesive – 1 sheet,
SpraynBond basting adhesive
Pattern - free download: Santa Gnome Mini Quilt - Creatin in the Sticks
HeatnBond Fusible Fleece,
HeatnBond EZ Print Lite iron-on adhesive – 1 sheet,
SpraynBond basting adhesive
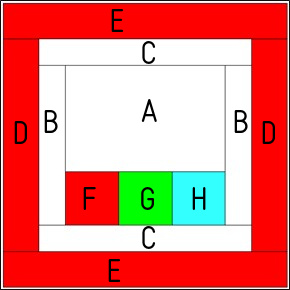 All seams are stitched at ¼” unless stated otherwise.
Stitch the F, G, and H squares right sides together as shown to form a 9 ½” x 3 ½” unit.
Press the seams open. Once the squares are stitched together, sew the A white rectangle to the top of the prepared unit and press. This unit measures 9 ½” x 9 ½”.
Next stitch the B strips to the sides and the C strips to the top and bottom and press. Finally, stitch the D strips to the sides and the E strips to the top and bottom. The final unit should measure 16 ½” x 16 ½”.
All seams are stitched at ¼” unless stated otherwise.
Stitch the F, G, and H squares right sides together as shown to form a 9 ½” x 3 ½” unit.
Press the seams open. Once the squares are stitched together, sew the A white rectangle to the top of the prepared unit and press. This unit measures 9 ½” x 9 ½”.
Next stitch the B strips to the sides and the C strips to the top and bottom and press. Finally, stitch the D strips to the sides and the E strips to the top and bottom. The final unit should measure 16 ½” x 16 ½”.
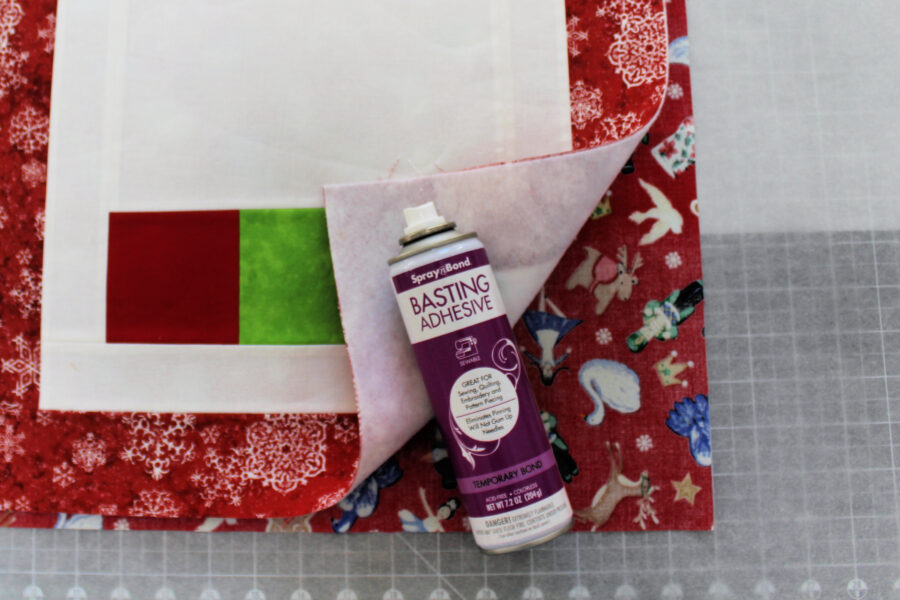 Cut one square of HeatnBond Fusible Fleece 16 ½”.
Follow the SpraynBond basting adhesive package instructions to bond the fleece to the wrong side of the 16 ½” background unit. Before applying the gnome and letter appliques, make the quilt sandwich by attaching the backing fabric with SpraynBond Basting Adhesive. By attaching the backing fabric now, part of the quilting is accomplished while the applique pieces are stitched.
Cut one square of HeatnBond Fusible Fleece 16 ½”.
Follow the SpraynBond basting adhesive package instructions to bond the fleece to the wrong side of the 16 ½” background unit. Before applying the gnome and letter appliques, make the quilt sandwich by attaching the backing fabric with SpraynBond Basting Adhesive. By attaching the backing fabric now, part of the quilting is accomplished while the applique pieces are stitched.
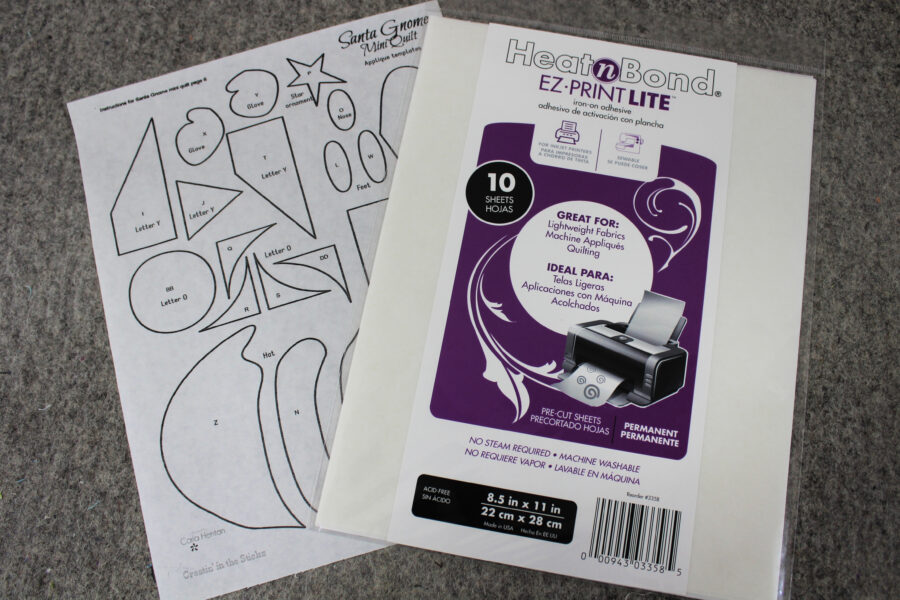 Using HeatnBond EZ Print Lite sheets, the first step is to print the applique pattern pieces (included with the free download above) with your inkjet printer. The patterns have been reversed for you. NO TRACING! How awesome is that?
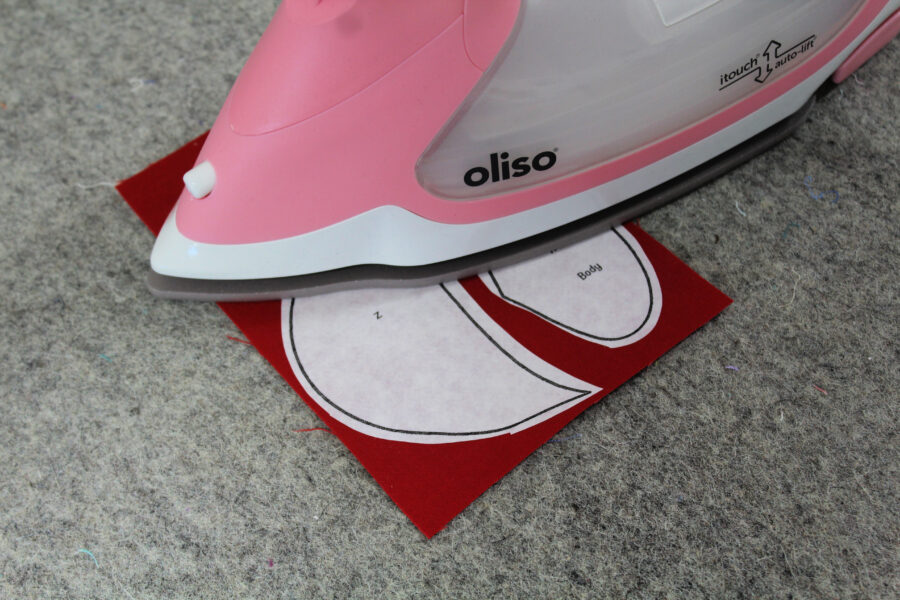 Follow the steps in the HeatnBond EZ Print Lite package instructions for printing and bonding the HeatnBond to the wrong side of the fabrics.
Tip: When a light-colored fabric is used as an applique, prevent “show through” by bonding lightweight fusible interfacing on the wrong side of the fabric before bonding the HeatnBond Lite. Fuse the HeatnBond lite onto the interfacing and continue as with all appliques.
Cut out all applique pieces on the solid black lines, peel off the backing paper, and place the applique pieced with the adhesive side down on the 16 ½” x 16 ½” background fabric unit. The applique template placement key is included in the free download pattern above.
Follow the steps in the HeatnBond EZ Print Lite package instructions for printing and bonding the HeatnBond to the wrong side of the fabrics.
Tip: When a light-colored fabric is used as an applique, prevent “show through” by bonding lightweight fusible interfacing on the wrong side of the fabric before bonding the HeatnBond Lite. Fuse the HeatnBond lite onto the interfacing and continue as with all appliques.
Cut out all applique pieces on the solid black lines, peel off the backing paper, and place the applique pieced with the adhesive side down on the 16 ½” x 16 ½” background fabric unit. The applique template placement key is included in the free download pattern above.
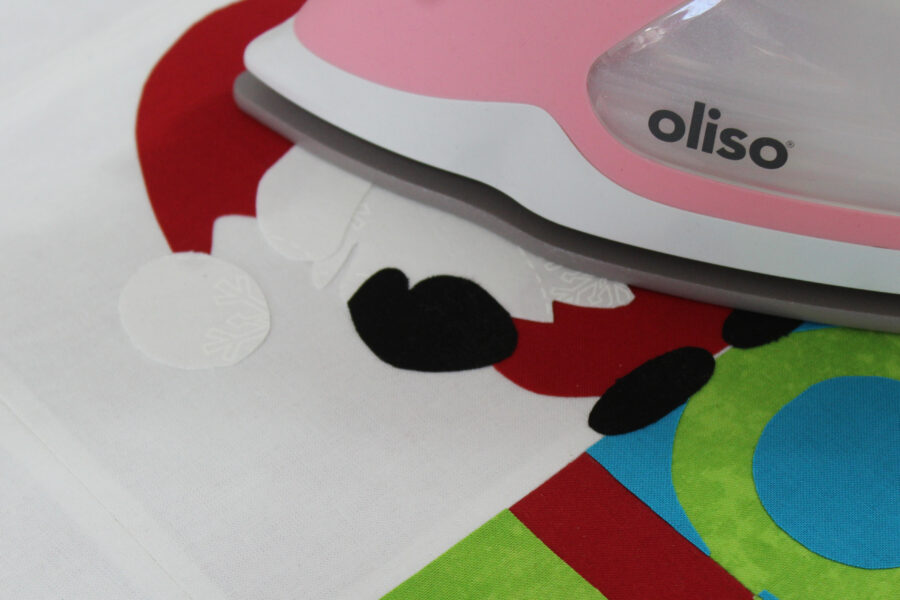 Following the HeatnBond EZ Print Lite package instructions, work in sections to press the applique to the background until the entire applique is fused.
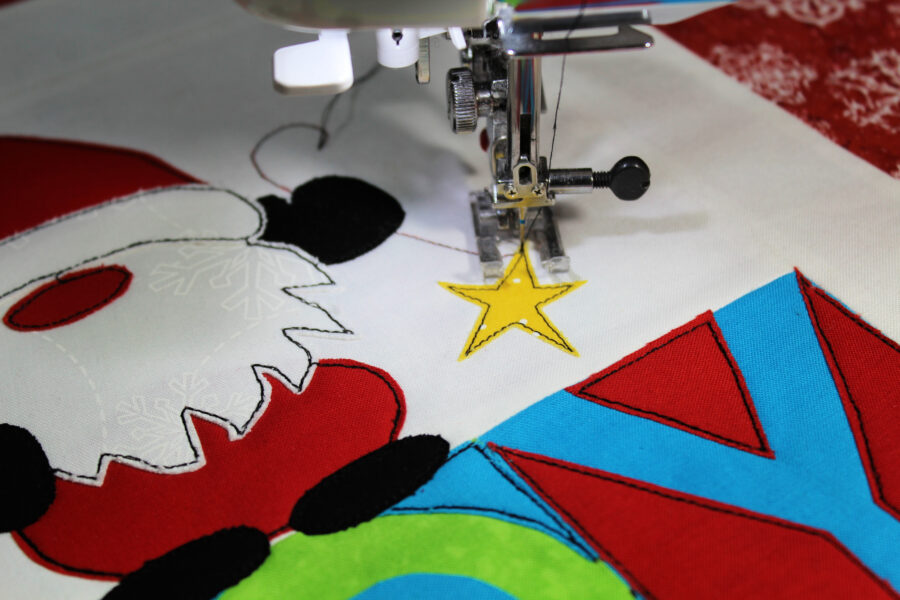 The last step for the applique is to use a straight stitch to stitch around each applique piece twice. Machine stitch the star string using the key as your guide.
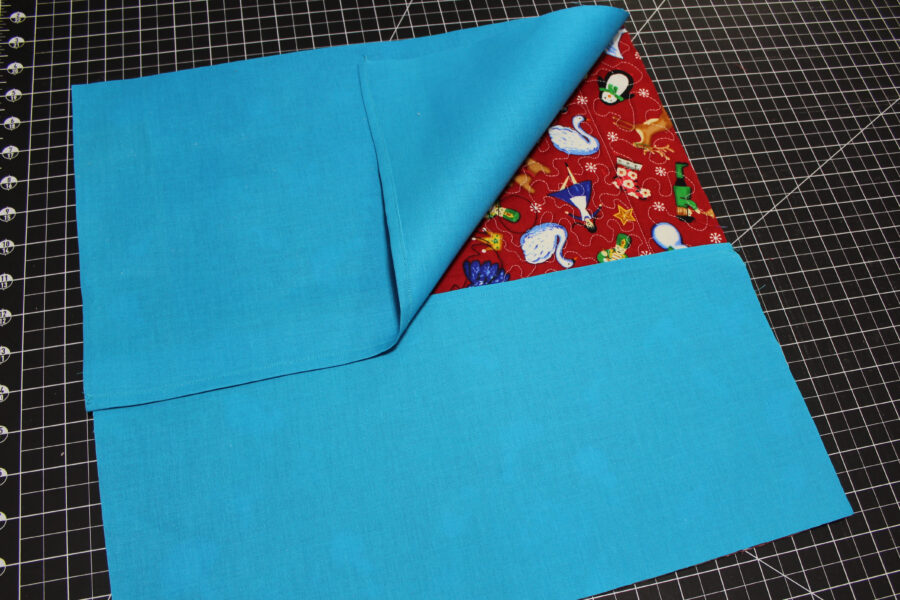 The next step is to place both hems in the middle of the back of the quilt, lining up the raw edges with the quilt top backing fabric. Pin and baste around the pillow cover 1/8” from the edge. Finally, apply the binding and stuff the Quilted Santa Gnome Pillow with HeatnBond cover with the 16” pillow form.
Pure joy!
The next step is to place both hems in the middle of the back of the quilt, lining up the raw edges with the quilt top backing fabric. Pin and baste around the pillow cover 1/8” from the edge. Finally, apply the binding and stuff the Quilted Santa Gnome Pillow with HeatnBond cover with the 16” pillow form.
Pure joy!