No Products in the Cart
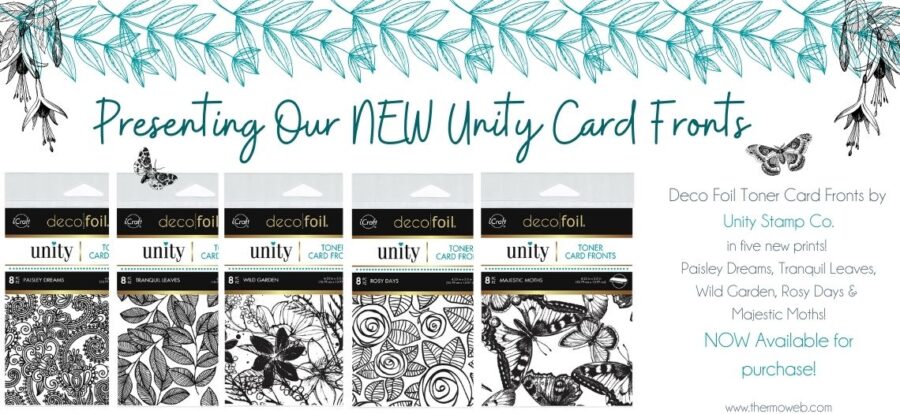 Hey Katrina here, with the NEW Unity Card Front releases!!! These are so fun and I cannot wait to use them on scrapbook layouts also. But today I have 5 cards with the new release! And super easy to just add foil and create an elegant card!
 Therm O Web Supplies Used
Memory Runner XL
Memory Runner XL Refill
3D Foam Squares – Combo Pack
NEW UNITY CARD FRONT RELEASE
Deco Foil Transfer Sheets-Pink Quartz
Deco Foil Foil Transfer Sheets-Summer Rainbow
Deco Foil Foil Transfer Sheets-Gold Shattered Glass
Deco Foil Foil Transfer Sheets-Lime
Deco Foil Foil Transfer Sheets-Amethyst Watercolor
Purple Tape-1/2 inch
Ultra Bond Liquid Adhesive
ZOTS Clear Adhesive Dots Small Singles-125 pk
ZOTS Clear Adhesive Dots Small Box-300 pk
Gina K Designs Fancy Foils-Turquoise Sea
Gina K Designs Foam Tape – White
Gina K Designs Foam Squares-White
Unity Stamps
Birthday Girl
Let The Little Things Gnome
Other Supplies Used
Gina K Designs-Amalgam Ink-Obsidian
Catherine Pooler Blender Brush 4pk
Catherine Pooler Ink-Limoncello
Catherine Pooler Ink-Grape Crush
Catherine Pooler Ink-Lime Rickey
Daniel Smith Watercolor Paints
Karin Pro Brush Markers
Waffleflower Circle Dies
Waffleflower Oval Dies
Waffleflower A7 Dies
Gems and Doilies
Cardstock
Border Punch
Therm O Web Supplies Used
Memory Runner XL
Memory Runner XL Refill
3D Foam Squares – Combo Pack
NEW UNITY CARD FRONT RELEASE
Deco Foil Transfer Sheets-Pink Quartz
Deco Foil Foil Transfer Sheets-Summer Rainbow
Deco Foil Foil Transfer Sheets-Gold Shattered Glass
Deco Foil Foil Transfer Sheets-Lime
Deco Foil Foil Transfer Sheets-Amethyst Watercolor
Purple Tape-1/2 inch
Ultra Bond Liquid Adhesive
ZOTS Clear Adhesive Dots Small Singles-125 pk
ZOTS Clear Adhesive Dots Small Box-300 pk
Gina K Designs Fancy Foils-Turquoise Sea
Gina K Designs Foam Tape – White
Gina K Designs Foam Squares-White
Unity Stamps
Birthday Girl
Let The Little Things Gnome
Other Supplies Used
Gina K Designs-Amalgam Ink-Obsidian
Catherine Pooler Blender Brush 4pk
Catherine Pooler Ink-Limoncello
Catherine Pooler Ink-Grape Crush
Catherine Pooler Ink-Lime Rickey
Daniel Smith Watercolor Paints
Karin Pro Brush Markers
Waffleflower Circle Dies
Waffleflower Oval Dies
Waffleflower A7 Dies
Gems and Doilies
Cardstock
Border Punch
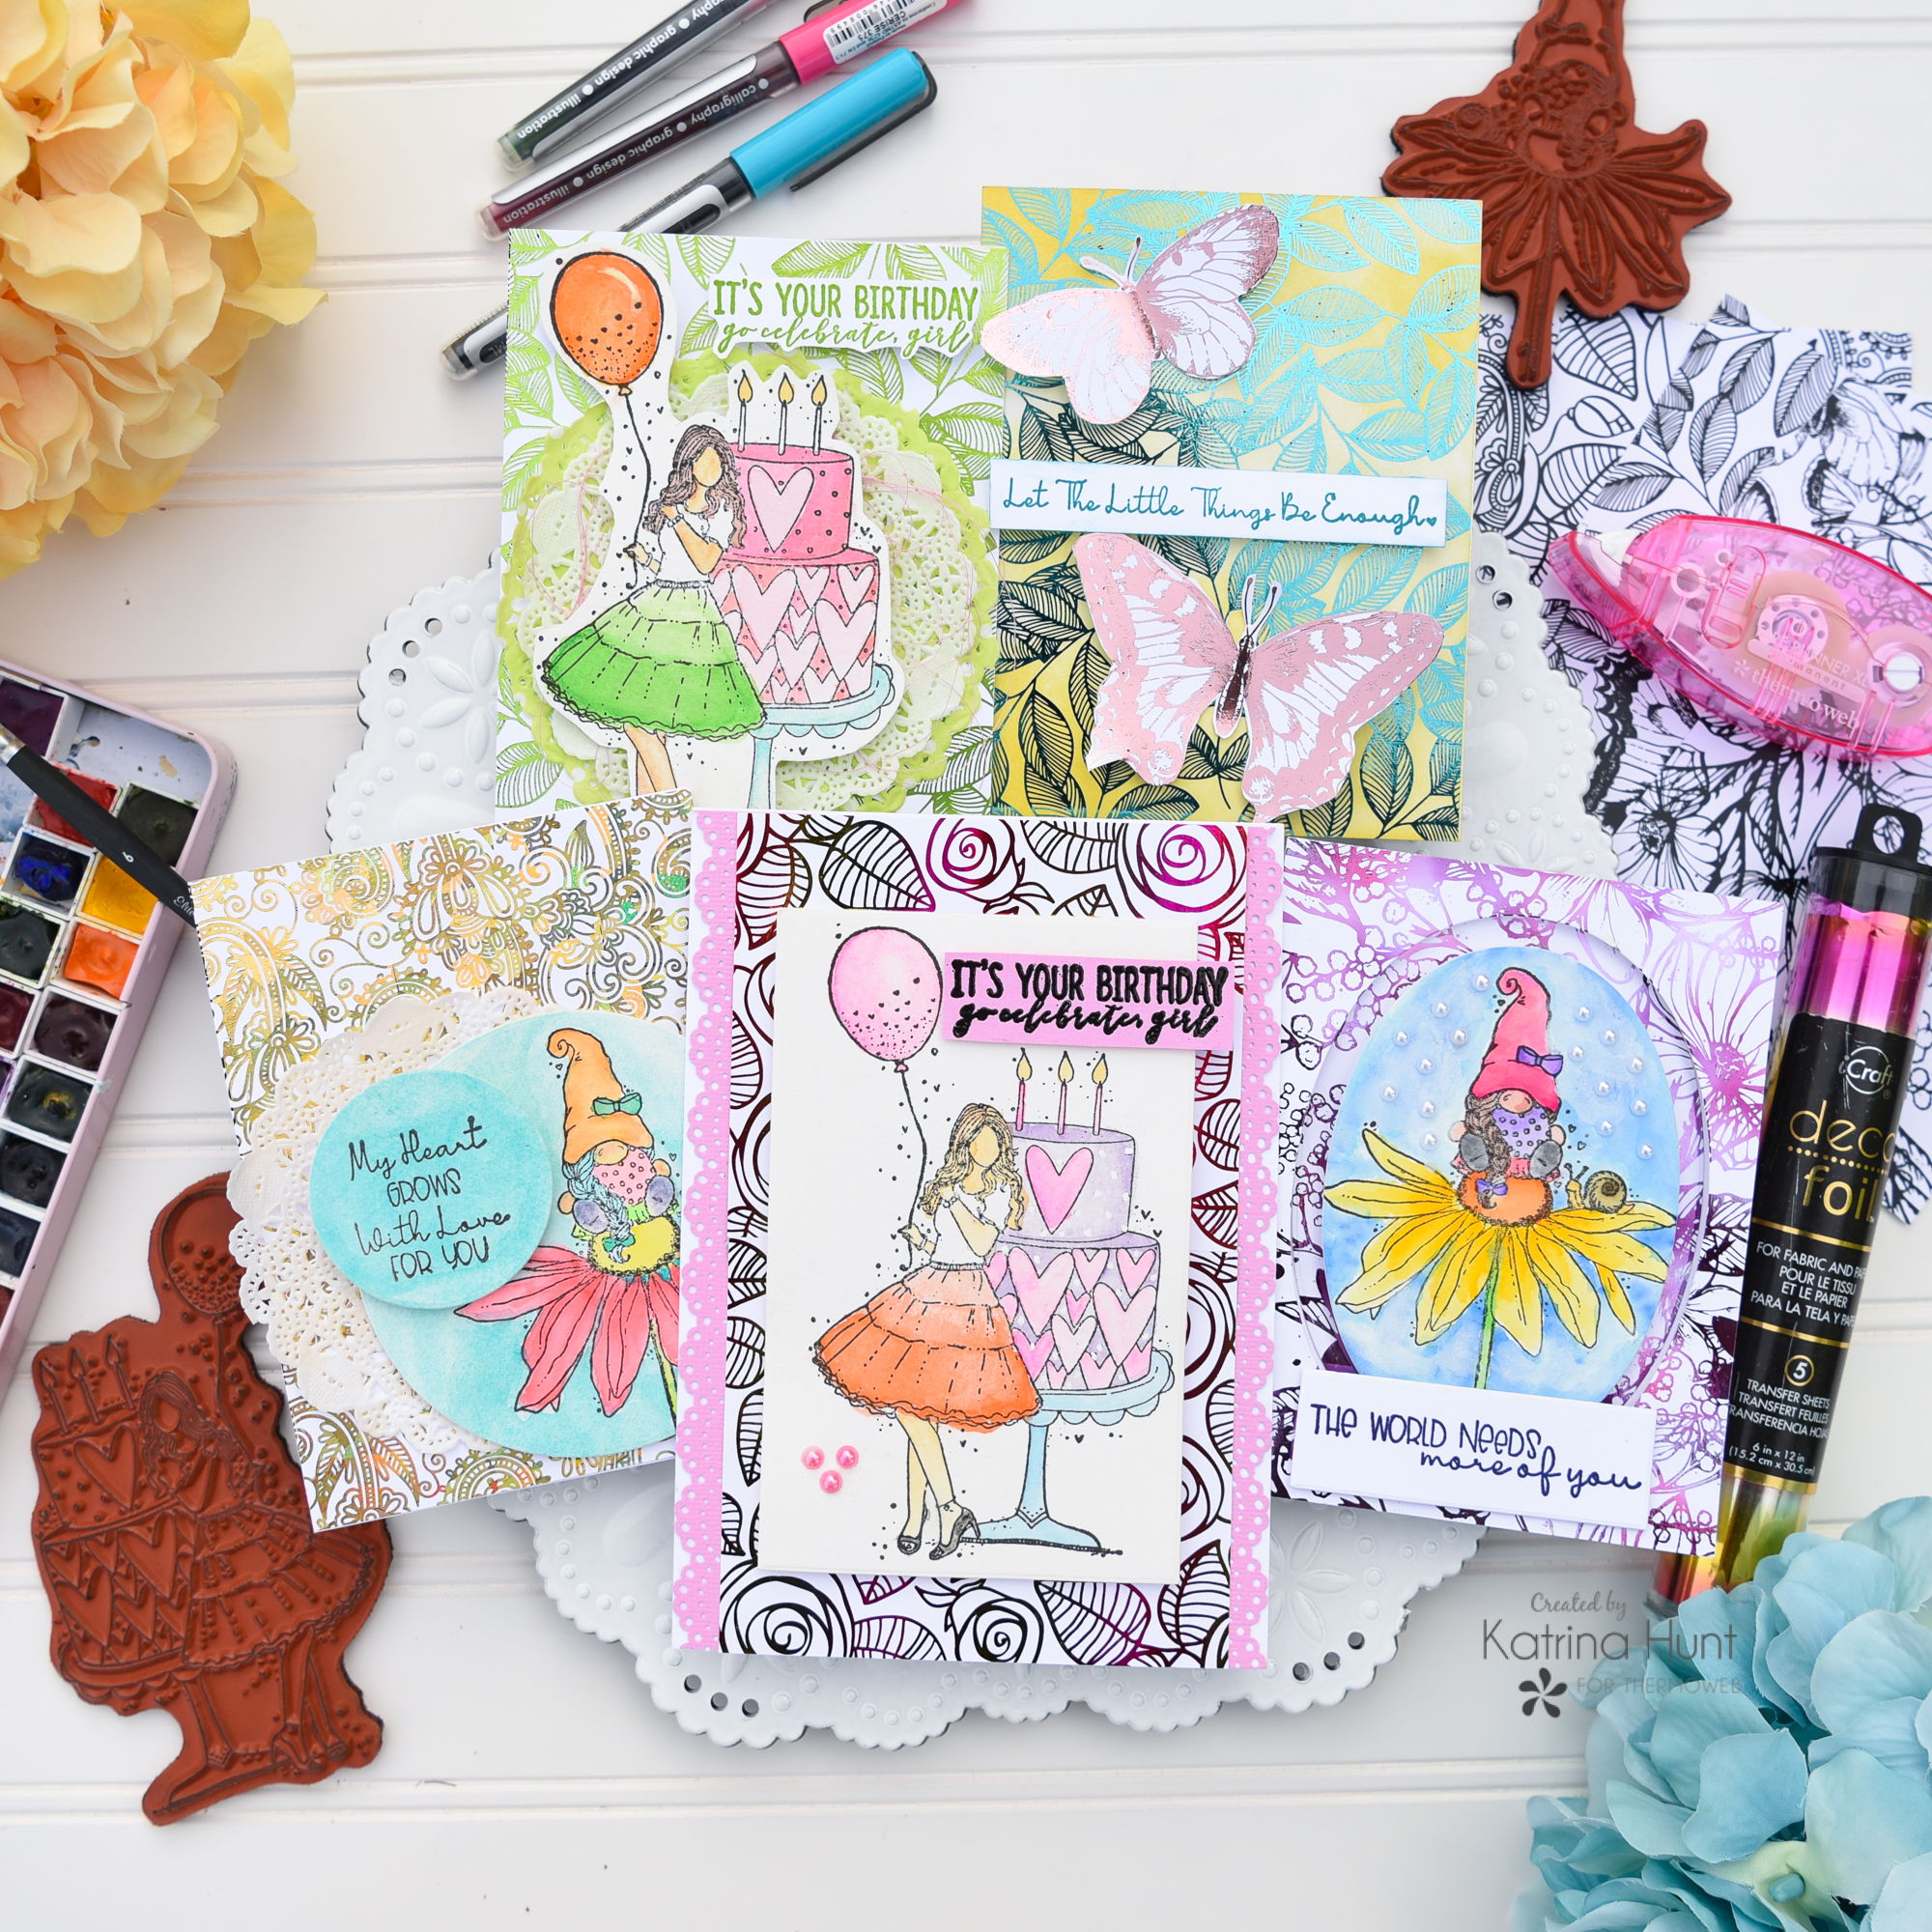
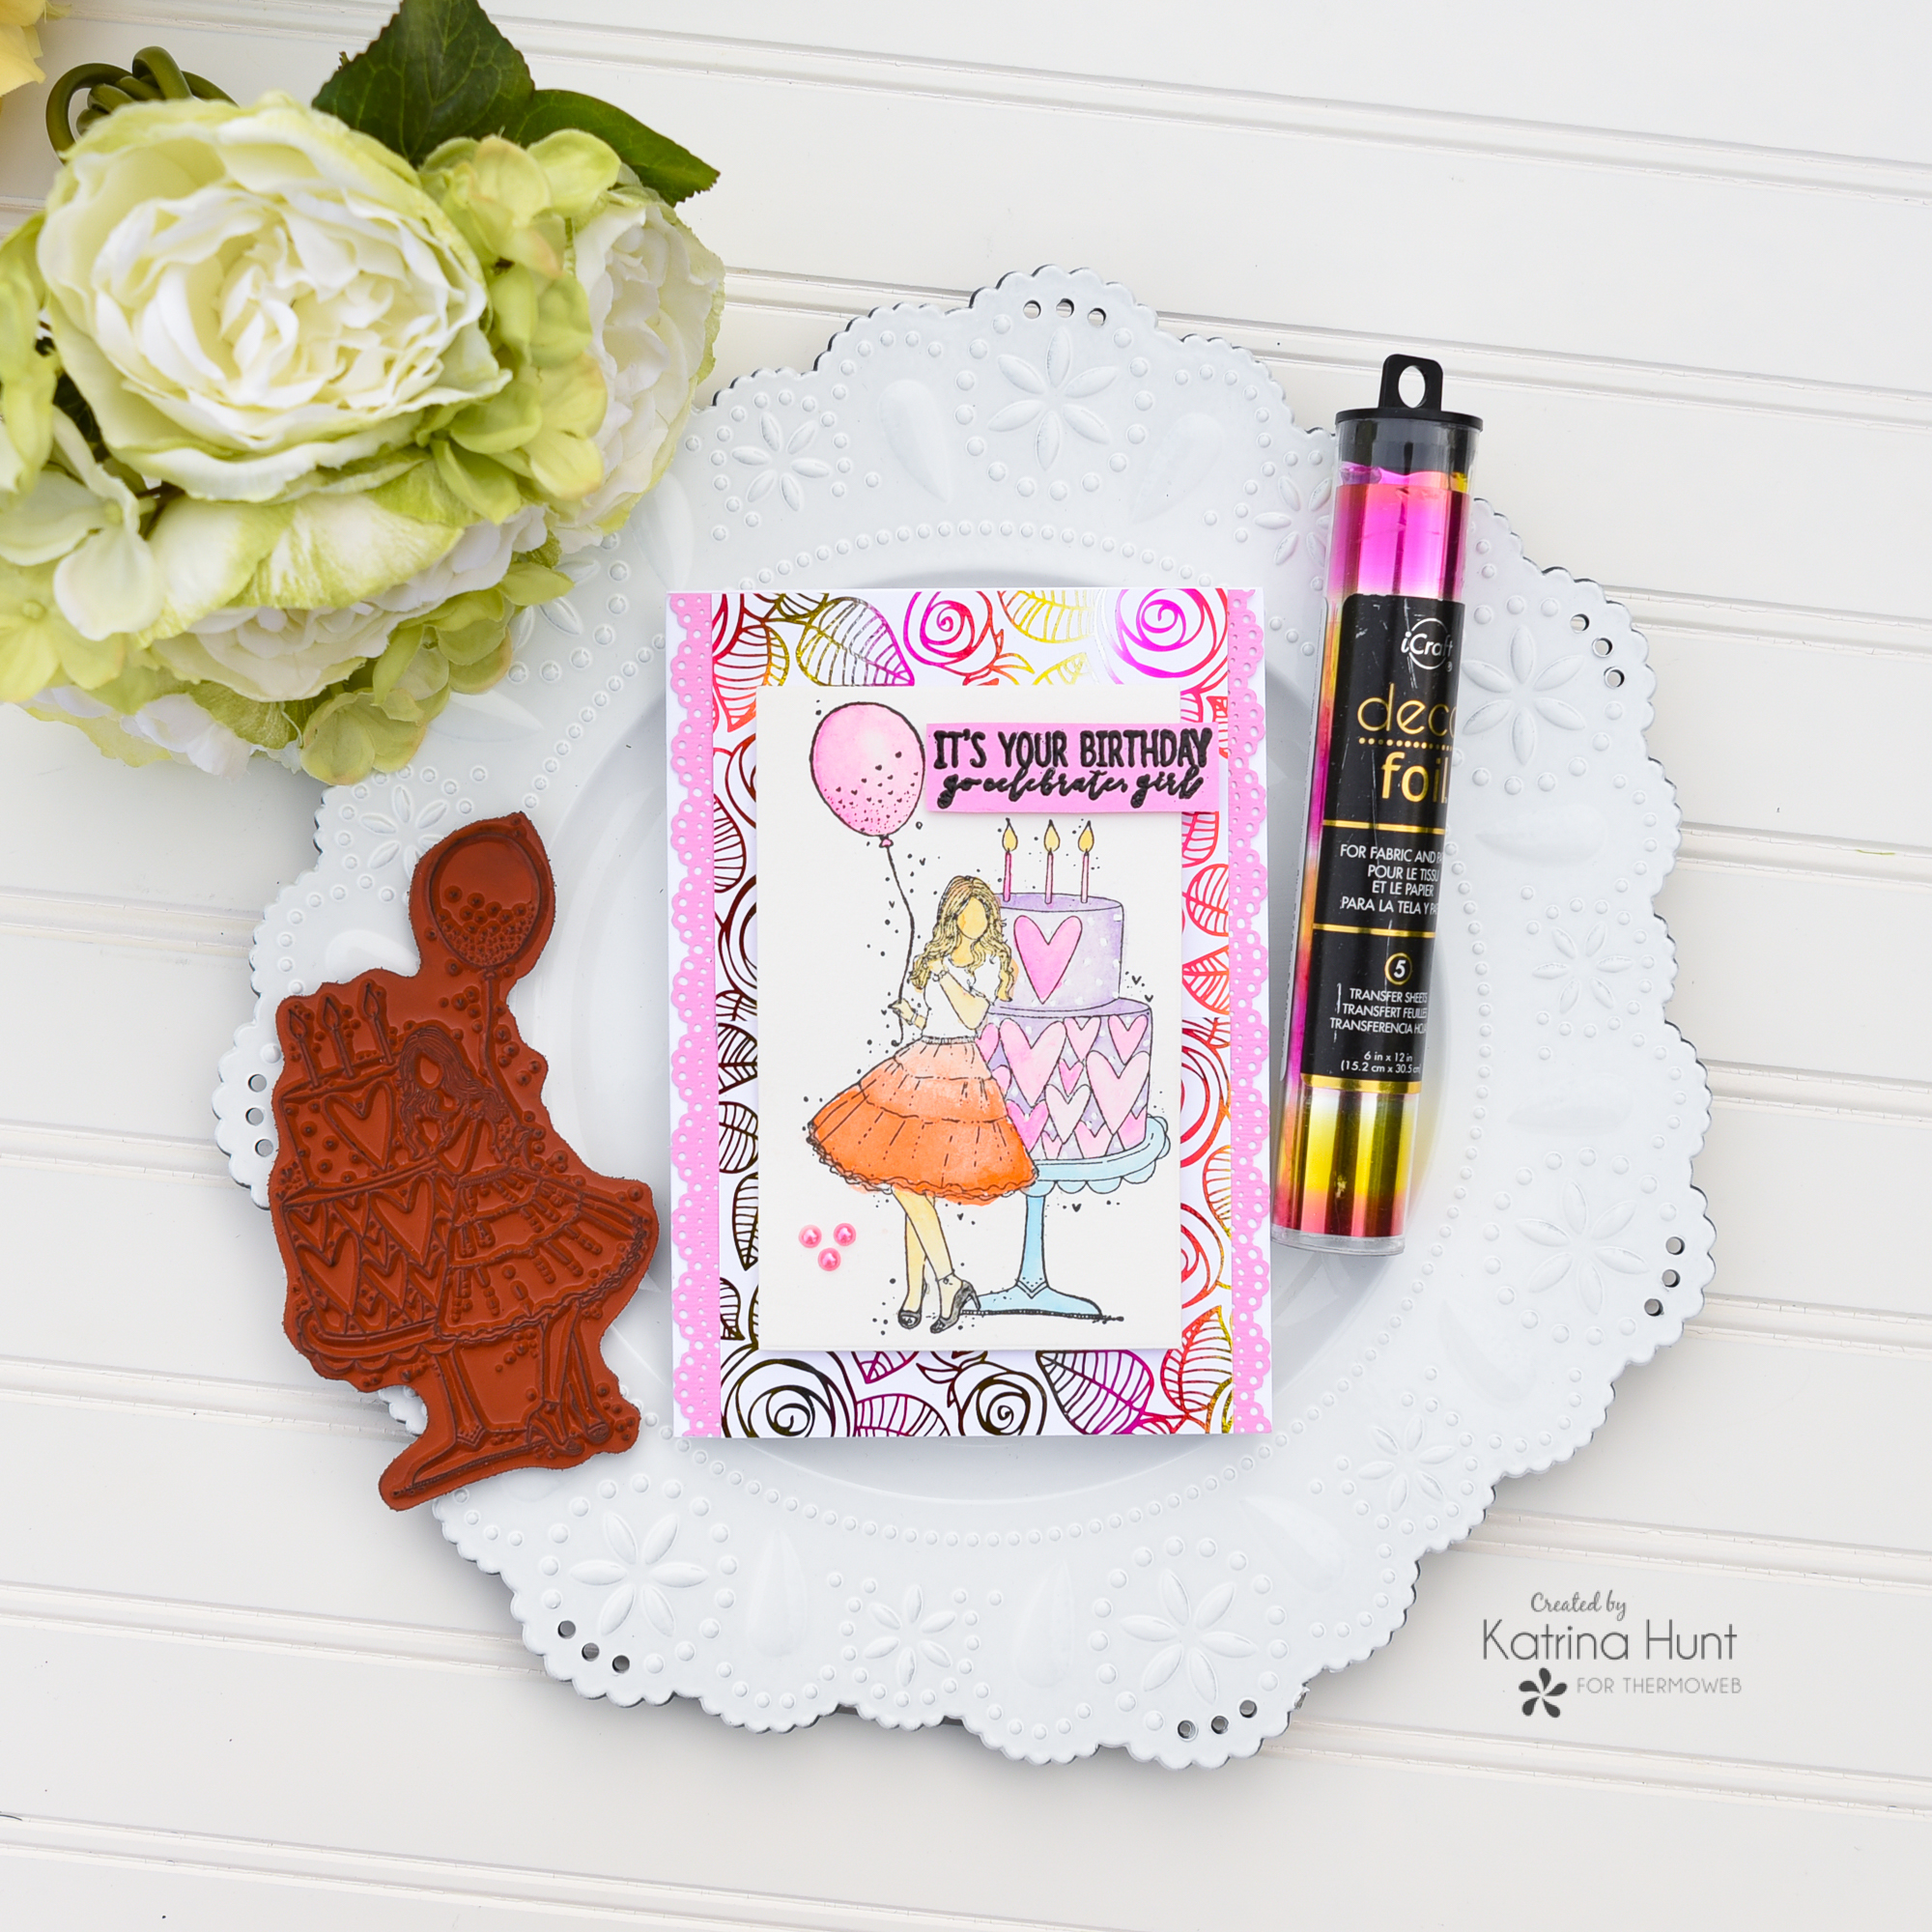 This card uses the Rosy Days toner card front, along with the Summer Rainbow Deco Foil. When the watercolored image was die cut, it was sized for a 5x7 card. To make the toner front work, I just used two of the card fronts taped together with some Purple Tape on the back and then trimmed down. Added a cardstock punched border on both sides and done!
 Gnomes are some of my favorites and this one is adorable! I used the toner card front Wild Garden, which goes perfect with the gnome theme! I used Karin Brushmarkers to create a vivid colored image. Using oval dies, I die cut a large oval out of the toner card front and then an oval two sizes smaller for the image. I used 3d Foam Squares to pop up the main part of the card front and then adhered the oval die cut part down on the card base. Then 3D Foam Squares again pop my image up. I used Catherine Pooler Ink in Grape Crush for my sentiment.
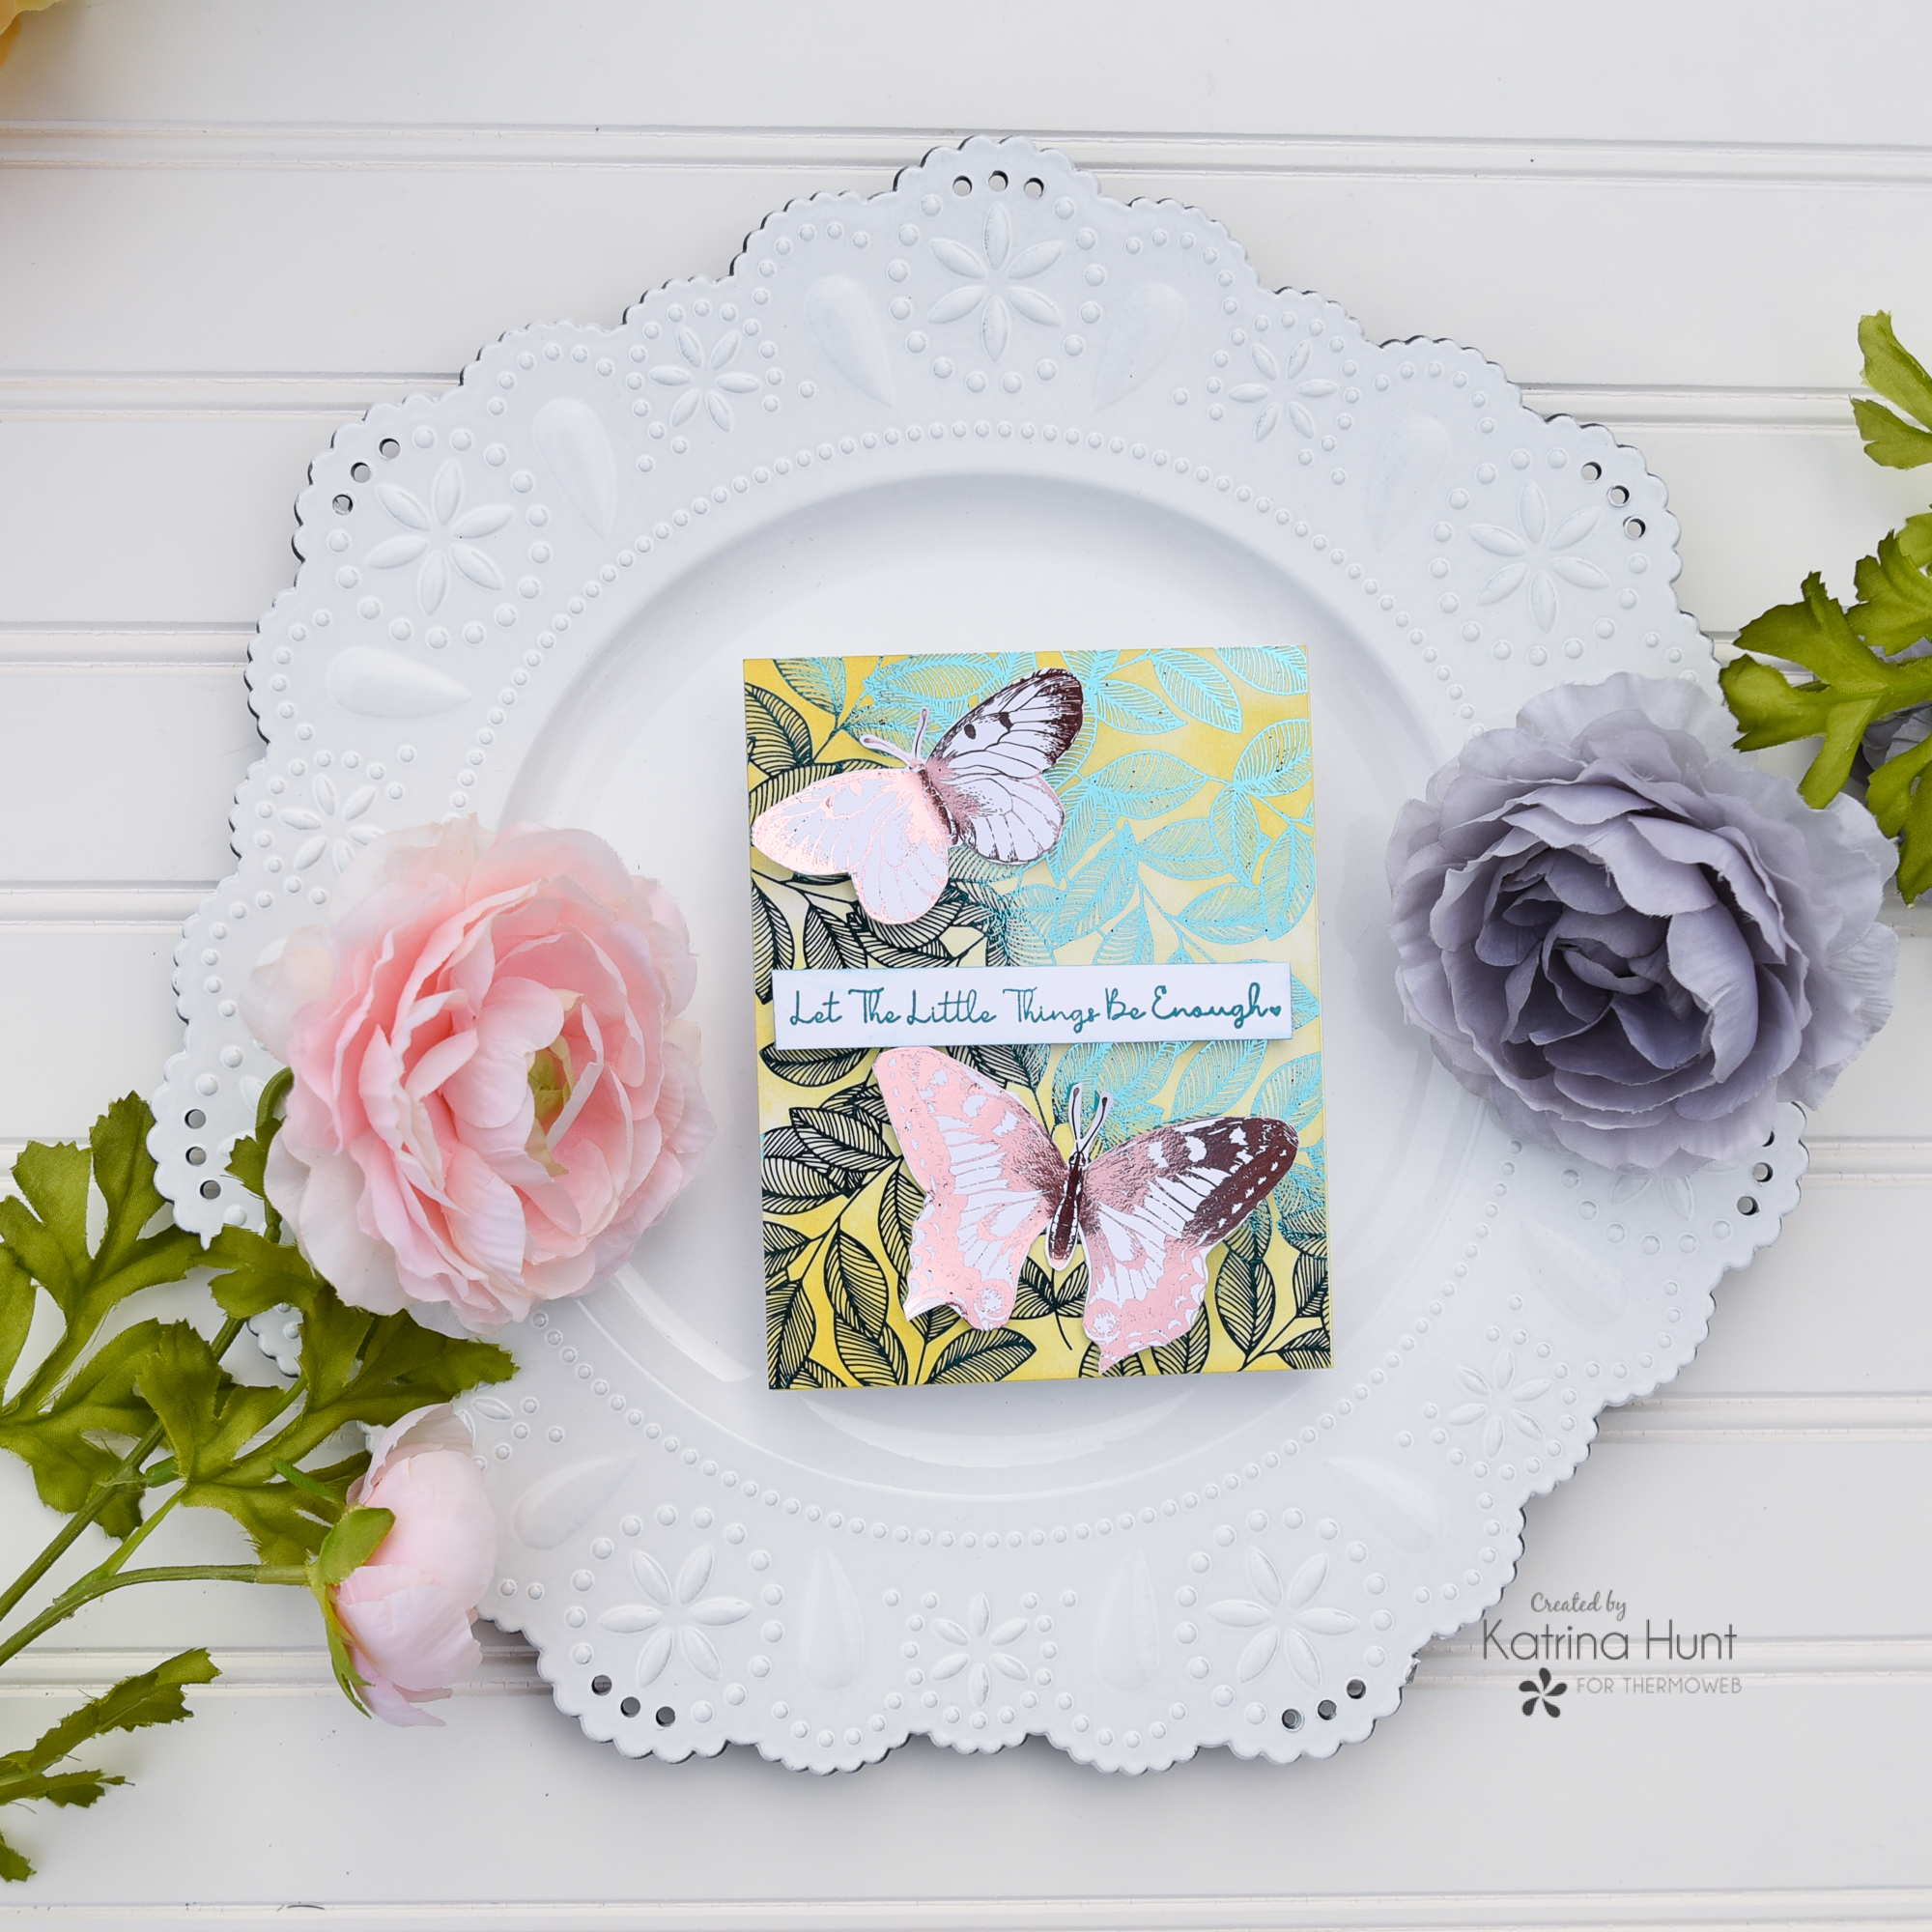 This card is super simple, quick, and most of all elegant. I used two of the different toner card fronts - Tranquil Leaves and Majestic Moths. I foiled the Tranquil Leases with the Gina K Turquoise Sea and the Majestic Moths with Deco Foil Pink Quartz. After foiling, I ink blended the Tranquil Leaves background with Catherine Pooler Ink in Limoncello, using a blending brush. I trimmed out a couple of the foil moths from the Majestic Moths card front and adhered them on the ink blended background with Ultra Bond Liquid Adhesive. I only used adhesive on the middle section, so the wings could be raised. Finally, I stamped and trimmed out the sentiment and adhered it with 3D Foam Squares. It took longer to warm up my laminator than to make this card!
 Same stamped image, but different toner card front and color scheme. I played off the green ombre of her skirt and used Deco Foil in Lime to foil the Tranquil Leaves card front. This image was also watercolored, but I trimmed it out around the image using scissors so that it would fit the card front. I added a couple of different size doilies behind the image, using my Memory Runner XL to adhere them. I stamped my sentiment with Catherine Pooler Ink in Lime Rickey and then trimmed around it also. I used 3D Foam Squares to attach the sentiment. So bright and fun!
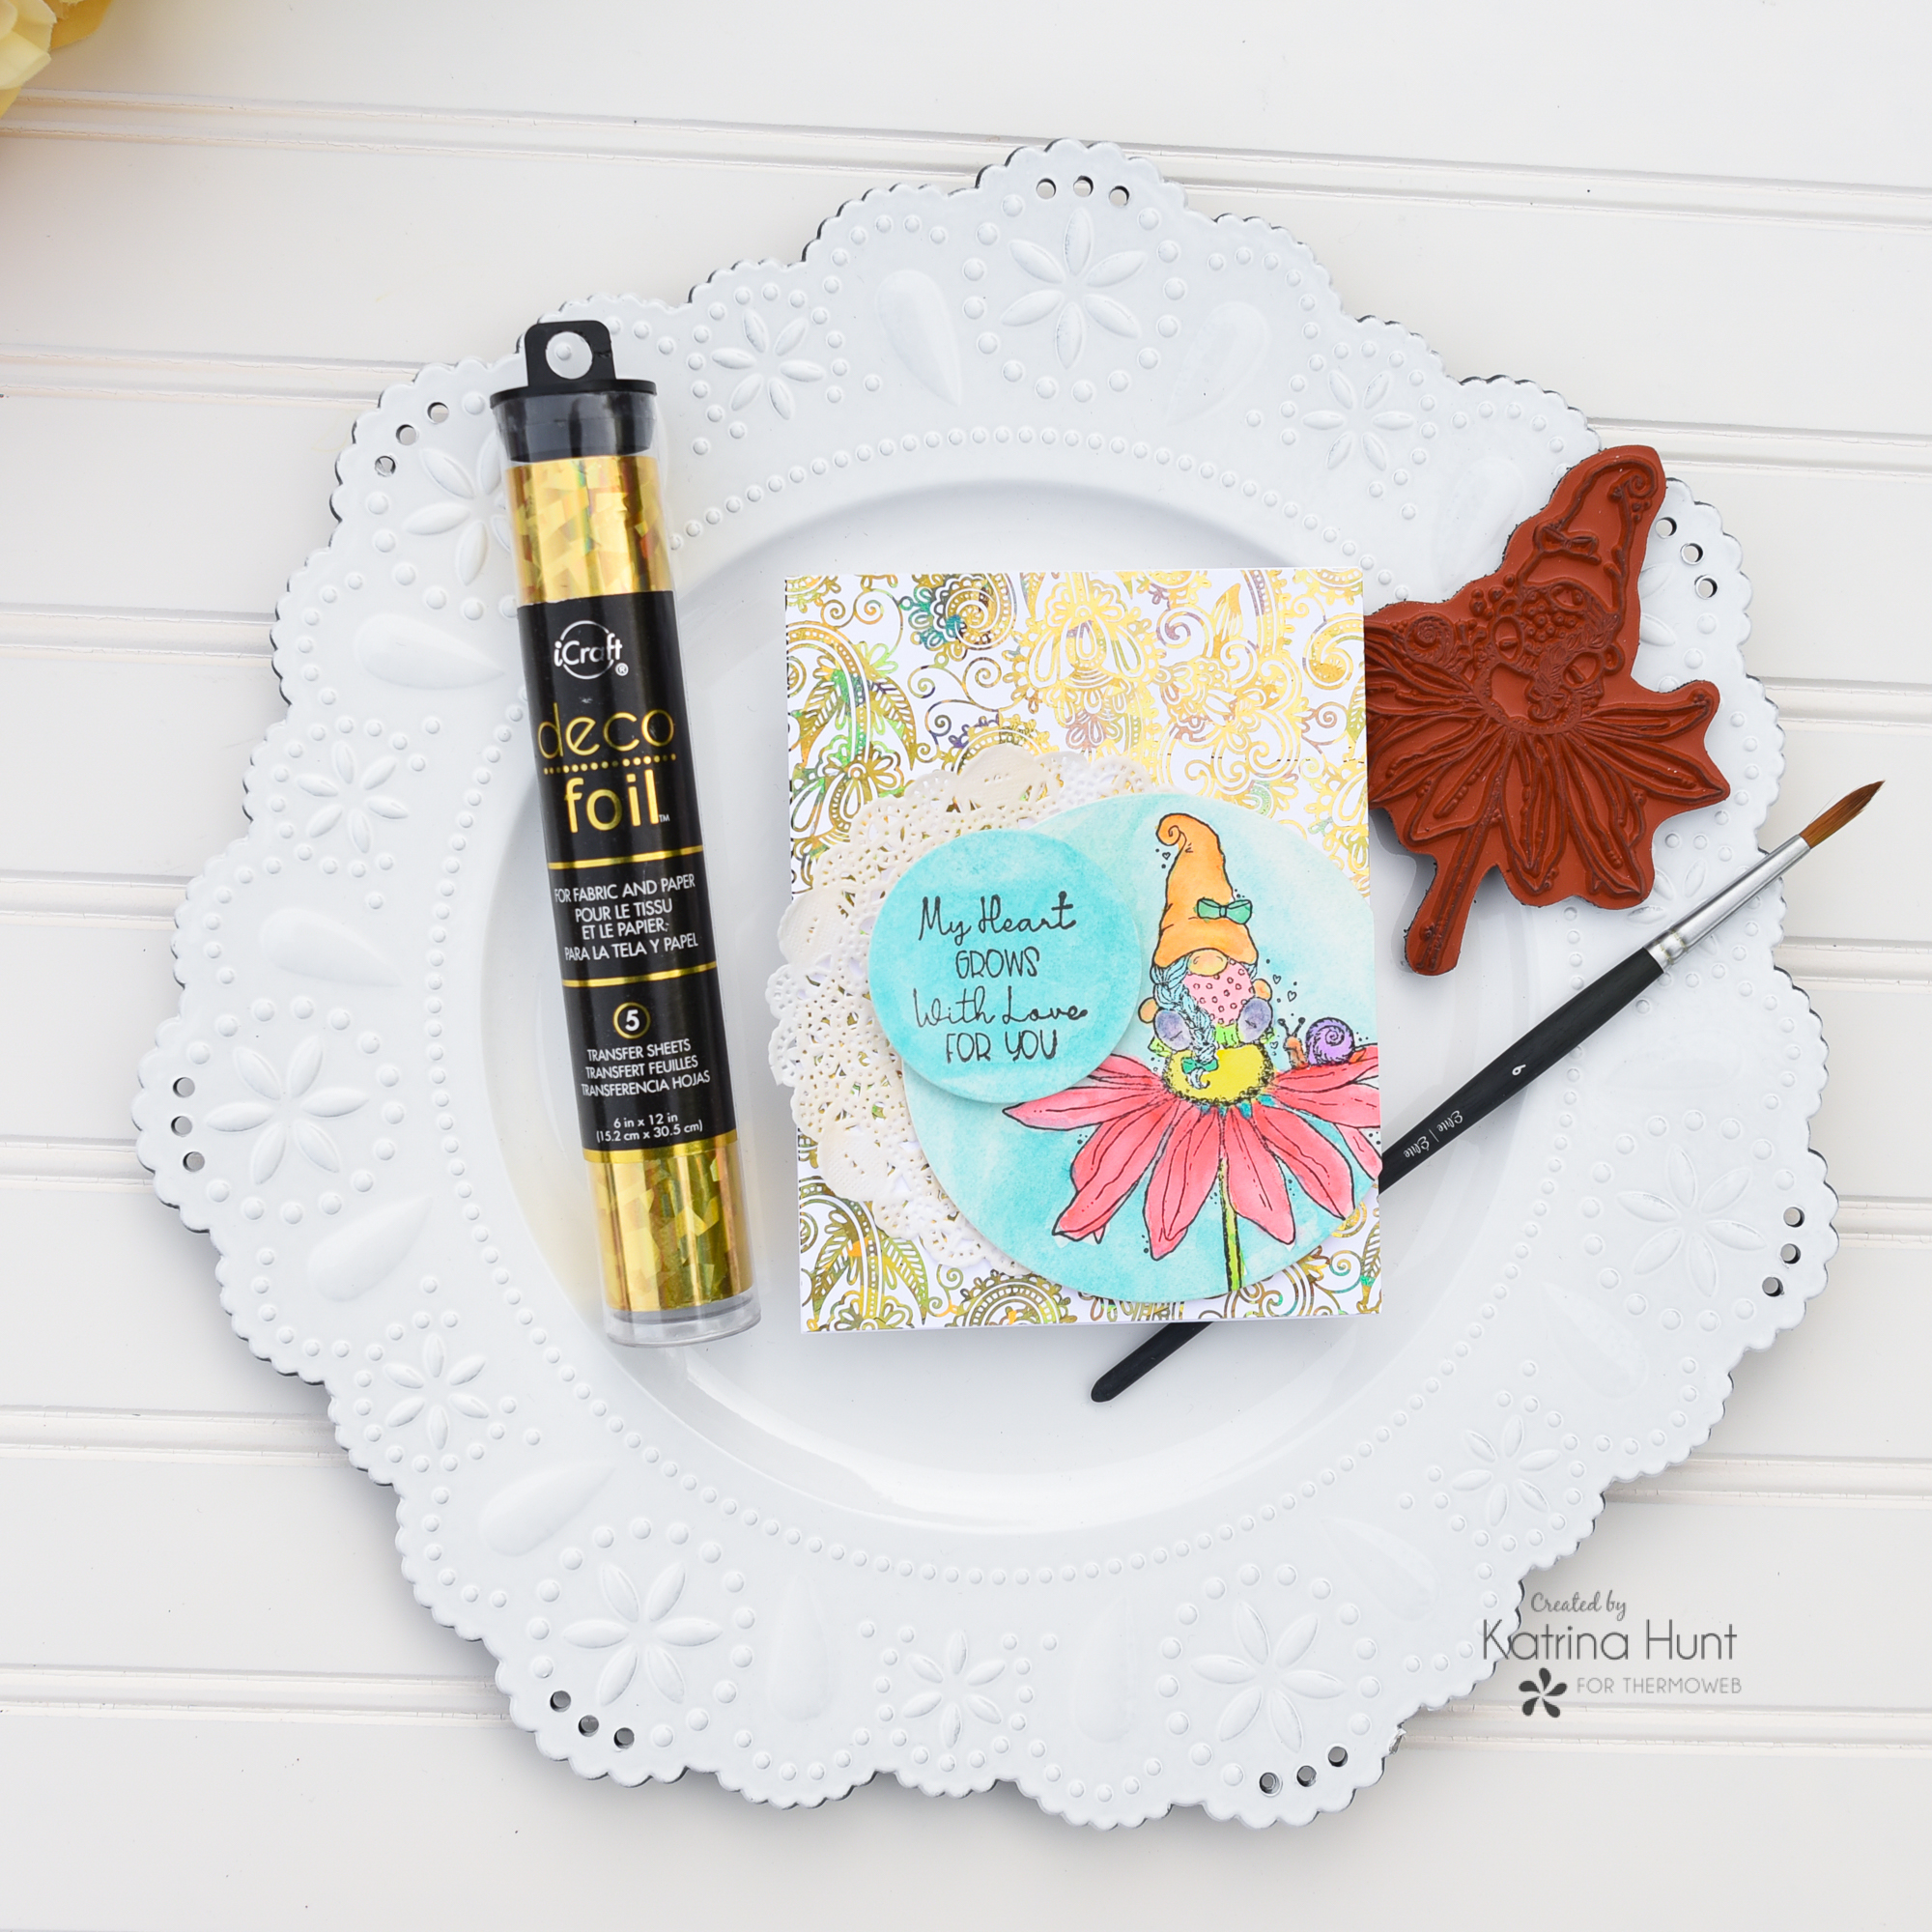 And last, but not least, is another gnome card. This one uses the Paisley Dreams toner card front. Doesn't it look AMAZING with the Gold Shattered Glass Deco Foil? I was stunned when this came out of the laminator! This card is fairly easy also. The image was colored with the Karin Brushmarkers also in a fun, whimsy theme. After coloring the image was die cut with a circle die that was offset slightly. This image and the doily behind it adhered to the card front with my Memory Runner XL. I also colored another small piece of watercolor paper, that would fit my sentiment and a smaller circle die. I popped the smaller circle onto the large circle with 3D Foam Squares. So fun!
 This post contains affiliate links. For more information, see our disclosure HERE.