No Products in the Cart
 Therm O Web Supplies Used
Memory Runner XL
Memory Runner XL Refill
UltraBond Liquid Adhesive, 2fl oz
Easy Tear Tape ½”
Jumbo Tape Roll 1/8"
Deco Foil Transfer Sheets, Emerald Watercolor
Easy Cut Adhesive Sheets
Pixie Tape
Gina K Fancy Foils, Radiant Red
Gina K Fancy Foils, Dazzling Orange
Gina K Fancy Foils, Glimmering Gold
Gina K Fancy Foils, Turqoise Sea
Other Supplies Used
Simple Stories Family Fun collection
Elle's Studio number and star dies
Black Archival Ink
Big Shot manual die cutting machine
Sequins from {Not} Just for Boys Kit Club
White cardstock by Park Lane
Paige Evans Date Stamp
Black Heidi Swapp Color Shine
Therm O Web Supplies Used
Memory Runner XL
Memory Runner XL Refill
UltraBond Liquid Adhesive, 2fl oz
Easy Tear Tape ½”
Jumbo Tape Roll 1/8"
Deco Foil Transfer Sheets, Emerald Watercolor
Easy Cut Adhesive Sheets
Pixie Tape
Gina K Fancy Foils, Radiant Red
Gina K Fancy Foils, Dazzling Orange
Gina K Fancy Foils, Glimmering Gold
Gina K Fancy Foils, Turqoise Sea
Other Supplies Used
Simple Stories Family Fun collection
Elle's Studio number and star dies
Black Archival Ink
Big Shot manual die cutting machine
Sequins from {Not} Just for Boys Kit Club
White cardstock by Park Lane
Paige Evans Date Stamp
Black Heidi Swapp Color Shine
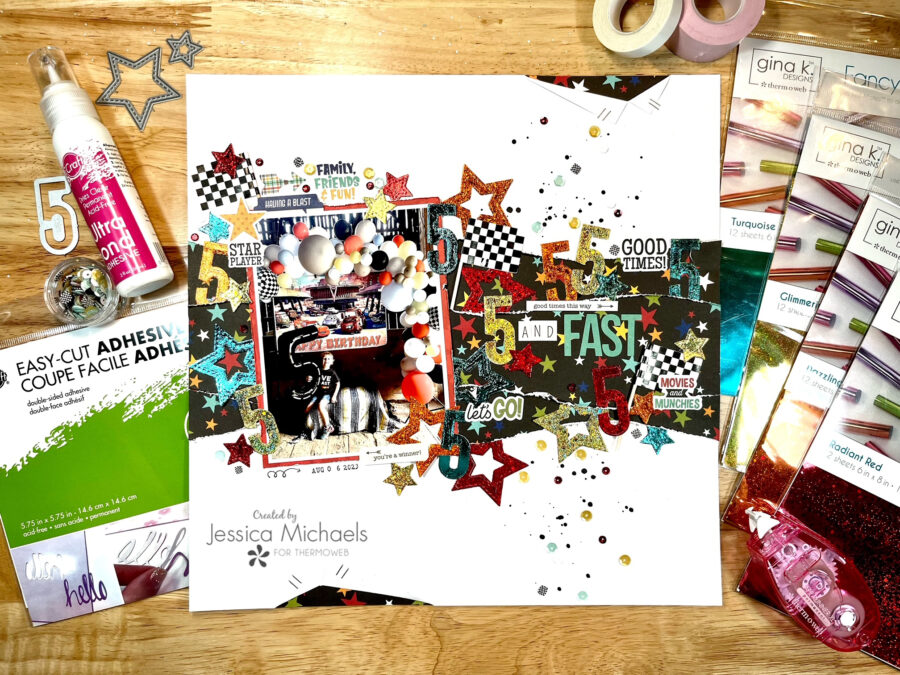
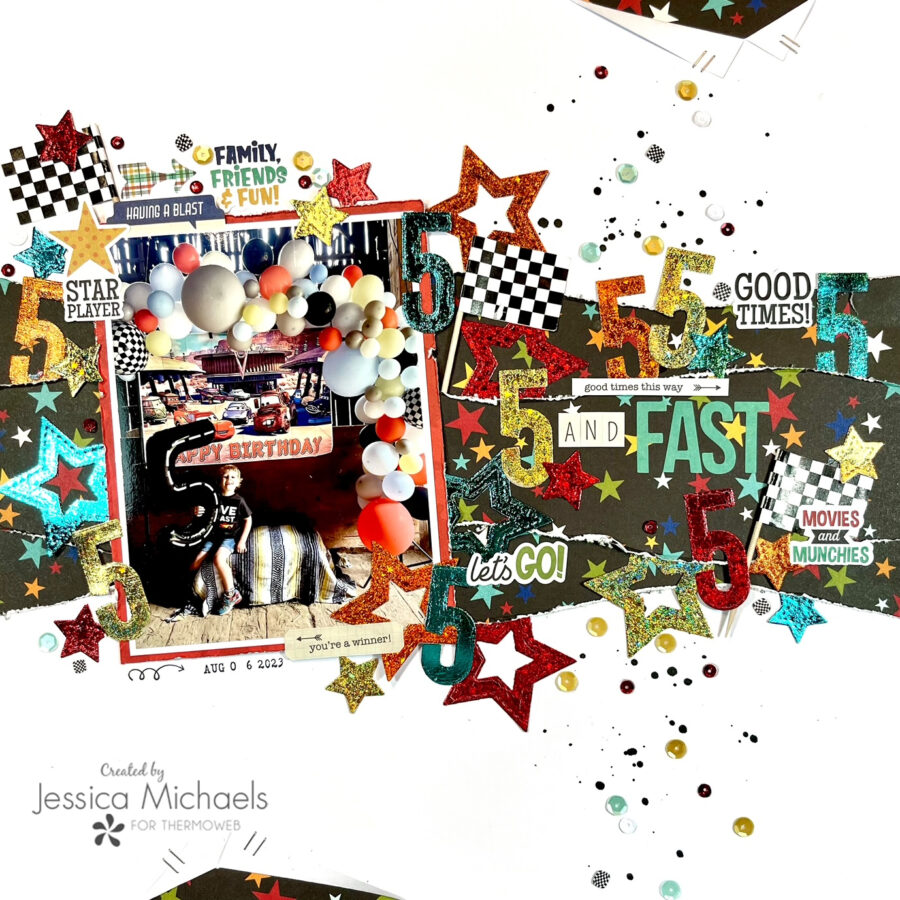 I started this layout by pulling out a sheet smooth white cardstock by Park Lane. I grabbed the Family Fun collection by Simple Stories to use for this layout as I really loved how the colors matched my son’s birthday party theme, which was Cars(like the movie). I pulled out the patterned paper with a black background and colored stars and used one of my wavy shaped rulers to draw out some wavy lines and cut sections of the paper to layer like waves on my paper. I distressed all those edges with my edge distresser and adhered them with some easy tear tape.
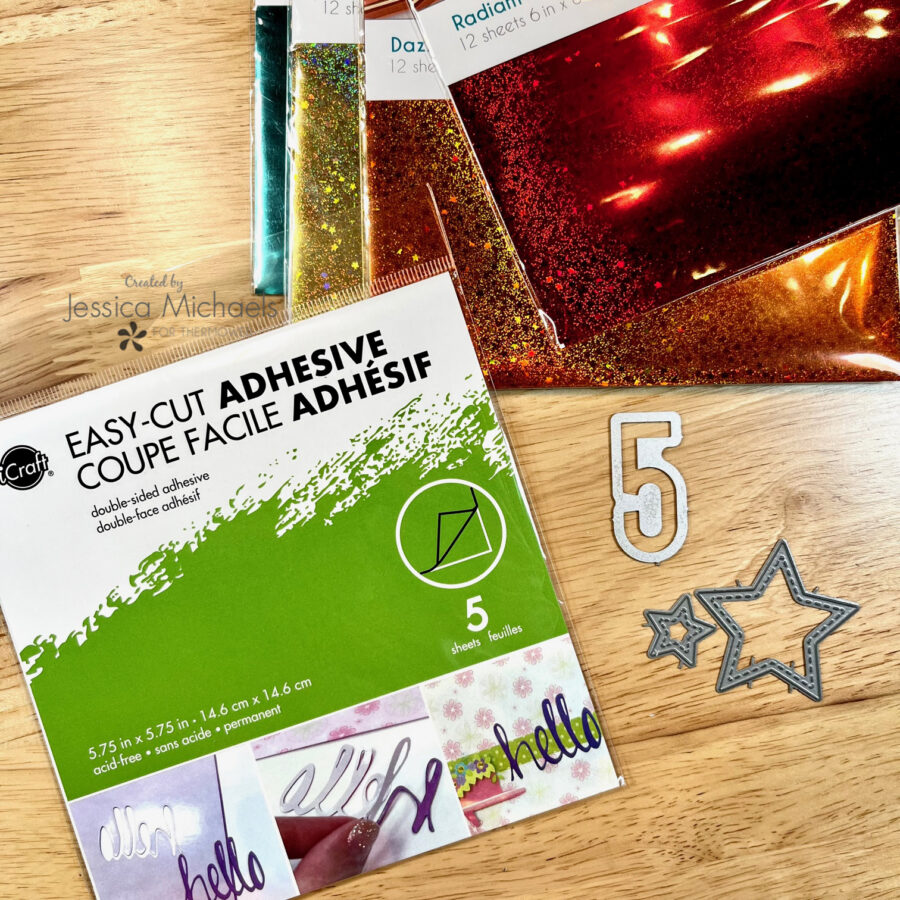 I then began working on my foiled numbers and stars by adhering a sheet of Easy Cut Adhesive to a 6x6” piece of white cardstock and then die cutting the number 5’s and stars with some Elle’s Studio dies and my manual die cutting machine. Once they were cut into my shapes, I peeled off the top backing piece to expose the adhesive and laid various colors of Gina K Fancy Foils on them and ran through my machine again. A little pressure is all you need! I used a piece of pixie tape to secure my die in place when cutting the actual shapes and I also shimmed with a couple pieces of cardstock for more pressure. Once I ran them through with the foil, I peeled the foil from the stars and numbers and they were ready to adhere to my layout.
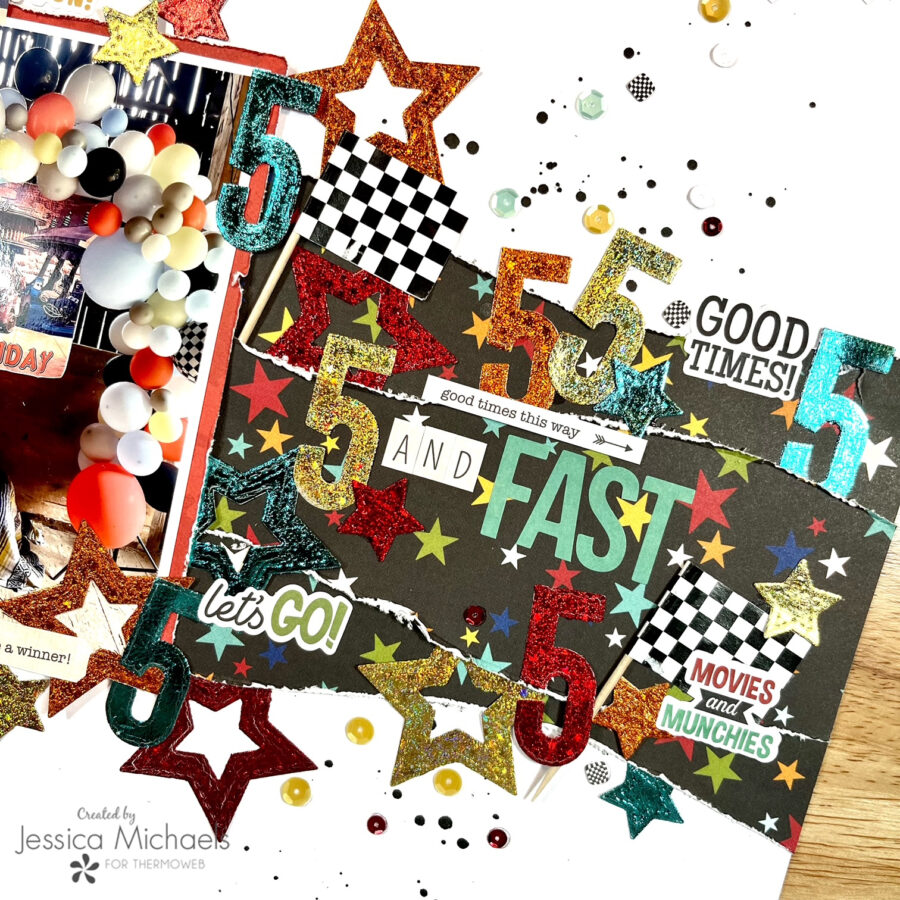 I tucked them in and on my wavy layers and scattered them about my page, using UltraBond Liquid Adhesive to secure. I also tucked in little racing flags from my sons party! I added some phrases from the sticker book from the Simple Stories Family Fun collection and completed my title with letters from that book as well.
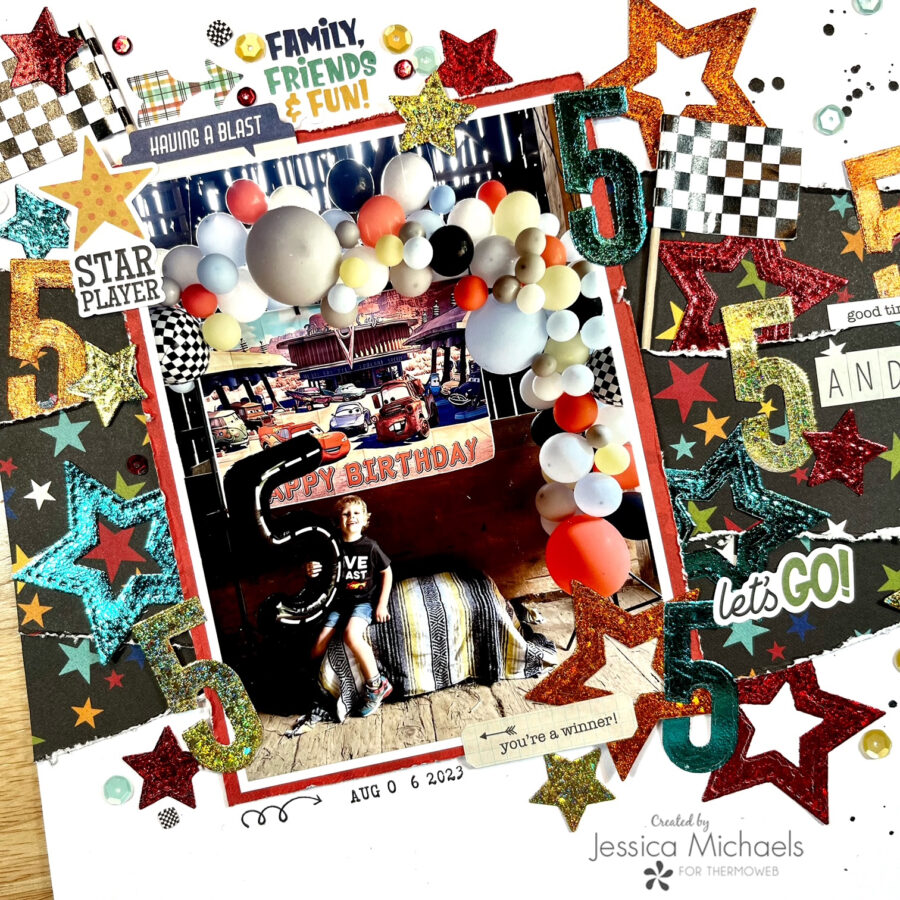 I added some distressed layers to my photo from one of the patterned pieces of paper from the collection and secured to my page with some easy tear tape. I then continued embellishing by adding sequins from the {Not} Just for Boys Kit Club and some UltraBond Liquid Adhesive. I also added my date stamp with some black archival ink and my Paige Evans Roller Date Stamp.
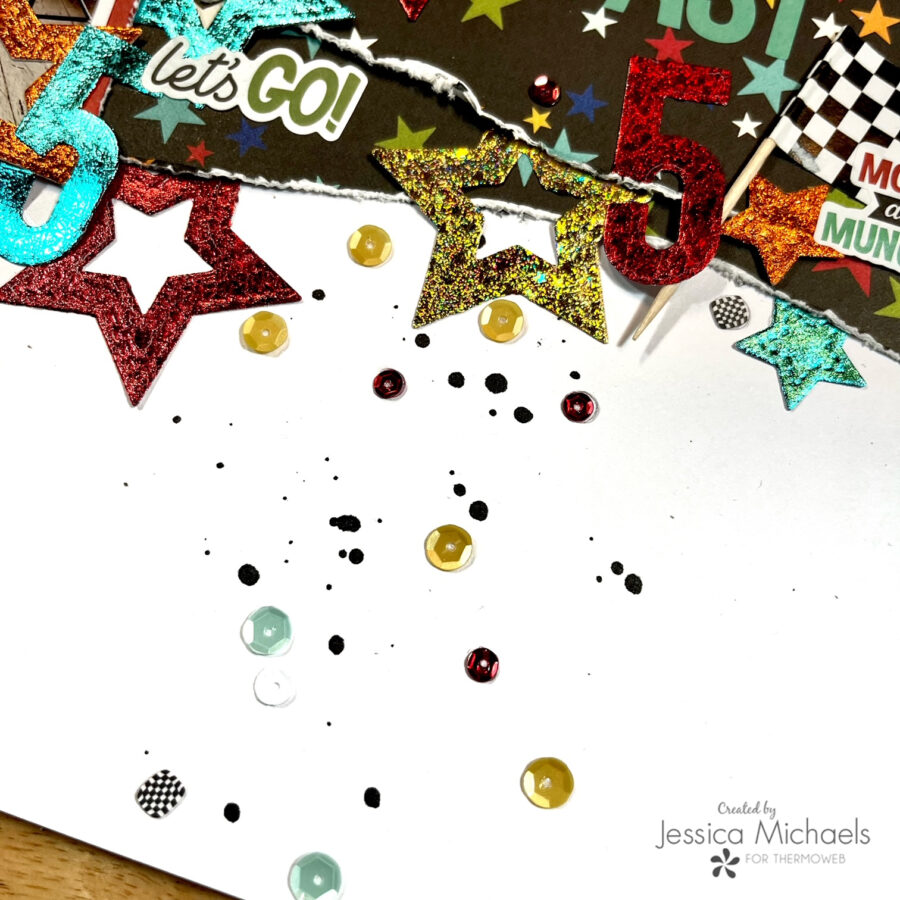 I added splatters with Heidi Swapp Black Color Shine and more sequins!
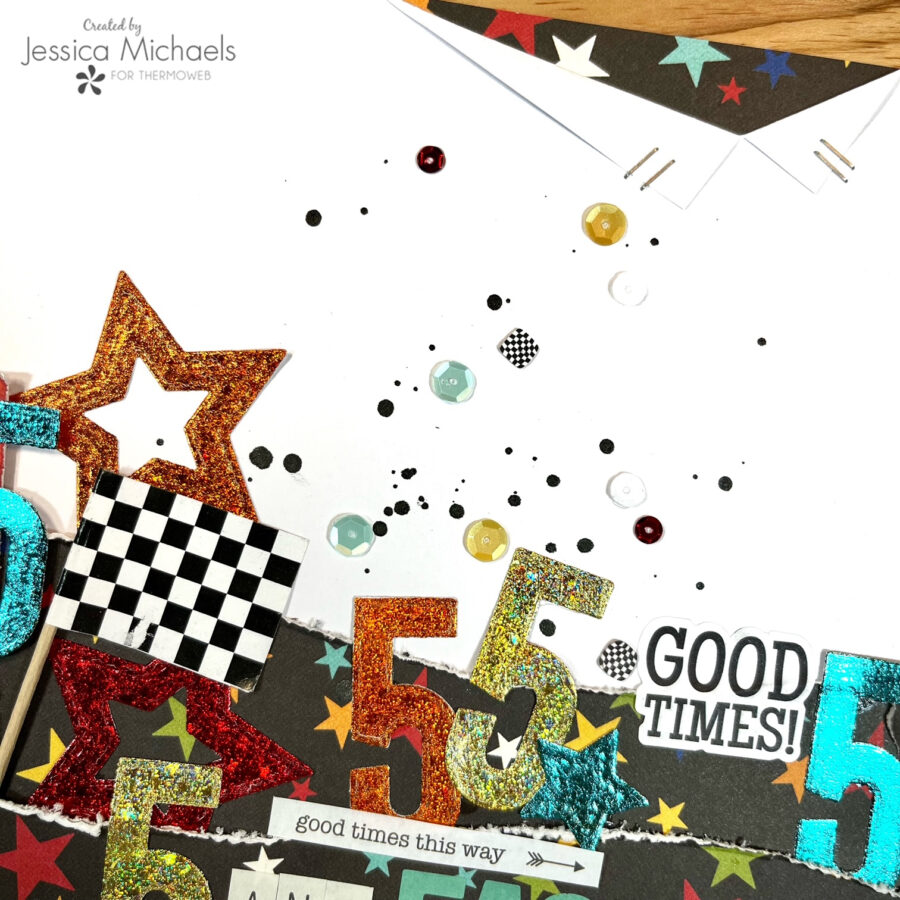 To finish it off, I cut a notch in the top and bottom and added more patterned paper behind so it peeked through using my Memory XL Tape Runner to secure, and then adding mini staples for effect. I just love how those foiled bits just make this layout so amazing! I have a process video if you'd like to watch exactly how this came together!
Watch the 5 and Fast Process Video:
https://youtu.be/-tJWuHEvk6Y
Thank you for being here today and I hope I was able to inspire you to create!
Jessica
This post contains affiliate links. For more information, see our disclosure HERE.
To finish it off, I cut a notch in the top and bottom and added more patterned paper behind so it peeked through using my Memory XL Tape Runner to secure, and then adding mini staples for effect. I just love how those foiled bits just make this layout so amazing! I have a process video if you'd like to watch exactly how this came together!
Watch the 5 and Fast Process Video:
https://youtu.be/-tJWuHEvk6Y
Thank you for being here today and I hope I was able to inspire you to create!
Jessica
This post contains affiliate links. For more information, see our disclosure HERE.